

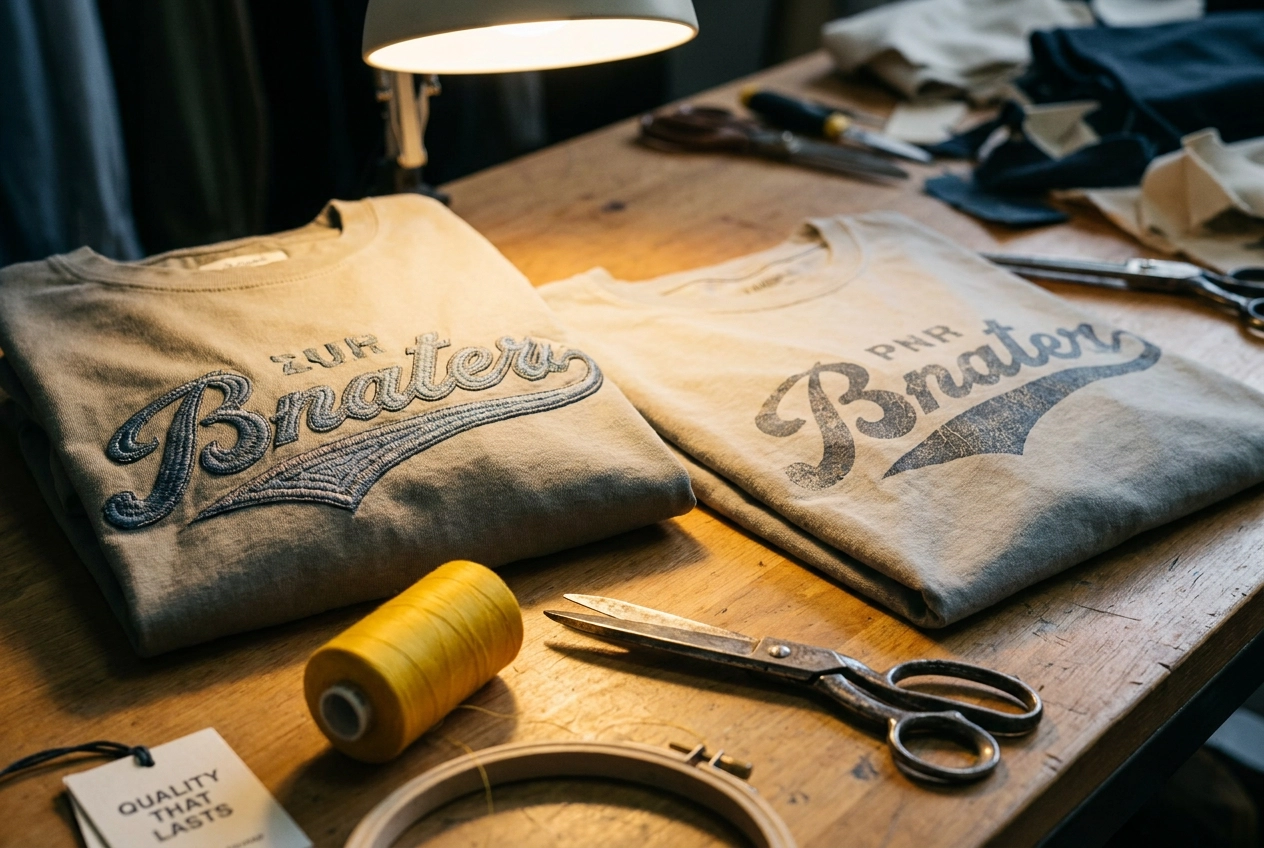
So you've decided to create a custom logo t shirt for your business, team, or upcoming event. Amazing! But here's where most people hit their first big decision: should you go with embroidery or printing? And honestly, it's a question worth taking seriously because the method you choose can make a huge difference in how your finished shirts look and hold up over time.
If you're new to the world of custom apparel, all the options can feel a little overwhelming. Screen printing, heat transfer, direct-to-garment, embroidery... where do you even start?
In this post, we're going to break it all down in simple, easy-to-understand terms. We'll walk you through the key differences between embroidery and printing, explain why embroidery tends to win when it comes to long-lasting quality, and help you figure out which option actually makes sense for your specific needs. By the time you finish reading, you'll feel confident knowing exactly what to look for when ordering your custom shirts. Let's dive in!
Why the Decoration Method You Choose Actually Matters
The global custom t-shirt printing market is valued at roughly $4.8 billion and growing fast, which means more sellers, more short-run brands, and more competition for attention on every chest and sleeve. When the market is this crowded, the quality of your logo decoration stops being a style choice and starts being a business decision. A poorly executed logo on a t-shirt does not just look bad; it signals to everyone wearing or seeing it that the brand cut corners.
Think about what happens the first time a customer, teammate, or event attendee holds a branded shirt. The texture, finish, and durability of that logo shape their immediate impression. Raised embroidery thread feels premium and professional in a way that a cracked, peeling screen print simply does not. That sensory difference matters, and it is why commercial applications including corporate branding and event merchandise account for 52.6% of custom t-shirt demand. Most people ordering logo t-shirts have real stakes in the outcome, whether that is a company uniform, a team jersey, or trade show giveaways.
The main decoration options available today are embroidery, screen printing, and digital printing methods like DTG (Direct-to-Garment) and DTF (Direct-to-Film). According to a detailed breakdown of each method, each one produces a dramatically different result on the same garment in terms of feel, color accuracy, durability, and cost. Choosing the wrong method for your specific logo is an expensive mistake that shows up in every wash cycle afterward.
For makers and small-batch decorators who want the elevated look of embroidery without paying custom digitizing fees, instant-download embroidery design files are a practical shortcut. You purchase the file, load it into your machine, and start stitching logo-quality results the same day, with no waiting on a digitizer and no minimum order requirements attached. It is one of the fastest ways to close the gap between a great logo idea and a finished, professional product. Custom apparel industry trends for 2026 confirm that buyers expect faster turnaround and frictionless ordering, and ready-to-use embroidery files deliver exactly that.
Embroidery vs. Screen Printing vs. DTG/DTF: A Side-by-Side Comparison
Now that you know why the method matters, let's put all three options side by side so you can see exactly how they stack up. Here is a plain-language breakdown across the dimensions that matter most for custom logo t-shirts.
Durability
Embroidery wins this category outright. The thread used in machine embroidery is dyed polyester or rayon, which means the color is built into the fiber itself. There is no ink layer sitting on top of the fabric to crack, peel, or wash away. Screen printing, when properly cured, is also quite durable and can outlast the garment in ideal conditions. DTG and DTF ink layers, however, can degrade over repeated wash cycles, especially without careful cold-water washing and inside-out garment care. If your custom logo t-shirt is going to see frequent, heavy laundering, like team uniforms or workwear, embroidery is the clear choice.
Texture and Perceived Value
This one is not even close. Embroidery creates a raised, three-dimensional surface that flat printing simply cannot replicate. When someone picks up an embroidered polo or structured cap, they feel the difference immediately, and that tactile quality communicates quality before a word is read. Screen printing and DTG/DTF both produce flat, two-dimensional results regardless of how detailed or colorful the artwork is. For chest-pocket logos, team crests, and branded corporate apparel, that premium feel is part of what customers are paying for.
Setup Cost and Minimum Quantity
This is where things get interesting for small-run makers. Screen printing requires a separate physical screen burned for every color in your design, which makes short runs genuinely expensive per unit. DTG and DTF carry very low or zero per-job setup fees, but the per-unit cost stays higher on small quantities. With downloadable embroidery design files, you pay a one-time low cost to get the stitch file, and from there every run uses the same file with no additional setup charges. That structure is a real advantage if you are producing small batches, custom gifts, or on-demand orders.
Color Range and Design Complexity
DTG and DTF are the right tools for photorealistic artwork, gradients, and complex multi-color illustrations. Embroidery works best with clean, vector-style logos that use defined shapes and a limited palette of solid colors. The good news is that most brand logos, team marks, and wordmarks are designed exactly that way, which is precisely why embroidery and logo decoration are such a natural fit.
Here is a quick reference to make the decision concrete:
Embroidery | Screen Printing | DTG / DTF | |
|---|---|---|---|
Durability | Highest, thread will not crack or peel | Very high when properly cured | Moderate, ink layer may degrade |
Color range | Limited solid palette | Vibrant but per-screen cost | Unlimited, photorealistic |
Setup cost | Low one-time file cost | High, per color per run | Very low to none |
Minimum quantity | As low as one | High-volume optimized | No minimum |
Texture | Raised, 3D, premium feel | Flat | Flat |
Ideal use case | Logo marks, team wear, corporate | Mass event tees | One-off or photo prints |
For a deeper look at how DTG and screen printing compare on design complexity and order volume, this 2026 guide from Arklavo breaks it down well.
Best Use Case in Plain Terms
If your goal is a structured logo mark, team crest, wordmark, or corporate insignia on a polo, cap, or jacket, embroidery is the right method. Screen printing makes the most sense for high-volume event tees where you are printing hundreds of identical shirts and want the lowest possible per-unit cost. DTG and DTF shine for one-off photographic prints or designs with gradients and detailed illustration work. Knowing which category your project falls into before you start saves time, money, and a lot of frustration.
The Use Cases Where Embroidered Logo T-Shirts Shine
Now that you know how embroidery stacks up against other decoration methods, the next question is whether it's actually the right fit for what you're making. The good news is that embroidered logo t-shirts work beautifully across a surprisingly wide range of projects. Here is a look at the six use cases where embroidery really earns its spot.
Sports Teams and Fan Gear
If you have ever watched a youth soccer jersey fall apart after a summer of weekly games and twice-weekly practices, you already understand the appeal here. Embroidered team logos sit on top of the fabric as a woven structure rather than a coating, which means they resist cracking, peeling, and fading through a full season of wear and washing. Youth leagues, club teams, and recreational sports organizations increasingly lean toward embroidered decoration on polos and performance tees because the finished look is sharp on the sideline and still looks great at end-of-season photos. Custom apparel trends for 2026 show that sports and wellness culture is actively reshaping everyday merch, which means the demand for sports-ready decorated apparel is only growing.
Corporate Branded Apparel and Gifting
This is one of the strongest use cases for embroidery right now. The promotional products industry hit a record $27.7 billion in North American sales in 2025, and t-shirts specifically generate $4.2 billion in annual industry sales according to the Advertising Specialty Institute's 2026 Ad Impressions Study. Corporate clients are also trading up, moving away from budget blanks toward premium garments with clean, small embroidered chest logos. That shift matters because embroidery is the decoration method that reads as polished and intentional at the executive level. A printed logo on a staff shirt looks functional; an embroidered one looks like a uniform worth wearing. For client gifts, onboarding kits, and employee apparel, embroidered logo t-shirts consistently communicate a level of care that printed alternatives simply cannot match.
College and University Spirit Wear
Campus merch is a huge category, and embroidery is climbing fast within it. An analysis of more than 10,000 custom apparel orders across 500-plus schools found that embroidery is gaining share on elevated staples like tees, fleece sweatshirts, and hats. Screen printing still handles the bulk of high-volume campus orders, but Greek life organizations, alumni groups, and booster clubs are increasingly choosing embroidery when the garment needs to feel premium. Machine embroidery files for university athletic marks translate directly onto t-shirts, making it easy for makers and decorators to serve campus bookstores and spirit wear shops.
Boutique and Etsy-Style Small-Batch Production
Craft marketplace sellers have a real pricing advantage when they go with embroidery. The broader apparel decoration industry is moving away from commodity merch, with industry watchers noting that the days of slapping a logo on the cheapest available tee are fading. Embroidered logo t-shirts let independent sellers on platforms like Etsy command meaningfully higher price points than printed alternatives, and ready-to-stitch digital files from a library like Embroidery n Sewing make small-batch production practical without expensive custom digitizing fees.
NFL and Pro Sports Fan Apparel
Fans who want something more personal than mass-produced licensed merchandise have a genuine option here. Ready-to-stitch stadium-themed and franchise-inspired embroidery files let you create one-of-a-kind logo t-shirts that look hand-crafted and unique. The result stands apart from anything you can pull off a retail shelf, which is exactly the point for serious fans.
Small-Business Branded Merchandise
Local gyms, salons, food brands, and boutique retailers increasingly treat branded apparel as a marketing tool rather than just a uniform requirement. An embroidered logo t-shirt functions as a walking billboard that builds both internal team pride and external brand recognition. Downloadable embroidery files make this accessible to small businesses that cannot afford custom digitizing on every new design, putting professional-quality branded merchandise within reach for any budget.
How to Go from Embroidery File to Stitched Logo on a T-Shirt
So you've decided embroidery is the right move for your custom logo t-shirt. Great choice. Now let's walk through exactly how to get from a digital file to a finished, stitched garment without the frustration that catches most beginners off guard.
Step 1: Choose a Pre-Digitized Design File
The very first thing to understand is that your embroidery machine cannot read a regular image file. A JPEG or PNG of your logo is not stitchable until it has been digitized, which is a process that converts artwork into stitch data your machine can follow. The good news is that browsing a catalog like embroiderynsewing.com gives you instant access to thousands of designs that are already digitized and ready to stitch. No software. No waiting on a digitizing service. You download the file and you are ready to move to the next step.
Step 2: Confirm Your File Format
Not every embroidery file works with every machine, so matching the format to your equipment matters before you buy. The most common formats are DST for Tajima and most commercial machines, PES for Brother, JEF for Janome, HUS for Husqvarna Viking, and EXP for Bernina. Many downloadable design bundles include multiple formats in a single purchase, which covers you no matter what machine you own. Always check your machine's manual if you are unsure which format it reads natively.
Step 3: Hoop Your T-Shirt Correctly (This Is the Big One)
Hooping is where most beginners run into trouble, and it comes down to one word: stabilizer. Jersey knit fabric stretches, and without a stabilizer backing, that stretch will cause your design to pucker, distort, or shift during stitching. For dense logo designs, a cutaway stabilizer is the strongest choice because it stays permanently behind the design and keeps everything locked in place. For lighter designs, a tearaway stabilizer works well and removes cleanly after stitching. Adding a layer of water-soluble topping on the fabric surface also helps because it prevents the needle from snagging the knit loops. The ULTIMATE Guide to Perfect T-Shirt Embroidery has racked up over 41,000 views for good reason. It is worth watching before your first hoop-up. Use a ballpoint or stretch needle for jersey fabric, since a standard sharp needle can damage the knit weave.
Step 4: Transfer Your File and Test First
Once your t-shirt is hooped and your machine is loaded, transfer the design file via USB drive, direct cable connection, or your machine's companion software. Before you stitch on the actual garment, run a complete test stitch on a scrap piece of the same fabric. This is non-negotiable for logo work. Knit fabric behaves differently than woven cotton, and a test run lets you catch any tension issues or scaling problems before they ruin a real shirt.
Step 5: Stitch, Trim, and Finish
After stitching, trim any jump stitches close to the fabric surface. Remove the stabilizer carefully, tearing or cutting it away depending on the type you used. Then press the finished garment lightly from the reverse side with a pressing cloth between the iron and the stitches. Pressing from the back sets the thread without flattening the raised embroidered texture that gives logos their premium look.
Plan Your Placement Before You Hoop
One last thing worth deciding before you ever touch the hoop: where is the logo going? Left chest placement reads as professional and brand-forward. Center chest works well for bold graphic logos. Sleeve placement is a nice secondary branding spot, and back yoke works for team apparel. Choosing placement in advance lets you mark your shirt accurately and hoop it confidently the first time, since re-hooping after a misalignment wastes fabric and risks distortion.
Embroidery File Formats and Machine Compatibility Explained
Before you download a single file, it pays to spend two minutes understanding embroidery formats. Think of them like audio files: an MP3 and a WAV both play music, but not every device reads both. Embroidery machines work the same way, and using the wrong format means your file simply will not load.
DST is the closest thing the embroidery world has to a universal language. Originally developed by Tajima, it runs on practically every commercial and semi-commercial machine on the market. If you are ever unsure which format to grab and you can only choose one, DST is your safest bet. The one thing to know is that DST files do not store thread color information, so you will want to keep the color chart that comes with your design nearby as a reference while you stitch.
PES is the format most home embroiderers will use, because it is native to Brother and Baby Lock machines, which are two of the most popular home embroidery brands in the United States. PES files store both stitch data and thread color information, which makes the setup process a lot smoother when you are working on your own.
Other major formats follow the same brand-specific logic. JEF and JEF+ belong to Janome machines. HUS covers older Husqvarna Viking models, while VP3 is the current standard for modern Husqvarna Viking and Pfaff machines. EXP serves Melco commercial systems and some Bernina models. Each format was built for a specific manufacturer, which is why the format list can feel overwhelming at first.
The good news is that quality design catalogs, including the collections at Embroidery n Sewing, typically package downloads as ZIP bundles containing all major formats in one file. You unzip, pick the format that matches your machine, and you are ready to stitch. That also means you are covered if you upgrade machines later.
One more thing that matters specifically for t-shirts: stitch count. Designs with very high stitch counts, generally above 15,000 stitches, can cause lightweight jersey knit fabric to pucker and distort because the fabric is simply too stretchy to handle that much thread density without proper support. Always look for logo files that are described as digitized for garment use, since those are set up with the right underlay and density adjustments for knit fabric.
If your machine's format is not listed in a product description, conversion software like Embrilliance or Hatch can translate between formats. It works, but starting with a natively compatible file is always faster and skips the extra step entirely. You can check this helpful embroidery machine file format guide for a full breakdown of which formats match which machines before you buy.
Downloadable File vs. Custom Digitizing vs. POD: What Does It Actually Cost?
Let's talk numbers, because this is where the three main routes to a custom logo t-shirt look very different from each other.
Custom digitizing is the traditional option where a human specialist converts your logo artwork into a stitch-ready machine file. The price for that service typically runs anywhere from $20 to $75 or more per design, depending on how complex your logo is, how many stitches it requires, and how fast you need it. That cost might feel manageable for a one-time project, but there's a catch most beginners don't know about upfront: the file you receive is often tied to that digitizer's format or platform. If you switch suppliers or need a different machine format later, you may end up paying to have it redone from scratch.
Print-on-demand platforms flip that model entirely. You pay nothing upfront, upload your artwork, and pay per finished garment ordered. It sounds beginner-friendly, and it is, right up until you look at the per-unit costs and realize the platform's production margin is built into every single shirt. You're also not building any reusable asset. Every new order restarts the same cost cycle, and there's no improvement in your unit economics as your volume grows. Add in the standard production-plus-shipping timeline, and fast turnaround becomes harder to guarantee at a time when starting a t-shirt printing business in 2026 increasingly depends on speed as a competitive advantage.
Downloadable embroidery design files work differently than either option above. A ready-to-stitch logo file from a digital marketplace is typically priced well under $5, arrives the moment you check out, and is yours to use on as many garments as you want, forever. There are no per-unit fees attached to the file itself.
Here is how the math plays out simply:
Route | Typical File Cost | Scales with Volume? |
|---|---|---|
Custom digitizing | $20 to $75+ | File reusable, but high upfront |
POD platform | $0 | No, per-unit cost never drops |
Downloadable file | Under $5 | Yes, cost per shirt drops every run |
For anyone planning more than two or three garments with the same logo, the downloadable file route pays for itself almost immediately. A boutique decorator or Etsy seller stitching that same design across a small team order, a gift run, or a seasonal collection is spreading a single sub-$5 file cost across every piece they produce. That is a unit economics model that actually improves the more you use it, which is exactly what small-scale apparel businesses need to stay profitable as order volume grows.
Where to Find Ready-to-Stitch Logo Embroidery Designs
If you've worked through the previous sections and you're ready to actually start stitching, the next practical step is finding a reliable source for ready-made embroidery files. Embroidery n Sewing is built specifically for this moment. The catalog covers pre-digitized logo-style designs spanning sports teams, NFL and college athletics, entertainment properties, and business-themed motifs, all available as instant downloads. No waiting, no back-and-forth with a digitizer, no minimum order quantities.
The sports and fandom categories are where the catalog really stands out. Stadium-themed designs, college athletics files, and franchise-inspired motifs go deep into the kind of niche territory that fan gear makers and team apparel decorators actually need. If you're making shirts for a booster club, a fantasy league, or a local fan group, browsing those categories is genuinely worth your time.
For small-business and corporate use cases, the catalog includes fonts, monograms, and icon-style designs you can mix and match to build branded apparel without hiring a custom digitizer. Combine a clean monogram font with an icon motif and you have a professional-looking logo setup at a fraction of the cost.
One practical tip: browse by category rather than typing a keyword into the search bar. Category browsing regularly surfaces designs that a keyword search would miss, especially in niche sports, seasonal, and entertainment themes. It's the difference between finding exactly what you pictured and settling for something close.
Best-seller visibility on the site acts as a built-in quality filter. Designs that have been purchased and used by many other makers are a reasonable signal that the file will stitch out cleanly on a t-shirt. Finally, look for multi-format file bundles. A bundle that includes PES, JEF, HUS, and EXP formats covers Brother, Janome, Husqvarna Viking, and Bernina machines without requiring any conversion software on your end.
Make Your Logo T-Shirt Project Count
You have everything you need to stitch with confidence right now. Embroidery consistently delivers better durability, richer texture, and a more professional look than screen printing or digital printing when a logo is the centerpiece of your garment. That advantage is most visible on team jerseys, branded polos, and boutique apparel where a flat printed design simply cannot match the dimensional quality of thread stitched directly into fabric.
The single most important habit you can build is deciding on your decoration method before you buy anything else. Choosing embroidery first tells you exactly what file format you need, what stabilizer to use, and whether your blank garment is compatible. Sports teams, small businesses, and makers producing multiple pieces save real money by locking in this decision upfront rather than discovering a mismatch mid-project.
From there, downloading a pre-digitized file is the smartest move for your budget and your timeline. There are no digitizing fees, no waiting on a specialist, and you can reuse the same file across as many garments as you want. The sports, NFL, college athletics, and logo-style categories at embroiderynsewing.com are stocked with ready-to-stitch files built specifically for projects like yours.
Before you stitch a single thread on your finished shirt, confirm that the file format matches your machine brand, and run a test stitch on scrap fabric first. That one extra step catches tension issues, sizing problems, and color surprises before they reach your final garment. Your logo deserves a clean first impression, and so does every shirt you make.
Conclusion
Choosing the right decoration method for your custom logo t-shirt does not have to be complicated. To recap the key takeaways: embroidery delivers superior durability that outlasts printing through countless washes, it projects a professional and premium image that elevates your brand, it holds up beautifully on structured garments like polos and hats, and it offers a tactile quality that printed designs simply cannot match.
If you want shirts that still look sharp years from now, embroidery is the clear winner for long-term value.
Ready to bring your logo to life? Start by requesting a sample, uploading your design to get a free quote, or speaking with a custom apparel specialist today. Investing in quality upfront means your team, customers, or event attendees will proudly wear your brand, not just once, but for years to come.