

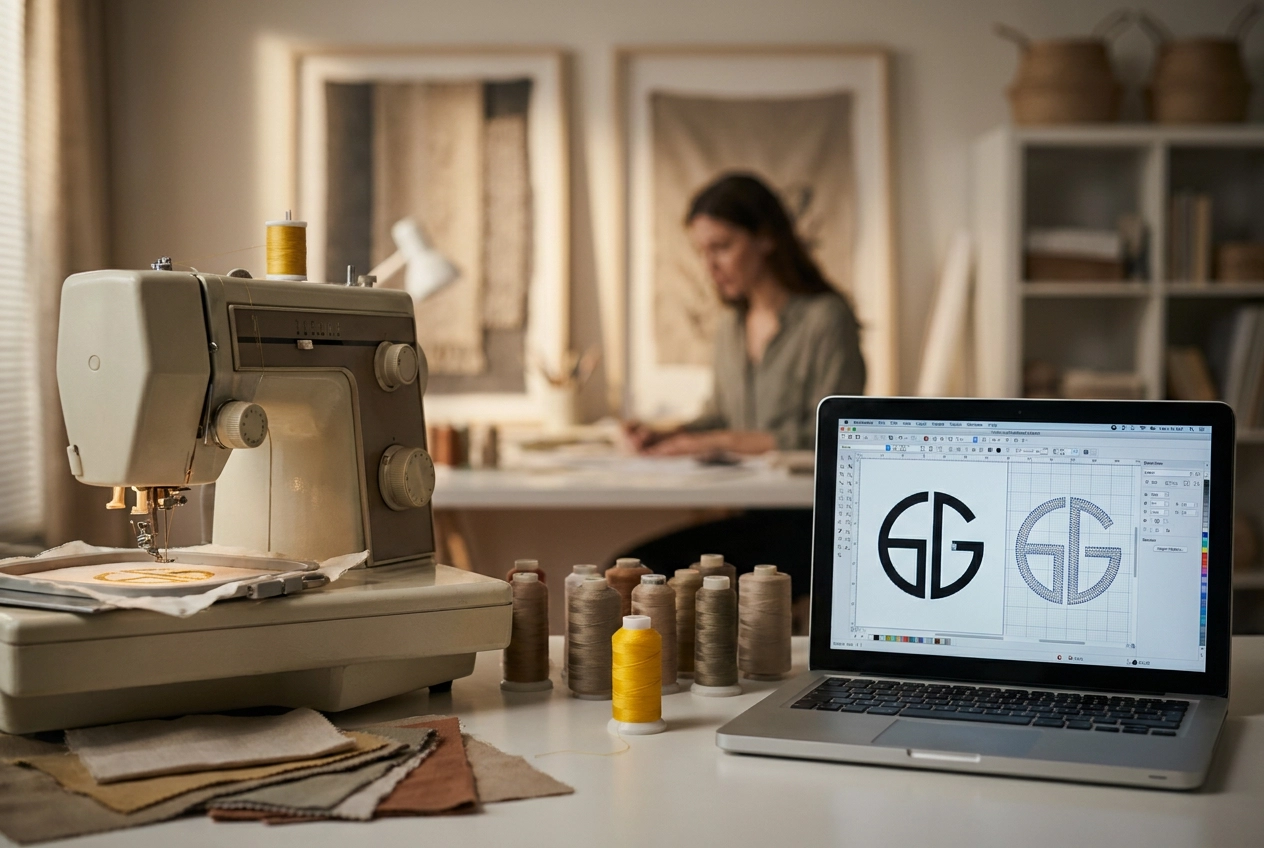
So you've got a logo and you want to see it stitched onto a hat, jacket, or tote bag. Sounds simple enough, right? But then you discover that you can't just hand an image file to an embroidery machine and expect magic to happen. That's where things get a little tricky, and that's exactly why you're here.
Learning how to digitize a logo for embroidery is one of those skills that sounds intimidating at first, but it becomes a lot less scary once someone breaks it down in plain English. And that's exactly what this tutorial is going to do.
By the time you finish reading, you'll understand what digitizing actually means, why it matters, and how to do it yourself even if you've never touched embroidery software before. You'll also learn about a smarter shortcut that most beginners completely overlook, one that can save you hours of frustration. Whether you want to DIY the whole process or just want to know your options, this guide has you covered. Let's dig in.
What 'Digitize a Logo' Actually Means
When you hear the phrase "digitize a logo for embroidery," it simply means taking a static image, whether that's a JPG, PNG, or a vector file, and converting it into a stitch file that your embroidery machine can actually read and execute. That stitch file tells the machine precisely where every single needle penetration goes, the sequence in which each element gets sewn, and how dense or light the thread coverage should be. Think of it like translating a painting into a set of extremely detailed instructions a robot can follow, one needle stroke at a time.
Here's where a lot of beginners get tripped up: digitizing is absolutely not just tracing an image. A skilled digitizer makes hundreds of small but critical decisions throughout the process. They choose between stitch types, with running stitches used for fine outlines and thin details, satin stitches wrapping neatly around text and narrow shapes, and fill stitches covering larger background areas with even thread coverage. They also plan stitch direction, density, and the travel path the needle takes across the design. Get any of those decisions wrong, and you end up with a design that puckers the fabric, breaks thread repeatedly, or simply looks muddy and unrecognizable up close. As one embroidery shop puts it, proper digitizing is what makes your embroidery look clean, sharp, and professional.
That precision matters across a massive industry. The global embroidery market is worth over $4 billion in 2026, and the embroidery machine market alone is projected to surpass $8.12 billion by 2035. That represents an enormous number of machines humming away in home studios, boutique shops, and commercial facilities, all of them hungry for properly built stitch files. You can even take a free Digitizing 101 course on YouTube to get a feel for just how much goes into creating those files correctly.
Poor digitizing shows up fast and painfully in practice. Fine logo details disappear into blobs of thread, the fabric bunches or distorts under excessive stitch density, and thread breaks interrupt your machine mid-run, wasting both materials and your time. These frustrations are entirely avoidable when a design is built right from the start.
Your source artwork quality plays a huge role in getting there. A clean, high-resolution vector file gives a digitizer crisp, scalable edges to work with. A blurry phone screenshot forces guesswork, and that guesswork shows up on your finished project.
The Three Ways to Get a Logo Digitized
Now that you understand what digitizing actually does, the next question is obvious: how do you get it done? There are three main paths, and picking the right one depends on a few honest questions you need to ask yourself before spending a single dollar or hour.
Path 1: DIY Digitizing Software
You download software, learn the tools, and convert your logo yourself. Free options like Ink/Stitch exist alongside paid platforms, and some programs export to 22 or more file formats, which matters if you own a machine with specific format requirements. The catch is the learning curve. Even experienced hobbyists find that auto-digitizing functions often need significant manual correction before a design stitches cleanly. If you plan to digitize frequently, have a unique personal logo, and genuinely enjoy the technical side of the craft, DIY is worth the upfront investment of time. If you just want to stitch something this weekend, it probably is not your fastest route.
Path 2: Hiring a Professional Service
Professional digitizing services take your artwork and return a polished, production-ready stitch file, typically within 12 to 24 hours, with rush options now marketed as fast as a couple of hours at no extra charge. This path makes the most sense when you have a complex, one-of-a-kind brand logo headed toward commercial production and the quality simply cannot be compromised. Per-design pricing makes this accessible for occasional use, though costs add up quickly if you need dozens of files. Check out Capital Digitizing's breakdown of complex logo services to see what specialized placement formats like cap digitizing and 3D puff digitizing involve.
Path 3: Pre-Digitized Ready-to-Stitch Files
This is where most beginners find the sweet spot. Pre-digitized files are already converted, tested, and ready to download the moment you complete checkout. No software to learn, no waiting on a service turnaround. Approximately 69% of embroidery digitizing files sell for under $10, making this the lowest per-design cost available for popular themes. If your project involves a sports team, collegiate logo, or fandom design, a pre-digitized file from a well-stocked catalog almost certainly already exists and is ready to stitch immediately.
Ask yourself these four questions before choosing: How unique is the logo? How fast do you need to stitch? What is your budget per design? How often will you reuse this file? Your answers will point you straight to the right path.
Option 1: DIY Digitizing Software
DIY digitizing makes the most sense in three specific situations. First, you have a truly unique personal logo that simply does not exist anywhere as a pre-made file. Second, you plan to digitize many designs over time and want to build a skill that pays off repeatedly. Third, you genuinely enjoy the technical side of the craft and find the process of translating artwork into stitches rewarding in itself. If none of those three apply to you, the DIY route may cost you more in time and frustration than it saves in money.
The Free and Low-Cost Software Landscape in 2026
The good news is that getting started does not require an expensive software investment. As of 2026, six well-tested free or entry-level options are available, each with different strengths. Ink/Stitch is an open-source plugin that runs inside Inkscape and is popular with makers who already work in vector design tools. Embird supports a wide variety of hoop styles and sizes. Legacy Digitizing Software is frequently recommended as a solid starting point for beginners. My Editor offers 3D previewing so you can see how a design will look before stitching it out. SophieSew includes unified thread management tools that help keep your color workflow organized. Hatch rounds out the list and stands apart for one very important reason: it exports to 22 different file formats.
Why File Format Export Is a Big Deal
That 22-format capability in Hatch is not just a marketing number. Your embroidery machine reads a specific file type, whether that is .pes, .dst, .exp, or another format entirely, and software that cannot export to your required format makes all of your digitizing work unusable. If you stitch on multiple machine brands or sell finished goods to customers who use different machines, format flexibility becomes critical from day one.
The Honest Learning Curve
Here is where beginners need a realistic heads-up. Digitizing a logo for embroidery is not a point-and-click process. Most beginners spend several hours learning stitch types, underlay settings, and pull compensation before they achieve clean results on even a moderately complex design. Terms like satin stitch, fill stitch, and underlay refer to real technical decisions that affect how fabric behaves under the needle. Skipping that learning phase typically shows up in puckered fabric, gaps in coverage, or designs that simply fall apart after washing.
Start Simple and Build From There
The single best practical tip for any beginner is to choose the right logo before you open any software. Start with designs that have bold lines, strong color contrast, and minimal fine text. Gradient-heavy artwork and photorealistic images are significantly harder to digitize cleanly and are not a good fit for a first attempt. Simple, blocky shapes let you focus on learning the software mechanics without also fighting artwork complexity at the same time.
Option 2: Hire a Professional Digitizing Service
Hiring a professional digitizing service is the right call in three clear situations. Your logo is completely original and custom, meaning it does not exist in any pre-built catalog anywhere. You need consistent, production-quality results across dozens or hundreds of garments. Or your design contains elements that punish sloppy technique, things like fine gradients, intricate lettering, dense layered detail, or specialty placements like 3D puff caps. According to real 2026 pricing data from ourdigitizer.com, a poorly digitized file can cause thread breaks every 800 stitches and pucker fabric badly enough that you have to rip the whole stitch-out and start over. That kind of rework cost adds up fast, especially when you are decorating premium garments at volume.
What to Expect From Turnaround Times in 2026
Speed expectations have shifted noticeably. Rush digitizing with a 1 to 2 hour turnaround is now marketed as a standard feature by professional services, not a premium upsell. Many services are advertising same-day completion at no extra charge, which means buyers in 2026 can realistically treat fast turnaround as a baseline expectation rather than a lucky bonus. If a service you are considering cannot match that general window for straightforward logos, it is worth asking why.
What to Send Your Digitizer
Getting a great result starts with what you hand over. Send a high-resolution vector file in AI, EPS, or SVG format whenever possible. Raster images like PNGs force the digitizer to do extra interpretation work, which increases the chance of detail loss. Beyond the artwork itself, include clear color guidance matched to a thread color system like Madeira or Isacord, your intended placement (left chest, jacket back, cap front), the approximate finished size you need, and the machine format your embroidery machine reads, such as DST, PES, JEF, or VP3. Small text under about 6mm needs special handling, so flag that too. The more specific you are upfront, the fewer revision rounds you will need.
Manual vs. AI-Assisted Digitizing
This is an active conversation in the industry right now. Some professional services are publishing direct comparisons between manual and AI-assisted digitizing workflows, and the debate is worth understanding before you order. The short version is that manual digitizing still produces cleaner results on complex logos because an experienced digitizer makes thousands of individual decisions about stitch direction, underlay, pull compensation, and sequencing. AI-assisted tools can speed up simpler or more geometric conversions, but they do not yet reliably handle nuanced artwork the way a skilled human does.
What It Actually Costs
Professional digitizing is typically priced per design or through a subscription model for high-volume buyers. Budget overseas services can run as low as around $10 per design for standard corporate logos. Flat-fee domestic studios generally charge significantly more, with complex work or specialty placements like full jacket backs pushing prices higher still. That cost can absolutely be worth it when your logo is genuinely one of a kind and quality matters. But it makes much less sense when a design close to what you need already exists as a ready-to-stitch instant download at a fraction of the price, which is exactly the scenario worth exploring before you commission anything custom.
Option 3: Buy a Pre-Digitized File (The Fast Path)
If the first two options feel like too much work for what you need right now, Option 3 is probably your answer. Buying a pre-digitized file is the fastest, most affordable way to get a recognizable design onto your embroidery machine, and for a huge range of popular themes, it is genuinely the smartest choice available.
When a Pre-Digitized File Is the Right Call
The simple rule here is this: if millions of people already love the same design you want to stitch, someone has almost certainly already digitized it professionally. Think NFL team logos, college mascots, anime characters, cartoon figures, holiday motifs, children's themes, and fandom artwork. These are exactly the categories where pre-digitized catalogs shine. You are not working with a one-of-a-kind custom logo that only exists in your brand guidelines. You want a design that is recognizable, beloved, and widely searched, which means the digitizing work has already been done for you by experienced professionals who know how to translate artwork into clean, machine-ready stitch files.
What You Get When You Skip the Custom Route
Custom digitizing requires submitting your artwork, waiting for a turnaround period, reviewing proofs, and paying a per-design fee. Pre-digitized files eliminate every single one of those steps. The artwork has already been converted, tested for smooth stitch output, and packaged in the common machine formats your embroidery machine already reads. You download the file, transfer it to your USB drive or machine card, and you can be stitching the same afternoon. No waiting, no back-and-forth emails, no minimum order requirements.
What You Will Find at EmbroideryNSewing.com
Embroidery N Sewing offers a large, searchable catalog built around exactly the themes that embroiderers search for most. The selection spans NFL and college sports logos, anime and cartoon characters, children's motifs, florals, country flags, machine embroidery fonts, seasonal designs, and transportation themes. Every design is available as an instant download, which means your file is ready the moment your payment clears. Prices sit firmly in the impulse-purchase range, which brings up a point worth knowing: according to market research, 69% of embroidery digitizing products sell for under $10, with most clustered around $5. A pre-digitized file from a quality catalog costs a fraction of what a single custom conversion would run you.
How to Find the Right File in Minutes
Finding your design is straightforward. Search by sport, team name, character, holiday, or theme using the catalog's search bar. Once you find a design you like, check the format compatibility list included with the product to confirm it matches your machine brand. Common formats include PES for Brother machines and DST for a wide range of commercial equipment. Download instantly, load the file onto your USB drive or directly into your machine's memory, and you are ready to stitch. For fandom-driven categories like anime embroidery files, demand has grown steadily alongside pop culture interest, meaning catalogs are actively expanding these sections with fresh designs regularly.
The pre-digitized route is not a compromise. For popular themes, it is simply the most practical, budget-friendly, and time-efficient path to a finished project.
Logo Types and Their Digitizing Challenges
Not every logo digitizes the same way, and understanding why makes a huge difference in the quality of your final stitch-out. Some designs translate beautifully with minimal fuss, while others require serious skill and careful planning to look right on fabric. Here is a breakdown of the most common logo types and what makes each one tricky to work with.
Fine Text and Small Lettering
Small text is one of the hardest things to pull off cleanly in embroidery. Once letters drop below about 4mm in height, the satin stitches that normally give text its crisp, defined edges start to pile on top of each other and blur together. The result is a blob of thread where readable letters should be. A skilled digitizer can manually adjust letter spacing and stitch density to coax legibility out of tiny type, but it takes real experience to do it well. This is exactly why pre-digitized files built specifically for small-scale output are worth seeking out rather than trying to force a standard file to work at a size it was never intended for.
Gradients and Photorealistic Artwork
Here is something that surprises a lot of beginners: embroidery machines have no way to blend colors smoothly the way a printer does. A gradient that looks gorgeous on screen simply does not exist as an option in thread form. When a logo contains soft color fades or photorealistic shading, a digitizer has to make a creative call, either simplifying those areas into distinct solid color zones or using carefully placed fill stitches that suggest a transition without actually replicating one. The logo embroidery digitizing guide from Digitizing Studio puts it plainly: gradients must be re-interpreted entirely, not converted. This is one of the biggest reasons embroidery always requires skilled human judgment rather than a simple file conversion.
Multi-Color Sports and Team Logos
Multi-color logos, especially the kind of bold sports and team designs you will find throughout the catalog at EmbroideryNSewing.com, come with a specific set of technical demands. Every color in the design needs its own color stop in the correct sequence, and the underlay stitching beneath each element has to be solid enough to prevent the fabric from showing through. Stitch direction matters too; the angles you choose affect how each shape reads visually once the thread is down. A mismanaged color sequence or sloppy underlay can make a recognizable team mark look muddy or distorted, which is why these files benefit so much from professional-grade digitizing.
Placement-Specific Considerations
Where you are stitching a logo changes everything about how it needs to be digitized. A left-chest logo running 3 to 4 inches wide needs tighter density settings because it sits on a relatively flat, firm surface and the design is meant to read at close range. A full jacket back design can stretch up to 12 inches wide and requires an entirely different approach to density and underlay to prevent the larger surface area from pulling or puckering. Cap digitizing is its own challenge entirely, since the curved surface and the tight hoop constraints mean a flat design will distort unless the file is specifically built to compensate for that curve.
3D Puff Digitizing for Caps and Hats
3D puff is a technique that places a layer of foam beneath the stitching to create a raised, dimensional effect. It looks sharp on snapbacks and structured hats, especially for athletic and sports-inspired designs. But a flat embroidery file will not work here. The foam requires specially adjusted stitch density and border settings so the thread locks the foam in place and the edges come out clean. Bold block lettering and simple geometric logos with thick outlines are ideal for this technique; fine details tend to disappear in the raised effect and can cause the foam to compress unevenly. If you are shopping for cap-ready designs, look specifically for files labeled as 3D puff optimized.
File Formats Explained for Beginners
Once you have your digitized logo file in hand, there is one more thing that trips up almost every beginner before their first stitch-out: making sure you have the right file format for your specific machine. This is not a minor technical detail you can skip. An embroidery machine is a precision device that reads exact stitch-by-stitch instructions, and those instructions are encoded differently depending on the brand that built your machine. Loading the wrong format means your machine will simply not recognize the file at all, even if the design looks absolutely perfect on your computer screen.
Why Different Formats Exist
The short answer is history. Major machine manufacturers each developed their own proprietary file formats decades ago, partly for competitive reasons and partly because their machines had different technical requirements. Think of it like different languages. They all communicate stitching instructions, but a Brother machine and a Janome machine speak different dialects, and they do not automatically translate for each other.
The Formats You Will Actually Encounter
Here is a quick, practical reference for the most common formats:
PES is the native format for Brother and Baby Lock machines. It is by far the most common format among home embroiderers in the US, since Brother machines are widely popular at the beginner level.
DST is the closest thing the embroidery world has to a universal standard. It has been around since the 1980s and is readable across nearly all commercial machines. If you ever send a logo to a commercial shop, they will almost certainly ask for DST.
JEF is the native format for Janome machines and is not interchangeable with PES or DST without conversion.
VP3 is used by both Husqvarna Viking and Pfaff machines, carrying brand-specific thread and function data.
HUS is an older Husqvarna format that predates VP3. It is still in use on older machines that have not been upgraded.
How to Find Out Which Format Your Machine Needs
You have three easy options. First, check your machine manual; the accepted file extension is always listed in the specifications section. Second, look at the file extensions on designs already loaded onto your machine's USB drive or memory card, since your machine will have used its own native format. Third, simply search your machine's model number alongside the phrase "embroidery file format" and you will find a clear answer within seconds.
Getting the Right Format Without the Hassle
When buying from a marketplace or ordering from a digitizing service, always mention your machine brand and model before you purchase, not after. Requesting a format change after the fact can mean extra steps, delays, or additional fees.
This is one area where buying from a catalog like EmbroideryNSewing.com genuinely makes life easier. Designs typically come packaged with multiple format options in a single download, so you just pick the file that matches your machine and start stitching. No conversion software, no back-and-forth with a seller, no guesswork. For a beginner still learning the technical side of things, that kind of built-in flexibility removes a real barrier between you and your finished project. You can also explore this overview of common embroidery file formats if you want to dig deeper into what each format stores under the hood.
Getting the Best Results from Your Digitized Logo
Having a well-digitized logo file is a great start, but what happens between that file and your finished stitch-out depends on several factors you control. Getting those variables right is what separates a crisp, professional result from a puckered, distorted mess.
Match Your Design to Your Fabric
Fabric choice has a bigger impact on stitch quality than most beginners expect. Stable woven fabrics like twill, denim, and canvas are the friendliest surfaces for logo embroidery because they hold their shape under the tension of dense stitch fills without stretching or warping. Stretchy materials like jersey knit, polo fabric, and fleece are a different story entirely. These fabrics move as your machine stitches, which can distort letter shapes and pull fills out of alignment. If you are stitching onto a knit or fleece garment, look for a digitized file with lower stitch density settings, or ask the file seller whether the design is optimized for stretch fabrics before you buy.
Stabilizer Basics You Cannot Skip
Stabilizer is the unsung hero of clean embroidery, and using the wrong type is one of the most common beginner mistakes. Cut-away stabilizer is the most supportive option; it stays permanently behind the fabric and is the right choice for stretchy or unstable materials that need ongoing reinforcement. Tear-away stabilizer is a lighter option that removes cleanly after stitching and works well on stable woven fabrics where the design has finished doing its structural work. For textured surfaces like terry cloth towels or fleece, add a layer of topping (also called solvy or water-soluble stabilizer) on top of the fabric before stitching. This thin film keeps stitches from sinking into the pile and disappearing, and it rinses away cleanly with water when you are done.
Always Test Before You Commit
Even a perfectly digitized design can behave differently depending on your specific fabric, stabilizer, and machine tension combination. Running a test stitch on a scrap of the actual garment fabric before your production run costs almost nothing and can save you from ruining multiple finished pieces. A quick test catches thread breaks, registration issues, and density problems while you still have time to adjust your settings.
Thread Weight and Color Planning
40-weight polyester thread is the industry standard for machine embroidery and the weight most digitized files are built around. It delivers consistent coverage, handles color vibrancy well, and works reliably across most machine brands. Variegated thread is a fun way to add visual interest to a logo, but it requires some planning. Because variegated thread shifts color continuously, the color transitions need to line up with deliberate color stops in your digitized file; otherwise the effect looks accidental rather than intentional. Confirm that your file supports custom color sequencing before committing to a variegated run.
Respect the Resizing Limits
A digitized file is built for a specific size range, and scaling it significantly outside that range degrades quality fast. As a general guideline, staying within roughly 20% of the file's intended output size keeps stitch density, fill quality, and fine details intact. Pushing beyond that in either direction causes problems; scaling too large spreads stitches thin and creates gaps, while scaling too small crowds stitches together and turns crisp lettering into an unreadable blob. Always confirm the target size of your project matches the file's intended range before you load it into your machine. Most quality file listings will include the original stitch-out dimensions, so check that detail at purchase if size accuracy matters for your project.
Start Stitching Today
You now have three clear paths in front of you. DIY software works best when you have a truly unique logo and the patience to learn. Professional digitizing services are the right call when your brand needs a custom, one-of-a-kind conversion done by an expert. And pre-digitized instant-download files are the fastest, most affordable route for anyone who wants to stitch a popular theme today without waiting or overspending.
For sports fans, fandom makers, collegiate decorators, and gift crafters, that third path removes every obstacle between your idea and a finished project. Browse embroiderynsewing.com by sport, team, theme, or character and you will find files that are already optimized, already formatted, and ready to download right now. Before you check out, use the format filter or product description to confirm your machine's file type, whether that is .PES, .DST, .JEF, or another format, then download, load, and stitch the same day.
The embroidery industry is growing fast, and 2026 has made getting started easier than ever before. Whether you are personalizing a gift, decorating team apparel, or building a small craft business one design at a time, the tools and resources available today mean there is no reason to wait.
Conclusion
Digitizing a logo for embroidery does not have to be an overwhelming process. You now know what digitization actually means, why a simple image file cannot go straight to a machine, and how the conversion process works from start to finish. You also know that hiring a professional digitizer is a legitimate shortcut that saves time, money, and a lot of headaches, especially for beginners.
The most important takeaway? You have options. Whether you want to learn the craft yourself or delegate it to an expert, the path forward is clearer than it was an hour ago.
Now it is time to take action. Grab your logo, choose your approach, and start your first embroidery project. That hat, jacket, or tote bag is closer to reality than you think. Go make something worth wearing.