

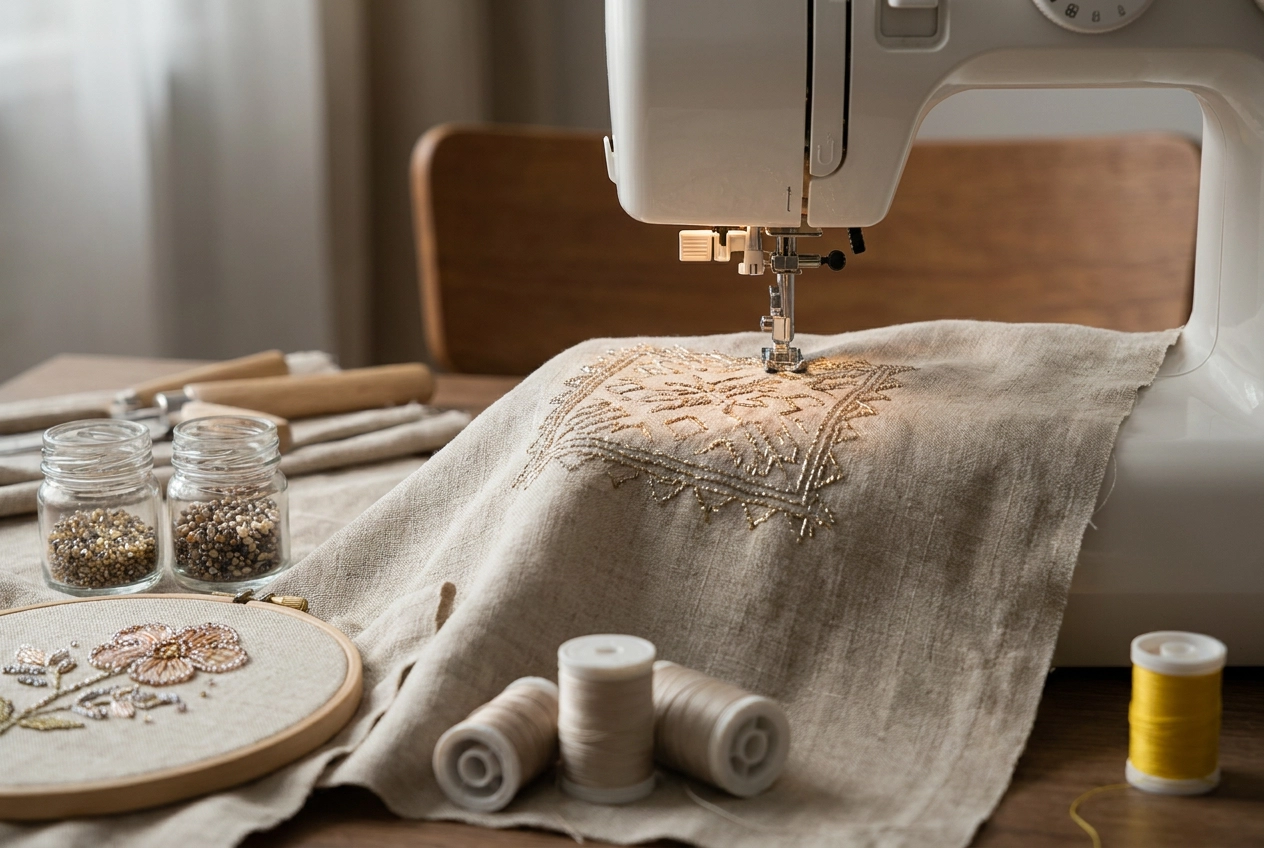
Have you ever looked at a beautifully embroidered piece and wondered how those tiny, sparkling details were added? Chances are, embroidery beads played a big role in creating that stunning effect. These little gems can completely transform a simple design into something that looks professionally crafted and absolutely eye-catching.
If you're new to the world of embroidery, the idea of working with beads might feel a little intimidating at first. But here's the good news: it's much easier than it looks, and this tutorial is going to walk you through everything you need to know. From understanding the different types of embroidery beads available to learning the basic techniques for applying them by hand or machine, we've got you covered.
By the end of this post, you'll feel confident enough to start incorporating beads into your own projects. Whether you're embellishing a tote bag, personalizing a jacket, or creating a decorative hoop piece, beads add that extra something special that makes people stop and say, "Wow, did you make that?" Let's dive in and get started!
What Are Embroidery Beads?
If you've ever admired a piece of embroidery that seemed to sparkle, shimmer, or pop off the fabric with unexpected dimension, there's a good chance embroidery beads were involved. At their simplest, embroidery beads are small decorative elements that get sewn or applied directly onto fabric as part of an embellishment design. The category is wonderfully broad, covering everything from tiny seed beads and tubular bugle beads to lustrous pearls, dazzling crystals, and heat-applied hotfix embellishments. As the team at Ricamour puts it, embroidery "offers limitless design solutions thanks to the huge array of beads, sequins, threads and techniques available." That's great news if you're just starting out, because it means there's a bead type perfectly suited to whatever project you have in mind.
Seed Beads
Seed beads are the go-to starting point for most beginners, and for good reason. These tiny, rounded beads typically measure between 1mm and a few millimetres across, making them easy to stitch in dense clusters or delicate scattered arrangements. Their real superpower is uniformity; because each bead is roughly the same size and shape, they layer predictably and fill stitched areas with satisfying, even texture. You can find them in matte, metallic, transparent, and iridescent finishes, so the subtle shimmer level is entirely up to you. The creative range is genuinely impressive. A single seed-bead watermelon design by Flynn and Mabel pulled in over 670,000 views and 17,000 reactions, which tells you everything you need to know about how engaging bead embroidery can be.
Bugle Beads
Bugle beads take a different shape entirely. These elongated, tube-like glass beads are purpose-built for linear work, think sharp accent lines, geometric fills, and directional patterns that thread alone struggles to replicate cleanly. Twisted bugle bead variants add an extra layer of surface texture for designs that need more visual movement.
Pearls, Crystals, Hotfix, and Sequins
Pearl and crystal beads bring serious elegance to the table and are especially popular for bridal gowns, quinceanera dresses, and formal wear where a high-shine, dimensional effect is the whole point. Pearls carry a timeless, classic quality that photographs beautifully, while crystals deliver guaranteed sparkle in a wide range of cuts and sizes. For makers who want embellishment results with less hand-stitching time, hotfix beads and sequins bridge the gap between traditional bead embroidery and faster, machine-compatible applications. Hotfix rhinestones bond to fabric with a heat press or iron, while sequins can be applied individually or in pre-attached strips that layer over stitched designs. Each of these bead types opens up a completely different creative direction, and knowing which one suits your project is the first step toward getting the results you're after.
Hand Bead Embroidery vs. Machine Bead Simulation: What Is the Difference?
So now that you know what embroidery beads are, the next natural question is: do you actually need physical beads to get that look? The answer might surprise you, because there are really two distinct paths to achieving beaded embroidery, and they work in completely different ways.
The Hand Beading Approach
Hand bead embroidery is exactly what it sounds like. You thread a needle, pick up an individual bead, sew it down onto your fabric, and repeat. One bead at a time. Skilled hand embroiderers use specialized beading needles in sizes 10 to 12, because standard embroidery needles have eyes too wide to pass cleanly through tiny seed beads. The smallest seed beads, called 15/0, measure just 2mm and allow roughly 13 beads per inch of stitching. That gives you a sense of how painstaking and precise the process really is.
The results are genuinely stunning and irreplaceable. Hand beading creates true three-dimensional texture because each bead sits physically above the fabric surface. It catches light from every angle in a way that no thread-only technique can fully duplicate. Haute couture designers rely on this approach for a reason: a single beaded gown can require hundreds of hours of hand labor, and that handcraft history is part of what gives the finished piece its value. For heirloom projects, wedding accessories, or one-of-a-kind art pieces, hand beading carries an authenticity that machine work simply cannot replicate.
How Machine Bead Simulation Works
Machine bead simulation takes a completely different route to the same visual destination. Instead of sewing physical beads onto fabric, a specially digitized embroidery file instructs your embroidery machine to layer satin stitches, specialty fills, and directional stitch techniques that mimic the light-catching, rounded appearance of real beads. The stitches are programmed to build up slight dimension and visual texture, creating the illusion of beadwork through thread alone.
For home machine embroiderers, this approach solves several real problems at once. There are no loose beads to reattach after washing, no specialized needles to source, and no risk of individual placement errors throwing off your pattern. A downloadable bead-simulation design file produces a consistent, repeatable result every single time you run it, which matters enormously if you're personalizing multiple items or running small production batches for an Etsy shop.
You can explore how hand embroidery differs from machine embroidery at the stitch level if you want a deeper technical breakdown of what separates the two methods structurally.
Which One Is Right for You?
Both approaches have genuine value, and experienced crafters often use both depending on the project. Hand beading is the right choice when authenticity, handcraft character, and true three-dimensional texture are the priority. Machine bead simulation is the practical choice for beginners, for items that will be laundered regularly, and for any project where consistency and speed matter more than artisanal uniqueness.
The catalog at Embroiderynsewing.com is built entirely around the digital side of this equation. Every design file available for download is engineered to deliver the beaded aesthetic using your home embroidery machine, no physical beads required. That makes the look accessible to anyone, regardless of whether they have beading needles, seed bead inventory, or hours of hand-stitching experience.
How Machine Embroidery Simulates the Look of Beads
Machine embroidery pulls off the bead look through a handful of clever techniques, and once you understand how each one works, you'll start seeing the magic behind every sparkly, dimensional design you stitch out.
Satin stitches are where bead simulation begins. A satin stitch is essentially a series of dense, parallel stitches laid side by side at a tight angle, and when you use shiny rayon or polyester thread, the surface of the finished stitch catches light in a way that feels remarkably similar to the glossy curve of a glass or plastic bead. The shorter the stitch length and the more tightly packed the stitches, the more reflective and bead-like the result. This is why thread choice matters so much; a matte cotton thread will never replicate that same glassy shimmer, but a high-sheen polyester thread can genuinely fool the eye at a glance. You can explore how fill stitch techniques affect embroidery texture and results to better understand why stitch density is such a critical starting point.
Specialty fill patterns take things a step further. Stipple fills, which use small, wandering stitch paths, and circular micro-fills, which stack tiny looping patterns together, can mimic the organic, clustered look of a seed bead field when the digitizer sets the right stitch density and chooses a complementary thread weight. These patterns create visual texture that reads as dimensional even when the fabric surface is technically flat, which is a big deal for beginner stitchers who aren't ready to work with physical beads quite yet.
Dimensional layering adds physical height to the equation. Some designs use foam underlay beneath the top fill stitches to literally push the embroidery off the fabric surface, creating a slight raised profile that echoes how a sewn-on bead sits above the base cloth. Stacking multiple stitch passes can create a similar puffed effect without foam. Creating texture in embroidery through layering techniques is a well-established approach among experienced embroiderers and can elevate even simple designs considerably.
Sequin-style stitch files bridge the gap between machine embroidery and actual bead-like embellishment. These specialized file formats work with sequin presser feet and feed mechanisms to physically attach sequins to fabric during the embroidery run, giving you true sparkle without hand-sewing a single element. The result is a hybrid approach that combines stitching and bead-adjacent embellishment in one automated process.
Underlying all of these techniques is digitizing quality. A well-built embroidery file accounts for stitch direction, underlay settings, and pull compensation, which prevents the design from distorting as stitches pile up. A poorly digitized file will produce a flat, muddy fill that looks nothing like beadwork, no matter how nice your thread is. When you download a professionally digitized design, that technical groundwork is already handled for you, which is one of the biggest advantages of working with ready-to-stitch files rather than attempting complex bead-simulation digitizing from scratch as a beginner.
Compatible Machine Embroidery File Formats for Bead-Effect Designs
Before you download any bead-effect design, there's one practical step that will save you a lot of frustration: confirming the file format works with your specific machine. Embroidery machines don't all speak the same language, and the industry runs on a fragmented set of proprietary formats tied to individual brands.
DST (Tajima) is widely considered the most universally compatible format available. Created by Tajima in the late 1980s, it's accepted by the vast majority of both home and commercial machines, making it a reliable choice if you're ever unsure. Think of it as the common ground that almost every machine understands.
PES (Brother/Baby Lock) is the format you'll reach for most often if you own a Brother or Baby Lock machine, which happen to be among the most popular home embroidery machine brands in the US hobbyist market. PES files store stitch data, color information, and needle movement instructions all in one tidy package, per this helpful embroidery machine file formats guide.
JEF (Janome) and VP3 (Husqvarna Viking/Pfaff) are brand-specific formats that require a quick compatibility check before purchasing. Loading the wrong format means the file simply won't open on your machine, so a 30-second verification before checkout is genuinely worth it.
EXP (Melco/Bernina) and XXX (Singer) round out the most commonly requested formats. Because so many formats exist simultaneously, reputable design retailers package multiple formats together in a single download. At embroiderynsewing.com, each design file includes multiple formats so you can stitch right away regardless of your machine brand. Always scan the listed formats on any design page before purchasing.
The Best Projects for Bead-Effect Embroidery Designs in 2026
Now that you have a solid understanding of how bead-effect embroidery works, the exciting part begins: figuring out exactly what to make. Some project categories are a natural fit for dimensional shimmer and pearl simulation, and in 2026, a handful of them are pulling ahead of the pack in terms of demand, search interest, and commercial opportunity.
Bridal and Quinceanera Apparel
Few applications feel more at home with bead-effect embroidery than bridal and quinceanera garments. Pearl and crystal simulation stitching applied to veils, sashes, bodices, and corset panels delivers a genuinely luxurious result without the hours of hand-stitching that traditional beadwork requires. For small custom apparel businesses and home embroiderers alike, this is a significant advantage: you get the high-end visual result at a fraction of the labor investment. Bridal beading embroidery inspiration is actively searched and saved on Pinterest right now, which tells you real customers are looking for exactly this aesthetic. If you want to offer something premium without premium production time, this category is worth every bit of your attention.
Holiday Ornaments and Seasonal Decor
The winter holiday season is practically designed for bead-effect embroidery. Shimmer, sparkle, and dimensional texture are exactly what customers want on ornament covers, stocking cuffs, table runners, and tree skirts during Q4. A bead-simulating satin fill in metallic thread on a simple snowflake or star motif looks genuinely elevated, and it stitches out faster than you might expect. This is a great category for beginner embroiderers to explore because the designs are often bold and forgiving, which means small imperfections disappear in all the glittery texture.
Boho Fashion Accessories
Tote bags, denim jackets, and canvas shoes are among the hottest surfaces for dimensional embellishment right now. The boho aesthetic thrives on texture and layering, and bead-effect fills add exactly the visual richness that makes a piece feel handcrafted and intentional. The new releases in sewing beaded trim confirm that consumer appetite for beaded embellishment on everyday fashion items is actively growing heading into 2026.
Pearl and Coastal-Inspired Home Decor
Shell motifs, nautical accents, and pearl-simulating stitch designs are riding a genuine trend wave in 2026, connected to the broader coastal grandmother and quiet luxury aesthetics that have taken hold across home and fashion categories. Throw pillow covers, framed textile art, and gift-market tote bags are all strong candidates for this look. If you are building a product line for Etsy or craft fairs, coastal pearl designs offer a fresh angle that feels current without being trendy in a way that fades quickly.
Team and Fandom Apparel
Adding bead-effect accent fills to a sports team design or a beloved character motif immediately upgrades the perceived value of the finished piece. A shimmer border around a team logo or a beaded-look background fill behind a mascot turns a standard embroidered patch into something that looks custom and premium. This is a smart move for anyone already selling fan apparel or spirit wear, because the dimensional quality adds visual complexity that flat embroidery simply cannot replicate, giving your customers a reason to choose your work over something mass-produced.
Tips for Getting the Best Results With Bead-Effect Embroidery
Getting clean, professional results from bead-effect embroidery designs comes down to a few smart habits that make a real difference in the finished piece.
Start with the right stabilizer. Bead-effect designs typically carry heavy stitch density because the fills are doing a lot of work to simulate dimension and shine. Cut-away stabilizer is your best friend here. Unlike tear-away options, cut-away backing stays permanently in the fabric, supporting all those dense stitch layers and preventing the design from distorting or puckering over time. This is especially important on softer fabrics where the stitch buildup would otherwise cause the material to warp.
Thread choice shapes the entire look. Rayon thread produces a high sheen that comes closest to the light-catching quality of actual beads, making it ideal when the visual effect is your top priority. Polyester thread offers comparable shine with added durability, which makes it the smarter pick for anything heading into the wash regularly, such as kids' clothing, tote bags, or team gear.
Fabric foundation matters more than beginners expect. Tightly woven fabrics like cotton twill, canvas, or stable knits hold up well under high stitch counts. Loose weaves tend to shift and pucker as stitch density builds, which undermines the crisp, dimensional look you're going for.
Always run a test stitch first. Scrap fabric that matches your actual project fabric is the best practice before committing to the real thing, particularly for layered bead-effect files where stitch buildup can subtly affect thread tension and final appearance.
Slow your machine speed down slightly for satin fills and specialty stitch sequences. Better thread control reduces mid-design thread breaks and keeps your fills smooth and consistent throughout.
Find Bead-Style Embroidery Designs Ready to Download and Stitch
When you're ready to put bead-effect techniques into practice, having the right design file makes all the difference. Embroiderynsewing.com offers a broad catalog of machine embroidery designs spanning floral, bridal, seasonal, and decorative themes, many of which are natural fits for the pearl, shimmer, and dimensional stitch aesthetics covered throughout this guide. Whether you're chasing that elegant raised look on a bridal piece or want a holiday ornament design that practically glows with satin-stitch shimmer, the catalog gives you plenty of starting points without needing to commission custom digitizing.
Categories like florals, nature motifs, and holiday designs are especially worth exploring if bead-effect techniques are your goal. These themes rely heavily on the smooth curves, concentrated fill areas, and reflective thread work that make metallic and pearl-finish stitching look its best.
Every design is available as an instant download in multiple machine-compatible formats, so you can go from browsing to hooping the same day. Projects ranging from boutique apparel to personalized gifts are all well within reach, and the pricing is structured to keep things impulse-friendly so you can grab a design and start experimenting right away.
Start Your Bead Embroidery Journey Today
You've got two great paths in front of you, and neither one is wrong. Physical bead embroidery gives you that hands-on, artistic experience of literally painting with beads, as described beautifully in this bead embroidery beginner's guide. The machine embroidery route, on the other hand, delivers that same shimmery, dimensional look using nothing more than the equipment you already own. Both approaches are valid, and your project goals and current skill level should guide which path you choose.
If you're just getting started, the machine embroidery path removes a lot of friction fast. There are no loose beads to manage, no specialty needles to source, and no threading techniques to master before you can stitch your first project. You simply download a design, load it onto your machine, and go. It's also worth checking out these tips for embroidering with beads if you ever want to explore the hand-sewn side later.
For now, head over to embroiderynsewing.com, browse the instant-download bead-inspired designs, and confirm your machine's file format before purchasing. Then pick one project from the ideas covered in this post and start stitching today.
Conclusion
Embroidery beads are one of the simplest ways to elevate your needlework from ordinary to extraordinary. Throughout this post, you have learned about the different types of beads available, the essential techniques for applying them by hand and by machine, and how to choose the right designs for your projects. Most importantly, you now know that adding beads does not require professional experience, just a little patience and practice.
Now it is time to put that knowledge to work. Start small with a single beaded accent on your next project, then build your confidence from there. Grab your supplies, pull up a design you love, and let those tiny sparkling details do the talking. The moment you finish your first beaded piece, you will understand exactly why so many embroiderers consider beads an absolute game changer.