

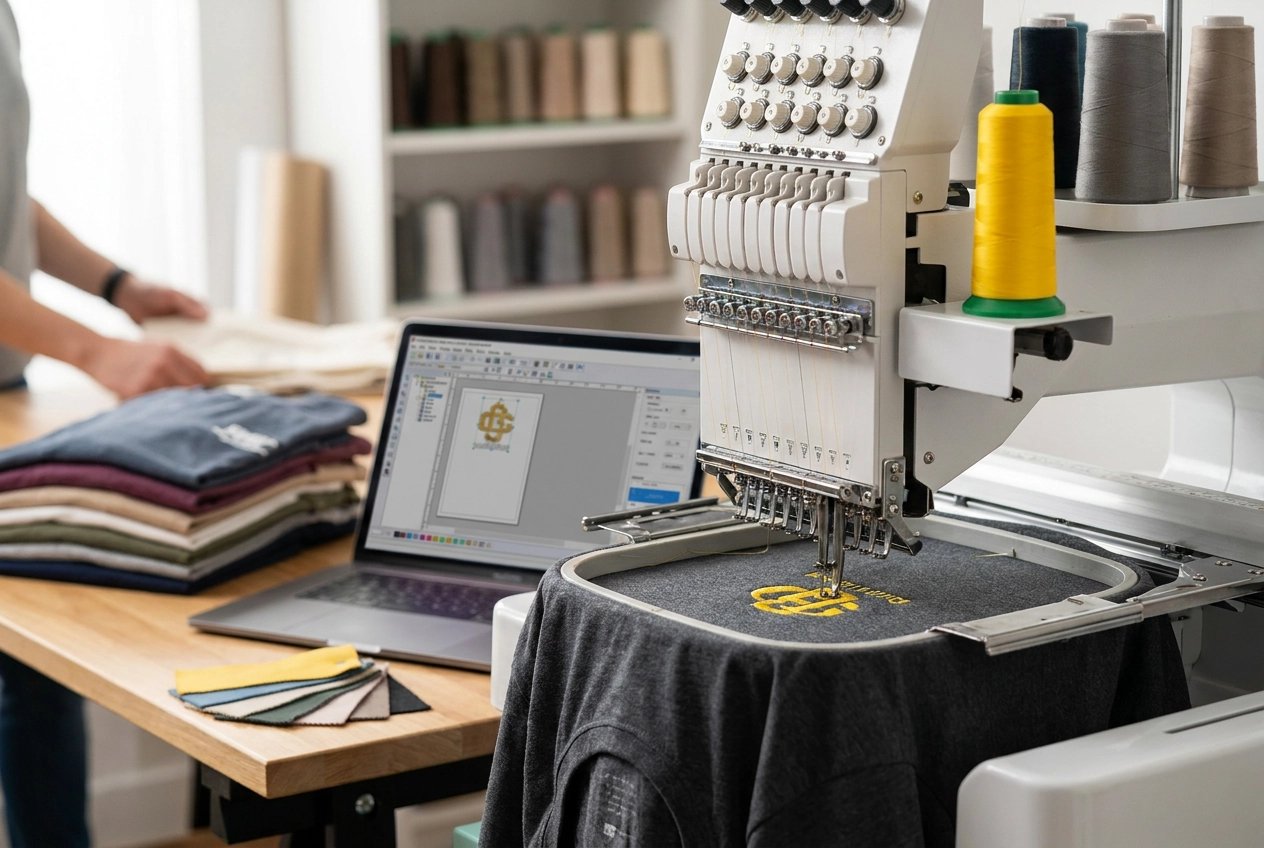
Have you ever looked at a crisp polo shirt or a branded hoodie and wondered how that perfectly stitched logo got there? Logo shirt embroidery might seem like a mysterious process reserved for big businesses, but it is actually more accessible than you think, and learning the basics can open up a whole new world for your brand, team, or personal projects.
Whether you are decorating shirts for a small business, outfitting a sports team, or simply want to add a professional touch to your wardrobe, understanding how embroidery works will save you time, money, and a lot of frustration.
In this guide, we are going to walk you through everything a beginner needs to know. We will cover where to place your logo on a shirt, the different embroidery styles available to you, and what design files you actually need to get started. By the end, you will feel confident enough to take your first steps into the world of logo shirt embroidery without feeling overwhelmed. Let's break it all down in plain, simple terms.
Why Logo Shirt Embroidery Is Booming Right Now
If you've noticed more embroidered logos showing up on shirts, hats, and hoodies lately, you're not imagining it. Logo shirt embroidery is having a genuine moment right now, and the momentum behind it is real, measurable, and showing no signs of slowing down.
Sports and collegiate styles are at the heart of this surge. Game-day shirt customization, Greek life aesthetics, and university-branded apparel drive consistent search activity year-round, not just during football season. Whether it's a sorority sweatshirt or a hometown team polo, stitched logo designs on shirts remain one of the most searched and purchased categories in the entire embroidery space.
The numbers back this up. The global embroidery machine market is projected to grow from USD 3.62 billion in 2025 to USD 5.83 billion by 2035, at a steady CAGR of 4.9%. That kind of sustained infrastructure growth signals rising demand across the whole ecosystem, including downloadable design files for home machine owners.
Beyond sports, hyper-personalization is reshaping what people actually want stitched onto their shirts. Monogram revivals, name drops, and custom typography are pushing logo-style embroidery into gifting, occupational pride, and hobby identity. Think nurse name badges, teacher totes, and gym culture crewnecks.
Streetwear aesthetics are also rewriting the rules. Bubble fonts, 3D puff monograms, and workwear-inspired canvas pieces are trending hard alongside the classic left-chest format, according to US streetwear market data for 2026. And vintage "Digital Americana" styles, featuring 70s typography and distressed palettes, are opening up a whole new commercial lane for lifestyle and gift-focused makers. The opportunity right now is genuinely wide open.
Choosing the Right Logo Style for Your Shirt
Not every logo style works the same way on a shirt, and choosing the right one before you download a file saves you a lot of frustration at the hoop. Here is a quick breakdown of the most popular logo styles so you can match your design choice to your project from the start.
Sports and Team Logos
Sports and team designs are the single highest-demand category for logo shirt embroidery in the US right now. Think NFL fan gear, college athletics apparel, and Greek life game-day shirts. These designs typically feature mascots, arched lettering, shields, and layered details, which means they tend to have high stitch counts. A quality digitized file matters more here than in almost any other category, because a poorly converted design will show thread breaks and uneven fills right where you want crisp, clean results. When you browse for sports-style files, look for designs built specifically for fabric rather than adapted from flat print graphics.
Occupational and Niche Identity Designs
Nurse caduceus emblems, teacher apple motifs, and gym culture badges are having a strong moment in 2026. These designs serve buyers who are emotionally connected to what the symbol represents, which means they are willing to pay a fair price for a shirt that reflects their identity. As a seller or maker, this category gives you a focused audience and strong repeat potential. A well-placed caduceus on a scrub top or a bold gym graphic on a hoodie can move from file download to finished product in under an hour.
Typography and Text-Based Logos
Curved text arcs, bubble fonts, and quote-style layouts are among the fastest-selling embroidery styles on shirt and sweatshirt products right now. They stitch quickly, require fewer color changes, and translate beautifully onto fleece and cotton alike. If you are managing volume orders or just getting started, a clean typography file is one of the lowest-risk ways to produce a polished result. You can explore current logo design trends for 2026 to see how font choices are shaping what buyers expect.
Vintage and Retro Designs
Distressed badge logos, 70s color palettes, and Digital Americana graphics are surging this year. This style performs especially well on heavyweight cotton shirts, flannels, and denim jackets, where the slightly worn, dimensional finish of embroidery looks intentional rather than imprecise. The texture of a heavier fabric actually enhances the retro look, giving the finished piece that lived-in quality buyers actively seek out.
Minimalist Line Art Logos
Clean outlines with low stitch counts are trending strongly on lightweight T-shirts and tote bags. These designs are a practical choice when you are working with thinner fabrics that cannot support dense fill stitching without puckering. As Eric Turney of The Monterey Company notes, the strongest logos use clear shapes and strong contrast that stay readable across embroidery and real-world applications. Simple line art meets that standard naturally.
Monogram and Personalized Logos
Monograms in decorative fonts are one of the quickest wins for beginner machine owners. The design is contained, the stitch path is predictable, and the finished product feels intentional and giftable. Hyper-personalization is a defining trend of 2026, and a single raised initial in a bold serif or script font is a perfect entry point into that space.
Logo Placement Guide for Embroidered Shirts
Where you place your logo on a shirt matters just as much as the design itself. Getting the positioning right makes the difference between a polished, professional result and something that looks off-center or awkwardly small. Here is a breakdown of the most common placement zones and exactly how to use them.
Left Chest: The Gold Standard
Left chest is the go-to position for most logo shirt embroidery projects, and for good reason. It reads as professional, familiar, and clean on everything from polo shirts to button-downs to jackets. For adult shirts, size your design between 3.5 and 4 inches wide, then position it approximately 7 to 9 inches down from the shoulder seam and about 4 inches in from the center front. That landing zone sits right over the chest pocket area on most shirts, which is exactly where the eye naturally travels. Per the T-Shirt Logo Placement Guide from Arklavo, using consistent reference points like the shoulder seam and collar intersection helps you nail placement across different shirt sizes in a run.
Center Chest and Sleeve Options
Center chest works best for streetwear-inspired pieces and bold statement designs. This position shines on crew-neck tees and comfortably holds designs in the 5 to 6 inch range. Avoid it on collared or button-front shirts, because the placket runs straight through the middle of your design and breaks the visual entirely.
Sleeve placement is trending strongly in 2026 for branded and team apparel. Keep sleeve designs between 2 and 3 inches to fit cleanly within the sleeve cap area. You will need a sleeve split or specialty clamp hoop to flatten the sleeve before hooping; without one, your machine will stitch through both layers and the shirt will be unwearable. Check the T-Shirt Logo Placement Guide from T-Shirt Elephant for visual references on how sleeve placement compares to chest zones.
Back Yoke and Youth Sizing
Back yoke placement is ideal for workwear, team jerseys, and club apparel, with designs running up to 10 to 12 inches wide. Stitch count increases significantly at this size, so always use a cutaway stabilizer that covers the full design area and run a test stitch on a matching fabric scrap first.
For children's shirts, scale your design down by 20 to 30 percent compared to adult sizing. Position the left chest logo slightly higher too, around 5 to 6 inches from the shoulder seam, so it does not land too low on a smaller torso.
Before loading any shirt onto your machine, hoop a pressing cloth or scrap tearaway first and mark your center point with a water-soluble pen. Knit fabrics especially will shift under hoop pressure, and catching that drift before you stitch saves a lot of heartache.
Fabric and Stabilizer Basics for Logo Shirt Embroidery
Getting your fabric and stabilizer pairing right is honestly the most important technical decision you'll make before stitching a single logo. The good news is that once you understand how each shirt type behaves, the choices become pretty straightforward.
Woven Cotton and Poly-Cotton Shirts
Woven fabrics like Oxford cloth button-downs and standard dress shirts are the friendliest starting point for logo embroidery beginners. Because these fabrics are stable and don't stretch under the needle, you have a lot of room for error. Pair them with a medium-weight tearaway or cutaway stabilizer and a standard sharp needle in the 75/11 or 80/12 range. The sharp needle punches cleanly through the tight weave, and the stabilizer keeps everything flat and smooth while your machine works through the design. Tearaway is fine for most woven cotton projects since you can simply score and remove it after stitching without affecting the finished look.
Knit and Jersey Shirts
T-shirts and casual polos are trickier because knit fabric stretches, and that movement can distort your logo after the hoop comes off. A cutaway stabilizer is the right call here since it stays in place permanently and keeps the design from warping through wear and washing. One extra trick that makes a big difference: lay a piece of water-soluble topping over the shirt surface before stitching. This thin layer prevents your needle from pushing stitches down into the fabric loops, keeping the logo crisp and raised. Embroidering on T-shirts is a skill worth practicing specifically, since knits behave so differently from woven fabrics.
Denim and Canvas Shirts
Denim and canvas can handle bold, dense logo designs beautifully, but they demand heavier stabilization. Use a heavy tearaway or stack two layers of standard tearaway underneath to give the fabric enough support. You will also want to switch to a denim needle in the 90/14 or 100/16 range to avoid skipped stitches on the thick weave. For design selection, go with logos that have clean, bold edges rather than fine detail fills, since the coarser texture of denim tends to blur intricate stitching.
Performance Wear and Spandex Blends
Athletic and performance shirts are an increasingly popular substrate in 2026, and they need a specialized approach. Use a stretch cutaway stabilizer paired with a ballpoint needle in the 75/11 size. The ballpoint slides between fabric fibers rather than piercing them, which protects the stretch quality of the fabric. Choose logo designs with lower stitch density on these shirts; a high thread count locks down the fabric and causes stiffness or puckering that ruins the shirt's drape.
Always Test-Stitch First
No matter which fabric you are working with, always test your logo design on a scrap before hooping the actual shirt. Stabilizer choice is genuinely the single biggest variable between a polished result and one that puckers, tunnels, or deteriorates after a few washes. A quick test run costs you a few minutes and saves you a finished garment.
Understanding Design Files for Logo Embroidery
Before you download a single file, it helps to understand what kind of file your embroidery machine actually needs, because this is where a lot of beginners get tripped up.
Your machine cannot read a JPG, PNG, or even a vector file like an SVG or AI. Those are image formats, and your embroidery machine has no idea what to do with them. What your machine needs is a stitch file, a purpose-built format that encodes every needle path, thread color, and stitch sequence as direct machine instructions. Think of it like the difference between a photo of a recipe and the actual step-by-step directions. One is just a picture; the other tells the machine exactly what to do, in what order, one stitch at a time.
The format your machine accepts depends entirely on the brand you own. The most common formats you will encounter are DST (compatible with most commercial and home machines, making it the closest thing to a universal format), PES (used by Brother and Baby Lock machines), JEF (Janome), XXX (Singer), and HUS (Husqvarna Viking). Before you download any design, look up your machine brand and confirm the required format. The good news is that many digital retailers bundle multiple formats inside a single download, so you get the right file without hunting around.
Stitch count is another number worth paying attention to. It tells you how complex a design is and roughly how long it will take to stitch out. A clean left-chest logo typically runs between 4,000 and 8,000 stitches. A detailed team logo with dense fill stitching and several color changes can climb to 12,000 or 15,000 stitches. Both ranges are well within what beginner machines handle comfortably.
One more thing: skip the auto-conversion route. Dropping a brand or team logo image into conversion software rarely produces a stitch-ready file worth using. A properly digitized file is engineered for how thread actually behaves on fabric, and automated tools cannot replicate that reliably. Buying a pre-digitized file from a dedicated embroidery retailer also keeps you on solid legal ground compared to repurposing third-party artwork yourself.
That cost difference adds up fast. Custom digitizing runs roughly $20 to $75 per design. An instant-download file from a digital embroidery shop typically lands between $3 and $10, often including commercial use rights. For anyone making logo shirts in any kind of volume, that math is straightforward.
The Commercial Opportunity Behind Logo Shirt Embroidery
If you're already excited about stitching logos onto shirts, here's some genuinely encouraging news: there's real money in it. Finished logo-embroidered shirts typically retail between $25 and $65, and sellers working in sports, nursing, teaching, or personalized gifting niches routinely land at the top of that range. A well-positioned Etsy shop selling embroidered nurse tees or college-spirit sweatshirts isn't chasing bargain buyers; it's selling identity, and people pay a premium for that.
The math on design files makes the opportunity even more attractive. A professionally digitized file from a specialty digital retailer typically runs $3 to $10, and once you purchase it with commercial use rights, you can stitch that same design onto unlimited shirts. That means your design cost per shirt shrinks toward zero the more you sell, while your retail price stays exactly where it is.
Getting started is also far more accessible than most beginners expect. If you already own a home embroidery machine, you can enter the market with nothing more than a file download and a blank shirt. The custom t-shirt printing market is projected to nearly double by 2034, confirming that demand for personalized decorated apparel is growing, not flattening.
The final piece of the puzzle is niche selection. Generic designs compete on price; occupational themes, fandom categories, and hobby-specific logos compete on meaning. Catalog depth in these high-demand categories is one of the clearest advantages a seller can build.
Start Your Next Logo Shirt Project with the Right Foundation
Everything you've covered in this guide comes down to three things working together: the right design style for your fabric and audience, a placement that's measured before you ever touch the hoop, and a file format that actually matches your machine. Get all three aligned and your results will look intentional and polished. Miss one and you'll spend a frustrating afternoon troubleshooting instead of stitching.
If you're just getting started, keep it simple on purpose. A left-chest placement on a woven cotton shirt, paired with a tearaway stabilizer and a clean logo in the 4,000 to 7,000 stitch range, gives you the most stable setup possible. Fewer variables mean fewer mistakes, and finishing a clean first project builds the kind of confidence that makes the next one easier. Knits, back placements, and high-stitch-count designs are all worth exploring once the basics feel comfortable.
For sellers building out a logo shirt line, the categories converting best right now are sports and collegiate designs, occupational identity themes, typography-forward logos, and vintage or retro aesthetics. These niches align with what buyers are actively searching for in boutique and Etsy markets heading into 2026.
Browse ready-to-stitch logo and monogram designs across dozens of categories at embroiderynsewing.com, download instantly in your machine's format, and start stitching today.
Conclusion
Logo shirt embroidery does not have to be intimidating. By now you understand the three pillars that make every embroidered shirt a success: placement matters for both visual impact and practicality, style choices shape how your brand or design comes to life, and having the right design files ensures your artwork translates beautifully into thread.
Armed with this knowledge, you are no longer guessing. You know where to position your logo, which embroidery styles suit different garments, and exactly what file formats to hand over to your embroiderer.
Now it is time to put that knowledge to work. Start small if you need to. Order a sample shirt, gather your design files, and reach out to a local or online embroidery service. Every great branded wardrobe begins with a single stitch, and yours is ready to begin.