

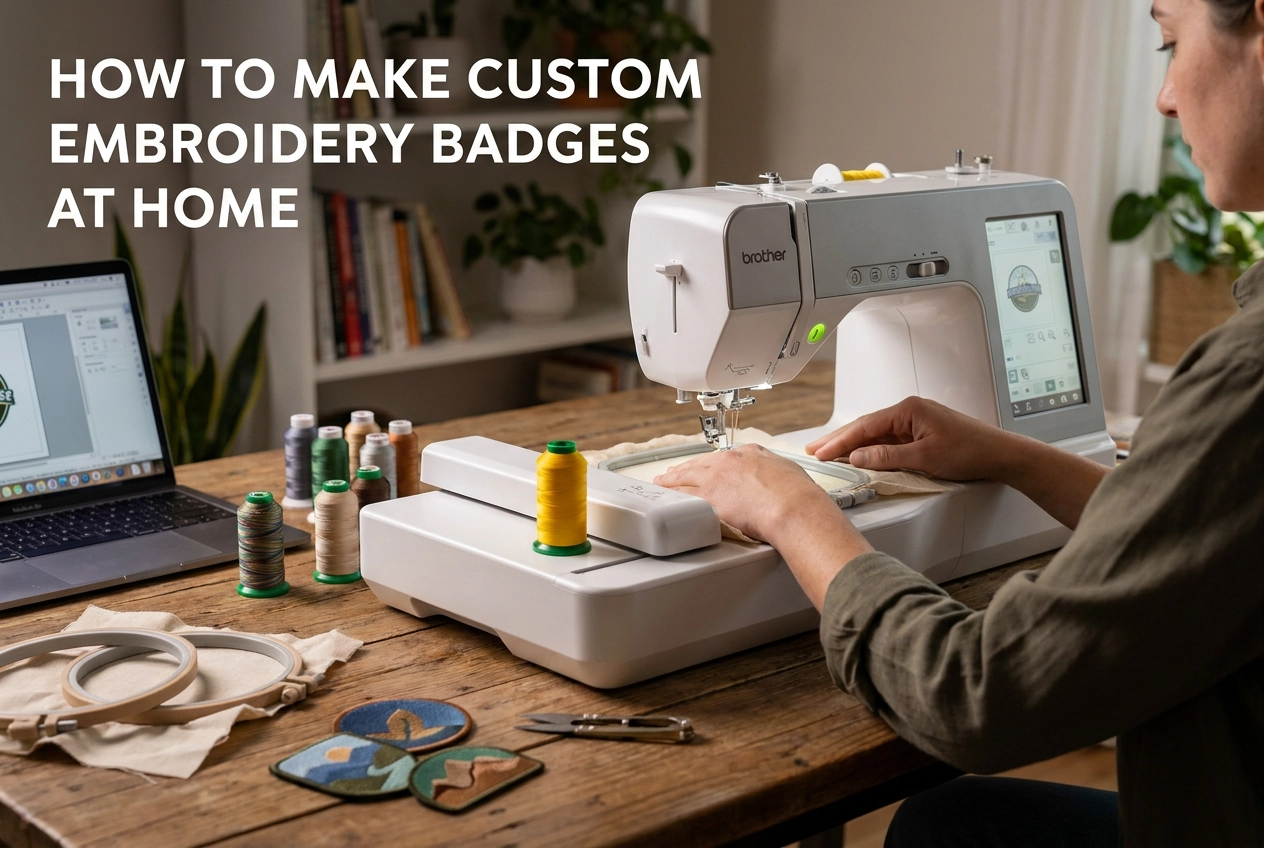
Have you ever spotted a beautifully embroidered badge on someone's jacket and thought, "I wish I could make something like that"? Well, good news: you absolutely can, and it is much easier than you might think!
Whether you want to personalize your denim jacket, create patches for a scout troop, or simply explore a new creative hobby, making custom embroidery badges at home is a fun and rewarding project for anyone to try. No fancy equipment required, no professional training needed, just a little patience and a willingness to learn something new.
In this guide, we are going to walk you through everything you need to know to start creating your very own custom embroidery badges from scratch. We will cover the basic supplies you need to get started, simple techniques that work perfectly for beginners, and step-by-step instructions to bring your first badge to life. By the time you finish reading, you will have all the confidence and knowledge to pick up a needle and thread and start stitching. Let's dive in!
What Are Custom Embroidery Badges?
Custom embroidery badges are fabric pieces stitched with a design, logo, or decorative motif that are created as standalone textile objects and then attached to garments, bags, hats, or accessories after the fact. Think of them as a wearable canvas you stitch separately and apply wherever you want, rather than embroidering directly onto a finished item. The terms "badge" and "patch" are used interchangeably in the industry, and they come in all shapes, sizes, and attachment styles including iron-on, sew-on, and Velcro-backed options.
There are two very different ways these badges get made. The first is the commercial manufacturer route, where businesses order in bulk, supply their artwork, and a factory handles the digitizing and production. That route comes with minimum order quantities and longer lead times. The second route is the one that's genuinely exciting for home crafters: using your own embroidery machine paired with downloadable, pre-digitized design files. You simply purchase a ready-to-stitch file, load it onto your machine, and get stitching. No custom digitizing fees, no waiting on a supplier, no order minimums. The Hatch Embroidery User Group community is a great example of how actively home embroiderers are already sharing and using these files across formats like DST, EXP, and VP3.
The demand behind all of this is real and growing fast. The embroidered badges and patches market is projected to expand at a 10.3% CAGR from 2026 to 2033, fueled by personalization trends, fashion-forward streetwear culture, and corporate branding needs. People want customized items that express identity, and badges deliver that in a tactile, visually bold way.
Use cases span a surprisingly wide range. Sports and varsity teams use them on jackets and uniforms. Corporate workwear brands rely on them for professional, consistent identity. Schools and scouting programs have been using merit-style badges for generations. Fandom and cosplay communities love them for franchise insignia and character logos. Streetwear designers use patches to make garments feel unique and premium. And for gift-givers, a personalized embroidered badge adds a handmade touch that's genuinely memorable.
For home machine owners, browsing a large library of downloadable embroidery designs is the fastest way to find badge-ready artwork across all of these categories without commissioning anything custom.
What You Need to Make Custom Embroidery Badges at Home
Before you stitch your first badge, it helps to take a quick inventory of what you actually need. The good news is that you probably already have the most important piece of equipment sitting on your craft table.
Your Embroidery Machine
Any home embroidery machine will work for badge-making as long as the hoop is large enough to fit your badge design. A standard 4x4 inch hoop covers most small badges, while a 5x7 inch hoop gives you more flexibility for larger designs. Single-needle machines like entry-level Brother models are featured in countless beginner tutorials and handle badge projects beautifully. Multi-needle machines speed things up if you're making badges in batches, but they're absolutely not required to get started. Check your machine's maximum hoop dimensions before you pick your badge size and you'll avoid a frustrating mismatch at the start.
Blank Patch Fabric
Your choice of base fabric shapes the final look and feel of your badge. Poly patch twill is the most traditional option, giving you those crisp, clean edges you see on professional-looking badges. Felt is a fantastic starting point for beginners because it's firm, doesn't fray, and trims neatly. Denim or canvas works well when you want a rugged, casual vibe for lifestyle or workwear projects.
Stabilizer
This is where beginners sometimes go wrong. Cutaway stabilizer is the right choice for badges because it permanently supports the dense stitch fills used in most badge designs. Tearaway stabilizer is not recommended since it lacks the durability those thick fills need. Check out this helpful guide to making embroidered patches with stabilizer and hooping tips for a deeper breakdown of stabilizer options.
Optional Finishing Supplies
A few extras make the finishing process much cleaner. Iron-on adhesive backing sheets let you add a heat-bond layer so badges attach easily to garments. Velcro adhesive strips are great for detachable badge applications on bags or jackets. Sharp embroidery scissors are genuinely essential; precision blades let you trim close to the satin-stitch border without accidentally cutting your thread.
Your Design File
You'll need a machine-compatible embroidery file before anything else can happen. The most common formats are PES (Brother), JEF (Janome), VP3 (Husqvarna Viking and Pfaff), DST, and EXP. Always match the file format to your specific machine brand. For ready-to-stitch badge designs in all major formats, browsing a well-stocked digital design library saves significant time compared to digitizing from scratch. You can also explore free beginner resources on YouTube to see exactly how the process comes together before you buy supplies.
Step 1: Choose Your Badge Design File
Everything starts with your design file, and this is honestly where most beginners either set themselves up for success or accidentally waste an afternoon. Getting this choice right before you touch your machine makes the rest of the process much smoother.
Know Your Cost Options Before You Shop
There are three ways to get an embroidery design file for a badge project, and they vary a lot in price and effort. Downloading a ready-made design file is by far the fastest and most affordable route, typically costing just a few dollars per design with instant access after purchase. No waiting, no back-and-forth emails, no setup fees. Commissioning custom digitizing is the middle option; you hire a professional digitizer to convert your artwork into a stitch file, which adds both cost and turnaround time to your project. At the top of the cost ladder, ordering manufactured patches from a factory involves per-unit MOQ (minimum order quantity) pricing, meaning you usually have to commit to buying in bulk before the price per patch becomes reasonable. For a beginner making badges at home, a downloadable design file is almost always the right starting point.
Match the File Format to Your Machine
Before you purchase any design file, you need to know your machine's native format. Buying the wrong one is a very common beginner mistake. Here are the four formats you will most often see:
PES is used by Brother and Baby Lock machines and is one of the most common consumer-level formats you will encounter.
DST is a universal industrial format that works across a wide range of commercial multi-needle machines, making it broadly compatible.
JEF is the native format for Janome machines.
VP3 is used by Husqvarna Viking and Pfaff machines.
The simplest fix is to look for multi-format download packages, which bundle PES, DST, JEF, VP3, and other formats into a single purchase. You get everything you need regardless of which machine you are using.
Look for Badge-Ready Design Qualities
Not every embroidery file is built to work as a standalone badge. A properly badge-ready file has three things: sufficient stitch density to create a solid, opaque fill (so the fabric underneath does not show through), a defined border stitch such as a satin column or bean stitch outline to give you a clean finished edge, and lettering no smaller than 0.4 inches tall so the text stays legible after stitching.
Embroiderynsewing.com is a great place to browse downloadable badge and patch design files covering sports teams, university-style crests, fandom themes, and much more. Files are available for instant download right after purchase, so you can be stitching the same day you shop.
Step 2: Set Up Your Stabilizer and Fabric
Stabilizer is one of those supplies that beginners tend to underestimate, but it genuinely makes or breaks a badge project. Badge designs are packed with high-density fill stitches, and all that thread tension pulls and pushes the fabric in multiple directions at once. Without solid backing support, you end up with puckering, distortion, and a finished piece that looks warped once you detach it. Because a badge lives as its own standalone object rather than being permanently fused to a shirt or jacket, any distortion during stitching is locked right into the patch with nowhere to hide.
Cutaway stabilizer is your best friend for badge work. Unlike tearaway, which you remove after stitching, cutaway stays bonded to the back of the patch and continues to support those dense fill stitches long after the machine stops running. For most badge projects on twill or felt, reach for a medium-weight cutaway at 2.5 oz. That weight handles the stitch density of typical badge designs without adding unnecessary bulk. If you are working with a particularly dense design or stitching onto heavier canvas material, step up to 3 oz cutaway to give the design the extra foundation it needs. You can learn more about how stabilizer weight affects stitch quality in this complete guide to machine embroidery stabilizers.
For hooping, do not put your patch fabric directly in the hoop. Instead, hoop the stabilizer alone so it sits taut and flat, then float your patch fabric on top using a temporary spray adhesive. This technique prevents hoop burn, which is the permanent crease that direct hooping leaves on smaller, stiffer fabric pieces. Apply the spray adhesive lightly and let it tack up for about 30 seconds before pressing your fabric into place.
Before you start stitching, take a moment to check your grain alignment. Hold the fabric up and look at the weave direction, then position it so the grain runs parallel to the hoop's straight edges. Twill has a visible diagonal weave that makes off-grain placement obvious on the finished badge, so it is worth taking the extra 20 seconds to get it straight.
One handy shortcut worth knowing: many badge makers use pre-cut patch blanks in standard shapes like circles, shields, or rectangles. These blanks are sized consistently, so trimming after stitching becomes much faster and more uniform, which matters a lot if you are making badges in batches.
Step 3: Stitch Your Badge
With your stabilizer locked in and your fabric ready to go, it's time to actually run the design. This is the most satisfying part of the whole process, but a few smart habits during the stitch-out will separate a crisp, professional-looking badge from one that ends up wrinkled, thread-heavy, or blurry around the edges.
Get Your Tension Right Before You Start
Badge designs are dense. You have thick satin fills, layered color blocks, and sometimes fine detail stitching all packed into a small area. That density puts more pressure on your thread path than a typical embroidery project, which means your standard tension settings may not serve you well here. Try loosening your upper tension slightly compared to where you normally run it. This small adjustment reduces the pull that drags bobbin thread up through the top of your fabric, which is a common issue on heavy fill areas. If you are seeing little dots of bobbin thread peeking through on the right side of your stitching, that is your signal to ease the upper tension down just a touch. Make a test stitch on a scrap piece of the same fabric before committing to your full badge run.
Respect the Stitch Sequence
One of the biggest beginner mistakes is reordering color stops without understanding why the file was sequenced the way it was. Most badge-ready embroidery design files are built to stitch background fills first, then layer foreground details on top, and finish with the border as the very last element. This sequence is intentional. Changing it can cause detail stitches to sink into unstitched areas or leave your border floating on top of nothing. Trust the file. If you are using a well-digitized design from a reliable source like the catalog at Embroidery n Sewing, the sequencing has already been worked out for you.
The border stitch deserves its own moment of attention. A satin column border or a triple bean stitch outline stitched last creates a clean, defined edge that makes trimming much easier and gives your finished badge that merrowed, manufactured-patch look. It essentially frames everything that came before it and tightens up any stray fibers along the edge.
Watch Your Small Text
If your badge design includes lettering, pay close attention to how small those characters are. Text smaller than about 0.4 inches tall tends to lose definition when stitched in standard satin column lettering; the columns get so narrow that the stitches bunch up and the letters become hard to read. Running stitch or bean stitch lettering handles small sizes much better because those stitch types do not rely on column width for clarity. Your cleanest option, though, is simply to scale the badge up enough that all text sits comfortably above that size threshold. Check your step-by-step patch guide resources before resizing to make sure your stitch counts still work at the new dimensions.
Monitor as You Go
Do not walk away from a dense badge run. High-density fill stitches consume thread fast and can snap a thread or drain a bobbin without any obvious warning sound. Pause periodically during the run, especially between major color stops, to check for thread breaks, uneven tension, or bobbin thread running low. Catching a break early means a clean fix; catching it late means backtracking through multiple stitched layers. Stay close, stay attentive, and your finished badge will look exactly the way you planned it.
Step 4: Finish and Attach Your Badge
Your badge has been stitched and you are probably already loving how it looks. Now it is time to clean it up and get it onto whatever you are making. This last step is where a little attention to detail pays off in a big way.
Trimming Your Badge
Start by removing the badge from the hoop and tearing away any excess stabilizer around the edges. Then grab your sharpest pair of fine-tipped embroidery scissors and trim the fabric as close to the border stitch as you can get without actually cutting into it. Work slowly and rotate the badge as you go rather than trying to muscle around tight curves in one pass. If you spot any stray threads hanging off the trimmed edge, a seam ripper is perfect for plucking those out cleanly without disturbing your stitches. The Ricoma embroidery community notes that tight, manufacturer-quality edges are genuinely one of the trickier parts of DIY badge-making, so do not rush this step.
Choosing Your Attachment Method
Once the badge is trimmed, you have three solid options depending on how permanent you want the attachment to be.
Iron-on application is the fastest route. Fuse a sheet of heat-activated adhesive like Heat n Bond Lite to the back of your badge, then position it on your garment and press with a firm iron or heat press for about 15 to 20 seconds. Cotton and denim work best here because they can handle the heat needed for a strong bond. Avoid using this method on nylon or moisture-wicking synthetic fabrics since the heat can damage them.
Sewing is the most durable choice, especially for anything going through the washing machine regularly. Run a zigzag or straight stitch around the outer edge of the badge by machine, or hand-stitch it if you prefer more control. According to this complete DIY patch guide, stitching is the preferred professional-grade method for workwear and uniforms.
Velcro backing is ideal when you want a badge that can move between garments. Attach the loop side to the badge back and the hook side to the garment. This is especially popular for children's clothing, tactical gear, and branded workwear where you might want to swap the badge out over time.
Final Finishing Touch
Before you call the badge completely done, run a thin line of Fray Check or fabric glue along the trimmed edge, especially if your base fabric is canvas or another loosely woven material. This small step seals any raw fibers and keeps your clean trim looking sharp after multiple washes. Let it dry fully before attaching the badge to anything.
Custom Badge Design Ideas for Every Use Case
Now that you have got the technique down, the real fun begins: deciding what to actually make. Custom embroidery badges work across an impressive range of projects, and knowing which design style fits each use case will save you time and help you get the best results from every stitch-out.
Sports Team and Varsity Badges
Sports badges are one of the most popular entry points for home embroiderers, and for good reason. A well-stitched team crest or mascot patch on a jacket or gear bag looks genuinely professional and means a lot to the person wearing it. Varsity-style chenille letters are having a major comeback in 2026, showing up on everything from letterman jackets to baseball caps as a premium, tactile alternative to flat embroidery. Embroiderynsewing.com carries a broad catalog of sports-themed embroidery files spanning NFL designs, college athletics, and university-style crest formats, so you can find team-inspired designs ready to load and stitch without any custom digitizing. For best results at badge size, look for designs with clear outlines and bold fills rather than fine detail work that can get muddy at small dimensions.
School and Scout-Style Achievement Badges
This category is perfect if you have kids or work with youth groups. Achievement badges, rank indicators, and subject-themed patches for backpacks, sashes, and jacket sleeves are genuinely useful items that kids actually want to wear. Shield and crest shapes hold up especially well at small badge sizes because the bold borders give the design a finished, structured look even when stitching at two inches or less. Keep your text large and your letter count low so everything stays legible after the fabric relaxes. Simple two-color fills with a contrast border are your friend here.
Corporate Workwear and Uniform Badges
Small businesses are increasingly turning to embroidered twill patches as a smart, budget-friendly branding move. Stitching a logo-style design onto a cut piece of twill and then sewing or ironing it onto polos, hats, or work jackets gives you a clean, professional look without the cost of sending out full garments for commercial embroidery. According to 2026 custom embroidery trends coverage, organizations in 2026 are prioritizing premium, story-driven branded apparel rather than basic stitched logos, and a well-made patch delivers exactly that feel.
Fan and Fandom Cosplay Patches
Cosplayers and collectors have embraced embroidered badges as a way to add authenticity to costumes or build custom character-inspired accessories. Anime and cartoon-themed embroidery files are ideal for recreating costume-accurate sleeve patches, rank insignias, or fictional faction crests. Embroiderynsewing.com's anime and cartoon design categories are well-stocked for this kind of project, giving you recognizable motifs ready to stitch onto felt or twill backing.
Streetwear and Fashion Patches
Bold typographic badges, retro crests, and graphic fills are landing on denim jackets, canvas tote bags, and sneakers right now. Per 2026 patch trend analysis, personalized patches have shifted from decorative afterthoughts into primary styling tools, with placement choices as intentional as the designs themselves. Oversized embroidered quotes and statement phrases are especially popular this season.
Personalized Gifts
A single design file purchase can fuel an entire small-batch gift run. Name badges, monogram crests, hobby-themed patches, and seasonal motif designs are all low-cost to produce but feel genuinely thoughtful as gifts. Stitch a gardening-themed badge for a plant-loving friend, a travel crest for someone who collects country patches, or a monogram shield for a personalized bag. The per-unit cost stays low even when you make a handful at a time, which makes custom embroidery badges one of the most practical handmade gift formats going.
Why Download Badge Design Files Instead of Ordering Manufactured Patches?
If you have already worked through the steps above and stitched your first badge, you might be wondering whether ordering manufactured patches would be easier for bigger projects. It is a fair question, and the honest answer is that downloadable design files win on almost every dimension that matters for home machine owners and small-scale sellers. Here is why.
The cost comparison is significant once you run the numbers. Commercial patch manufacturers typically require minimum order quantities of 50 to 100 units before they will even accept an order. That structure makes sense for large organizations ordering in bulk, but it creates a real problem for someone who needs ten badges for a little league team or twenty patches for an Etsy shop restock. A downloadable design file costs a few dollars as a one-time purchase. Your only per-unit cost after that is thread and backing fabric, which runs pennies per badge. You are not paying for a supplier's production overhead, setup fees, or the units you do not actually need.
Speed is the other major factor. Manufactured patch orders involve design proofing, material sourcing, machine setup, and shipping logistics, a process that routinely takes one to three weeks from order to delivery. A downloadable file is ready to stitch within minutes of checkout. If you are making badges for a weekend tournament, a pop-up market, or a last-minute gift, that difference is not just convenient; it is the entire reason the project is possible at all.
Control over the final product is something manufactured orders simply cannot offer. With your own machine and a design file, you choose the thread colors, the backing fabric, the badge size, and when you produce each batch. No waiting on a supplier to approve revisions or reprint proofs. The growing market for personalized embroidered products reflects exactly this appetite for creative ownership.
Reusability makes the value compound over time. One file purchase lets you stitch unlimited badges across multiple seasons or product restocks. For a small seller running an ongoing line or a sports parent making badges every fall, that single purchase keeps delivering. There is no MOQ pressure, no unsold inventory sitting in a box, and no financial commitment beyond what you actually need to produce right now.
Trending Badge Styles to Try Right Now
If you have mastered the basics and want to push your badge projects further, knowing what styles are actually trending right now gives you a serious creative edge. Here are five badge styles worth adding to your project queue in 2026.
Chenille-Look Fills
Chenille patches are officially back, and they are everywhere from varsity jackets to streetwear drops. True chenille uses a moss stitch process that requires specialist equipment most home machines cannot replicate. The good news is that you can get surprisingly close using dense, heavily layered fill stitches and loop pile effects built into your design file. Look for digitized files that use multi-directional fills and varying stitch densities to mimic that soft, raised texture. The result reads as premium and tactile even without the traditional chenille construction.
Varsity and Athletic Lettering
Bold block letters with satin fill and a contrasting outline thread are a perennial favorite, and demand is not slowing down. This style works beautifully on team apparel, custom hats, gym bags, and streetwear pieces. The key to nailing this look is choosing a design file where the lettering is digitized with clean satin columns and a defined border stitch, which keeps edges crisp even on thicker fabrics.
Retro Crest and Shield Shapes
Vintage heraldic crests and shield-shaped badge formats are having a genuine fashion moment in 2026. These layered designs look especially sharp on jacket chests, tote bags, and workwear. The structured outline paired with interior fill elements gives them a heritage quality that reads as intentional and polished.
Country Flag and Geographic Motifs
Flag-inspired badges remain strong sellers for personal expression, travel souvenirs, and heritage projects. The country flags design category maps perfectly to this demand, giving you instant-download options across dozens of nations.
Seasonal and Limited-Run Badges
Small-batch seasonal badges, think holiday themes, graduation patches, and annual event designs, are a growing application for home stitchers and small craft sellers alike. Instant-download design files make it easy to stitch a fresh run for every season without waiting on custom digitizing.
Start Stitching Your Own Custom Badges Today
You have got everything you need to start making custom embroidery badges that look genuinely professional. The process is straightforward: pick a badge-ready design file, set up your hoop with cutaway stabilizer and patch fabric, stitch with an eye on tension and border density, then trim, finish, and attach using whichever method fits your project. Once you have run through it a couple of times, the whole workflow becomes second nature.
The downloadable file model genuinely works in your favor here, especially for small batches and one-off gifts. Instead of waiting on minimum order quantities or paying per-unit manufacturing costs, you buy the file once and stitch on your own schedule.
That single file also keeps delivering long after your first badge is finished. Different fabrics, colorways, and backing options mean one purchase can fuel dozens of projects over time, making it one of the smartest additions to your embroidery toolkit.
Browse the catalog at embroiderynsewing.com for badge and patch design files spanning sports teams, fandom themes, university-style crests, country flags, and seasonal motifs. Your next badge project is ready to go whenever you are.
Conclusion
Making custom embroidery badges at home is more achievable than most people realize. You now know the essential supplies to gather, the beginner-friendly techniques to lean on, and the step-by-step process to bring your unique designs to life. Most importantly, you have learned that imperfection is part of the journey, and every stitch teaches you something new.
The best part? You do not need expensive tools or years of training to create something you are truly proud of. All it takes is a needle, some thread, a little fabric, and the willingness to start.
So pick a design that excites you, gather your materials, and take that first stitch today. Share your finished badges with friends, customize your favorite clothing, or even start gifting your creations. Your embroidery journey starts now, and the possibilities are endless.