

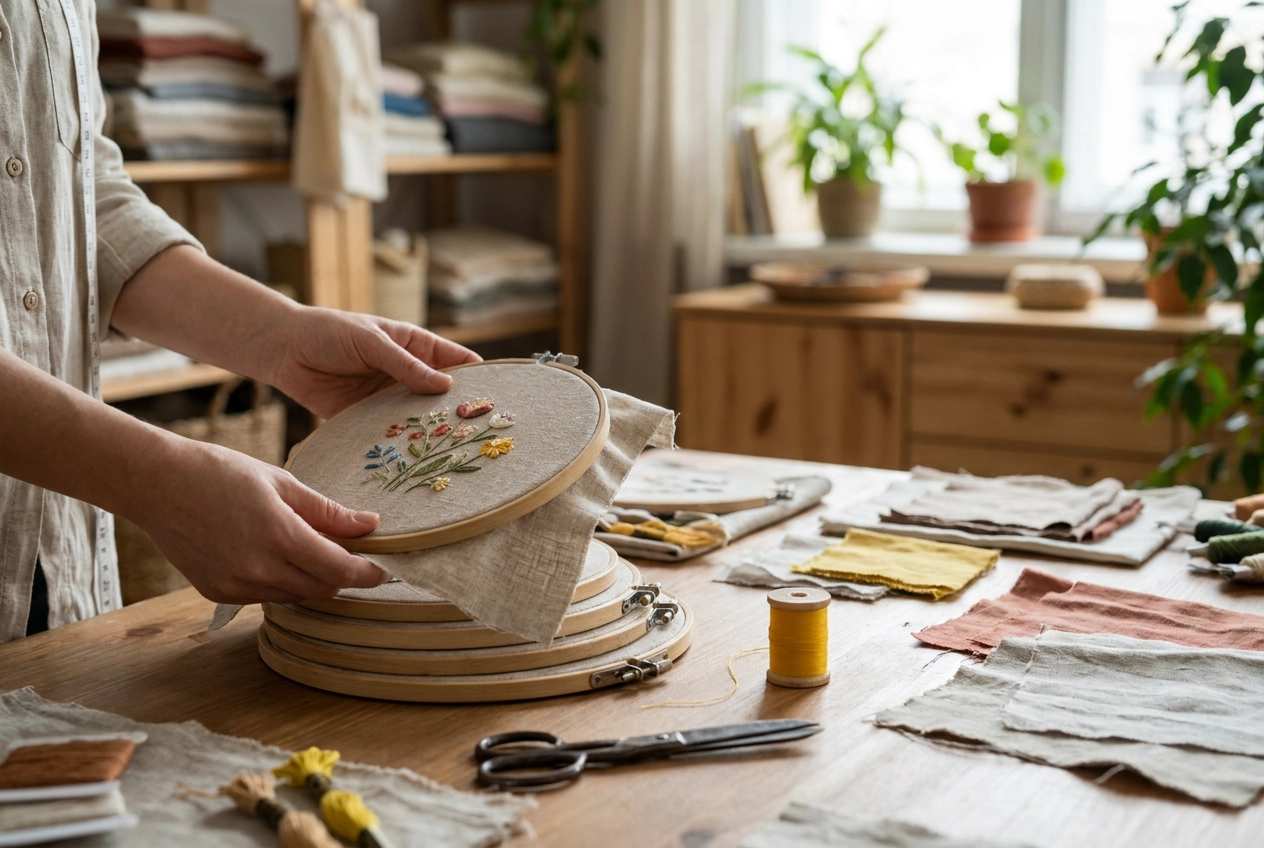
So you've decided to try embroidery, and now you're staring at a wall of circular frames at the craft store wondering which one to grab. Trust me, we've all been there! Picking the right embroidery hoop might seem like a small detail, but it can actually make a huge difference in how your stitching turns out.
The good news? Once you understand the basics, choosing the perfect hoop becomes pretty simple. Whether you're just getting started or you've dabbled a little and want to level up your supplies, this guide has got you covered.
In this post, we're breaking down everything a beginner needs to know about the embroidery hoop, including the different types available, what all those sizes actually mean, and how to figure out which one works best for your project. By the time you finish reading, you'll feel confident walking into any craft store and picking exactly what you need. No more guessing, no more grabbing the wrong size, just you and your embroidery off to a great start. Let's dig in!
What Is an Embroidery Hoop and Why Does It Matter?
At its core, an embroidery hoop is a two-part tensioning frame made up of an inner ring and a slightly larger outer ring. You sandwich your fabric between the two rings, tighten the screw on the outer ring, and suddenly your fabric is drum-tight and ready to stitch. That simple mechanism is doing something really important: it keeps your fabric at consistent, even tension throughout the entire project, which is the single biggest factor in whether your finished piece looks clean and polished or puckered and distorted. Without proper tension, stitches pull the fabric in uneven directions, designs drift out of alignment, and you end up with that telltale bunching underneath your work that every beginner dreads.
It is worth knowing that hand embroidery hoops and machine embroidery hoops are fundamentally different tools, even though they share a name. Hand hoops sit in your lap while you manually guide a needle through the fabric. Machine hoops, on the other hand, attach directly to the arm of your embroidery machine and move the fabric under a stationary needle automatically. The attachment mechanism, the registration process, and the sizing all work completely differently. According to embroidery hoop size research from Maggie Frames, matching your hoop to your specific design dimensions is a critical step that many beginners overlook.
The global embroidery hoop set market was valued at approximately $287 to $290 million in 2025, according to market data from Dataintelo, which tells you just how many people worldwide are actively stitching. This guide walks you through hoop materials, sizes, frame alternatives, and how to pair the right hoop to your downloadable design files so you can start your next project with confidence.
Hoop Materials Compared: Wood, Plastic, Bamboo, and Metal
Not all embroidery hoops are created equal, and the material your hoop is made from has a real impact on how your project turns out. Here is a quick breakdown of the four main types so you can shop with confidence.
Wood is the most popular choice for good reason. Wooden hoops hold the largest share of the market because they grip fabric firmly, rarely warp, and come in a wide range of sizes and shapes including circles, ovals, and squares. Finished beechwood hoops tend to be noticeably sturdier than bargain options, with thicker rings and better-quality screws that hold tension evenly throughout a long stitching session. They work beautifully for hand embroidery on quilting cotton, linen, and other lighter wovens, and they are a solid pick for machine embroidery on non-stretch fabrics as well. As craft educator Stephanie Carswell puts it, wooden hoops are "more grippy than bamboo," have "good quality screws," and "won't lose their shape," which is exactly what beginners need when they are still learning how fabric tension affects stitch quality.
Plastic hoops are lightweight and easy on the budget. Many plastic styles feature a no-slip groove on the inner ring that helps hold fabric securely, which is a handy feature for smaller or faster projects. The tradeoff is that plastic can flex over time and may struggle to grip thicker materials like fleece or denim as firmly as wood or metal. They are a fine secondary hoop for small accent work, but probably not your go-to workhorse for every project.
Bamboo hoops are commonly marketed as a natural, eco-friendlier option and typically sit at the lowest price point. In practice, quality can vary quite a bit. Many bamboo hoops sold at craft chains are technically unfinished bamboo rather than hardwood, which means they can splinter, lose their round shape, or fail to hold fabric tension as reliably as a finished wood hoop. If sustainability matters to you, bamboo is worth exploring, but inspect the hoop carefully for even spacing between the inner and outer rings before buying.
Metal hoops, especially spring-tension and magnetic styles, are the go-to choice for machine embroidery on stretchy or delicate fabrics. Because they use spring pressure or magnetic force instead of a tightening screw, they eliminate the risk of distorting knits or leaving screw marks on fine materials. That single advantage makes them genuinely useful once you start working with jersey, performance fabric, or anything that tends to stretch under tension.
Starter tip: If you are buying your very first hoop, go with a medium-size wooden hoop in the 6- to 8-inch range. It gives you enough room to work comfortably, grips most everyday fabrics well, and handles a variety of thread weights without any fuss. That combination of forgiveness and reliability makes it the easiest starting point for building good tension habits from day one.
Embroidery Hoop Sizes Explained: From 4x4 to 6x10 and Beyond
Here is something that trips up almost every beginner: when you see a hoop listed as "4x4" or "6x10," that number is not the outer diameter of the physical frame. It refers to the maximum stitch field, meaning the area the needle can actually reach and embroider. The physical hoop itself is always a bit larger than that number suggests. In fact, the usable stitch area can be up to 0.5 inches smaller per direction than the labeled size, so a "4x4" hoop typically gives you a real working field of about 3.9x3.9 inches. Always check your specific machine model's millimeter specs rather than relying purely on the rounded inch label.
The 4x4 Hoop: Small but Mighty
The 4x4 is the most common entry-level size and comes standard on many starter machines. It is perfectly sized for patches, monograms, small logos, and hat embroidery, since cap hoops are typically engineered around this footprint. Do not underestimate it just because it is small. For small-batch makers and Etsy-style sellers, the 4x4 remains one of the most commercially profitable hoop sizes available, especially for personalized gifts and custom apparel accents.
The 5x7 Hoop: The Sweet Spot
The 5x7 field (officially around 130x180 mm on many machines) is where things get genuinely exciting for beginners ready to level up. That extra canvas gives you room for more detailed character designs, medium-scale florals, and multi-element artwork that would otherwise require splitting across multiple hoopings at 4x4. You get significantly more creative freedom without needing a machine upgrade. Check out this helpful guide on understanding machine embroidery hoop sizes and formats for a deeper look at how different fields match different design types.
The 6x10 Hoop and Beyond
The 6x10 opens the door to back-of-jacket artwork, full character scenes, and sports graphics with surrounding text. It sits at the upper edge of what most home and prosumer single-needle machines can handle, making it a realistic and rewarding upgrade target. For a practical breakdown of how these measurements translate to real projects, this overview of hoop sizes in machine embroidery is worth bookmarking.
Community data from late 2025 shows hobbyists actively seeking hoops of 10 inches or larger for oversized patterns, and that enthusiasm is real. However, most home machines physically top out near the 6x10 range. Fields beyond that typically require commercial equipment or a technique called multi-hooping, where you re-position and re-hoop the fabric in sections. Multi-hooping adds complexity and demands careful alignment, so beginners should set honest expectations before chasing oversized designs. The shift toward larger embroidery fields is a defining hardware trend heading into 2026, with the traditional 4x4 increasingly viewed as limiting for production-level work, but it remains the smart starting point for anyone just getting their machine warmed up.
Hoop Size to Design File Compatibility: A Quick-Reference Guide
Now that you understand what hoop sizes actually measure, here is where things get really useful: matching those sizes to the right design files before you ever load a needle.
Hoop Label | Max Stitch Field | Safe Design Max | Best Design Categories | Ideal Projects |
|---|---|---|---|---|
4x4 | ~100 x 100 mm | 96-98 mm square | Monogram fonts, small sports logos, hat patches, anime icons, children's motifs, flag badges | Left-chest logos, hat fronts, baby bibs, small patches |
5x7 | ~130 x 180 mm | 128 x 178 mm | Mid-size anime/cartoon characters, floral wreaths, university wordmarks with mascots, seasonal panels | Tote bags, decorative towels, quilt blocks, garment panels |
6x10 | ~150 x 250 mm* | Check machine manual | Full team graphics, large nature scenes, multi-element sports compositions, back-panel art with text | Jacket backs, uniform back panels, large tote faces |
6x10 field dimensions vary significantly by machine brand, so always confirm your exact millimeter field in your machine manual rather than relying on the label alone.
The 4x4: Small But Mighty
The 4x4 hoop handles more than most beginners expect. Monogram fonts, small sports logos, hat patch designs, simplified anime icons, children's motifs, and country flag badges all stitch cleanly within this field. One important heads-up: a design saved at exactly 4.0 inches converts to 101.6 mm, which can actually trigger a "design too large" error on machines with a 100 x 100 mm field. Keeping your designs in the 96-98 mm range gives you a comfortable margin. Understanding hoop sizes for machine embroidery projects is a great habit to build early so these little surprises do not derail your first project.
The 5x7: Your Most Versatile Hoop
The 5x7 is the workhorse of the lineup. Its rectangular shape handles mid-size anime and cartoon character designs, fandom artwork, floral wreaths, university wordmarks paired with mascots, and seasonal panels beautifully. As Royal Present Embroidery explains, the actual stitchable area runs approximately 130 x 180 mm, slightly larger than the name suggests. A design at 128 x 178 mm fits comfortably with breathing room.
The 6x10: Go Big or Go Home
When you are ready for full team graphics, large nature scenes, multi-element sports compositions, or back-panel designs that combine imagery and multiple lines of text, the 6x10 is your hoop. This scale gives you enough real estate to let complex designs breathe properly.
Confirm Fit Before You Buy
Here is a practical shortcut that saves a lot of frustration. Design files listed on a catalog like embroiderynsewing.com include exact stitch field dimensions right in the product description. Compare those millimeter measurements against your machine manual's documented sewing field, and you can confirm compatibility before purchasing, no guesswork needed.
As of 2025-2026, wireless design transfer has shifted from a premium perk to a standard expectation on most machines. Loading the correct file to the right hoop setting is faster and cleaner than ever, with real-time field validation reducing the format and sizing errors that used to trip people up during manual USB transfers. The result is less setup fuss and more time actually stitching.
Machine Embroidery Hoops vs. Hand Embroidery Hoops: Key Differences
If you have ever walked into a craft store and grabbed a wooden embroidery hoop off the shelf, you probably picked up a hand embroidery hoop. These are the classic two-ring frames that have been around for centuries. The inner ring sits flat beneath your fabric, the outer ring (with its little metal screw at the top) clamps down over it, and you tighten everything until your fabric is drum-tight. From there, you pick up a needle and thread and stitch everything yourself, guiding each movement by hand. Simple, portable, and zero tech required.
Machine embroidery hoops work completely differently. Instead of you moving the needle, the machine does all the stitching automatically based on your loaded design file. The hoop clips or snaps directly onto the embroidery arm of your machine, and then the machine moves the hoop, repositioning the fabric under a fixed needle to place every single stitch exactly where the digital file tells it to. Understanding what a hoop does in machine embroidery makes it clear why the two types are built so differently; one is a hand tool, and the other is a precision mechanical component.
Here is the part that catches a lot of beginners off guard: machine hoops are brand-specific. A hoop built for a Brother machine uses a clip geometry that will not attach to a Janome, Singer, or most other brands. They are also size-specific, meaning the hoop dimensions have to match your machine's maximum embroidery field and your design file's stitch area. Always confirm compatibility before buying.
If you are working with downloadable design files in formats like .PES, .DST, .JEF, or .EXP, a hand embroidery hoop has absolutely no role in your workflow. It has no attachment bracket, no way to connect to your machine's arm, and no way to interact with your digital files. The differences between machine and hand embroidery tools run deeper than most beginners expect, and mixing them up leads to a frustrating and wasted purchase. Stick to machine-specific hoops for your embroidery machine projects, and save the wooden screw hoops for hand stitching.
Q-Snap Frames and Other Hoop Alternatives Worth Knowing
If you have spent any time in online embroidery and cross-stitch communities lately, you have probably seen Q-snap frames come up in conversation. These handy tools look nothing like a traditional round hoop. Instead, they use a rectangular PVC pipe frame with snap-on clamps that grip the fabric along each side, holding it taut without squeezing it between two circular rings. That distinction matters a lot for delicate fabrics like linen, evenweave, and aida cloth, because a traditional hoop pressed against those materials repeatedly leaves a circular indentation that can be nearly impossible to remove. Q-snaps eliminate that problem entirely, which is why they have built such a loyal following in the cross-stitch and hand embroidery community.
Community discussions from late 2025 show that hobbyist interest in Q-snaps is genuinely growing, particularly for larger projects. When a round hoop reaches the edges of a big design, maintaining even tension across the full area becomes a real challenge. Q-snaps handle that more gracefully, which is why stitchers working on ambitious pieces are reaching for them more often.
Beyond Q-snaps, scroll frames and stretcher bar frames are two more alternatives worth knowing about. Scroll frames use rods and extender bars so you can roll excess fabric out of the way and only expose the active working area, which is a huge help on very large pieces. Stretcher bars offer a completely fixed, rigid surface suited for canvaswork and needlepoint.
Here is the one thing to be clear on though: none of these alternatives work with an embroidery machine. Your machine requires a rigid, attachable hoop that physically connects to the machine arm and moves with it. Q-snaps and scroll frames are hand-embroidery tools only, and no amount of creativity changes that.
The practical takeaway is straightforward. If you do any hand embroidery or cross-stitch alongside your machine projects, a Q-snap frame is genuinely worth adding to your toolkit. Just know it lives in a separate category from the hoops your embroidery machine depends on to function.
How to Hoop Fabric Correctly Every Time
Good hooping technique is genuinely the difference between a clean, professional-looking design and one that puckers, shifts, or stitches out crooked. The good news is that once you nail these four steps, the whole process becomes second nature fast.
Step 1: Start with the right stabilizer underneath your fabric. Before your fabric ever touches the hoop, lay your stabilizer flat on your work surface. Tear-away stabilizer works well for stable woven fabrics like cotton quilting fabric or denim. Cut-away stabilizer is the better choice for stretchy knits because it stays bonded to the fabric permanently and keeps things from distorting over time. Water-soluble stabilizer is ideal for delicate fabrics or designs that need a clean finish with no backing visible. Match the stabilizer weight to your fabric and your design's stitch count; a dense design on a lightweight fabric needs more support, not less.
Step 2: Assemble the hoop in the right order. Loosen the outer hoop screw until the two rings separate easily. Place the inner hoop on a flat, stable surface, then lay your fabric and stabilizer together on top of it, right side up. Press the outer hoop down over both layers firmly and evenly, working from the center outward so you are not accidentally pushing wrinkles to one side. Check out this embroidery hooping tip from BERNINA for a visual walkthrough if this step feels unclear at first.
Step 3: Tension is everything. Once the outer hoop is seated, grip the fabric edges and pull gently but firmly in all directions to remove any slack before you tighten the screw. The surface should feel drum-tight when you tap it lightly with your fingertip. Loose fabric is one of the most common reasons designs stitch out uneven.
Step 4: Go easy on stretchy fabrics. Jersey, fleece, and other knits need special attention. Over-tightening stretches the grain of the fabric while it is hooped, and when it relaxes after you remove it, the finished design puckers or warps. Use a cut-away stabilizer, hoop just snugly enough to keep things stable, and consider floating the fabric on sticky-backed stabilizer instead of hooping it directly.
One mistake worth flagging: never reposition your hoop partway through a design. If your design does not fit your current hoop field, the fix is not re-hooping mid-stitch; that almost always causes misalignment that you cannot correct. Instead, choose a design file sized specifically for your machine's embroidery field. Every design in our catalog is labeled by hoop size so you can match them up before you ever load a needle.
Best Embroidery Design Categories for Each Hoop Size
Picking the right design for your hoop size is just as important as picking the right hoop for your machine. Here is a practical breakdown of which design categories shine at each size, so you can shop with confidence and start stitching without any surprises.
4x4 Hoop: Small Designs, Big Impact
The 4x4 field (technically 100x100 mm, or about 3.94 inches square) is the workhorse of home embroidery. Sports logo patches, country flag badges, and simple cartoon characters are perfect fits here because they deliver a clean, readable image without demanding a lot of stitch real estate. Monogram fonts and single-letter initials also thrive at this size, especially for personalizing hats, bag straps, and pocket logos. Small anime icons, like a character face or emblem, translate beautifully into this compact field. One quick note: hat embroidery typically requires a specialty cap frame rather than a standard flat hoop, even when the design itself is 4x4-sized. Keep that in mind when shopping for team logo or initial designs intended for headwear.
5x7 Hoop: Room to Get Detailed
Step up to 5x7 (roughly 130x180 mm) and a whole new category of designs opens up. Mid-scale anime and cartoon characters with full upper-body detail, university mascot graphics with color fills, layered floral motifs, and children's themed panels featuring animals, vehicles, and seasonal artwork are all natural fits here. The extra stitch area lets you capture shading and fine line work that a 4x4 simply cannot hold.
6x10 and Larger: Statement-Level Embroidery
The 6x10 field is where full team compositions really come to life. NFL and college football-style graphics with helmet detail and shadow effects, arced text with mascot art, large nature scenes, and back-of-jacket designs all need this expanded canvas to stitch out properly.
Before downloading any design, always check the file's listed dimensions against your machine's actual maximum stitch field. Sports, fandom, and character designs tend to run horizontally wide and can push past a hoop's real limit even when the name suggests otherwise. A good embroidery hoop size chart can help you cross-reference those numbers quickly. At embroiderynsewing.com, each design listing includes the stitch field dimensions, and the catalog is organized by theme, so you can filter by category and size without guessing or downloading files that will not fit your machine.
Choosing the Right Embroidery Hoop Is Easier Than You Think
You have covered a lot of ground in this guide, and the good news is that the decision really does come down to three straightforward factors. First, material: wood and bamboo are the friendliest starting points for most beginners, offering smooth tension and easy handling. Second, size: always match your hoop to your machine's actual sewing field and confirm that your design file's stitch-out dimensions fit comfortably within that field before you start. Third, type: machine hoops and hand hoops are completely different tools and cannot be swapped for each other.
The 4x4 hoop remains one of the most practical sizes you can own. It handles patches, monograms, hat logos, and small gifts quickly and profitably. As your confidence grows, a 5x7 or 6x10 hoop opens up t-shirts, tote bags, and larger decorative pieces without replacing your 4x4 at all.
The real skill is not chasing the biggest hoop available; it is matching the right design to the right field. Every size has a category where it absolutely shines. Browse the embroiderynsewing.com catalog filtered by design size to find files that fit exactly what your hoop can stitch today, and you will be up and running faster than you think.
Conclusion
Now you have everything you need to choose the right embroidery hoop with confidence. To recap the key points: hoop types each serve a specific purpose, so matching the material to your project matters. Size affects tension and stitch quality, so always choose a hoop slightly larger than your design. And the right fit keeps your fabric taut without stretching or distorting your threads.
Armed with this knowledge, you are no longer guessing in the craft store aisle. You know exactly what to look for and why it matters.
Ready to put this into practice? Head to your local craft store or browse online, pick up a hoop that suits your first project, and start stitching. Every expert embroiderer started exactly where you are right now. Your beautiful first piece is just one good hoop away!