

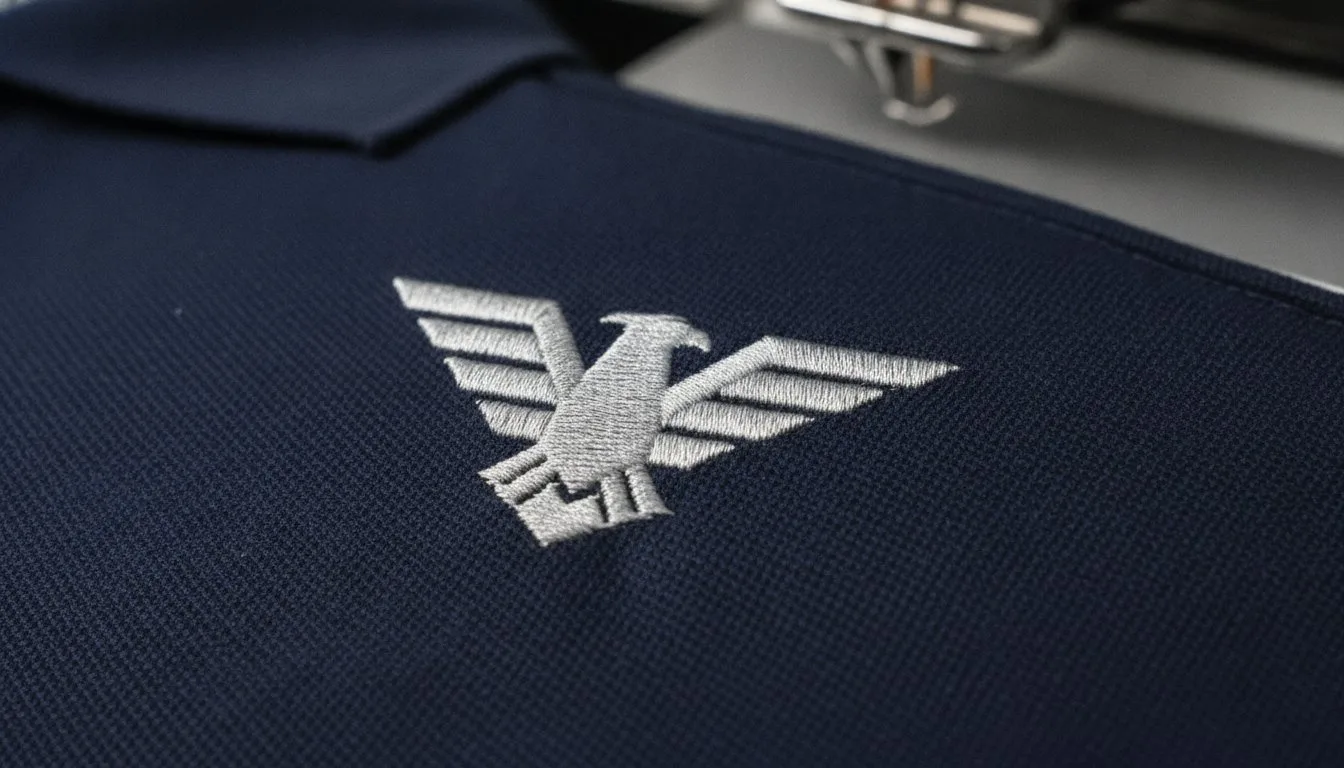
High-quality digitizing prevents the two biggest headaches in the shop: thread breaks and machine downtime. If a file isn't digitized correctly, the machine might struggle with tiny details, leading to a "puckered" look that no amount of ironing can fix. Working with a dedicated firm like Unique Art Services LLP ensures that a well-made file accounts for the "push and pull" of the fabric, keeping the logo flat and aligned. This level of detail is why professional digital files are the backbone of modern business branding.
- The necessity of the $20 to $60 digitizing fee for converting logos into stitch-ready files.
- Choosing between .DST and .PES formats to ensure machine compatibility. - Techniques for matching stitch density to fabric tension to prevent puckering.
- How proper stabilizer selection leads to crisp, retail-quality embroidery.
- Leveraging modern software like EmbroideryStudio 2026 for complex logo textures.
Did you know that a high-quality embroidered logo can survive over 100 washes, while standard DTF prints often start peeling after just 30 cycles? It's a massive difference in durability that sets professional brands apart. You've likely seen corporate polos where the logo looks puckered or bird-nested, which instantly ruins a professional image. We all want that sharp, retail finish, but getting corporate logo embroidery designs right is a science of matching stitch density to fabric tension. This guide will teach you how to select and prepare your digital files so your branding looks crisp and lasts. We'll walk through everything from file formats to mastering stabilizer techniques for those tricky pocket and hat placements.
- Learn to navigate the "alphabet soup" of file formats and why the DST format is the universal language for commercial-grade machines.
- Master the professional "Left Chest" rule and hat placement techniques to ensure your branding is perfectly aligned every time.
- Discover how to optimize corporate logo embroidery designs by matching stitch density to specific fabric types to prevent puckering.
- Understand why 40wt Rayon thread is the industry standard for achieving a high-end sheen without sacrificing production speed.
- Identify how using professionally digitized files can significantly reduce thread breaks and keep your embroidery machine running smoothly.
Table of Contents
- Mastering Corporate Logo Embroidery Designs for Professional Results
- Choosing the Right Digital File Formats for Business Logos
- Strategic Placement: Where to Embroider Your Corporate Logos
- Avoiding Common Pitfalls in Logo Embroidery
- Finding the Perfect Corporate Designs at Embroidery n Sewing
Mastering Corporate Logo Embroidery Designs for Professional Results
### Executive Summary: Key Takeaways for Pro Branding
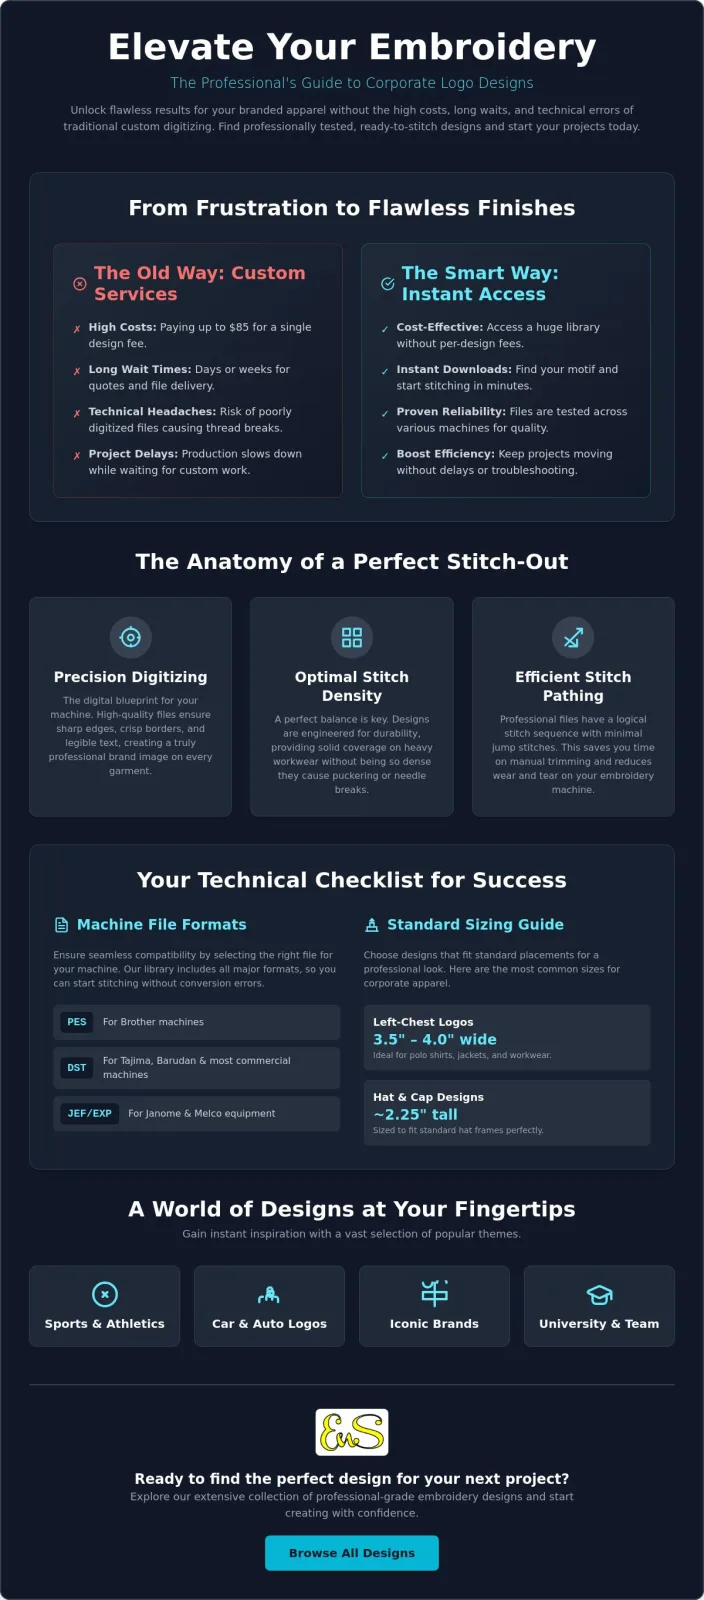
- Always match your file format (PES, DST, EXP) to your specific machine brand to avoid reading errors.
- Stabilizer choice is non-negotiable for high-stitch-count logos. Use cut-away for knits and tear-away for stable wovens.
- Test every new logo design on a scrap piece of the same fabric before the final run to check for tension issues.
- Professional branding requires high stitch density, typically between 4,000 and 6,000 stitches for a standard left-chest logo.
Let's be honest, your brand's first impression often happens on a polo shirt or a jacket. If that logo looks messy, people notice. Creating corporate logo embroidery designs that look like they belong in a high-end retail store isn't just about owning a machine. It's about the science of the stitch. A professional logo needs to maintain its shape and color through 50 to 100 washes. That is a massive jump in durability compared to printing methods like DTF transfers, which usually start cracking after only 30 cycles. When you use a high-quality digital file, you're investing in a look that stays crisp for the life of the garment.
The jump from a hobbyist pattern to a corporate-grade file is all about precision. Hobby designs often have too many "jump stitches" or inconsistent densities that lead to thread breaks. In contrast, a pro-level file is optimized for speed and clarity. By understanding modern machine embroidery techniques, you can ensure that every needle penetration serves a purpose. This prevents the dreaded "bird-nesting" under the throat plate and keeps your production moving smoothly. Since the global embroidery industry is now valued at over $4 billion, businesses are increasingly looking for that premium, textured feel that only thread can provide.
Why Digital Logo Designs Matter in 2026
As the global market shifts toward on-demand branding, small businesses and influencers need professional results without the wait. In 2026, the standard one-time digitizing fee for a custom logo sits around $45, though it can range from $20 to $60. Once you have that file, you can reuse it indefinitely. This makes digital corporate logo embroidery designs the most cost-effective way to scale your brand's physical presence. Using updated software like EmbroideryStudio 2026 allows for better color blending and texture management, ensuring that even complex gradients look sharp on a shirt.
High-quality digitizing prevents the two biggest headaches in the shop: thread breaks and machine downtime. If a file isn't digitized correctly, the machine might struggle with tiny details, leading to a "puckered" look that no amount of ironing can fix. A well-made file accounts for the "push and pull" of the fabric, ensuring the logo stays flat and aligned. This level of detail is why professional digital files are the backbone of modern business branding.
[Instruction: Insert an image showing a "bad" vs "good" logo stitch-out side-by-side.]
Choosing the Right Digital File Formats for Business Logos
When you're ready to get your corporate logo embroidery designs moving, you'll likely run into a wall of three-letter file extensions. It feels like an alphabet soup of PES, DST, JEF, and XXX. Choosing the right one is the difference between a smooth production run and a machine that won't even recognize your USB drive. If you've ever spent twenty minutes scrolling through a menu only to find your file is "invisible" to the machine, you know the frustration. Each format serves a specific purpose in the industry, and knowing which is which will save you hours of troubleshooting.
Most commercial embroidery shops rely on the DST format. It's the universal language of the industry. It tells the machine exactly where to move the needle with extreme precision, but it has a quirk; it doesn't store color information. You have to manually assign thread colors on your machine's console. On the other hand, if you're using a home or semi-pro machine like a Brother or Baby Lock, you're probably looking for PES files. These are much more intuitive because they keep your color mapping intact. Be careful about simple file conversions, though. Simply "saving as" another format can sometimes degrade the quality of complex corporate logos, leading to jagged edges or uneven fills.
Format Comparison: Which One Does Your Machine Need?
- PES: This is the gold standard for home machines. It's incredibly user-friendly and maps out your thread colors so you don't have to guess.
- DST: The commercial workhorse. It's built for maximum precision on industrial multi-head machines but requires you to set the colors yourself.
- EXP and JEF: These are specialized formats. Bernina machines typically use EXP, while Janome owners will need JEF files.
Stitch Density: The Secret to a Crisp Corporate Image
Stitch density is the hidden factor that determines if your logo looks high-end or homemade. If you pack too many stitches into a lightweight performance polyester polo, the fabric will bunch up and pucker. It won't look professional. A standard left-chest logo usually stays between 4,000 and 6,000 stitches to maintain flexibility. However, if you're embroidering heavy canvas workwear or denim, you can increase that density for a bolder, more textured look. Following logo design best practices often means simplifying your artwork before it ever hits the digitizing software. Clean, bold lines always translate better to thread than tiny, intricate details.
If you want to see how a well-optimized file should behave, you can browse professional machine embroidery designs to see the difference in stitch paths. High-quality files are designed to minimize "jump stitches," which are those annoying long threads you have to trim by hand after the machine finishes. [Diagram Suggestion: A cross-section of a satin stitch vs. a fill stitch for logos.]
Strategic Placement: Where to Embroider Your Corporate Logos
You’ve spent time picking the perfect corporate logo embroidery designs, but all that effort goes to waste if the logo ends up too high or tucked under an armpit. Placement is a science that separates a high-end retail garment from a rushed promotional giveaway. If you look at official government branding standards, you’ll see that consistency is everything. When your team stands together at a conference, those logos need to line up perfectly. It’s the difference between a professional uniform and a project that didn't quite land.
Modern tech companies and startups are moving away from the traditional chest-only look. Placing a small logo on the right sleeve or the nape, which is the back of the neck just below the collar, is a huge trend right now. It’s subtle and looks great on quarter-zips or performance gear. To get this right every time, you should use an alignment template. These plastic guides help you mark the center point so you aren't just eyeballing it and hoping for the best. A centered logo builds trust; a crooked one looks like an afterthought.
Standard Measurements for Corporate Apparel
Most pros use the 7 to 9 inch rule for the left chest. You measure down from the shoulder seam and center the design between the placket and the side seam. For a standard polo, this puts the logo right where the eye expects to see it. If you're working on hats, things get tighter. Most structured caps have a height limit of about 2.25 inches. If you go higher, you’ll hit the crown or the bill, which causes needle breaks. [Instruction: Create a diagram showing the "Standard Placement Zones" on a polo shirt.]
Hooping Techniques for Tricky Logos
Even with the best placement plan, poor hooping can ruin a garment. Hoop burn is that shiny ring left behind on delicate fabrics like thin polyester. You can avoid this by using the right tension or switching to magnetic hoops. Magnetic hoops are a game changer for faster production because they snap into place without stretching the fabric. If you’re just starting out and need a refresher on the basics of getting your fabric into the machine, check out this guide on how to embroider.
Using the right tools for corporate logo embroidery designs ensures your branding stays consistent across different sizes and styles. Whether it's a small polo or a 3XL jacket, the logo should always appear in the same relative position. This attention to detail is what makes a brand feel established and reliable.
Avoiding Common Pitfalls in Logo Embroidery
You've probably felt that sinking feeling when you unhoop a shirt and see the fabric gathered in a messy, wrinkled ring around the logo. Puckering is the absolute enemy of professional branding. It usually happens because the stitch density of your corporate logo embroidery designs is too high for the fabric, or the tension on your machine is pulling too hard. To get that retail-quality finish, you need to balance the "push and pull" of the thread. This is why testing your design on a scrap piece of the identical fabric is a step you can't afford to skip. If it puckers on the scrap, it'll definitely pucker on the expensive polo.
Your choice of tools makes a massive difference in the final result. While many beginners reach for a ballpoint needle, a Sharp (75/11) needle is actually the superior choice for crisp logo outlines on woven corporate wear. It pierces the fabric cleanly rather than pushing the fibers aside. For the thread itself, 40wt Rayon is the industry standard for a reason. It has a beautiful high-end sheen that makes logos pop, and it's flexible enough to handle high-speed commercial production without constant snapping. If you're looking for files that are already optimized for these technical standards, check out our collection of machine embroidery designs to ensure your next project is headache-free.
The Stabilizer Strategy
Stability is the foundation of any great logo. For most corporate apparel, especially knits like polos, you should almost always use a cut-away stabilizer. Unlike tear-away, which can break down over time, cut-away stays with the garment for its entire life, keeping the logo flat through dozens of laundry cycles. If you're working on textured fabrics like fleece or towels, don't forget to use a water-soluble "topping" film on top of the fabric. This prevents the stitches from sinking into the pile and getting lost. You can learn more about how different thread paths interact with these materials by checking out our guide on embroidery stitches.
Tackling Small Text and Fine Lines
Managing tiny text is the number one challenge when working with corporate logo embroidery designs. There's a hard limit known as the 5mm rule; if your letters are smaller than 5mm, they usually turn into a blob of thread. When you're forced to work with small taglines, swap out the traditional satin stitch for a simple running stitch. A satin stitch needs room to turn the needle, and in tight spaces, it just creates too much bulk. By using a single or triple-run stitch, you keep the text legible and professional without the clutter. [Instruction: Add a diagram showing the difference between a legible and an over-stitched small font.]
Finding the Perfect Corporate Designs at Embroidery n Sewing
You've mastered the placement rules and the stabilizer strategies. Now, the final piece of the puzzle is finding the right digital files to bring your vision to life. At Embroidery n Sewing, we specialize in providing high-quality digital patterns that take the guesswork out of the process. Our library is built for professionals who need results, not technical headaches. When you're searching for corporate logo embroidery designs, you want files that have been tested for production speed and clarity. Our collection of corporate logo embroidery designs is curated to meet the professional standards of 2026, focusing on the tiny details like pathing and tie-offs so your machine can do its job without constant supervision.
Curated Designs for Modern Businesses
Branding in 2026 has shifted toward clean, minimalist aesthetics. Thick, over-complicated logos are out; thin lines and geometric precision are in. Our collection reflects these current trends, ensuring your apparel looks modern and high-end. If you're building a brand from scratch or just looking for inspiration, our Pillar Guide on Embroidery Designs is a great place to start. For those projects that require specific personalization, like adding a CEO’s name or a department title, our Machine Embroidery Fonts provide the professional legibility you need.
We've organized our categories to help you find niche graphics that fit your specific corporate identity. Some of our most popular business-ready categories include:
- Sports Embroidery and NFL themes for team-building gear and corporate outings.
- Specialized Car and Anime Embroidery Designs for niche brand cultures and tech startups.
- Clean font sets for precise corporate names, titles, and department designations.
- National flags and minimalist symbols for international business branding.
The Embroidery n Sewing Advantage
Time is money in the world of professional branding. If your machine is sitting idle because of a thread break or a poorly digitized file, you're losing profit. We've optimized our files to ensure fewer thread breaks and faster production runs. High-quality digitizing saves hours of machine frustration by creating a logical stitch path that flows naturally from one section to the next. You won't find unnecessary jump stitches or overlapping densities that cause needle breaks here. Every file is built to be efficient, clean, and easy for your machine to read.
We also know that compatibility is key. That’s why we offer support for all major machine formats, including PES, DST, and EXP. Whether you’re running an industrial multi-head machine or a high-end home unit, our files are ready to go. Because we offer instant downloads, you don't have to wait for an email or a shipping confirmation. You can browse, buy, and start your next business project today. It’s the fastest way to get retail-quality results for your brand without the traditional hurdles of finding reliable digital patterns.
Take Your Branding to the Next Level
Building a brand that stands the test of time requires more than just a good logo; it requires the technical precision we've discussed today. From ensuring your corporate logo embroidery designs follow the 5mm rule for legibility to sticking with the 7 to 9 inch placement rule for a standard left-chest look, every detail counts. Remember that high-quality embroidery can last for over 100 washes, making it a far more durable investment than printing methods that fail after 30 cycles. By choosing the right stabilizer and professional-grade digitizing, you'll avoid the common pitfalls like puckering or thread breaks that often stall production.
Now it's time to put these strategies into action. You can Browse Our High-Quality Corporate Logo & Font Designs to find files that are already optimized for all major machine brands. With our instant digital downloads and professional-grade digitizing, you’ll get clean, retail-quality results without the frustration of troubleshooting poor files. Your next branding project is just a few clicks away, and we're excited to help you make a lasting impression.
Frequently Asked Questions
What is the best file format for corporate logo embroidery?
DST is the most reliable format for commercial machines because it is the industry standard for precision. While home users often prefer PES for its color-mapping features, DST ensures that your machine follows the exact coordinates intended by the digitizer. You should always check your machine’s manual, but for professional branding, DST is the universal language.
Can I use any logo I find online for my embroidery machine?
You can't just download a JPG or PNG and expect your machine to sew it. These are pixel-based files, while embroidery machines need vector-based stitch data created through a process called digitizing. Using corporate logo embroidery designs requires a specific file type like .DST or .PES that includes commands for needle movements and thread trims.
How do I prevent my logo from puckering on polo shirts?
Preventing puckering starts with using a high-quality cut-away stabilizer that stays attached to the garment. Many people make the mistake of using tear-away on knits, but this doesn't provide enough support for the 4,000 to 6,000 stitches found in typical logos. You should also lower your machine's top tension slightly to prevent the thread from pulling the fabric inward.
What size should a left-chest corporate logo be?
A standard left-chest logo should typically be between 3 and 4 inches wide. If you're working with a square or circular design, keeping it around 2.5 to 3 inches ensures it doesn't look overwhelming on the shirt. This size fits perfectly within the standard placement zones and stays legible without becoming too heavy for the fabric.
Do I need a special needle for embroidering logos on hats?
You should use a 75/11 or 80/12 sharp needle, preferably with a titanium coating for longevity. Structured hats have a stiff buckram backing that can dull standard needles quickly. A sharper, stronger needle pierces this tough material cleanly, which reduces the risk of deflected stitches or broken threads during the run.
What is the difference between a stock design and a custom digitized logo?
Stock designs are pre-made patterns you can buy and use immediately, while custom digitized logos are created from your specific company artwork. Stock designs are great for general themes, but corporate logo embroidery designs usually require custom work to ensure your specific brand colors and fonts are represented accurately.
Why does the thread keep breaking when I embroider small text?
Thread breaks on small text usually happen because the stitches are too close together, creating a "bullet-hole" effect in the fabric. If your lettering is smaller than 5mm, the needle is essentially striking the same spot repeatedly. You can fix this by reducing the stitch density or switching to a thinner 60wt thread for those tiny details.
How many layers of stabilizer should I use for a high-density logo?
One single layer of high-quality, 2.5-ounce cut-away stabilizer is usually sufficient for most logos. Stacking multiple layers can actually lead to registration issues because the layers can shift against each other. If your logo has a very high stitch count, it’s better to use a heavier weight stabilizer rather than adding more sheets to the hoop.


