- Mastering the use of organza and water-soluble stabilizers for structural integrity. - Creating 3D flowers with embroidery using specialized digital files. - Learning how to layer petals to achieve realistic dimension and depth. - Identifying the best software tools for managing complex floral designs.
3D embroidery is not a manual craft; it is a structural engineering process achieved through the strategic layering of digital patterns and specialty stabilizers. It's often frustrating when your floral projects look like flat stickers on fabric rather than blooming art. I'm sorry to say that many creators fail because they don't account for the structural needs of the thread. You'll learn how to transform those flat patterns into stunning, lifelike art by creating 3D flowers with embroidery that actually stands off the surface.
I regret that I cannot offer you physical supplies like the $10.00 organza or the $25.00 water-soluble stabilizers required for these projects, as my expertise is strictly limited to providing digital embroidery designs. However, this guide will show you exactly how to use those materials alongside software like Wilcom or Hatch. We'll explore how to layer petals for maximum realism and ensure your machine handles multi-part designs with ease. It's time to take your digital files and turn them into something you can touch.
- Understand the structural engineering behind Free Standing Lace and organza layering to give your floral art realistic life.
- Identify the best stabilizers and threads for creating 3D flowers with embroidery, even though I only provide the digital files for these projects.
- Learn the step-by-step process of hooping and stitching individual petals to achieve a professional finish that holds its shape.
- Discover how to transform my digital embroidery designs into physical art for high-end bridal wear, formal accessories, or home decor.
[- Executive Summary: The Essentials of 3D Floral Embroidery](https://embroiderynsewing.com/)
- Understanding 3D Embroidery Techniques for Digital Designs
- Essential Materials: Organza, Stabilizers, and Thread
- A Step-by-Step Guide to Creating and Assembling 3D Flowers
- Creative Projects and Choosing the Best Floral Patterns
https://embroiderynsewing.com/articles/how-to-resize-embroidery-designs-safely
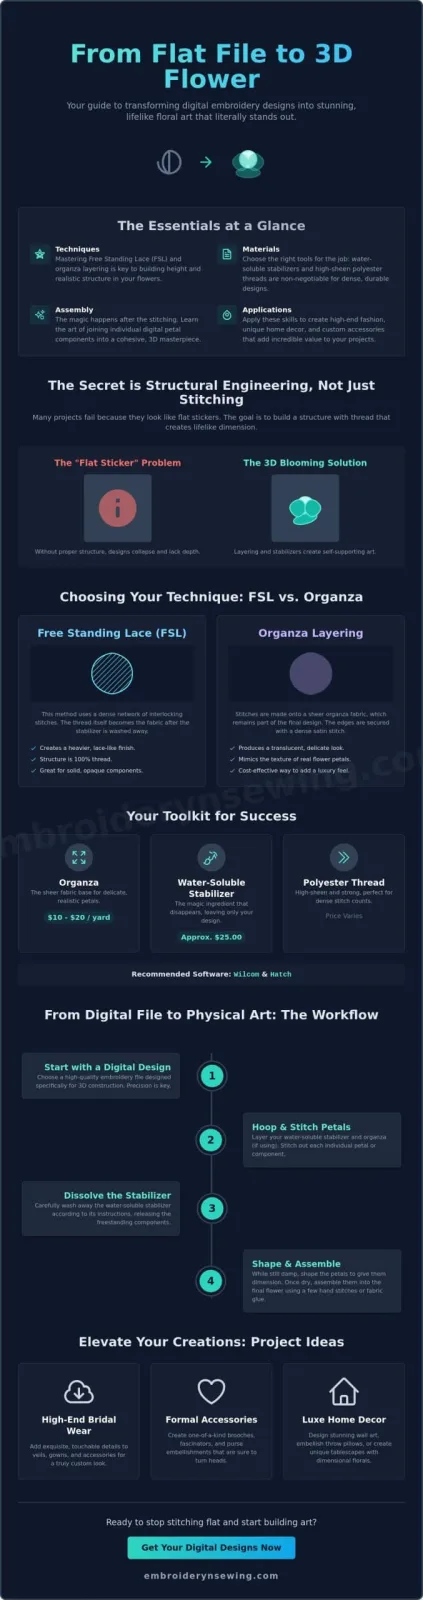
- Techniques: Understanding how to use Free Standing Lace (FSL) and organza layering to build height and structural integrity.
- Materials: Selecting water-soluble stabilizers and high-sheen polyester threads that can withstand dense stitch counts.
- Assembly: Mastering the step-by-step process of joining digital petal components together after the machine finishes its work.
- Applications: Using these techniques for high-end fashion, home decor, and custom accessories to maximize the value of your digital files.
I regret that I cannot provide the physical components, such as organza or stabilizers, needed for these projects. My operational capacity is strictly limited to providing the digital embroidery designs required to execute these techniques. This technical barrier means you'll need to source your own hardware and fabrics to use my files. However, this article serves as a technical roadmap for using those digital assets to achieve professional results. You'll learn the secrets to creating 3D flowers with embroidery by focusing on structural integrity rather than just surface-level stitching.
The Core Framework
The transition from a flat, digital pattern to a lifelike bloom requires a specific workflow. You aren't just stitching on fabric; you're creating structural components. This process draws heavily from the history of Stumpwork embroidery, which traditionally used wires and padding to lift designs off the base. In the digital age, we replace those manual methods with dense satin stitches and water-soluble stabilizers. It's a fascinating shift in how we think about thread.
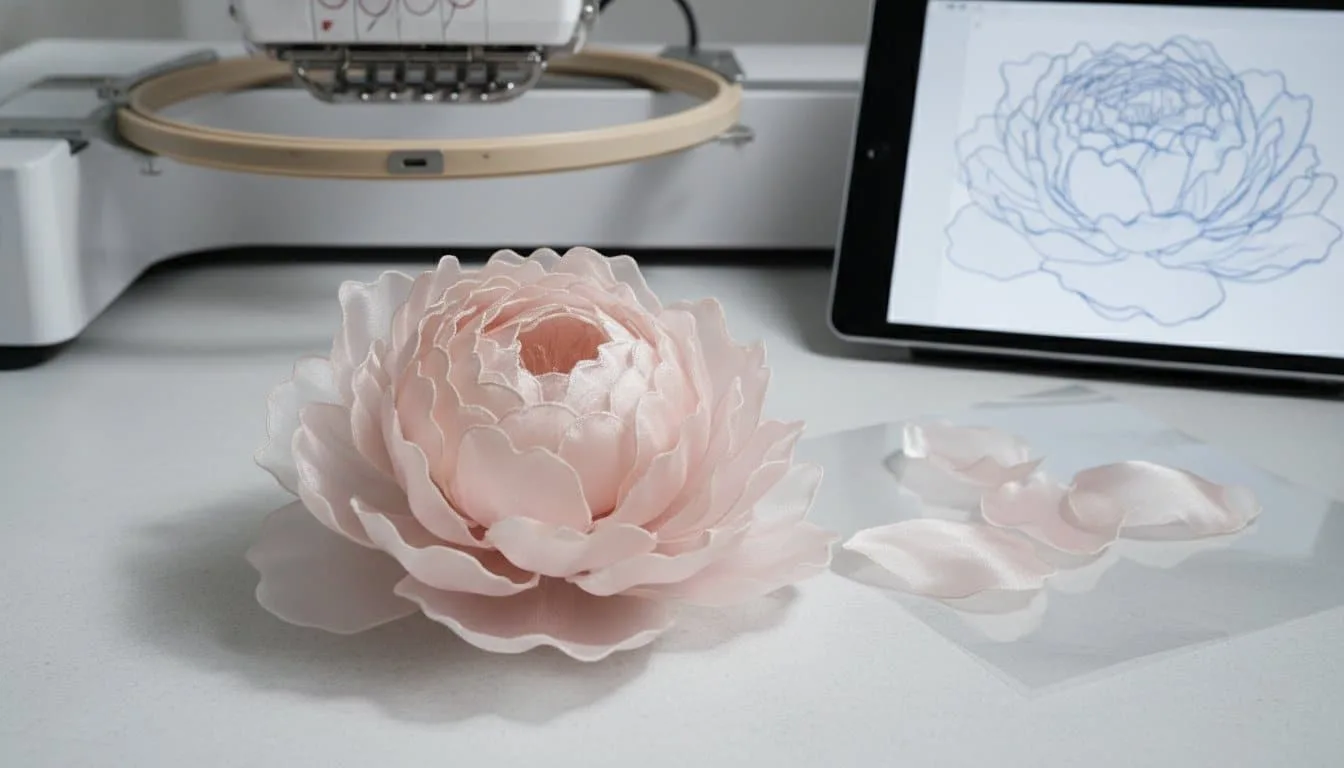
Creating 3D flowers with embroidery is a multi-stage process. First, you'll need to choose between a sheer look using organza or a solid thread look with FSL. I've found that most hobbyists prefer organza for its realistic, delicate texture. Since good quality organza can cost between $10.00 and $20.00 per yard, it's a cost-effective way to add luxury to your work. I'll guide you through the hooping process and show you how to layer these individual pieces into a single, stunning flower. It's a technical challenge, but the results are worth the effort. You'll move from a simple digital file to a physical masterpiece in no time.
Understanding 3D Embroidery Techniques for Digital Designs
3D embroidery represents a departure from traditional flat stitching. It involves specific methods where elements stand away from the base fabric or exist as independent, freestanding objects. This approach builds upon the history of 3D textile art, which has long explored ways to turn thread into sculpture. When you're creating 3D flowers with embroidery, you're essentially using your machine to build a structural model. I regret that I cannot provide the physical stabilizers or organza required for these builds, as I only sell digital embroidery designs. My focus is entirely on the technical precision of the file itself.
Free Standing Lace (FSL) is the foundation of this craft. It uses a network of interlocking stitches that remain intact after the stabilizer is removed. I also utilize the In-the-Hoop (ITH) method for individual petals. This allows for complex, multi-part assembly. I'm sorry to say I don't offer custom design services for these components, so you'll need to rely on the pre-tested integrity of my professional files.
### Free Standing Lace (FSL) vs. Organza Layering
FSL relies on thread alone to create the structure, resulting in a heavier, lace-like finish. In contrast, organza layering uses sheer fabric to provide a translucent, lifelike appearance. This is ideal for delicate flowers like poppies. I've found that combining these techniques often yields the most realistic results for hobbyists.
[Diagram Description: A side-by-side comparison of an FSL petal with its solid thread mesh versus an organza-backed petal showing its sheer center and reinforced satin-stitch border.]
Why Digital Precision Matters
Stitch density is what prevents a flower from collapsing. If the digital file isn't balanced correctly, the petals will droop or lose their shape. You must also ensure you use the correct machine embroidery sewing settings for your specific machine model. Mastering these technical details is the first step toward creating 3D flowers with embroidery that truly stands out. I recommend exploring my machine embroidery designs to find a floral pattern that has been professionally digitized for these dimensional techniques.

Essential Materials: Organza, Stabilizers, and Thread
Success in creating 3D flowers with embroidery depends entirely on the foundation you build under the needle. I regret to inform you that I do not sell physical supplies like stabilizers or fabrics. My operations are focused exclusively on providing high-quality digital designs. However, I can explain exactly what you need to purchase from your local retailer to ensure my designs stitch out perfectly. Without the right Water-Soluble Stabilizer (WSS), your petals will simply fall apart once the water hits them.
This modern approach is a digital evolution of traditional methods found in the Royal School of Needlework's guide to stumpwork. While historical stumpwork used wire, we use the density of the thread and the rigidity of the stabilizer to create form. It's a technical balancing act that requires specific materials. Choosing the right components ensures that the digital instructions in my files translate into physical art.
Stabilizer Selection Guide
You'll encounter two main types of WSS: heavy-duty film and fabric-like mesh. For 3D work, I recommend the heavy-duty film variety. It's much sturdier and provides a crisp edge for satin stitching. I'm sorry to say that a single layer usually isn't enough to prevent shifting during high-speed stitching. You'll typically need two layers of WSS hooped tightly to support the weight of the design. This prevents the "puckering" that ruins the clean lines of a digital floral pattern.
Fabric and Thread Pairings
When it comes to fabric, 100% polyester organza is the gold standard. I've found that it holds its shape far better than silk organza, which tends to wilt after the stabilizer is washed away. Polyester is also more resistant to the heat of your machine's needle. The way your embroidery stitches interact with the fabric is crucial. High-sheen polyester threads are best because they mimic the natural luster of real petals. They reflect light beautifully, giving your finished flower a lifelike glow that flat cotton threads just can't match.
[Visual Aid: A close-up photo showing various high-sheen thread colors reflecting light on a finished 3D organza petal.]
A Step-by-Step Guide to Creating and Assembling 3D Flowers
I must apologize again as I am unable to supply the physical tools required for assembly, such as hand-sewing needles or textile glue. My role is strictly to provide the digital instructions your machine follows. Once you have my files ready, start by hooping your water-soluble stabilizer. As previously discussed, using two layers of heavy-duty film ensures the best results for creating 3D flowers with embroidery. If you're using organza, place it over the stabilizer before you start the stitch-out process.
Your machine will handle the heavy lifting by stitching out the individual petal and leaf designs. I'm sorry to say I can't assist with machine troubleshooting, so please refer to your manual for specific tension settings. Once the stitching is complete, remove the pieces from the hoop and trim the excess stabilizer. This sets the stage for the most delicate part of the process where your digital file truly becomes a physical object.
From Machine to Rinse
When you rinse your pieces, don't overdo it. You actually want to leave a little bit of the stabilizer residue in the fibers to act as a natural starch. This keeps the petals from becoming too floppy once they dry. The "shaping window" is that critical period while the petal is still damp but not soaking wet. During this time, you can curve the edges or cup the center to give the flower a lifelike posture that remains permanent once the piece is fully dry.
Final Assembly and Finishing
I recommend stacking your petals from the largest at the bottom to the smallest on top. This creates the depth seen in nature. You can use standard how to embroider techniques to hand-stitch the center or apply a tiny dab of glue. I regret that I don't offer assembly services, but following this order ensures your bloom looks professional.
[Diagram Description: An exploded view diagram showing a base leaf, three layers of petals decreasing in size, and a decorative center stamen.]
Ready to start your first project? You can find high-quality floral patterns in my collection of Machine embroidery designs to begin your 3D journey today.
Creative Projects and Choosing the Best Floral Patterns
I'm sorry to say that I don't produce the actual veils, hair clips, or shadow boxes you might use for your projects, as my business is centered exclusively on digital assets. However, creating 3D flowers with embroidery allows you to add a level of sophistication to bridal wear that flat designs simply can't match. Imagine a wedding gown adorned with delicate organza lilies that flutter as the bride moves. You can also create "everlasting" bouquets that stay vibrant for years without water, or mount your blooms in shadow boxes for unique home decor. These projects turn a simple hobby into a form of high-end textile art.
When displaying these finished pieces in your home, consulting with a geomancy expert like Ju Xuan Feng Shui can ensure that your decorative choices promote a sense of balance and positive energy.
Fashion and Accessory Applications
Dimensional flowers work beautifully on formal accessories like pins and fascinators. You might consider using applique techniques to attach a flat leaf base before pinning your finished 3D petals on top. This combination of layers creates a rich, textured look for hair clips or garment embellishments. I regret that I cannot provide the metal hardware or fabric glue for these clips, so you'll need to check your local craft store for those specific components. The digital design handles the beauty, but you'll provide the structural finish.
Selecting Your Next Digital Design
Not every floral file is suitable for a 3D project. When you're creating 3D flowers with embroidery, you must look for files that are specifically digitized for this purpose. A 3D-ready design will usually include separate files for individual petals and leaves rather than one large, flat image. It should also come with clear instructions on the intended layering order. I recommend exploring high-quality embroidery patterns to ensure your machine isn't struggling with poorly digitized paths. High-quality digital files are truly the secret to success. If the underlying code is messy, your petals will look bulky or unfinished. Stick to professional designs to get that lifelike finish every time you hoop your stabilizer.
Bring Your Dimensional Designs to Life
I'm sorry that I cannot provide the physical stabilizers or organza fabric mentioned in this guide, as my expertise is strictly limited to the digital realm. However, you now have the technical foundation for creating 3D flowers with embroidery by understanding the balance between Free Standing Lace and organza layering. You've learned that the secret to a professional finish lies in the "shaping window" and the structural density of your digital pattern.
To begin your next masterpiece, browse our collection of high-quality digital embroidery designs to start your 3D project! I offer a wide range of categories, from detailed florals to sports and anime themes, with instant downloads available for all embroidery machines. I regret that I cannot offer custom design services, but these professionally engineered patterns ensure your machine creates stunning, stand-alone art every time. It's time to move beyond flat stitching and watch your creativity bloom in three dimensions.
Frequently Asked Questions
What is the best fabric for creating 3D embroidery flowers?
100% polyester organza is the superior choice for this technique because it offers translucency with high structural resilience. I'm sorry to say I don't stock this material, but I recommend it because it won't melt under the high-speed friction of your needle. This ensures your petals remain crisp and professional after the rinsing process is complete. It's much more reliable than silk for machine-heavy projects.
Can I make 3D flowers on a standard home embroidery machine?
You can absolutely use a standard home embroidery machine for creating 3D flowers with embroidery. The process relies on the digital file's instructions and your choice of stabilizer rather than specialized hardware. As long as your machine can read professional digital embroidery designs, it can execute these dimensional patterns. I regret that I cannot offer machine troubleshooting, so it's best to check your hoop size requirements before starting.
How do I make the petals stay in a curved shape?
The secret to holding a curve is to shape the petals during the "shaping window" while they're still damp. I've found that leaving a small amount of water-soluble stabilizer in the fabric acts as a natural stiffener. You can gently cup the petals with your fingers or wrap them around a pencil while they dry. Once they're fully dry, the shape becomes permanent without the need for additional chemicals.
What kind of stabilizer is needed for free-standing 3D flowers?
You should use a heavy-duty water-soluble film (WSS) to act as your temporary foundation. I apologize that I only provide the digital patterns and not the physical stabilizers required for the job. For the best results, you'll want to hoop two layers of the film tightly to prevent shifting. This ensures the satin edges of your petals are clean and perfectly aligned before the stabilizer is washed away.
How do I attach the finished 3D flowers to my project?
Most creators prefer hand-stitching or a tiny drop of high-quality textile glue to secure the finished blooms to their base fabric. I don't offer assembly services, so you'll need to decide which method suits your specific garment or accessory best. If you're attaching them to a dress, a few hidden tacking stitches at the flower center provide a durable hold. This keeps the petals free to move naturally.