Ever looked at a digital embroidery design and wondered how it all comes together? Understanding the basic building blocks-the stitches-can transform you from a hobbyist into a confident creator. This guide demystifies the fundamental stitches your machine uses, helping you choose better designs and achieve more professional results.
Here’s a quick summary of what you’ll learn:
- **The Core Three Stitches:** Most digital designs are made from just three types of stitches: the Running Stitch for outlines, the Satin Stitch for bold borders, and the Fill Stitch for large color areas. - **Machine vs. Hand Embroidery:** We'll clarify why the stitches in a digital file are different from those you'd create by hand.
- Specialty Stitches: Discover how techniques like Appliqué and 3D Puff add unique textures and dimensions to your projects.
- Practical Identification: Learn how to spot these stitches in a design file, empowering you to make smarter choices about stabilizers, threads, and projects.
Machine Embroidery Stitches vs. Hand Stitches: What’s the Difference?
If you've searched for information on embroidery stitches, you've likely found countless tutorials on hand embroidery. While the goal is the same-creating art with thread-the process is fundamentally different. When you embroider by hand, you create every single stitch. With a machine, a digital file tells your machine exactly where to place each stitch.
This process of creating a digital stitch file is called digitizing. A digitizer is an artist who translates a visual design into a set of instructions (a file) that your embroidery machine can read. This guide focuses on the main types of stitches that digitizers use to build the beautiful designs you purchase and love.
The 3 Foundational Machine Embroidery Stitches
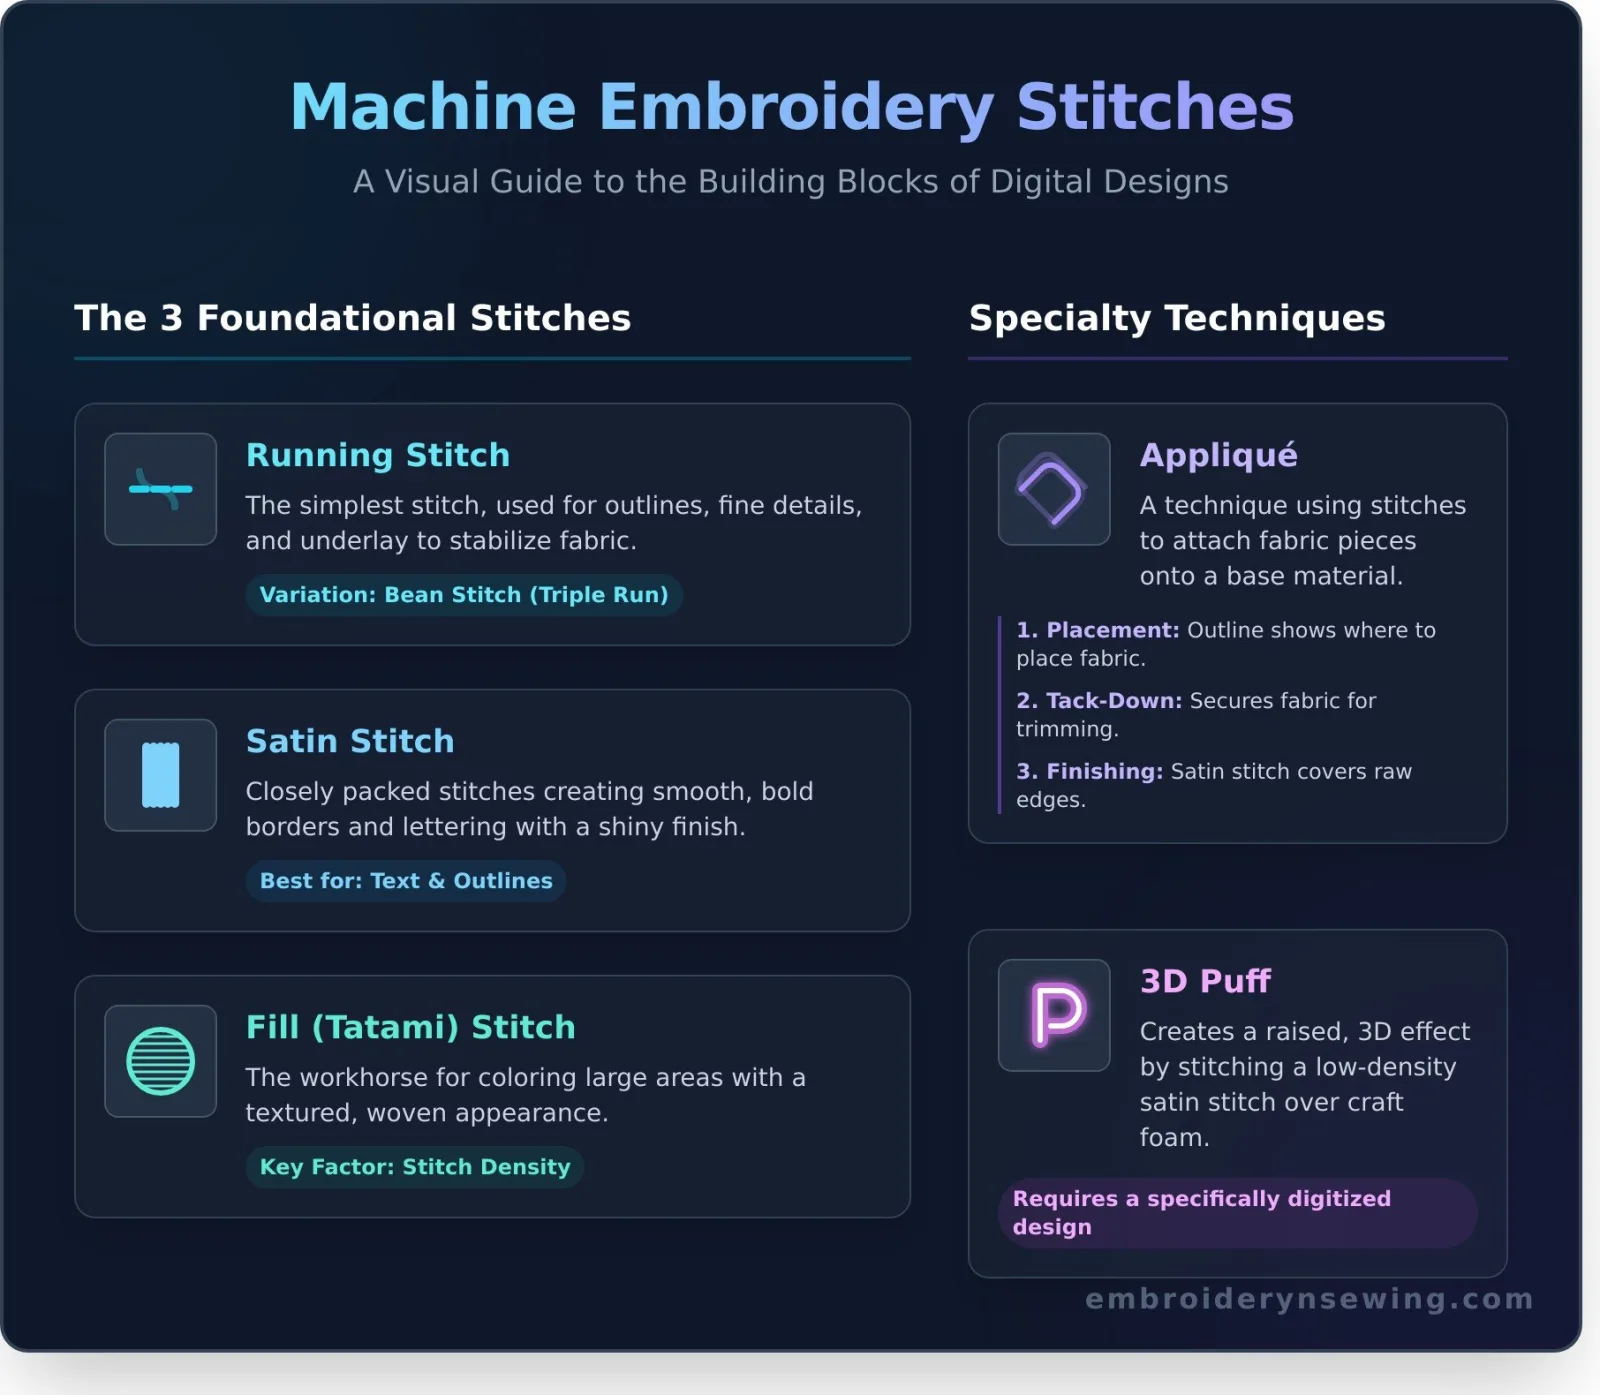
While there are many variations, almost every machine embroidery design is constructed from three core stitch types. Understanding these will help you "read" a design before you even thread your needle, giving you a better sense of how it will stitch out.
1. The Running Stitch: For Outlines and Fine Details
The running stitch is the simplest of all. Think of it as drawing a line with your machine. It's a single line of stitches used for creating outlines, adding fine details like whiskers or smiles, and for "traveling" from one part of the design to another. It's also the foundation for underlay-a light grid or outline of running stitches sewn before the main stitches to stabilize the fabric and prevent puckering.
A common variation is the Bean Stitch, which is a triple running stitch (back and forth over the same line) that creates a bolder, more defined outline without the thickness of a satin stitch.
[Image: An annotated diagram showing a running stitch used for the outline of a simple cartoon character, with a callout pointing to the thin, single line of thread.]
2. The Satin Stitch: For Smooth, Bold Borders and Lettering
When you see smooth, shiny, and raised borders or lettering, you're looking at a satin stitch. This stitch is made by placing many straight stitches very close together, creating a solid, satin-like block of color. It’s the go-to stitch for outlining patches, creating bold text, and filling in small, narrow shapes.
High-quality designs use a proper underlay beneath satin stitches to give them loft and prevent the fabric from showing through. Without it, the stitches can sink into the fabric and look uneven.
[Image: An annotated close-up of embroidered text, highlighting how the parallel threads of the satin stitch create a smooth, solid surface.]
3. The Fill Stitch (Tatami): For Covering Large Areas
The fill stitch is the workhorse of machine embroidery. Also known as the Tatami stitch, it's used to color in large sections of a design. It consists of rows and rows of running stitches that create a textured, woven appearance. The digitizer can change the angle and pattern of these stitches to create different light-reflecting textures and effects within the design.
The stitch density-how close the rows of stitches are to each other-is a critical factor. Too light, and the fabric will show through; too dense, and the design can become stiff and even cut through the fabric.
[Image: A diagram showing the woven pattern of a Tatami fill stitch covering a large circular area, with arrows indicating the stitch direction.]
Specialty Stitches That Add a 'Wow' Factor
Beyond the foundational three, digitizers use specialty stitches to create unique effects that make a design stand out. These often require a bit more involvement from you but produce incredible results.
Appliqué Stitches: Combining Fabric and Thread
Appliqué isn't just one stitch, but a technique that uses stitches to attach a piece of fabric onto your base material. A digital appliqué file typically includes three steps:
- Placement Stitch: A running stitch outline shows you where to place your appliqué fabric.
- Tack-Down Stitch: A second running stitch secures the fabric in place so you can trim the excess.
- Finishing Stitch: A wide, clean satin stitch covers the raw edges of the fabric for a professional finish.
3D Puff Stitches: For Raised, 3D Effects
Popular on baseball caps and jackets, 3D puff embroidery uses a special, low-density satin stitch sewn over a piece of craft foam. The density is just right to cut the foam at the edges while covering it completely, creating a distinct, raised 3D effect. This technique requires a design that has been specifically digitized for puff embroidery; you cannot use a standard satin stitch file.
How to Identify Stitches in Your Embroidery Designs
You can start identifying stitches by looking at the design preview on your computer or the screen of your embroidery machine. Thin, single lines are running stitches. Thick, solid borders and letters are satin stitches. Any large colored-in areas are almost certainly fill stitches. Knowing what to look for helps you anticipate how a design will sew and allows you to choose the best stabilizer and thread for the job. When you understand the construction of a design, you can better predict the final result. Ready to see these stitches in action? Browse our professional embroidery designs and see if you can spot the different types.
Frequently Asked Questions (FAQs)
What is the difference between a satin stitch and a fill stitch?
A satin stitch is used for narrow shapes and borders, creating a smooth, glossy finish with parallel stitches. A fill stitch is used for large areas, creating a textured, woven appearance with rows of stitches.
Can I change the stitch type in an embroidery file I bought?
No, not without special digitizing software and expertise. The stitch type is fundamental to the design's structure and is set by the digitizer.
What is an underlay stitch and why is it important?
Underlay is a foundation of stitches (usually running stitches) sewn before the main design. It stabilizes the fabric, prevents puckering, and gives the top stitches a smooth, raised surface to lie on, improving the final quality.
What is the best stitch for small, delicate lettering?
For very small text, a running stitch or bean stitch is often better than a satin stitch, which can become messy and unreadable at tiny sizes.
Why do some fill stitches look textured?
Digitizers can alter the angle and pattern of fill stitches to create texture and the illusion of shading. This is an intentional artistic choice to add depth and interest to a design.
What is a 'travel stitch' in machine embroidery?
A travel stitch is a running stitch that goes from one part of a design to another, often hidden underneath other stitches. It helps create a continuous sewing path without needing to trim the thread.
Understanding the basic language of machine embroidery stitches empowers you to take your craft to the next level. By recognizing the difference between a simple outline and a dense fill, you can better plan your projects, troubleshoot issues, and appreciate the artistry that goes into every digital file. Now that you're equipped with this knowledge, you're ready to tackle your next project with confidence. Explore thousands of high-quality digital designs now!