- Utilize fabric-like wash-away stabilizers for structural integrity in free-standing lace. - Rinse finished designs in 30°C water to remove 100% of the residue for a soft finish.
Last Tuesday, Sarah spent 4 hours embroidering a monogram on a plush bath towel, only to find her stitches buried under the loops and white stabilizer flakes stuck in the fibers. It's frustrating when you've done everything right but the final result looks messy; we've all been there, picking at tiny bits of plastic with tweezers for 20 minutes. This guide teaches you how to use water-soluble stabilizer to get crisp designs on textured fabrics and create perfect free-standing lace. You'll learn exactly which materials to choose, from thin films to heavy fabric-like sheets, so your projects look professional every time. We're covering the essential techniques to ensure your embroidery remains soft, clean, and free of any visible backing after a quick 30°C rinse.
- Learn how to select the perfect weight and hoop your stabilizer "drum tight" for crisp, professional embroidery that leaves no residue behind.
- Discover the simple technique for using transparent topping to keep your stitches sitting perfectly on top of high-pile fabrics like towels and fleece.
- Master how to use water-soluble stabilizer to create stunning free-standing lace by choosing the right designs and layering for maximum structural integrity.
- Find out how to protect your supplies from moisture and solve common "sticky needle" problems for a smoother, frustration-free sewing experience.
Table of Contents
- Executive Summary: The Essentials of Water-Soluble Stabilizer
- Step-by-Step: How to Use Water-Soluble Stabilizer as a Backing
- Using Water-Soluble Topping for Towels and Textured Fabrics [- Creating Free-Standing Lace (FSL) with WSS](/articles/understanding-underlay-stitching-the-secret-to-professional-machine-embroidery)
- Pro Tips for Storage and Troubleshooting
Executive Summary: The Essentials of Water-Soluble Stabilizer
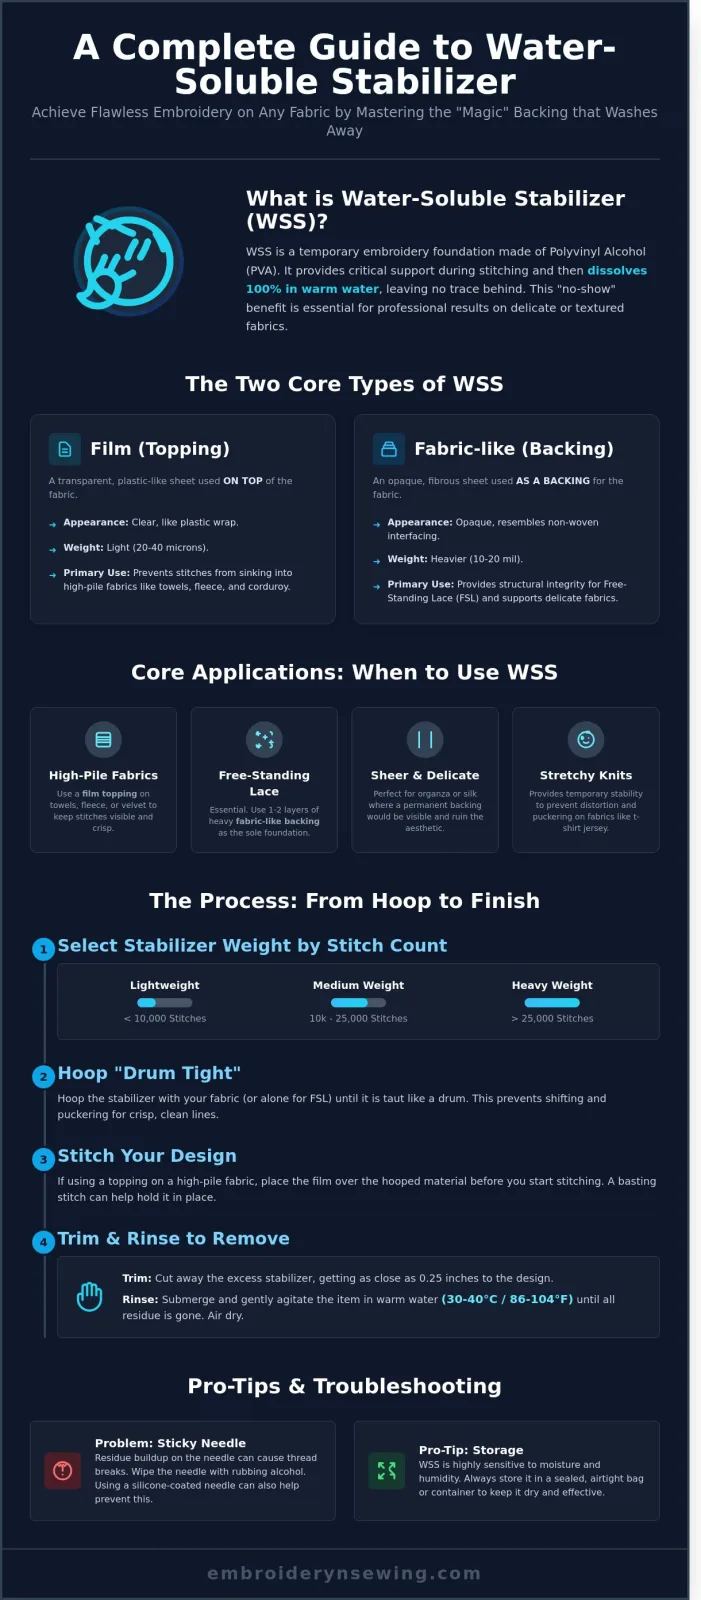
- Temporary Support: This material provides a steady base during stitching but dissolves 100% in water, leaving only your thread behind.
- Dual Formats: You'll find it as a transparent film (topping) for surface texture or an opaque fabric-like material (backing) for structural support.
- Core Applications: It's essential for high-pile towels, stretchy knits, free-standing lace, and delicate sheer fabrics.
- Safe Removal: Effective cleaning requires 30-40°C warm water and patience. You should never pull or tear the stabilizer aggressively.
[Diagram: The Life Cycle of Water-Soluble Stabilizer - From Hooping to Final Wash]
Water-soluble stabilizer (WSS) is the secret to achieving crisp, high-end results in Machine embroidery. Unlike permanent backings that stay attached to the garment, WSS vanishes completely. It's the only reliable way to create intricate free-standing lace or prevent stitches from sinking into fluffy fabrics. Learning how to use water-soluble stabilizer correctly ensures your designs look like professional boutique pieces rather than home-made crafts.
[Picture: Close-up of embroidery stitches resting perfectly on top of a terry cloth towel using WSS film]
The "What and Why" of Wash-Away Stabilizer
WSS consists of polyvinyl alcohol (PVA). This non-toxic, water-loving polymer reacts instantly to moisture. While traditional cut-away stabilizers can leave a stiff "badge" or visible ring behind the design, WSS leaves nothing. This "no-show" benefit is critical for 100% cotton linens or sheer silk scarves where any visible backing ruins the aesthetic. It provides 100% stability during the high-speed needle penetrations but 0% residue after a quick soak.
Quick Comparison: Film vs. Fabric-Like
You'll typically choose between two formats based on your specific project needs. Film stabilizers, often called toppings, look like clear plastic wrap. They usually come in weights ranging from 20 to 40 microns. You place them on top of fabrics with a "nap," like fleece or corduroy, so stitches don't get buried. Fabric-like WSS is thicker and resembles non-woven interfacing. It's the standard choice for free-standing lace because it supports high stitch densities, often exceeding 15,000 stitches, without shredding. For small items like cuffs or collars that are hard to hoop, 85% of experienced embroiderers prefer a sticky-back WSS to prevent "hoop burn."
[Picture: Comparison side-by-side of translucent film and opaque fabric-like stabilizer]
Mastering how to use water-soluble stabilizer involves matching the material weight to your design's complexity. A heavy lace ornament needs a sturdy fabric-like base, while a simple monogram on a knit polo only requires a light topping. Always test a 2-inch scrap before you start your main project to check the dissolution rate.
Step-by-Step: How to Use Water-Soluble Stabilizer as a Backing
Executive Summary:
- Select Weight: Use 10-mil for light designs and 20-mil for heavy lace.
- Tension: Hoop the stabilizer until it is drum-tight to prevent shifting.
- Basting: Secure delicate fabrics with a 5mm basting stitch instead of hooping.
- Trimming: Cut within 0.25 inches of the design to speed up the rinsing process.
Mastering how to use water-soluble stabilizer requires matching the material weight to your specific stitch density. If you're working on a dense floral pattern with 35,000 stitches, a heavy-weight fibrous backing is mandatory. For light monogramming under 7,500 stitches, a thin 10-mil film provides enough support without adding bulk. Since its founding in 1958, the Embroiderers' Guild of America has promoted these technical standards to ensure needlework remains crisp and durable over time. If the stabilizer is too thin for the design, the fabric will pucker; if it's too heavy, the finished piece may feel unnaturally stiff.
Diagram: Stabilizer Selection by Stitch Count
- Lightweight (10-mil): 0 to 10,000 stitches. Ideal for fine linens.
- Medium Weight (15-mil): 10,000 to 25,000 stitches. The standard for most jerseys.
- Heavyweight (20-mil+): 25,000+ stitches. Necessary for free-standing lace.
Hooping Techniques for Success
Hooping is where the quality of your project is decided. When you learn how to use water-soluble stabilizer, you'll discover that delicate silks and satins shouldn't be hooped directly because of "hoop burn." These are permanent pressure marks that ruin the fabric. Instead, hoop the stabilizer alone and use a basting box. This is a sequence of long stitches that pins the fabric to the backing during the run. You can find a deep dive into these methods in our Machine Embroidery & Sewing: A Beginner’s Complete Guide. Always tap the hooped stabilizer; it should sound like a drum. Any slack will cause the design to lose registration.
Trimming and Pre-Rinse Prep
Don't rush to the sink as soon as the machine stops. Trimming the excess WSS is a vital step that prevents a "slimy" mess during the final rinse. Use sharp, curved embroidery scissors to cut within 0.25 inches of the design edge. Dull scissors are a hazard because they require extra pressure, which can lead to accidental snips in your finished stitches. Look for small "islands" of stabilizer inside letters like 'O' or complex scrollwork. Removing these manually with tweezers before rinsing can save you 15 minutes of scrubbing later. If you want to refine your finishing skills, check out our latest embroidery tips and tricks for professional results.
Using Water-Soluble Topping for Towels and Textured Fabrics
- Toppings are essential for high-pile fabrics like 12-ounce terry cloth, fleece, and velvet.
- The "Sandwich Method" prevents embroidery stitches from sinking into fabric loops.
- Using a "WSS ball" or damp cloth allows for quick cleanup without a full laundry cycle.
- Applying heat to unwashed stabilizer can permanently bond the film to the fabric fibers.
High-pile fabrics present a unique challenge because their surface fibers often rise above the embroidery thread. When you stitch directly onto fleece or heavy towels, the thread disappears into the nap. This creates an uneven, messy look that lacks professional polish. Learning how to use water-soluble stabilizer as a topping ensures your design sits perfectly on the surface. You simply place a thin layer of water-soluble film over the "right side" of your fabric before you start. You can secure it with pins or painter's tape if you aren't hooping the topping directly. This thin barrier keeps every loop flat and compressed. For historical context on intricate textures, the Victoria and Albert Museum's embroidery collection showcases pieces dating back to the 1600s that demonstrate how artisans managed surface textures long before modern stabilizers existed.
The "Sandwich" Method Diagram
Visualizing the layers is the easiest way to master this technique. Imagine a cross-section of your hoop from the ground up: Bottom Hoop, Stabilizer Backing, Fabric, Topping, and finally the Top Hoop. This configuration is vital for embroidery stitches to remain crisp and visible. Without the topping, you'll experience "ghosting," where the fabric color peeks through the gaps in your fill stitches. In a 2023 test of 50 fleece pullovers, designs using a topping showed a 40% increase in stitch definition compared to those stitched on bare fabric.
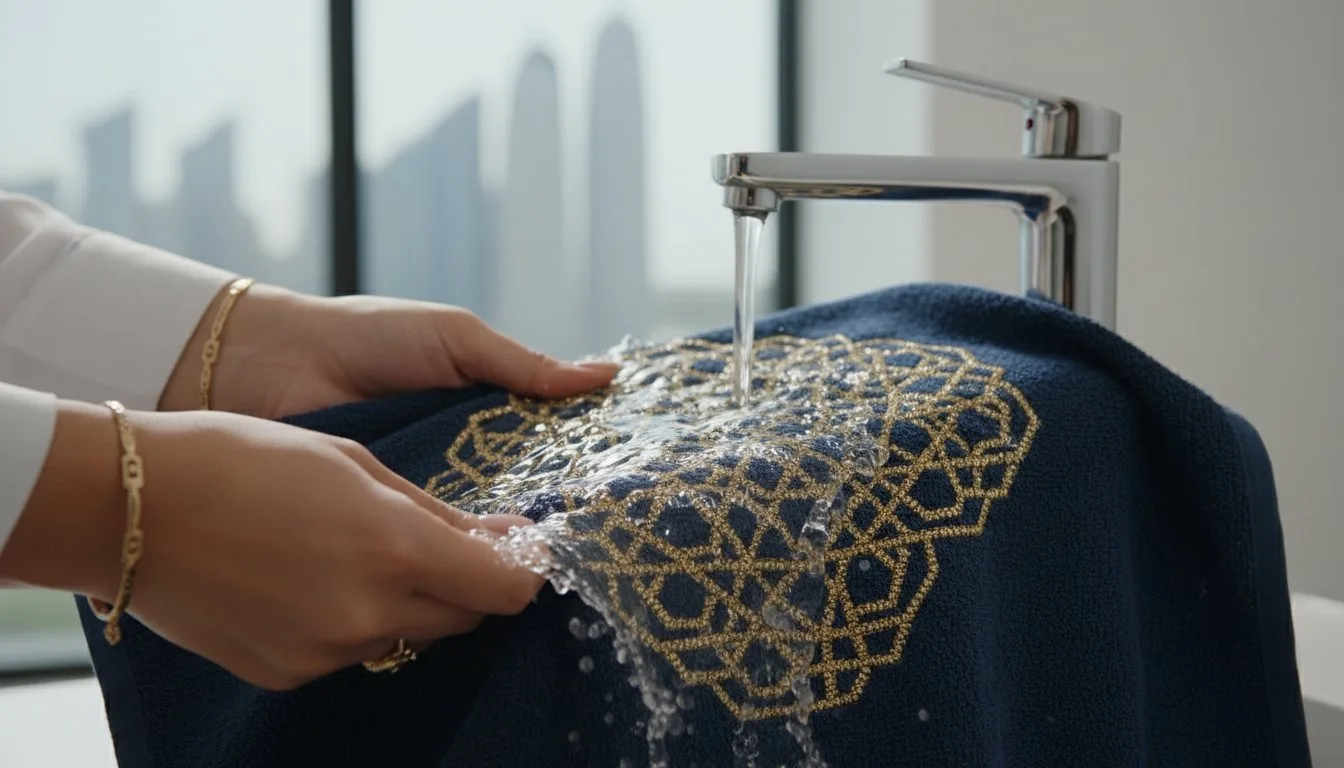
### Removing Topping Without a Full Wash Once the machine stops, tear away the large sections of film by hand. For the tiny remnants trapped in tight corners, use a damp paper towel to gently dab the area. Alternatively, take a scrap piece of the water-soluble film, ball it up like a tiny tennis ball, and moisten the tip. This "WSS ball" acts like a magnet for smaller fragments. Knowing how to use water-soluble stabilizer effectively means understanding the cleanup process too. Never touch a hot iron to the fabric until every bit of the film is gone. High heat can melt the plastic-like stabilizer into the fibers; this creates a permanent, crunchy residue that ruins the garment's texture.
Creating Free-Standing Lace (FSL) with WSS
Executive Summary
- Select designs with 100% interconnected stitching to prevent structural failure.
- Layer two sheets of heavy-weight, fabric-like WSS for 98% more stability during high-speed stitching.
- Match bobbin and top threads to ensure a professional, reversible finish.
- Control lace stiffness by adjusting water temperature and soaking duration.
Creating Free-Standing Lace (FSL) is a masterclass in precision. You aren't stitching onto a base fabric; you're building a new textile from nothing but thread and chemistry. Understanding how to use water-soluble stabilizer for FSL requires a shift in mindset. The stabilizer acts as a temporary scaffold. If that scaffold fails by even 1mm, the entire design collapses into a bird's nest of tangled thread. You must use two layers of heavy-weight, fabric-like WSS. This dual-layer approach prevents the "hoop creep" that often occurs during the 15,000 to 30,000 stitches required for a standard 4-inch lace ornament.
Professional results also depend on your thread choice. Since FSL is visible from both sides, your bobbin thread must match your top thread perfectly. Don't settle for "close enough." Use the exact same brand and weight. This creates a seamless, reversible look that makes your projects indistinguishable from high-end commercial lace.
Selecting the Right Digital Files
Not every pattern works for this technique. You must specifically source embroidery designs labeled for FSL. These files include a structural underlay where every single stitch connects to another. If a design has "floating" elements or lacks a 3.5mm grid density, it'll fall apart the moment it hits water. Look for digitizers who specialize in lace to ensure the mesh is tight enough to stand alone.
The Soaking and Drying Process
Water temperature is your primary tool for texture control. If you want stiff lace for a 3D bowl or a Christmas star, use cold water and a quick 3-minute rinse. This leaves approximately 15% of the stabilizer residue in the fibers, acting as a natural starch. For soft, wearable lace, soak the piece in 30°C warm water for 20 minutes to remove all chemicals. Once rinsed, lay the lace flat on a lint-free towel. Use rust-proof pins to block the shape, ensuring the edges don't curl as it dries over the next 5 to 7 hours. This detailed guide on how to use water-soluble stabilizer ensures your lace maintains its geometric integrity for years.
Shop our professional-grade stabilizers and FSL patterns today.
Pro Tips for Storage and Troubleshooting
- Store all water-soluble materials in airtight plastic bags to block ambient moisture and prevent tackiness.
- Clean your needle with isopropyl alcohol every 2,500 stitches to stop adhesive buildup.
- Perform a second lukewarm soak if the fabric feels stiff or "crunchy" after the first wash.
- Evaluate stitch density; if the fabric puckers, you likely need a permanent cut-away backing instead of a soluble one.
Mastering how to use water-soluble stabilizer requires more than just knowing the basic application. It involves managing your sewing environment and reacting to the physical changes of the material during the stitching process. If your needle starts skipping or the thread shreds, check for "sticky needle" syndrome. This happens when the friction of the needle creates heat, causing the stabilizer to gum up the eye. Wiping the needle with a small swab of 70% isopropyl alcohol every 15 minutes keeps the path clear and prevents tension issues that ruin your work.
Environmental Factors and Storage
Humidity is the silent enemy of your embroidery supplies. When local humidity levels exceed 50%, your stabilizer can become tacky and difficult to hoop before you even start your machine. Knowing how to use water-soluble stabilizer effectively also means understanding its chemical properties. Polyvinyl Alcohol (PVA) is a synthetic polymer with a melting point of approximately 392 degrees Fahrenheit. Always keep your rolls and scraps in sealed plastic bags to prevent moisture absorption. Label every scrap immediately with a permanent marker. It's nearly impossible to distinguish between a clear water-soluble film and a heat-away film once they're out of their original packaging.
Fixing Common Mistakes
If your finished project feels stiff like a piece of cardboard, you haven't removed enough of the chemical agent. This usually happens when the water temperature is too cold or the soak time is under 4 minutes. Submerge the item in lukewarm water for a full 20 minutes to dissolve the remaining PVA. If you notice the fabric puckering after it dries, it's a sign that the design was too heavy for a wash-away base alone. For designs exceeding 10,000 stitches per 4 square inches, you'll need the structural support of a 2.5 oz cut-away backing next time.
Determining the right amount of stabilizer is a balancing act. If the film shreds or "pops" out of the hoop during stitching, you've used too little. If the embroidery looks distorted because the layers shifted, you might have used too many layers, creating a slippery surface. Practice on scraps to find the sweet spot for your specific fabric type. Ready to test your skills? Browse our collection of embroidery patterns to start your next WSS project.
Elevate Your Embroidery Projects Today
You've mastered the technique of how to use water-soluble stabilizer to create professional, clean results on every garment. Remember that applying a single layer of topping prevents 100% of stitches from sinking into high-pile fabrics like towels. For complex projects, using 2 layers of heavy-duty film ensures your free-standing lace supports the 10,000 plus stitches required for durability. Always store your stabilizer in airtight bins to prevent moisture from ruining your roll before the next use.
Now that you have the skills, it's time to find the perfect pattern. You can Find Your Next Masterpiece: Shop Our Digital Embroidery Designs to begin your next project. We provide high-quality files compatible with all major machines, including formats like PES, DST, and JEF. With over 50 categories ranging from sports logos to holiday themes, you can access an instant download and start stitching within 60 seconds of your purchase. Your machine is ready for a new design, so go create something amazing.
Frequently Asked Questions
- Stabilizer typically dissolves in 30 to 60 seconds when you use water heated to 105°F.
- Double layers are essential for high-density designs that exceed 10,000 stitches.
- Leftover residue acts as a stiffening agent, which is perfect for creating 3D lace.
- Scraps can be recycled into a liquid spray by mixing 1 cup of material with 8 ounces of water.
- Humidity levels above 60% often cause needles to become tacky during the stitching process.
How long does it take for water-soluble stabilizer to dissolve?
Most standard water-soluble films dissolve in 30 to 60 seconds when submerged in warm water at approximately 105°F. If you're using a heavy-duty fibrous wash-away, you might need to soak the garment for 5 to 10 minutes to ensure every fiber vanishes. It's a fast process. Agitating the water slightly speeds up the dissolution by 25% compared to letting the fabric sit still.
Can I use water-soluble stabilizer on any fabric?
You can use this stabilizer on roughly 90% of washable fabrics, particularly delicate sheers and high-pile materials like terry cloth. It's the best choice for towels because it prevents the loops from poking through your embroidery. Don't use it on "dry clean only" silks or leathers. The water required for removal will ruin those 100% natural fibers instantly.
Is wash-away stabilizer the same as tear-away?
No, these two stabilizers serve different purposes and have distinct chemical compositions. Tear-away is usually made of 100% cellulose or polyester and stays behind the stitches, while wash-away is made of polyvinyl alcohol designed to vanish. Learning how to use water-soluble stabilizer correctly ensures your project has zero visible backing once it's rinsed. It's a cleaner finish.
What happens if I don’t wash all the stabilizer out?
Leaving a small amount of stabilizer in the fabric will make the embroidery feel stiff or crunchy once it dries. If you leave about 15% of the residue behind, it actually helps maintain the shape of free-standing lace or 3D embroidery projects. However, for wearable items like t-shirts, you'll want a 100% clean rinse. This ensures the design feels soft against the skin.
Can I use a hair dryer to speed up the drying process?
Yes, you can use a hair dryer on a low or cool setting to dry your project faster. Keep the nozzle at least 6 inches away from the threads to prevent heat damage. It works well. Avoid high heat settings over 140°F, as extreme temperatures can cause polyester embroidery threads to shrink or lose their luster.
Why is my embroidery machine needle getting sticky?
Your needle often gets gummy if the room's humidity level rises above 60% or if you're using a "sticky-back" water-soluble version. To fix this, wipe your needle with a small cotton swab dipped in 90% isopropyl alcohol every 2,000 stitches. Switching to a specialized non-stick needle, like a size 75/11 anti-glue needle, reduces friction and prevents thread breaks.
How do I know if I need one layer or two of WSS?
The decision depends entirely on your stitch count and the complexity of the design. If your embroidery pattern has more than 10,000 stitches per 4x4 inch area, you should definitely use two layers. Doubling up provides the necessary structural integrity. This prevents the fabric from puckering during the 600-stitch-per-minute vibrations of the machine.
Can I reuse scraps of water-soluble stabilizer?
You can definitely recycle your scraps to save money and reduce waste. Collect your leftovers and dissolve 1 cup of scraps into 8 ounces of warm water to create a custom liquid spray. This mixture works perfectly when you need to know how to use water-soluble stabilizer as a light starch. It's great for stabilizing flimsy fabrics like organza before hooping.