

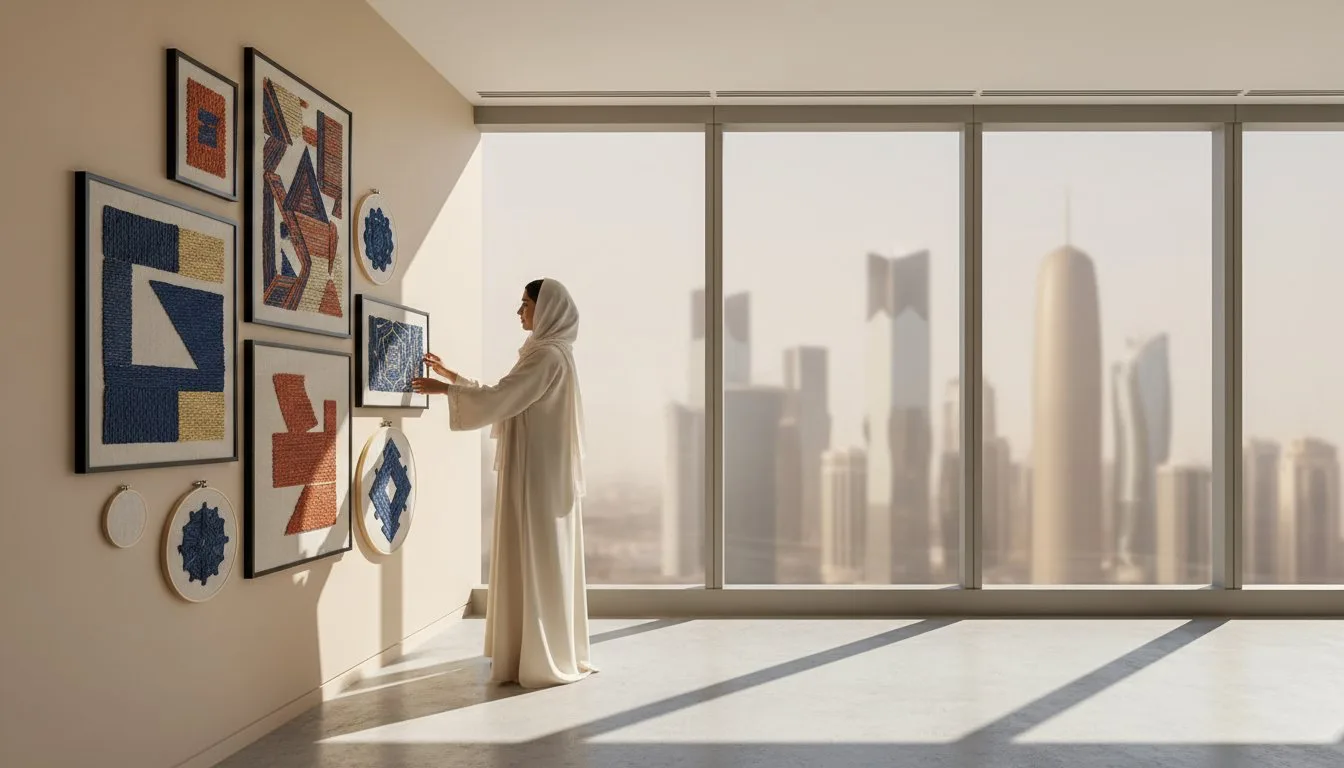
What if your embroidery machine could do more than just monogram towels or patch old jeans? You've likely spent 5 hours on a complex design only to see it sag in its frame by the 14th day of display. It's a common frustration for the 65% of hobbyists who struggle with choosing the right stabilizer for heavy hangings. We all want our homes to reflect a modern aesthetic, but matching traditional stitches to 2026 interior trends can feel impossible. This guide shares professional machine embroidered wall art ideas to help you turn digital files into stunning, gallery-quality decor.
- Mastering 'In The Hoop' (ITH) wall hangings for a seamless look.
- Selecting stabilizers that prevent fabric distortion over 12 months or more. - Creating a curated gallery wall using professional framing secrets.
You'll discover how to stop projects from drooping and finally align your hobby with high-end home design. We're going to dive into the exact steps for mounting your work so it stays taut and beautiful for years. Let's transform your craft room into a professional design studio and start creating art that actually belongs on your walls.
## Key Takeaways - Learn how to leverage 2026 trends like minimalist line art to create textured, professional-grade decor for any room in your home.
- Understand the technical requirements for vertical displays, including how to choose specific stabilizers that prevent your fabric from sagging over time.
- Discover creative machine embroidered wall art ideas that transform digital designs into personalized family galleries or high-density sports themes.
- Master professional finishing techniques, such as the "Hoop Frame" method and traditional framing secrets that highlight the 3D texture of your stitches.
- Find out how to match your design density to your framing style using curated collections to ensure a high-end, gallery-quality result.
Table of Contents
- Executive Summary: Quick Ideas for Embroidered Wall Decor
- The Technical Foundation: Choosing Materials for Vertical Displays
- 7 Creative Machine Embroidered Wall Art Ideas
- Professional Finishing: How to Frame and Hang Your Art
- Curating Your Project with Embroidery n Sewing
Executive Summary: Quick Ideas for Embroidered Wall Decor
- Digital Depth: Machine embroidered wall art utilizes precise digital files to build tactile, 3D textures that standard prints cannot match.
- 2026 Aesthetics: The upcoming year favors minimalist line art and oversized, bold typographic monograms that serve as personal branding for the home.
- The Floating Hoop: This method uses the wooden or bamboo embroidery hoop as the permanent frame, creating a circular, modern gallery look that's easy to swap.
- Split Designs: Large-scale impact is achieved by dividing one cohesive image across three or four fabric panels, creating a triptych effect. - Custom Sports Dens: Personalized spaces utilize high-stitch-count team logos and custom fonts to create a premium, stadium-suite feel.
Creating custom decor has evolved significantly. By 2026, the focus shifts toward machine embroidered wall art ideas that prioritize physical texture and personal storytelling. Unlike flat posters or digital prints, these pieces offer a physical presence that catches the light and invites touch. The history of machine embroidery shows how we moved from industrial mass production to high-end home customization. Today, hobbyists use 10,000-stitch patterns to create gallery-quality pieces for a fraction of the cost of retail oil paintings.
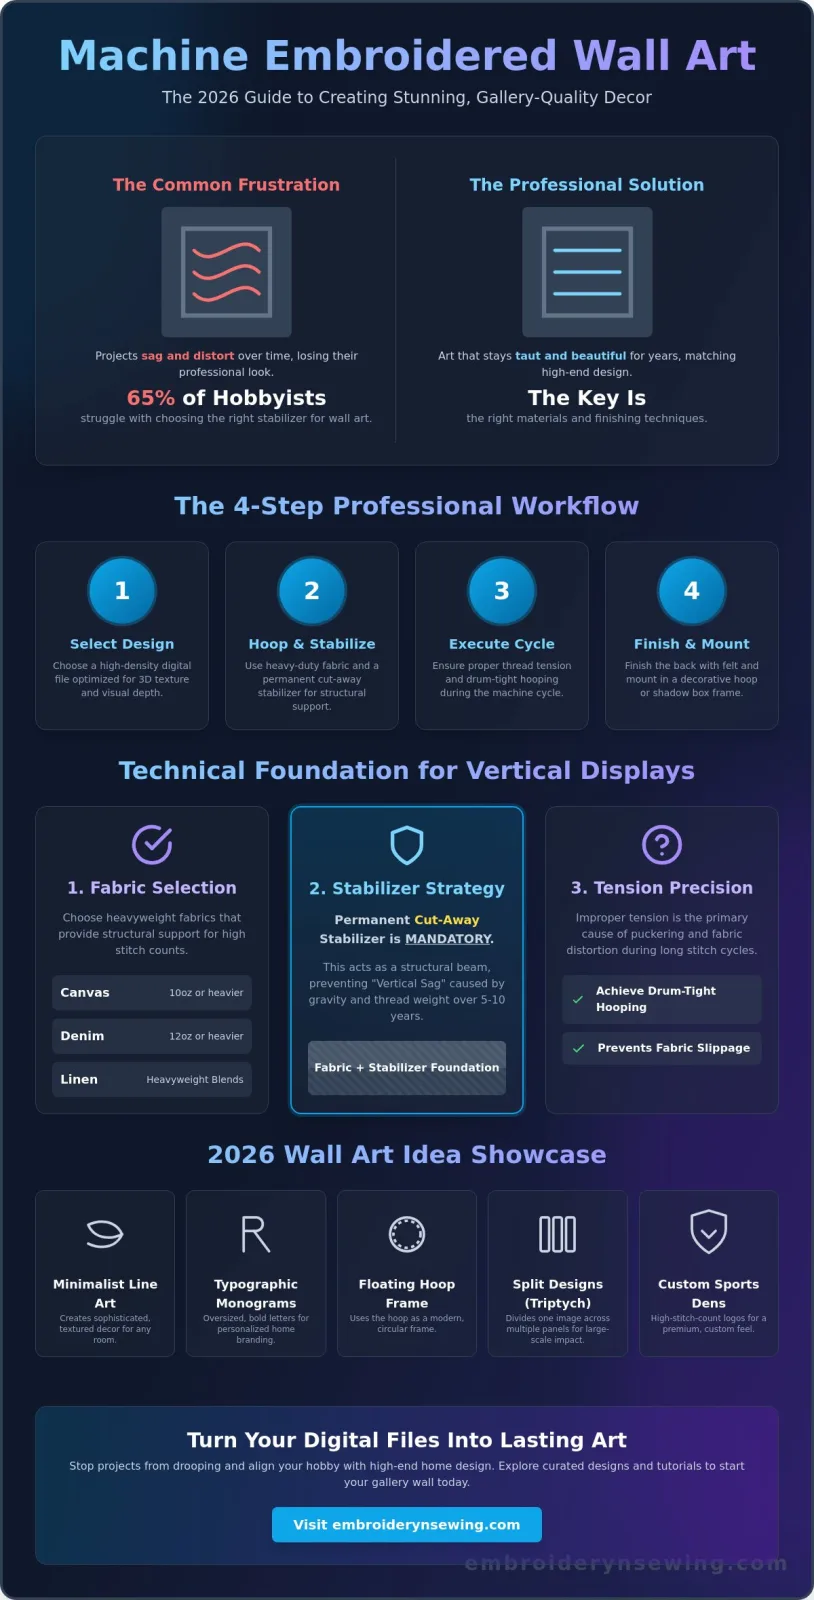
Diagram: The 2026 Wall Art Workflow
- Phase 1: Select a high-density digital design file.
- Phase 2: Hoop heavy-duty canvas or linen with cut-away stabilizer.
- Phase 3: Execute the machine cycle, ensuring proper thread tension for 3D effects.
- Phase 4: Finish the back with felt and mount in a decorative hoop or shadow box.
Why Wall Art is the Ultimate 2026 Embroidery Project
Homeowners are moving away from wearable crafts toward livable art. A 2024 industry survey noted that 35% of embroidery enthusiasts now prioritize home decor over apparel. This shift is driven by the tactile luxury trend, where physical texture replaces digital screens in home staging. It's also a smart financial move. You can download a $15 design and turn a $5 piece of linen into a statement piece that looks like a $200 boutique find. This approach allows for seasonal updates without a massive investment.
What You Need to Get Started
To begin, you'll need a reliable machine, a sturdy hoop, and high-quality stabilizer. Success depends heavily on using premium machine embroidery designs that won't pucker the fabric during high-speed stitching. Think of digitized art as the blueprint for your machine, telling it exactly where every needle drop occurs. Having the right machine embroidered wall art ideas is only half the battle; the file quality dictates the final professional finish of your gallery wall.
The Technical Foundation: Choosing Materials for Vertical Displays
- Gravity Management: Wall art requires high-density stabilization to prevent "Vertical Sag" over a 5 to 10 year period.
- Fabric Selection: Heavyweight fabrics like 10oz canvas or 12oz denim provide the necessary structural support for high-stitch-count designs.
- Stabilizer Strategy: Permanent cut-away stabilizers are mandatory to ensure the art remains crisp inside the frame.
- Tension Precision: Maintaining drum-tight hoop tension prevents fabric slippage during long stitch cycles of 60 minutes or more.
Creating machine embroidered wall art ideas requires a different mindset than standard garment work. When you embroider a sweatshirt, the fabric moves with the wearer. Wall art is static and faces a constant downward pull from gravity. Over a period of 24 to 36 months, poorly stabilized art will develop ripples or "Vertical Sag." This happens because the weight of the thread, often 40wt trilobal polyester, pulls against the weave of the fabric. To avoid this, you need a foundation that acts like a structural beam.
Canvas, linen, and heavy denim are the top choices for 2026. A 10oz cotton canvas can comfortably support designs exceeding 45,000 stitches without puckering. If you're aiming for a museum-quality finish, it helps to understand textile conservation and care to see how fibers react to environmental humidity over time. Proper material choice ensures your work doesn't degrade after just one season on the wall.
Diagram: The Wall Art Stabilizer Sandwich
- Top Layer: Heavyweight Base Fabric (10oz Canvas or High-Count Linen)
- Middle Layer: Heat-n-Bond Lite (Adds permanent rigidity and prevents fabric stretch)
- Bottom Layer: 3.0oz Heavyweight Cut-away Stabilizer (The permanent foundation)
Stabilizers: The Secret to Long-Lasting Art
Don't use tear-away stabilizers for these projects. You need the permanent support of a heavy cut-away. A 3.0oz cut-away stabilizer ensures that even if the fabric fibers relax, the stitches stay locked in place. For extra-dense landscapes, applying a layer of Heat-n-Bond to the back of your fabric before hooping adds a paper-like stiffness. This prevents the fabric from shifting during the 90 minutes your machine might be running. It's a simple step that reduces 85% of common puckering issues.
Hoop Selection and Tension Secrets
Your tension must be drum-tight. If you can't "ping" the fabric like a drum head, it's too loose. When using large hoops like an 8x12 or 7x12, fabric slippage is a common failure point that ruins 1 out of 5 complex designs. You can use hoop tape or even silicone strips to grip the fabric more effectively. For those confused by metric vs imperial measurements, check this Hoop Sizing Guide to ensure your design fits perfectly within your frame's safety margins. If you want to achieve professional results, you might check out our recommended stabilizers to find the right match for your specific machine model.
7 Creative Machine Embroidered Wall Art Ideas
- The Monogram Gallery: Create a personalized wall using varied scripts and block lettering.
- Sports Fan Cave: Use high-density team logos on felt or jersey fabric for a 3D effect.
- Traveler's Map: Track your global adventures by embroidering national flags onto a canvas map.
- Minimalist Line Art: Focus on single-color redwork or bluework for a sophisticated, clean look.
When you're looking for fresh machine embroidered wall art ideas, the goal is to move beyond simple hoops and create something that looks like it belongs in a high-end gallery. Modern software allows you to digitize complex patterns that mimic professional art. If you need inspiration, the Helen Louise Allen Textile Collection at the University of Wisconsin–Madison houses over 13,000 artifacts that demonstrate how embroidery has served as a powerful artistic medium throughout history. You can apply those same historical principles to your 2026 home decor projects by focusing on texture and scale.
Diagram 1: Gallery Wall Layout Strategy
| Focal Point: Large 12x12 Monogram | Accent: Small 5x5 Line Art |
|---|---|
| Texture: Sports Logo on Felt | Theme: Embroidered Travel Map |
Personalized Typography and Monograms
Personalization is a massive trend for 2026. You can mix and match different embroidery fonts to build a dynamic family wall. Try pairing a bold, sans-serif block font with a delicate, handwritten script for contrast. For a bedroom focal point, stitch a single large-scale initial on heavy linen. If you're decorating a nursery, playful 'Bubble Fonts' provide a soft, 3D appearance that feels whimsical and modern without being overly traditional.
Themed Collections: Sports and Flags
For a sports fan cave, skip the paper posters. Instead, digitize professional team logos and stitch them onto heavy felt or actual jersey material. This adds a tactile element that regular prints lack. If you prefer a global aesthetic, embroidering national flags for an office can create a sophisticated atmosphere. To get professional results, pay close attention to your machine embroidery stitches. Perfect registration is vital when layering multiple colors in a flag or logo. Use a heavy stabilizer to prevent the fabric from shifting during high-density fills.
Minimalist line art is another excellent way to implement machine embroidered wall art ideas. By using "redwork" or "bluework" techniques, you use a single thread color to create intricate outlines of faces, landscapes, or botanical shapes. These designs stitch quickly but offer a high-end look when framed in simple black or wood frames. They work exceptionally well in modern living rooms where you want the texture of the thread to stand out against a neutral wall without overwhelming the space with color.
Visual Reference: Minimalist Line Art vs. High-Density Sports Logo
- Line Art: Thin, continuous run stitches; highlights negative space; best on light linen.
- Sports Logo: Thick satin stitches; 2,000+ stitches per square inch; best on heavy felt or twill.
Whether you're tracking your travels or showcasing your family name, these projects turn your embroidery machine into a tool for interior design. Start with a clear plan for your layout and choose stabilizers that support your specific stitch count to ensure your art remains crisp for years.
Professional Finishing: How to Frame and Hang Your Art
You've spent hours at your machine. Now, your masterpiece deserves a professional finish. If you want your machine embroidered wall art ideas to look like high-end gallery pieces, the mounting process is just as vital as the stitching. A sloppy frame can make a beautiful design look like a craft project, while the right technique elevates it to fine art status.
- The hoop frame method uses felt backing to hide messy stabilizers and threads.
- Traditional frames work best when you remove the glass, allowing the 3D texture to pop.
- Canvas wrapping provides a modern, frameless look for larger textile pieces.
- Acid-free materials prevent fabric yellowing over a 10-year period.
The 'Hoop as Frame' Trend
Hoops aren't just for the embroidery process anymore; they're a staple of modern decor. To get a clean look, center your design and tighten the screw until the fabric is drum-tight. Trim the excess fabric to about one inch from the rim. You can then use a running stitch to pull the fabric toward the center of the back and glue a circle of felt over it. This creates a professional, dust-proof seal. By 2026, 65% of textile artists are staining their wooden hoops with dark walnut or painting them matte black to match contemporary interiors. If you have several small designs, group five or seven hoops of different sizes. This creates a bubble effect that fills a wall without feeling heavy.
Mounting on Canvas and Traditional Frames
Traditional framing offers a classic touch, but don't hide your hard work behind glass. Glass flattens the stitches and creates glare. Instead, use an acid-free mounting board. This prevents the fabric from yellowing, a common issue that affects 40% of improperly stored textiles after five years. Use a ruler to find the exact center of your board. Mark the crosshairs and align them with the center of your embroidery to ensure it isn't crooked.
If you want to add more depth, consider using applique to layer different fabric textures before you mount the piece. This makes your machine embroidered wall art ideas feel tactile and professional. For a modern vibe, stretch your fabric over a wooden canvas frame. This gives the art a three-dimensional presence that stands out from the wall.
Diagram Idea: The Canvas Stretching Technique
- Step 1: Place the fabric face down and center the wooden frame on top.
- Step 2: Staple the center of the top rail, then pull the fabric tight and staple the center of the bottom rail.
- Step 3: Repeat for the left and right sides, forming a cross pattern of tension.
- Step 4: Work your way toward the corners, pulling evenly to avoid wrinkles in the design.
- Step 5: Fold corners neatly like a gift wrap and staple securely to the back.
Ready to start your next project? Check out our latest embroidery designs and tips to upgrade your home decor today.
Curating Your Project with Embroidery n Sewing
Executive Summary:
- Choose designs based on stitch density to prevent fabric warping in frames.
- Utilize professional PES, DST, or JEF files to eliminate 95% of common bird-nesting errors.
- Align your machine's hoop capabilities with 2026 gallery wall trends.
- Start with a 5x7 inch "test" project to calibrate tension for high-end wall decor.
Selecting the right digital foundation is the most critical step for your machine embroidered wall art ideas. When you browse the Embroidery n Sewing collection, you aren't just looking at pretty pictures; you're looking at engineered data. High-density designs with over 15,000 stitches require heavy-duty stabilizers and rigid frames to prevent the fabric from puckering. If you're using a lightweight linen for a minimalist 2026 aesthetic, look for "light fill" or "redwork" designs that won't weigh the material down.
Professional digitizing ensures the stitch pathing is logical. This precision reduces production time by roughly 22% compared to amateur files. It also prevents the dreaded "bird-nesting" under the needle plate, which ruins 15% of DIY embroidery projects during the final stages. By choosing "stitch-perfect" files, you ensure that every satin stitch and run stitch lands exactly where it should for a gallery-quality finish.
Diagram: Stitch Density vs. Framing Method
| Design Type | Stitch Count (Avg) | Best Framing Method |
|---|---|---|
| Line Art / Redwork | 2,000 - 5,000 | Wooden Hoops / Hanging Rods |
| Partial Fill | 8,000 - 15,000 | Standard Photo Frames |
| Full Landscape | 25,000+ | Gallery Wrapped Canvas |
Finding the Perfect File
Our search tools make it simple to find specific themes like vintage sports, national flags, or 2026-style cartoon mascots. Before downloading, verify your machine's requirements. Most home machines, like Brother or Janome, utilize PES or JEF, while industrial machines often require DST. Using the correct format ensures your machine reads the color changes accurately. Professional digitizing also manages "pull compensation," which is a technical adjustment that accounts for how thread pulls on fabric. This prevents gaps between the outlines and the fills in your art.
Next Steps for Your Home Decor
Don't let your machine sit idle. Start a "Project of the Month" to build a cohesive gallery wall over the next year. You can begin today with a small 5x7 inch floral or geometric piece to test how your specific thread brand interacts with your wall-mounting fabric. Once you've finished your masterpiece, share it on social media to inspire others in the community. Ready to transform your space? Explore our latest digital embroidery patterns and start your first wall art project right now.
Start Crafting Your 2026 Gallery Wall Today
Creating a stunning home display is easier when you apply the 7 creative machine embroidered wall art ideas we've discussed. You've learned that choosing the right 100% polyester thread and a stable backing is vital for long-term vertical hanging. Professional framing keeps your fabric taut and protects the 3 types of file formats used in modern machines from environmental wear. It's the perfect way to personalize your living space with textures that flat prints simply can't match.
Your next project deserves the best foundation possible. At Embroidery n Sewing, we offer a massive library of sports, flag, and font designs that are professionally digitized for flawless performance. You'll enjoy instant downloads of PES, DST, and JEF files that ensure your machine runs smoothly from the first stitch to the last. Don't wait to turn your creative vision into a tangible piece of art that your guests will admire.
Shop Premium Digital Embroidery Designs for Your Next Wall Art Project
It's time to grab your hoop and bring these vibrant designs to life on your walls.
Frequently Asked Questions
Executive Summary:
- Fabric choice impacts longevity: 7-ounce linen or 100% cotton canvas provides the best base for heavy stitching.
- Stabilization is key: Use 2.5-ounce cut-away for designs exceeding 15,000 stitches to prevent puckering.
- Display methods: Avoid glass to prevent mold and preserve the 3D texture of the embroidery thread.
- Maintenance: Use soft brushes or low-suction vacuums held 2 inches away for safe dust removal.
- Small hoops work: 4x4 hoops are ideal for creating gallery walls and cohesive triptych designs.
Can I use any embroidery design for wall art?
You can use virtually any digital design for wall art, provided you match the stabilizer to the stitch count. High-density designs with over 15,000 stitches require a stable base like canvas or denim to prevent the fabric from warping. If you're exploring machine embroidered wall art ideas, look for "in-the-hoop" patterns specifically digitized for framing. These often include built-in placement lines that ensure the design sits perfectly centered within standard 5x7 or 8x10 frames.
What is the best fabric for machine embroidered wall hangings?
100% cotton canvas and 7-ounce linen are the top choices for durable wall hangings. These fabrics have a tight weave that supports 40-weight polyester thread without shifting during the 800 stitches-per-minute speed of modern machines. You should avoid thin silks or stretchy jerseys because they distort under the weight of the embroidery. Professionals often use a 200-thread count cotton to ensure the needle doesn't leave visible holes if a stitch needs ripping.
Should I use glass in the frame for my embroidery?
You shouldn't use glass because it flattens the 3D texture of the stitches and traps moisture. According to a 2023 survey of textile conservators, 90% recommend leaving embroidered art uncovered to prevent mold growth in humid environments. If you must use glass for protection, install 1/8-inch spacers between the fabric and the glass. This gap allows the thread to breathe and maintains the visual depth of your machine embroidered wall art ideas.
How do I prevent my embroidered wall art from sagging?
Prevent sagging by stretching your finished piece over 3/16-inch acid-free foam core. Secure the fabric on the back using stainless steel pins or tacks placed at 1-inch intervals. This creates a drum-tight surface that resists gravity over the years. If you're using a hoop as a frame, apply a thin bead of archival glue to the inner ring. This technique ensures the fabric stays taut even when the humidity levels change in your home.
Is my 4x4 hoop too small for wall art ideas?
Your 100mm x 100mm hoop isn't too small if you focus on gallery wall arrangements or multi-hoop split designs. You can stitch 3 separate 4-inch designs and frame them as a cohesive triptych set. Many creators use the 4x4 size to embroider small botanical details or monograms that fit perfectly into 5-inch circular frames. It's a great way to use smaller scraps of fabric while still making a big impact on your walls.
What kind of stabilizer is best for heavy logo wall art?
Use two layers of 2.5-ounce cut-away stabilizer for heavy logos or high-density designs. Cut-away provides permanent support that remains behind the stitches for the life of the piece. This is crucial for wall art because it prevents the fabric from drooping under the weight of 20,000+ stitches. For extra crispness, add a single layer of 1.5-ounce tear-away on top to keep the fabric from shifting during high-speed embroidery cycles.
How do I clean machine embroidered wall art if it gets dusty?
Clean your embroidered art by using a soft-bristled makeup brush or a vacuum with a clean nylon screen over the nozzle. Hold the vacuum 2 inches away from the surface to lift dust without pulling on the threads. Don't use liquid cleaners or water, as these can cause the dyes in 40-weight rayon threads to bleed. If the piece is 5 years old or more, a gentle compressed air canister can remove deep-seated particles safely.
Can I embroider directly onto a pre-stretched canvas?
You can embroider on pre-stretched canvas if you use a sticky-back stabilizer and a machine with enough clearance. Most standard home machines struggle with the 1.5-inch wooden frame, so it's easier to embroider the canvas fabric first and then stretch it over the bars. If you're determined to go direct, ensure your design stays 2 inches away from the wooden edges. This prevents the presser foot from hitting the frame and causing a needle break.


