

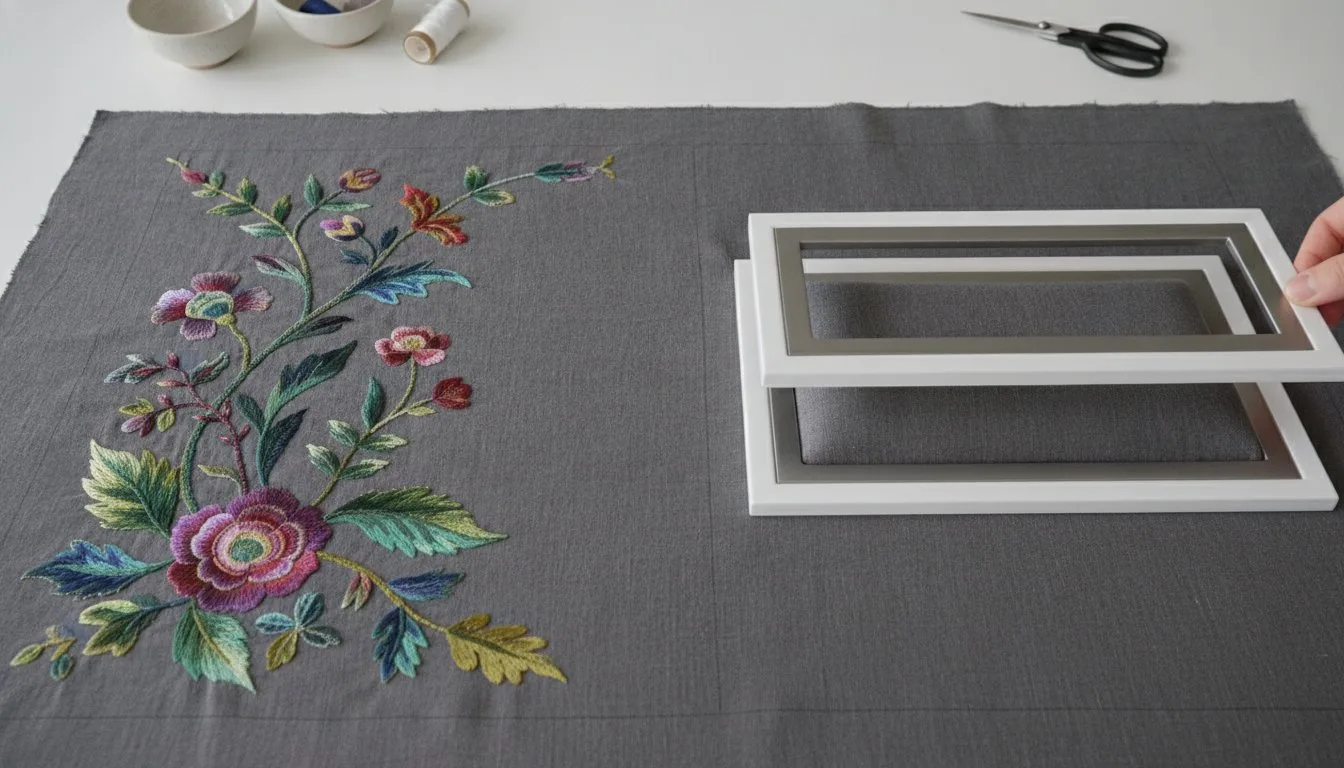
Have you ever found the perfect, sprawling embroidery design, only to deflate when you realize it’s far too big for your largest hoop? That feeling of limitation is frustrating, and the thought of trying to stitch a large piece in sections can be downright intimidating. The fear of misaligning the design, ruining your fabric, and wasting hours of work is enough to keep many stitchers from even trying. It's a common hurdle that keeps your most ambitious creative ideas on the shelf.
But what if you could break through that barrier with confidence? This guide is your key to unlocking those grand-scale creations. We're here to demystify the art of tackling large multi-hooping embroidery projects, transforming your apprehension into excitement. We will walk you through every step, from splitting your design file in your software to our foolproof method for re-hooping and aligning each section perfectly. Get ready to say goodbye to hoop-size restrictions and hello to stunning jacket backs, elaborate quilts, and breathtaking decor with a flawless, seamless finish.
- Understand the multi-hooping technique to confidently tackle embroidery designs that are larger than your machine's hoop. - Follow a universal 5-step method for splitting, aligning, and stitching to ensure seamless results on all your multi-hooping embroidery projects. - Discover which types of digital designs are easiest to split and which to avoid, setting yourself up for success before the first stitch.
- Learn to quickly identify and fix common alignment issues and gaps, turning potential frustrations into flawless finishes.
Table of Contents
- What is Multi-Hooping and Why is it a Game-Changer?
- The Essential Toolkit: What You Need Before You Start
- The 5-Step Multi-Hooping Process: A Universal Method
- Choosing the Right Digital Designs for Multi-Hooping
- Troubleshooting Common Multi-Hooping Mistakes
Ever fallen in love with a large, intricate design only to realize it won’t fit in your machine’s hoop? That's a common frustration. Multi-hooping is the elegant solution. In simple terms, it’s the technique of stitching out a single large design in multiple, perfectly connected sections. It’s a modern digital approach to a classic challenge in the craft of Embroidery, allowing you to overcome the physical limitations of your equipment.
This method doesn't just let you stitch bigger; it transforms what you can create. Imagine flawless, full-back jacket designs, elegant table runners with continuous patterns, or stunning, oversized quilt blocks. These ambitious multi-hooping embroidery projects move beyond small-scale personalization into the realm of true textile artistry. The technique involves two key components: digitally splitting the design file and physically re-hooping the fabric with precision.
When Do You Need to Use Multi-Hooping?
This technique becomes essential in several common scenarios. You'll want to master multi-hooping for:
- Oversized Designs: Any time a design's height or width exceeds your machine's largest hoop area.
- Continuous Borders: Creating seamless, repeating patterns along the edges of items like curtains, tablecloths, or bed linens.
- Large-Scale Scenes: Combining multiple smaller designs, like a floral bouquet and lettering, into one large, cohesive piece.
The Basic Principle: Splitting and Alignment
The magic of successful multi-hooping embroidery projects lies in perfect alignment. First, specialized embroidery software is used to "split" the large design file into smaller, numbered sections that will fit your hoop. The software automatically adds special alignment stitches, often called registration marks, to each section. These marks are the secret to a seamless finish. The process is straightforward: you stitch the first section, including its registration marks. Then, you re-hoop your fabric and use your machine's positioning tools to perfectly align the needle with the marks you just stitched. Once aligned, you simply stitch the next section, and the machine connects it flawlessly to the first.
The Essential Toolkit: What You Need Before You Start
While embroidery software is essential for splitting a large design, your success with multi-hooping embroidery projects hinges on the physical tools you use. Think of it this way: the software creates the map, but your hands-on tools are the compass and vehicle that get you to the destination. Flawless alignment doesn't happen by accident; it's the result of meticulous preparation. In fact, we estimate that 90% of a successful multi-hoop stitch-out is determined before your machine even makes its first stitch.
To set yourself up for a professional finish, gather these essentials:
- A large, single piece of medium to heavy-weight cut-away stabilizer
- Temporary spray adhesive
- Fabric-safe marking pen (air or water-soluble)
- Clear acrylic quilting ruler and a flexible measuring tape
- A full-size printed template of your design
- Embroidery software with splitting capabilities
Stabilizers and Adhesives
For multi-hooping, using one large piece of stabilizer that covers the entire design area is non-negotiable. This creates a single, stable foundation, preventing the fabric from distorting between hoopings. We recommend a medium to heavy-weight cut-away stabilizer for most projects. Paired with a light mist of temporary spray adhesive, it gently tacks your fabric to the stabilizer, ensuring nothing shifts as you reposition your hoop.
Marking and Measurement Tools
Precision is the name of the game. A fabric-safe marking pen allows you to draw crisp, clear horizontal and vertical center lines directly onto your stabilizer. These lines are your guideposts for every hooping. Use a clear quilting ruler to ensure your lines are perfectly straight and your measurements are exact. While these are core skills, a quick refresher on beginner embroidery basics can reinforce the importance of proper marking. Above all, your printed paper template is your most critical tool; it shows exactly where each section of the design should align with your marked grid.
Software with Splitting Capabilities
You'll need embroidery software that can "split" your large design into smaller sections that fit your machine's hoop. Most modern programs like Hatch, Embrilliance, or Brother's PE-Design have built-in multi-hoop or splitting functions that automatically generate the necessary files and alignment marks. Some large designs you purchase may even come pre-split for common hoop sizes, simplifying the process even further.
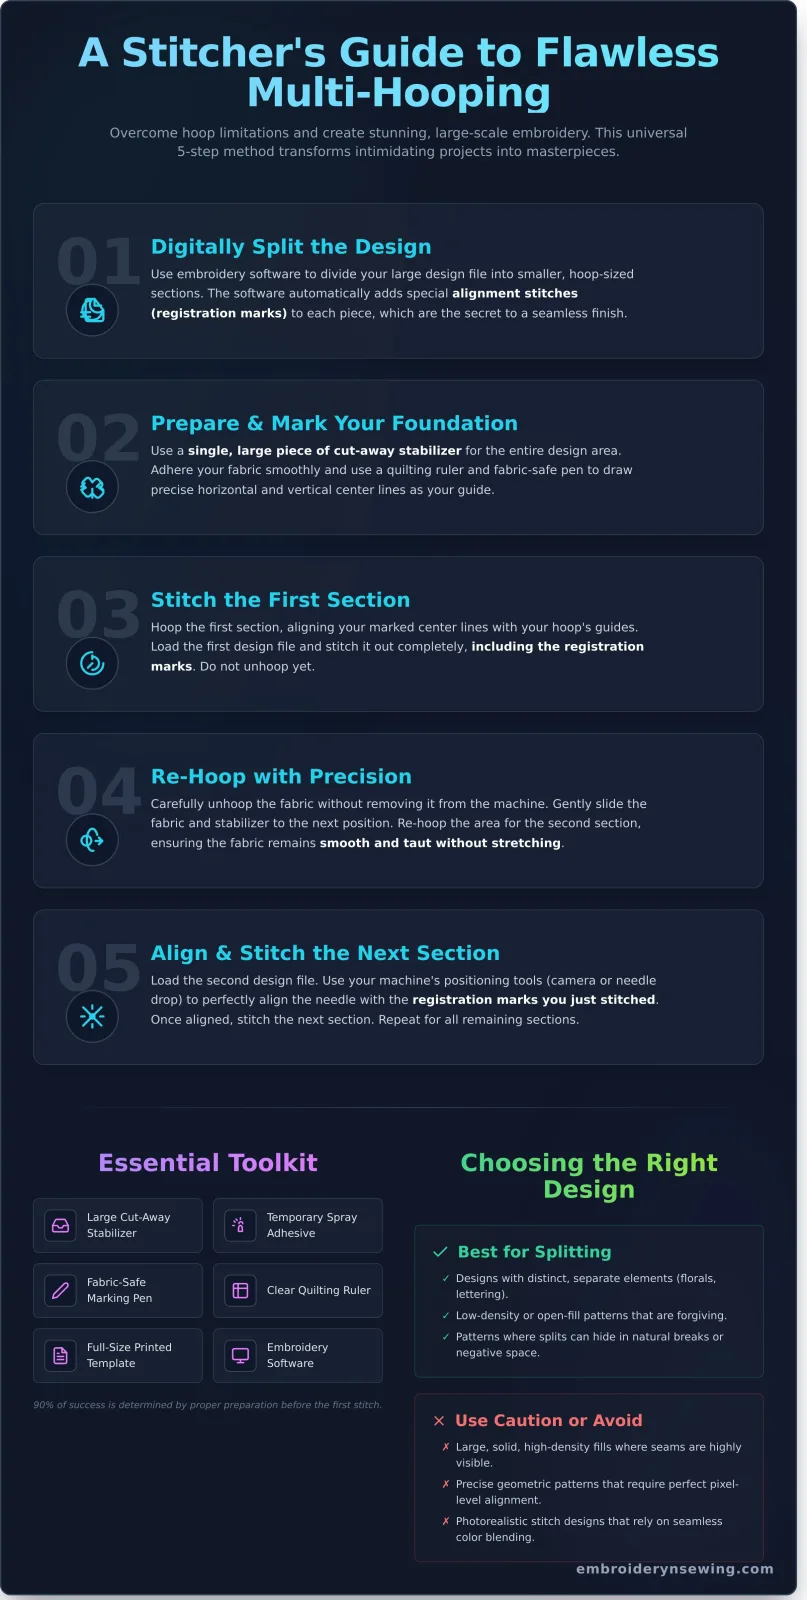
The 5-Step Multi-Hooping Process: A Universal Method
While every embroidery machine and software has its own quirks, the fundamental workflow for successful multi-hooping embroidery projects is universal. By mastering these core principles, you can tackle ambitious designs with confidence. Let's walk through this process, which is essential for any large-scale creation like a floral table runner.
- Step 1: Plan and Split Your Design
First, analyze your design's layout. For our long table runner, a top-to-bottom split makes the most sense. Use your embroidery software's splitting function to divide the design into sections that fit your largest hoop. Crucially, allow the software to automatically add registration marks (alignment stitches) at the connection points. Save each piece as a separate file, such as Runner_Top.pes and Runner_Middle.pes. - Step 2: Print Templates and Mark Your Fabric
Precision starts with preparation. Print full-size paper templates of each design section directly from your software. Using a water-soluble pen and a clear ruler, mark the center and axis lines on your fabric where the design will go. Lightly tape your paper templates in place along these lines to visualize the final layout and ensure everything is straight before you make a single stitch. - Step 3: Hoop and Stitch the First Section
Apply a single, large piece of appropriate stabilizer to the back of the entire project area, not just the first hooping. This prevents fabric shifting. Now, carefully hoop the first section, using your hoop's plastic template to align perfectly with the axis lines you drew on the fabric. Load your first design file and stitch it out, including the all-important registration marks. - Step 4: The Critical Re-Hoop and Alignment
This is the moment of truth in all multi-hooping embroidery projects. Gently un-hoop your fabric, being careful not to pull or distort it against the stabilizer. Slide the fabric to the next position. Now, use your machine’s alignment feature-whether it's a camera, a laser, or the needle-drop function-to precisely line up the needle with the registration marks you just stitched. Once perfectly aligned, you're ready to stitch the second section. - Step 5: Repeat and Finish
The final step is simply to repeat the process. Continue re-hooping and aligning each subsequent section using the registration marks from the previous one. Once the final part of your design is stitched, you can carefully remove the project from the hoop, trim any jump stitches, and remove the stabilizer according to its type. Your large-scale design is now flawlessly complete!
Choosing the Right Digital Designs for Multi-Hooping
The secret to successful multi-hooping embroidery projects often lies in the design you choose before you even thread your needle. Not all digital embroidery files are created equal when it comes to splitting them across multiple hoopings. Understanding what makes a design easy or difficult to divide is the key to preventing misalignment, gaps, and frustration, ensuring a beautiful finished product.
By selecting a design that is naturally suited for this technique, you set yourself up for a smoother, more enjoyable stitching experience. Let's explore which designs are your best friends and which you might want to save for when you have more experience.
Best Designs for Beginners
When you're starting out, look for designs that are forgiving. Designs with distinct elements separated by open space are ideal because they offer natural, low-risk split points. Flowing, organic patterns like vines, scattered flowers, or elegant scrollwork are perfect candidates. Appliqué designs are also a fantastic choice, as the edge of the fabric can cleverly hide any minor imperfections in alignment.
Explore our collection of border and floral designs perfect for your first project.
Challenging Designs to Avoid at First
Some designs demand a level of precision that can be frustrating for newcomers. To build your confidence, it’s best to initially steer clear of designs with these characteristics:
- Dense, photorealistic fills: These designs rely on complex color blending and thousands of tiny stitches. Any slight shift can create noticeable lines or patterns in the final stitch-out.
- Precise geometric patterns: Grids, plaids, or intricate logos require perfect point-to-point alignment. Even a millimeter of error will be immediately obvious to the eye.
- Fine, connecting outlines: Designs that feature delicate, continuous outlines, like a single-line drawing, are extremely difficult to match up flawlessly between hoopings.
Choosing wisely at the start will help you master the mechanics of multi-hooping without the added pressure of a difficult design. As your skills grow, you can tackle more complex patterns with confidence.
Troubleshooting Common Multi-Hooping Mistakes
Even the most seasoned stitchers encounter a hiccup in their multi-hooping embroidery projects. The key is not to panic. Almost every mistake is fixable, and each one is a learning opportunity. Think of this section as your emergency guide for when things don't go exactly as planned. We’ve all been there, and we can get your project back on track.
Problem: Gaps or Overlaps Between Sections
This is the most common fear in multi-hooping, but it's easily managed. A gap or overlap is almost always caused by inaccurate alignment when moving to a new hoop section. The fix requires patience.
- Solution: Meticulously use your machine’s positioning tools, whether it’s a camera, laser, or grid function. Don't rush the re-hooping process. If your machine allows, manually move the needle to check the four corner points of the new section before you press start.
- Prevention: Always, always stitch a test version of your design on a scrap piece of similar fabric and stabilizer. This allows you to perfect your alignment technique without risking your final project.
Problem: Fabric Puckering and Distortion
Puckering happens when the fabric shifts or is not properly supported for the density of the design. This issue is all about the foundation you create before the first stitch.
- Solution: Use a heavier cut-away stabilizer than you think you need; it provides a stable base that won't shift. A light mist of temporary spray adhesive between the fabric and stabilizer is non-negotiable, as it prevents the layers from moving independently.
- Prevention: When hooping, ensure the fabric is perfectly smooth but not stretched. Stretching the fabric in the hoop guarantees it will pucker when you un-hoop it and it relaxes back to its original size.
Problem: Registration Marks Don't Line Up
You’ve finished one section and moved the hoop, only to find your carefully placed registration marks are now off. This can happen if the fabric shifted slightly or the initial markings were a millimeter off.
- Solution: Stop immediately. Un-hoop the fabric and carefully re-align it using your printed template as your primary guide. It’s better to spend five minutes re-hooping than to live with a misaligned design.
- Prevention: Measure twice, stitch once. Before you ever start sewing, double-check your printed template against your on-screen design and ensure your initial fabric markings are precise.
Mastering large-scale multi-hooping embroidery projects is a journey of practice and patience. By understanding these common pitfalls, you can approach your next creation with confidence. For more tutorials and advanced techniques, be sure to explore the resources at embroiderynsewing.com.
Embroider Without Limits: Your Multi-Hooping Journey Begins
You've now unlocked the secret to creating large, breathtaking embroidery designs that once seemed impossible. By understanding the essential tools, mastering the universal 5-step process, and learning how to troubleshoot common issues, you're no longer limited by the size of your hoop. The world of large-scale multi-hooping embroidery projects is now at your fingertips, waiting for your creative touch.
The only thing missing is the perfect design to bring your vision to life. Ready to start stitching? Browse our extensive collection of embroidery designs to find the perfect pattern for your next large-scale project. With thousands of high-quality digital designs available for instant download in all major machine formats, we have incredible options perfect for both beginners and seasoned experts.
Don't let hoop size hold you back any longer. Go forth and create something magnificent!
Frequently Asked Questions About Multi-Hooping
Can I do multi-hooping without special embroidery software?
While some machines offer basic splitting functions for lettering, it is extremely difficult to accurately split complex designs without dedicated software. Embroidery editing software automates the process by slicing the design to fit your hoop and, most importantly, adding the registration marks needed for perfect alignment. Attempting this manually is tedious and highly prone to error, so software is strongly recommended for a professional-looking result on your multi-hooping embroidery projects.
What are registration marks and why are they so important?
Registration marks are small alignment stitches, like crosses or dots, that your software adds to each section of a split design. They are the secret to perfect re-hooping. After stitching the first section, the marks it leaves on the fabric serve as a precise guide. You then align the needle or a placement sticker with these marks when starting the next section, ensuring every part of the design connects seamlessly with no gaps or overlaps.
What is the best type of stabilizer for large multi-hooped projects?
A medium-to-heavy weight cut-away stabilizer is the best choice for large projects. It provides a stable foundation across the entire design area that won’t shift or distort during re-hooping. Unlike tear-away, it continues to support the stitches after laundering. For best results, use a single piece of stabilizer that is larger than the final, complete design, rather than trying to piece smaller sections of stabilizer together under each hooping.
How do I split a design that I purchased?
To split a purchased design, you need embroidery editing or digitizing software like Embrilliance or Hatch Embroidery. You simply open the design file in the software, select your hoop size from a list, and use the built-in "split" or "multi-hooping" tool. The program will automatically break the design into multiple files that fit your hoop, adding the necessary registration marks to each one for easy alignment on your machine.
Will the split be visible in my final embroidery project?
When done correctly, the split should be completely invisible. The key is using precise registration marks for alignment and maintaining consistent fabric tension with proper stabilization. Modern embroidery software is also very intelligent, often splitting designs along natural breaks or in low-density areas to further conceal the transition. With careful technique, the separate sections will merge into one flawless, continuous design without any noticeable seams or gaps.
Is it better to split a design horizontally or vertically?
The best split orientation depends on the shape of your design and your hoop. The goal is to create the fewest splits possible. For a design that is wide and short, like a border on a pillowcase, a horizontal split is most efficient. For a design that is tall and narrow, like a monogram on a jacket back, a vertical split makes more sense. Your software will typically recommend the most logical orientation for you.


