

You've just finished a stunning custom piece-the threads are perfect, the design is flawless, and your client is going to love it. But now comes the part that can make your stomach drop: quoting the price. If you're tired of second-guessing your rates, worrying you've forgotten a hidden cost, and fearing you're not making a real profit, you've come to the right place. Mastering the art of pricing custom embroidery work is one of the biggest challenges for creative entrepreneurs, but it doesn't have to be a source of constant stress.
This ultimate guide is designed to turn that anxiety into confident action. We'll demystify the entire process, showing you how to accurately calculate every cost-from thread and stabilizer to your valuable time and machine wear-and-tear. We will explore popular industry pricing models, like stitch count and flat-rate fees, and help you find a simple system that works for your small business. By the end, you'll be able to create fair, profitable quotes with ease and explain your value to customers without hesitation.
- Accurately calculate your total project costs-including often-overlooked expenses like machine maintenance and utilities-to ensure every job is profitable. - Discover the two primary industry pricing models and learn how to select the right one for your business needs and customer base. - An effective strategy for pricing custom embroidery work combines solid numbers with clear communication and firm business policies to protect your time.
- Understand why charging a separate digitizing fee is crucial for custom artwork and how to build it into your quotes consistently.
Table of Contents
- The Foundation: Calculating Your True Embroidery Costs
- Choosing Your Pricing Model: Stitch Count vs. Flat Rate
- The Critical Role of Design & Digitizing Fees
- Building Your Official Price List
- Finalizing Your Strategy: Policies and Communication
The Foundation: Calculating Your True Embroidery Costs
Before you can set a price list, you must have a crystal-clear understanding of every single cost that goes into a project. This is the most critical step in pricing custom embroidery work for profit. Many beginners and even some seasoned embroiderers make the costly mistake of only factoring in the cost of thread and the blank garment. This approach is a fast track to losing money. To build a sustainable business, we need to break down your expenses into three key categories: direct, indirect, and labor costs. Mastering this foundation ensures every job you take on is genuinely profitable.
Direct Material Costs (The Consumables)
These are the tangible items consumed for each specific job. Track them meticulously to ensure your costs are covered. Your list must include:
- Embroidery Thread: Calculate usage based on the design's stitch count, which your software can typically estimate.
- Stabilizer & Backing: Factor in the cost of the specific type used for the fabric (e.g., cut-away, tear-away, or specialty toppings).
- Small Supplies: Needles, bobbins, and temporary adhesives have a cost. A small "sundries fee" per project can cover these.
- Blank Garments: The wholesale cost of the shirt, hat, or other item being embroidered.
Indirect Overhead Costs (The Hidden Expenses)
Often overlooked, these are the costs of simply keeping your business running. They aren't tied to one project but must be absorbed into your pricing model. Key overhead costs include:
- Machine Depreciation: Your machine is an asset that wears down. Set aside a small amount (e.g., $1-2) per hour of run time for maintenance and eventual replacement.
- Utilities & Software: Account for electricity consumption and any monthly subscriptions for your digitizing or design software.
- Workspace Costs: A percentage of your rent, mortgage, or utilities if you operate from a home studio.
Labor Costs (Your Time is Valuable!)
Never work for free! Your skill and time are your most valuable assets. First, determine a fair hourly rate for yourself. Then, track the time spent on every phase of a project. This includes initial design consultation, setup, and digitizing. The computerized machine embroidery process requires careful preparation to turn art into a stitch file, and this time is billable. Don't forget to include time for:
- Active Work: Hooping the garment, setting up the machine, and monitoring the stitch-out.
- Finishing Touches: Trimming threads, removing stabilizer, steaming the final product, and packaging it for the customer.
By meticulously calculating these three cost pillars-direct materials, indirect overhead, and your own labor-you build a powerful foundation. This detailed understanding is the secret to moving beyond guesswork and confidently pricing your work in a way that guarantees profitability.
Choosing Your Pricing Model: Stitch Count vs. Flat Rate
Once you understand your costs, the next critical step in pricing custom embroidery work is choosing a model that works for your business and your customers. In the embroidery industry, two primary methods dominate: charging by stitch count or using a flat rate. Before you can apply any model effectively, you must have a firm grasp of your expenses. Resources like the University of Maine's guide on Calculating Your True Embroidery Costs are invaluable for establishing a profitable baseline. Let's break down each approach to help you decide.
The Stitch Count Method
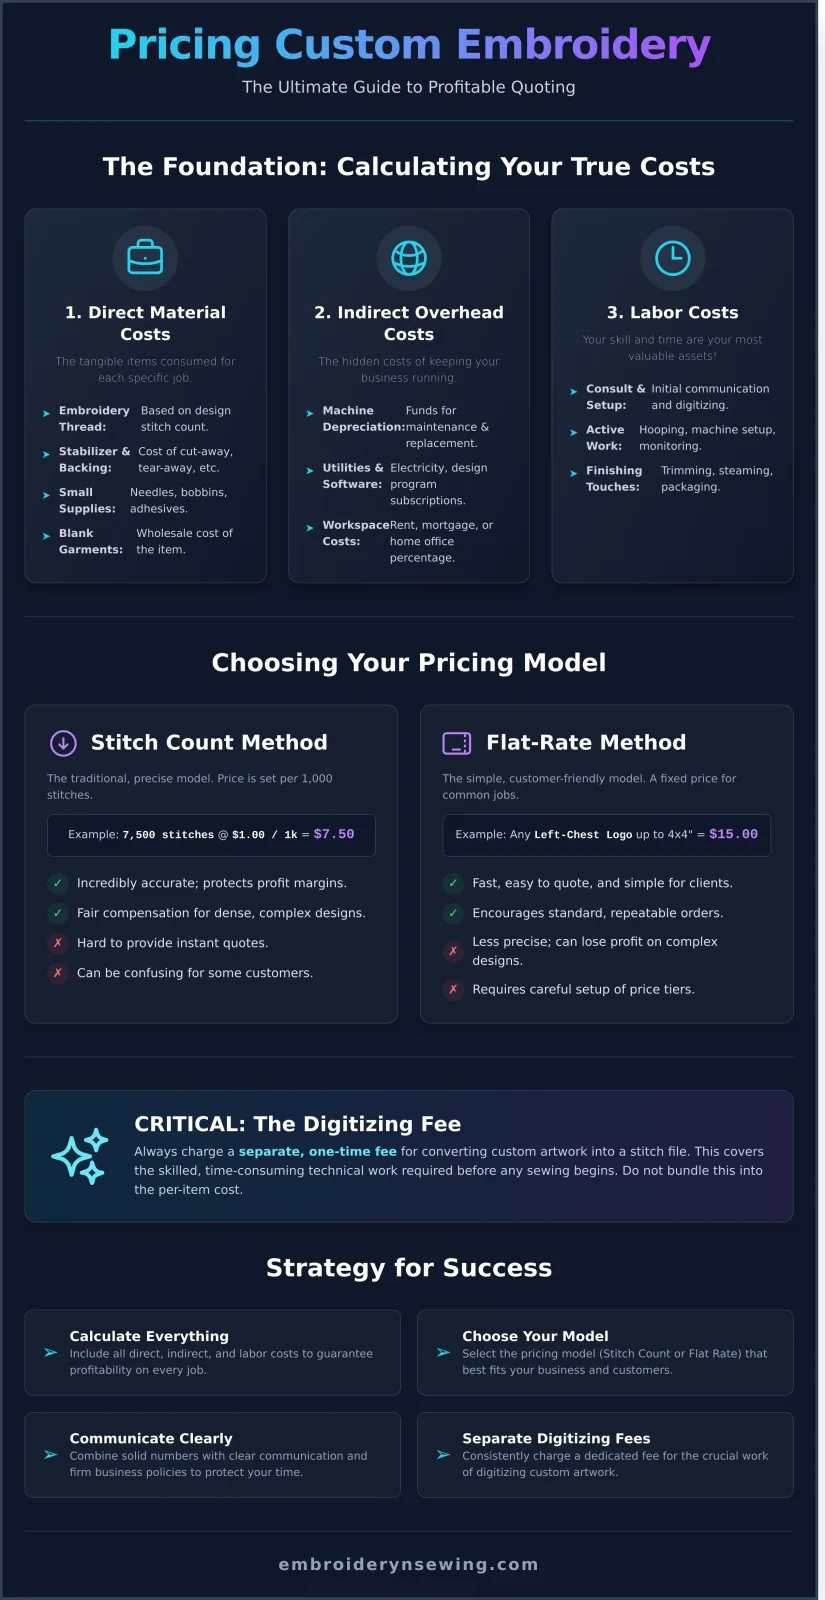
The stitch count model is the most traditional and precise way to price embroidery. You set a specific rate per 1,000 stitches, and the final price is determined by the design's total stitch count. For example, if your rate is $1.00 per 1,000 stitches, a 7,500-stitch logo would cost the customer $7.50 for the embroidery.
- Pros: This method is incredibly accurate. It ensures you are fairly compensated for the machine time and materials used in dense, complex designs, protecting your profit margins on every job.
- Cons: It can be difficult to provide an instant quote without digitizing software to analyze the design first. This complexity can also be confusing for customers who just want a simple, upfront price.
The Flat-Rate Method
The flat-rate model simplifies the quoting process significantly. You establish a fixed price for common embroidery applications, such as a left-chest logo or a standard hat design. For instance, you might charge a flat $15 for any left-chest logo up to 4x4 inches, regardless of the specific stitch count.
- Pros: This method is fast, easy to quote, and simple for customers to understand. It removes uncertainty and can help you close sales more quickly.
- Cons: The primary risk is underpricing. A customer could provide a 4x4 inch logo that is a solid, stitch-heavy block of color, which would take far more time and thread than a simple text-based logo of the same size, potentially eating into your profit.
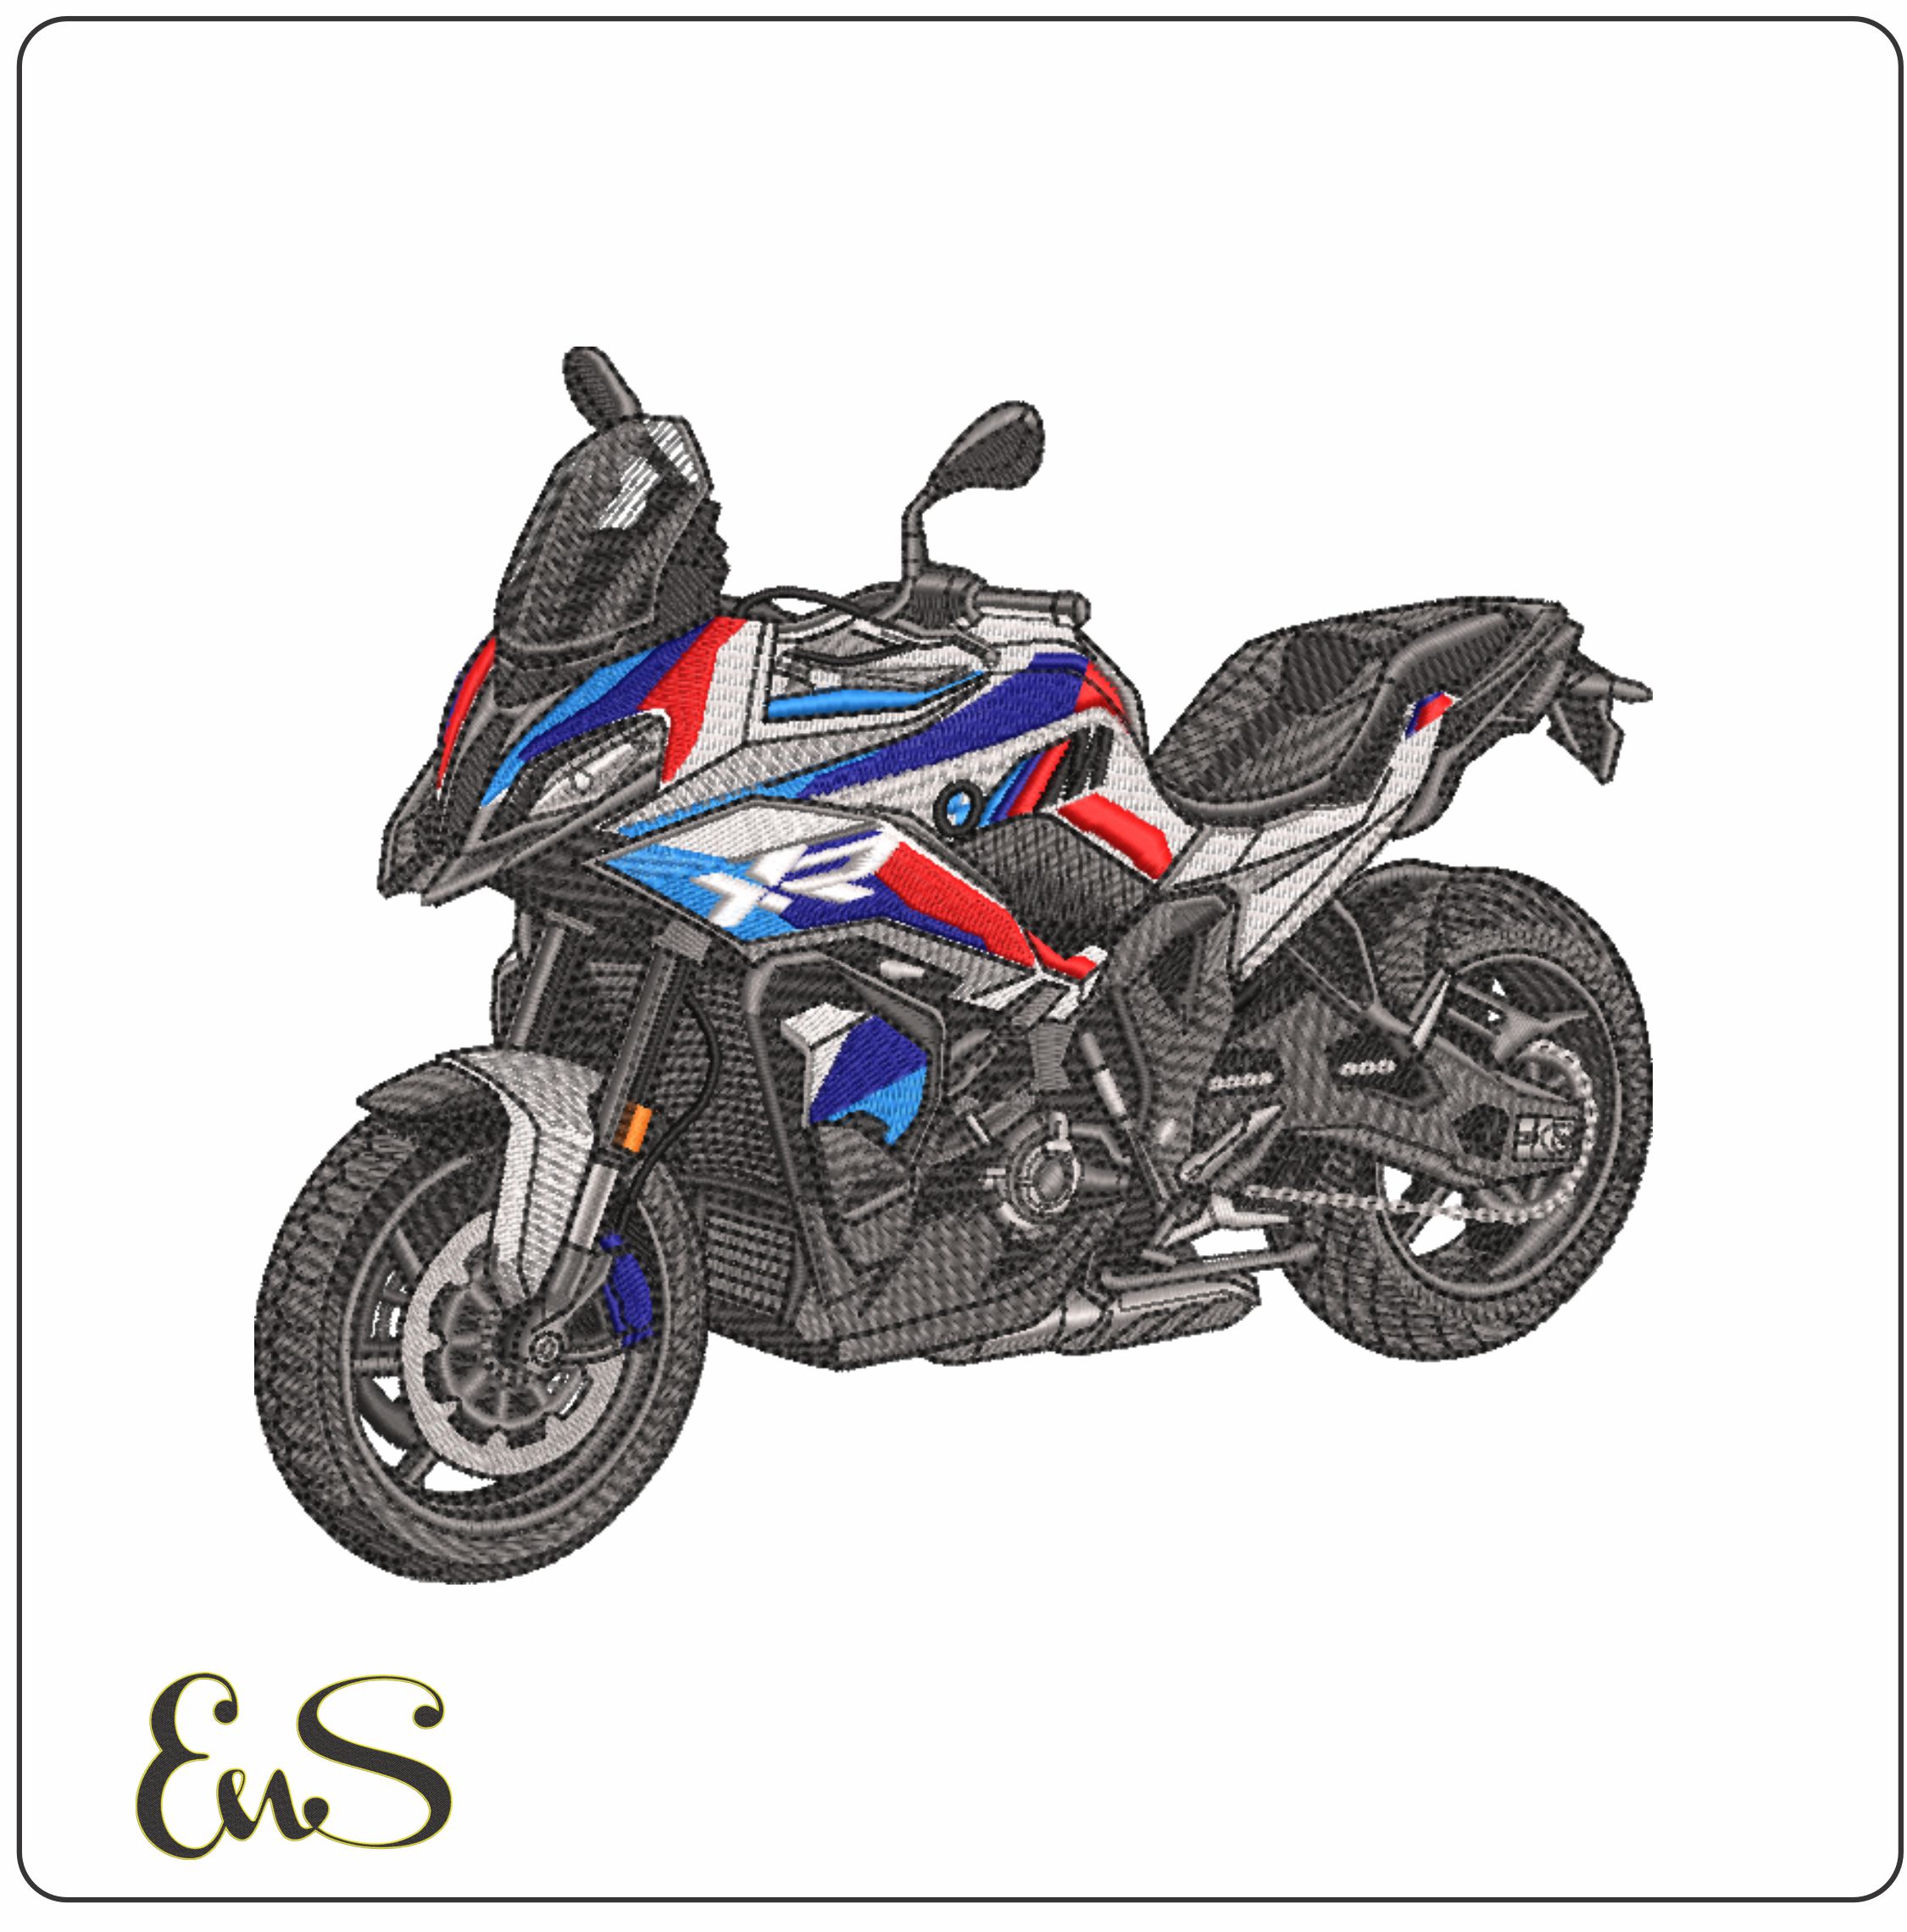
Many successful embroidery businesses find a sweet spot by combining both models. A hybrid or tiered approach offers the simplicity of flat-rate pricing with the financial protection of the stitch count method. You can offer a flat rate for standard placements (e.g., left chest, hat front) up to a generous stitch count, like 10,000 stitches. If a design exceeds that threshold, you can add a small surcharge for each additional 1,000 stitches. This balanced strategy gives customers the simple pricing they love while ensuring you remain profitable on every single project.
## The Critical Role of Design & Digitizing Fees
Beyond thread, fabric, and machine time, the most valuable-and often misunderstood-component in pricing custom embroidery work is the digital embroidery file itself. Before a single stitch is made, a client's artwork must be converted into a language the machine can understand. This process is called digitizing, and it's a skilled service that carries its own cost.
What is Digitizing? (And Why You Must Charge For It)
Digitizing is the manual process of converting a graphic file (like a JPG or PNG) into a stitch file (like a DST or PES). This is not an automated, one-click conversion. A professional digitizer uses specialized software to meticulously plot the path of the needle, defining stitch types, densities, and directions to accurately recreate the artwork in thread. It is a separate, skilled service, and you must charge for the time and expertise involved. Typically, digitizing fees can range from $20 for simple text to over $100 for complex, multi-color logos.
How to Price a One-Time Digitizing Fee
Setting a clear digitizing fee structure is essential for transparency and profitability. Developing a consistent fee structure is a core part of effective pricing strategies for service businesses, ensuring you cover your skilled labor costs. Consider these models:
- Flat Fee: Ideal for simple designs, such as standard text or basic logos under a certain stitch count (e.g., 10,000 stitches).
- Tiered or Hourly Rate: Best for complex artwork with intricate details, color gradients, or very high stitch counts.
Always show this as a separate, one-time "Setup Fee" or "Digitizing Fee" on your invoice. This educates the client that they are paying for a digital asset they can reuse for future orders without incurring the charge again.
Save Money with Pre-Digitized Embroidery Designs
Offering pre-made, professionally digitized files is a fantastic way to serve customers on a budget or those needing a quick, one-off project. By using a stock design, you skip the custom digitizing process entirely. This allows you to offer a lower all-in price to your client while protecting your profit margin. For customers without a specific logo, presenting a library of options makes small projects financially viable. You can browse thousands of ready-to-use embroidery designs to expand your offerings and attract a wider range of clients.
Building Your Official Price List
Once you've calculated your costs and chosen a pricing model, the next step is to translate that information into an official price list. This document is your internal playbook for quoting jobs quickly and accurately. It eliminates guesswork, ensures every customer receives consistent pricing, and projects a high level of professionalism. A well-structured price sheet is a foundational tool for successfully pricing custom embroidery work for long-term profit.
Start by documenting prices for your most frequently requested items, like polo shirts, baseball caps, and jackets. This foundation will allow you to handle the majority of inquiries with confidence and speed.
Creating a Simple Pricing Chart
Your internal price list doesn't need to be complex. A simple chart or spreadsheet is often the most effective tool. Create a table that includes the garment type, the most common embroidery location, and your base price, which should cover a standard stitch count (e.g., up to 8,000 stitches). This becomes your at-a-glance guide for generating instant quotes.
Example Internal Price Chart:
| Item | Standard Location | Base Price (Includes Garment) |
|---|---|---|
| Polo Shirt | Left Chest | $22.00 |
| Baseball Cap | Front Center | $18.00 |
| Fleece Jacket | Left Chest | $45.00 |
Pricing for Add-Ons and Modifications
Your base price is the starting point. Customers will frequently request extras, and you need a standardized menu of charges for these modifications. Clearly defining these costs prevents you from giving away valuable services for free and makes your quotes transparent.
- Additional Locations: Set a flat fee for adding a design to a second spot, such as a sleeve ($5-$7) or a back yoke ($10-$15).
- Personalization: Establish a per-item charge for unique names or numbers, typically between $4 and $8.
- Specialty Threads: Determine an upcharge for premium materials like metallic, glow-in-the-dark, or puff threads, as they cost more and may require slower machine speeds. A 15-25% surcharge is common.
Structuring Quantity Discounts
Bulk orders are more efficient. Your setup time is the same whether you're embroidering one item or fifty, so larger orders should be more profitable per piece. Pass some of these savings on to your customers to incentivize them to order more. Define clear price breaks to make the benefit obvious.
Example Price Tiers:
- 12-24 items: 5% discount
- 25-49 items: 10% discount
- 50+ items: 15% discount
This structure not only rewards larger clients but also serves as a powerful sales tool to increase the average value of each order you process.
Finalizing Your Strategy: Policies and Communication
A profitable pricing model isn't just about crunching numbers; it's built on a foundation of clear communication and firm policies. When customers understand your process and see the value you provide, they are more willing to pay your price. Establishing a clear framework protects your time, manages customer expectations, and positions your business as a professional operation, not a casual hobby.
Part of this professional image is a high-quality website that showcases your work and explains your process. For creative entrepreneurs looking to build a compelling online presence, working with an award-winning agency like Insight Multimedia can make a significant difference.
This professional mindset extends beyond pricing to securing your physical assets. For entrepreneurs running a home studio filled with valuable equipment, investing in security like a digital door lock singapore can be a crucial step in protecting your livelihood.
Setting a Minimum Order Quantity (MOQ)
The setup for a single custom hat-including digitizing, machine setup, and hooping-can take almost as long as setting up for a dozen. To remain profitable, it's crucial to establish a minimum. This can be a quantity, such as 6 or 12 pieces for a custom logo, or a minimum order value, like a $75 minimum charge. This policy ensures that every job you accept covers your foundational costs and time investment.
Handling Customer-Supplied Garments
Embroidering on items provided by customers is a common request, but it carries significant risk. A machine error, a needle break, or a hooping mishap could damage an irreplaceable or expensive item. To protect your business, many shops charge a higher per-piece embroidery fee on supplied goods to cover this risk. It's also wise to have customers sign a simple waiver acknowledging that while you will take every precaution, you are not liable for damage to their items.
Creating a Professional Quote
Your quote is a powerful tool for building trust. A detailed, professional document justifies your costs and prevents misunderstandings down the line. A complete approach to pricing custom embroidery work always ends with a clear quote. Every quote you send should include:
- An itemized breakdown: garment cost, one-time digitizing fee, and the per-piece embroidery charge.
- A digital mockup of the design on the garment for customer approval before any stitching begins.
- Clear terms: your estimated turnaround time, payment schedule (e.g., 50% deposit required), and accepted payment methods.
By implementing these clear policies and communication strategies, you transform your pricing from a simple number into a professional agreement that builds customer confidence and secures your profitability. For more in-depth guides on building your brand, explore the resources at embroiderynsewing.com.
Stitching It All Together: Your Path to Profitable Pricing
Mastering the art of pricing custom embroidery work is a game-changer for any small business. By first calculating your true costs and then choosing a strategic pricing model-whether based on stitch count or a flat rate-you build a solid foundation for sustainable growth. Remember that clear policies and transparent communication, especially around design and digitizing fees, are just as critical as the numbers themselves to ensure customer trust and protect your profits.
Now that you have the strategy, it's time to expand your creative offerings. Ready to start stitching? Browse our library of professional designs and offer more options to your customers today. With thousands of high-quality, pre-digitized designs compatible with all major embroidery machine formats, you get instantly downloadable files to start your next project now. Go forward with confidence and turn your passion into a thriving, profitable business.
Frequently Asked Questions
How much should I charge to embroider a logo on a shirt?
For a standard left-chest logo (around 4 inches, 5,000-8,000 stitches), a common price range is $7 to $15 per shirt, not including the garment's cost. The final price depends on the logo's complexity, stitch count, and the number of color changes. Most embroidery shops also have a minimum order charge to cover their setup time, and offer price breaks for larger quantity orders, which is a key factor in profitability.
What is a good starting price per 1,000 stitches for a beginner?
A great starting point for beginners is $1.00 to $1.50 per 1,000 stitches. It's also wise to implement a minimum charge, such as $10, to ensure small jobs are still profitable. For example, a 5,000-stitch logo at $1.25 per 1,000 stitches would be $6.25, but your minimum charge would make it $10. This approach to pricing custom embroidery work ensures your setup time is always covered, no matter the design size.
Should I charge extra for rush orders?
Yes, you should always charge a fee for rush orders. These orders disrupt your scheduled production and often require working longer hours. A standard rush fee is typically 25% to 50% of the total order cost, depending on how quickly the customer needs it. For a same-day or 24-hour turnaround, a 100% rush fee is not uncommon. This fee compensates you for prioritizing their job above others and for any inconvenience.
How do I price embroidery on a hat versus a polo shirt?
You should charge more for embroidering on hats. Structured caps require special equipment (a cap driver and frame) and are more challenging to hoop correctly, increasing the risk of misprints. It's standard practice to add a "hooping fee" or surcharge of $1.50 to $3.00 per hat. This extra charge covers the additional labor, setup time, and specialized skill required compared to embroidering on a flat garment like a polo shirt.
Do I have to charge a digitizing fee if the customer provides the file?
Even if a customer provides a digitized file (like a .DST), you should charge a setup or file-test fee. You must run a test stitch-out to ensure the file is compatible with your machine, thread, and fabric. This quality control step prevents costly mistakes on the final garments. A reduced fee of $15 to $25 is fair, as it covers your time, machine usage, and the materials used for the important test run.
What's the best way to price simple text or a monogram?
For simple text and monograms, flat-rate pricing is often faster and easier for both you and the customer. Instead of calculating stitch counts, establish set prices based on size or number of characters. For example, you could charge $10 for a three-letter monogram up to 3 inches tall or $12 for a single line of text like a name. This simplifies the quoting process for very common and straightforward embroidery requests.
How do I factor in mistakes or wasted materials into my pricing?
The best way to account for mistakes is to build a small margin into your overall cost structure. This isn't a separate fee you show the customer, but part of your overhead calculation. When pricing custom embroidery work, adding 3-5% to your operational costs helps create a buffer. This covers the occasional thread break, needle break, or mis-hooped garment, ensuring that unavoidable errors don't completely erase your profit margin on a job.


