

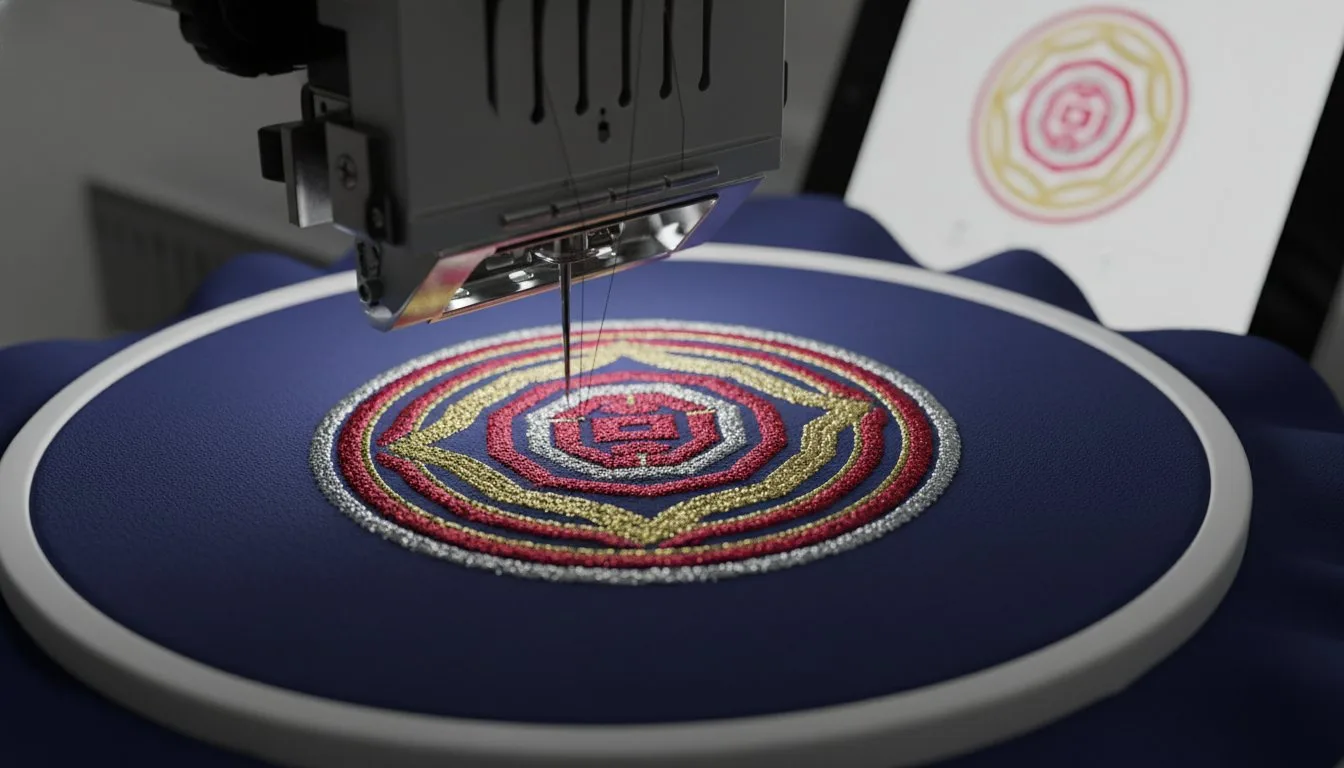
- Pull compensation is a proactive setting that widens stitches to account for fabric "pull" during the embroidery process.
- Without these adjustments, circles often appear as ovals and gaps form between fill stitches and their outlines.
- Advanced tools like the "Independent Pull Comp" in Wilcom EmbroideryStudio 2026 now allow for precise, side-specific corrections.
- Mastering these settings reduces project waste and ensures crisp results for everything from intricate logos to high-performance sports embroidery on gear from 2XU.
You've just spent an hour digitizing a perfect logo, but when the machine stops, your circle looks like a squashed oval and there's a visible gap between the fill and the border. It's incredibly frustrating when your digital embroidery designs look flawless on the screen but fail on the fabric. We've all been there, staring at a ruined garment and wondering where the alignment went wrong. This guide provides pull compensation in embroidery explained in plain English so you can stop guessing and start stitching with confidence. I'll show you how to balance thread tension against fabric elasticity to prevent distortion. We'll explore how to adjust your software settings to ensure your anime embroidery or NFL designs come out looking professional every single time.
- Understand how thread tension physically cinches fabric fibers so you can anticipate distortion before you even start your machine.
- Identify how fabric elasticity and stabilizer choices act as the primary variables that dictate how much compensation your design actually needs.
- Learn the difference between global and object-based settings to get pull compensation in embroidery explained through practical software adjustments.
- Discover why choosing professionally digitized car or anime embroidery designs can save you hours of manual troubleshooting by accounting for "push and pull" from the start.
Table of Contents
- Executive Summary: The Essentials of Pull Compensation
- The Mechanics of Pull: Why Your Machine Distorts Shapes
- Critical Factors That Change How Much Compensation You Need
- Practical Adjustments: Tuning Your Designs for Different Fabrics
- Choosing the Right Designs: How Professional Digitizing Saves Your Projects
Executive Summary: The Essentials of Pull Compensation
I must start by acknowledging a difficult reality in our craft. I'm sorry to say that what you see on your computer screen is rarely what you get on your fabric without deliberate intervention. This discrepancy isn't a flaw in your machine or your talent; it's a technical barrier caused by the physics of thread. When we talk about pull compensation in embroidery explained, we're describing the necessary over-correction we apply to digital files to combat the natural tendency of stitches to cinch and pull fabric together. It's a proactive strategy to ensure your final product matches your vision.
Stitches don't just sit on top of the material. They actively pull the fibers toward the center of the stitch path. If you're stitching a column of satin stitches, the fabric will narrow along that path. This is one of the most basic Embroidery fundamentals that every creator must master. If you ignore this pull, your circles will inevitably turn into ovals. You'll also see those frustrating gaps where your fill stitches fail to meet their borders. I apologize for the complexity this adds to your workflow, but understanding this physical "scrunching" is the only way to achieve professional results.
I've found that the amount of compensation you need isn't a fixed number. It changes based on your fabric's stretch and how well you've stabilized the hoop. A soft cotton jersey will pull much more than a heavy denim. While it's a technical hurdle, many high-quality machine embroidery designs already have these factors built-in. When you use professional digital embroidery designs from a shop like Embroidery n Sewing, the digitizer has already accounted for these forces, which saves you from having to manually adjust every node.
### Key Takeaways for Immediate Success
- Always test first. I regret to inform you that there's no shortcut here. You must stitch a sample on a scrap of the same fabric you'll use for the final project.
- Match fabric to settings. Heavier fabrics like canvas usually require less compensation. Stretchy knits need much more to keep shapes from distorting.
- Stabilize properly. Your stabilizer is the anchor. If it's too weak for the stitch density, no amount of software adjustment will fix the pull.
### Visualizing the Problem: Screen vs. Stitch-out
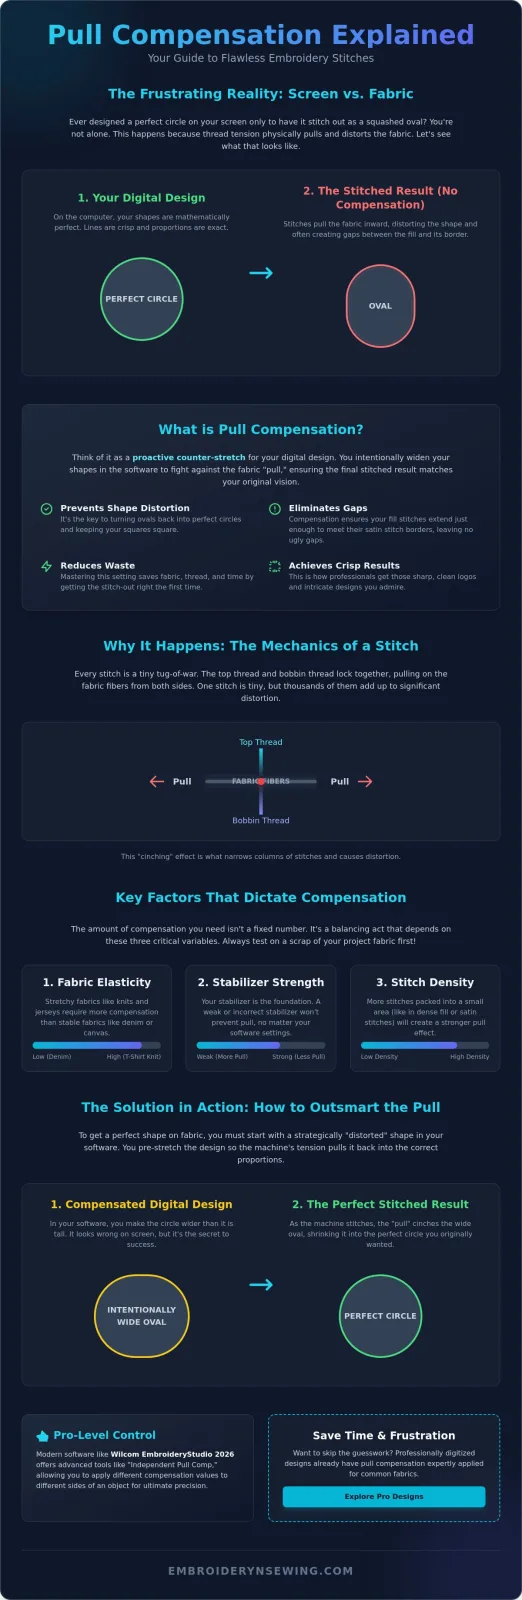
Imagine a diagram of a perfect, symmetrical circle on your computer screen. The lines are crisp and the diameter is even all the way around. This is the "ideal" state of your design. Now, imagine a second diagram showing that same circle after it's been stitched onto a t-shirt. Because the stitches pull inward, the circle now looks like a tall, thin oval. The sides have been "pulled" toward the center.
To fix this, a digitizer must create a "distorted" shape on the screen to get a "perfect" shape on the fabric. In your software, you'll actually draw an oval that looks a bit too wide. When the machine's thread tension pulls that wide shape inward, it shrinks down into a perfect circle. This is pull compensation in embroidery explained through visual logic. You're essentially "pre-stretching" the design on your screen so the machine's tension pulls it back into the correct proportions. It's a necessary step for everything from sports embroidery to complex car embroidery designs.
The Mechanics of Pull: Why Your Machine Distorts Shapes
I'm sorry to say that your embroidery machine is essentially a tiny tug-of-war. Every single stitch involves a high-speed negotiation between the top thread and the bobbin thread. To create a lockstitch, these two threads must meet in the middle of your fabric and pull against each other. This tension is a technical barrier that we cannot simply turn off. As the needle penetrates the material, the thread cinches the fibers together. While one stitch might only move the fabric a fraction of a millimeter, the effect is cumulative. When your machine executes thousands of stitches in a small area, those tiny tugs add up to significant distortion. This physical reality is why pull compensation in embroidery explained through physics is so much more helpful than just clicking buttons in a software menu.
The more stitches you pack into a row, the more the fabric will displace. If you're working on high-density anime embroidery designs, the sheer volume of thread creates a massive amount of internal pressure. I regret that this often leads to puckering or shifting if the design hasn't been properly adjusted. The fabric has to go somewhere, and the tension of the thread will always try to pull the material toward the center of the stitch path. It's a constant battle between the structural integrity of your garment and the force of the machine.
The "Pull" Effect in Satin Stitches
Satin columns are the most common victims of the pull effect. Whether you're stitching a border or the letters in a logo, those long stitches act like little rubber bands. They pull the edges of the column inward. I've often seen a 4mm wide column on a computer screen shrink down to 3.5mm or less once it hits the fabric. This is especially true if you're using heavy 40-weight thread, which carries more physical mass and tension than thinner specialty threads. If you don't widen these columns in your software, your text will look skinny and unprofessional.
### The "Push" Effect: The Other Side of the Coin
While stitches pull the fabric inward along their width, they actually push it outward at the ends of the stitch path. Think of a rolling pin moving over a piece of dough. As the needle moves along a fill area, it displaces the fabric fibers forward. This means your design might "grow" in length even as it "shrinks" in width. This dual action is why outlines often fail to line up. If you're using machine embroidery designs that haven't been professionally digitized, you'll likely see the fill area creeping past the border on the top and bottom while leaving gaps on the sides. Understanding this push and pull relationship is the key to pull compensation in embroidery explained for real-world projects.
Critical Factors That Change How Much Compensation You Need
I'm sorry to say that there is no "magic number" for pull compensation. I apologize for the complexity this creates, but your settings must change every time you switch fabrics. Fabric elasticity is the single most important variable. I've observed that stretchy knits, like the cotton used in t-shirts or sweatshirts, demand the highest levels of compensation. Because the fibers are loosely looped together, they offer very little resistance to the thread's pull. Without a significant adjustment, your design will collapse inward. I regret that I cannot provide a universal setting, as the technical barrier lies in the unique physical properties of each textile.
Having pull compensation in embroidery explained in the context of material science helps you understand why a setting that worked on denim will fail on a jersey knit. While denim is a stable woven fabric that resists shifting, a knit fabric is essentially a moving target. I must also point out that your stabilizer acts as the critical anchor for your project. If your stabilizer is too light or poorly hooped, it cannot resist the tension of the stitches. This means that even the best digitizing can be undone by poor hooping technique.
Beyond fabric type, you must consider the density of your design. I've found that the following factors directly impact how much the material will shift:
- Stitch Density: More stitches per millimeter mean more physical force pulling on the fabric fibers.
- Hoop Tension: Fabric should be "drum tight" but not stretched. If you over-stretch the fabric in the hoop, it will "spring back" once released, causing puckers around the design.
- Stitch Length: Longer stitches generally pull more than shorter ones, as they have more leverage over the fabric.
Fabric Types and Their Personalities
Knits are notoriously difficult because they stretch in multiple directions. I recommend increasing your pull compensation values significantly when working on these materials. Woven fabrics like canvas or twill are much more forgiving. They have a tight, interlaced structure that naturally resists the "cinching" effect of the needle. I also want to mention "slippery" fabrics like silk or satin. These require specialized hooping strategies, such as using a "sticky" stabilizer, because they tend to slide within the hoop. If the fabric slides, your compensation settings will no longer align with the physical reality of the stitch-out.
The Role of Underlay Stitches
Underlay stitches are your first line of defense. I view them as a foundation that pins your fabric directly to the stabilizer before the heavy fill stitches begin. A well-designed underlay reduces the amount of manual pull compensation you need to apply in your software. It creates a structural "grid" that holds the fabric fibers in place. This is a core part of machine embroidery sewing that every creator should study. When you use professional machine embroidery designs, the underlay is already optimized to minimize shifting, which ensures your final product remains distortion-free.
Practical Adjustments: Tuning Your Designs for Different Fabrics
I'm sorry to say that even with high-end software, you'll still face a learning curve when adjusting your designs. I apologize for the trial and error involved, but finding the perfect settings for your specific machine is a technical barrier we must address. Most digitizing programs offer two main ways to handle this: global or object-based adjustments. Global settings apply a blanket change to the entire file. Object-based settings are much more precise. They allow you to apply pull compensation in embroidery explained through individual adjustments to specific shapes or columns. If your software allows it, I recommend object-based tuning for complex projects like NFL embroidery or detailed car embroidery designs.
Automatic compensation is a great starting point. It applies a fixed millimeter increase to all satin columns. However, manual compensation is sometimes necessary. This involves physically moving the nodes or points of your design beyond the intended border. While it's more time-consuming, it gives you total control over how the thread interacts with the fabric grain. I've found that a combination of both methods usually yields the most professional results.
Fabric Compensation Reference Table
I've put together this cheat sheet to help you navigate common materials. Please remember that these are starting points. I suggest you always run a small test stitch before committing to a final garment.
| Fabric Type | Recommended Comp | Recommended Stabilizer |
|---|---|---|
| Pique (Polo Shirts) | 0.3mm | Medium Cut-away |
| Jersey (T-shirts) | 0.4mm | Light/Medium Cut-away |
| Denim / Canvas | 0.1mm | Tear-away or Heat-away |
Pro Tip: Your thread choice matters just as much as your fabric. Polyester thread is generally more elastic than rayon. If you switch to polyester, you might need to slightly increase your compensation values to account for that extra stretch.
Troubleshooting Common Distortion Issues
If you see gaps at the top or bottom of a fill area, you likely need to increase your push compensation. This happens when the material is shoved forward by the needle's movement. Conversely, if your satin columns look like skinny sticks instead of bold letters, you must increase your pull compensation. These issues are frustrating, but they're easily fixed once you understand the physics at play. I encourage you to follow [how to embroider] best practices, such as proper hooping and choosing the right needle size, to minimize these errors from the start.
If you're tired of fighting with settings, I suggest browsing our collection of professionally digitized machine embroidery designs. These files are pre-tuned to handle standard fabric pull, so you can spend more time stitching and less time troubleshooting.
Choosing the Right Designs: How Professional Digitizing Saves Your Projects
I'm sorry to say that not everyone has the time or desire to become a professional digitizer. While the previous sections provided pull compensation in embroidery explained for those who want to adjust their own settings, I realize that most stitchers just want to buy a file and get to work. I apologize for the technical barrier that digitizing presents; it's a specialized skill that takes years of practice to master. This is why choosing the right source for your digital files is the most important decision you'll make for your project. If the file isn't built correctly from the start, no amount of machine adjustment will fix it.
When you purchase high-quality machine embroidery designs from a professional shop like Embroidery n Sewing, you're paying for the digitizer's expertise in physics. I've seen countless garments ruined by "free" designs found on obscure internet forums. These files are often auto-traced, which means a computer program simply converted a picture into stitches without considering fabric pull. A professional design, however, has been tested on various machines and materials to ensure it holds its shape. I've found that these pros build the compensation directly into the stitch path, so you don't have to.
What to Look for in a Digital Design
I suggest you examine the stitch preview in your software before you ever hit the start button. A well-digitized file won't look "perfect" on the screen. Look closely at the edges where a fill area meets an outline. You should see a slight overlap. If the fill stops exactly at the border on your screen, I regret to inform you that you'll likely have gaps on your fabric. This overlap is the digitizer's way of applying pull compensation. You should also look for a robust underlay. If the design starts with a series of light stitches that map out the area before the heavy embroidery begins, you're looking at a file built for success. Avoid designs that look too "thin" or lack density control, as they'll likely shift during production.
The Value of Quality Digital Patterns
Investing in premium [embroidery designs]is actually a cost-saving measure. While it might seem cheaper to use free files, the cost of ruined hoodies, wasted thread, and broken needles adds up quickly. I've found that professional patterns provide a level of consistency that home machines need to produce retail-quality results. Whether you're looking for anime embroidery designs or specific sports embroidery logos, the technical precision in a pro file accounts for the "push and pull" naturally.
I invite you to explore the wide range of embroidery patterns available at Embroidery n Sewing. Every file in our collection, from college embroidery designs to Nike embroidery designs, is created with these distortion-free principles in mind. I apologize that I cannot make the physics of thread tension disappear, but I can provide you with the tools to work around them successfully. Start your next project with a design that's already been tuned for performance so you can focus on the joy of creating.
Achieve Crisp Results on Every Project
I'm sorry to say that the physics of thread tension will always present a technical barrier in our craft. I apologize if this reality feels daunting, but mastering these physical adjustments is the only way to achieve truly professional results. We've explored how fabric elasticity and stabilizer choices act as the primary variables for your success. Having pull compensation in embroidery explained helps you understand that gaps and ovals aren't machine failures. They're simply natural reactions of the material that you can now predict and correct.
If you want to skip the frustrating trial and error, I suggest you Browse Professional, Pre-Compensated Embroidery Designs. Our high-quality digital designs are rigorously tested for home machines to ensure they stitch perfectly every time. We offer a wide variety of sports, anime, and NFL embroidery patterns with instant download for your immediate project starts. You now have the tools to troubleshoot distortion and choose the right files for your specific fabric. I'm confident your next project will look incredible.
Frequently Asked Questions
What is the difference between push and pull compensation?
Pull compensation widens the stitch width while push compensation shortens the stitch length. I'm sorry to say that both effects happen simultaneously as the needle moves. Stitches pull the fabric inward on the sides and push it outward at the ends of the stitch path. I've found that balancing both is the only way to keep your designs from shifting out of alignment on the hoop.
How much pull compensation should I use for a 100% cotton T-shirt?
I suggest using a setting of 0.4mm for a standard jersey cotton T-shirt. I apologize for the extra effort this requires, but knits are much more elastic than woven fabrics and pull significantly during the stitching process. If you're stitching a dense logo, you might even need to go higher. I always recommend a test stitch on a scrap piece to verify the results.
Why does my embroidery outline not line up with the fill?
Your outline and fill don't line up because the fabric shifted while the machine was running. I regret that this is a common technical barrier when the fill density is high. The stitches pull the fabric toward the center, leaving a visible gap where the outline was originally digitized. Increasing your compensation settings will help the fill area reach the border as intended.
Can I add pull compensation to a design I already bought (PES/DST file)?
I'm sorry to report that adding compensation to stitch-based files like PES or DST is difficult. These files don't contain the original objects that software needs for precise adjustments. I apologize for the limitation, but your best option is to use a global compensation setting in your software. This will apply a blanket increase to all stitches in the design rather than targeting specific shapes.
Does the type of stabilizer I use affect pull compensation?
Yes, your stabilizer choice is the foundation that resists thread pull. I've observed that a weak stabilizer allows the fabric to cinch much more easily under the needle. This forces you to use higher compensation settings in your design file. I recommend using a heavy cut-away stabilizer for stretchy fabrics to minimize the amount of digital correction needed to keep things straight.
Is pull compensation the same as thread tension?
No, pull compensation and thread tension are two different technical concepts. Thread tension is a mechanical setting on your embroidery machine that controls how tight the thread is. Pull compensation is a digital setting in your software that changes the actual shape of the design. I must explain that you use compensation to fix the physical distortion that thread tension naturally causes.
Why do circles always look like ovals in my embroidery projects?
Circles look like ovals because the stitches pull the fabric inward along the horizontal path of the needle. I apologize for the frustration this causes, but it's a basic physical reality of machine embroidery. To fix this, pull compensation in embroidery explained in this article suggests making the circle slightly wider on your screen. The machine's tension will then pull it into a perfect circle.
How do I know if a design I purchased has pull compensation built-in?
You can check for built-in compensation by zooming in on the design in your software's preview mode. I've found that professional designs will show the fill stitches slightly overlapping the border or outline. If the fill stops exactly at the edge on your screen, I'm sorry to say it probably lacks the necessary pull compensation in embroidery explained for professional results on stretchy fabric.


