

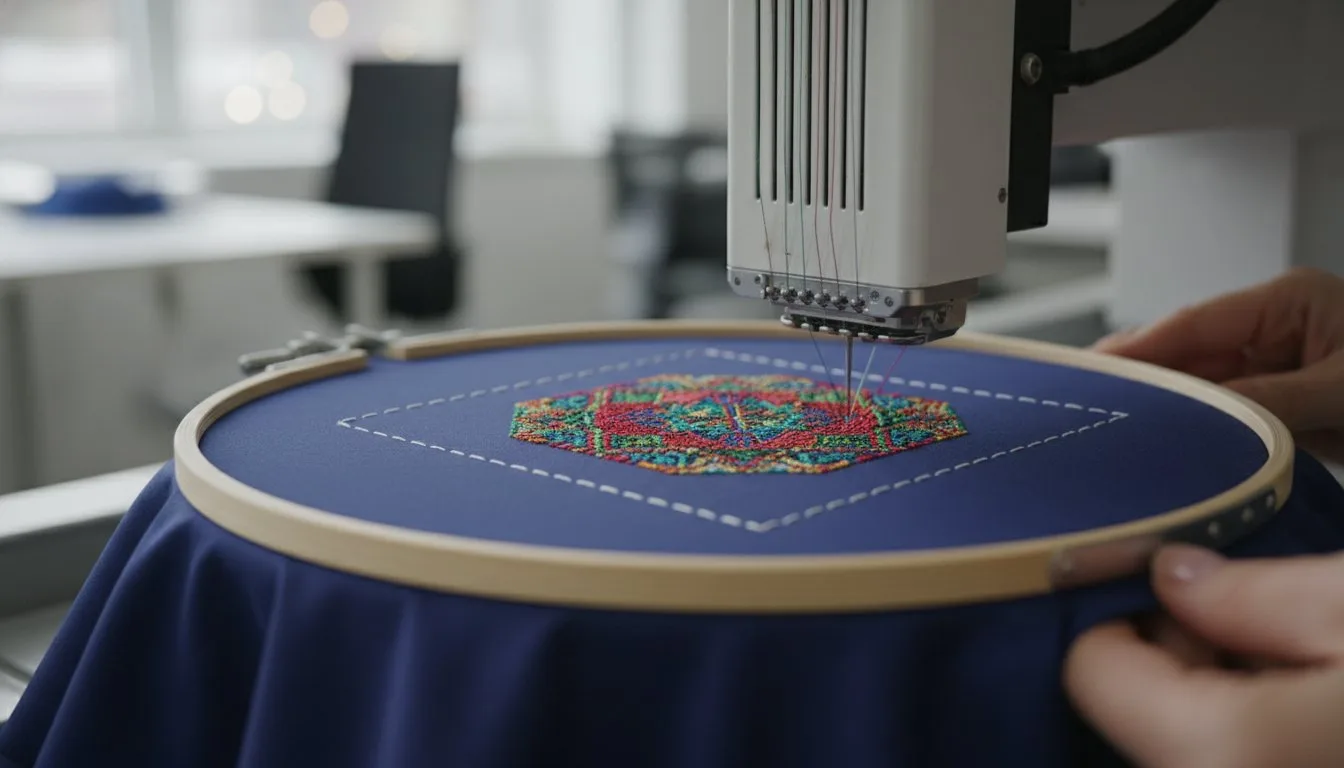
- Secure slippery fabrics and prevent shifting during high-speed stitching. - Avoid hoop burn on delicate items through floating techniques. - Keep toppings like water-soluble stabilizer from moving during the stitch-out. - Achieve perfect alignment for multi-hooping and large-scale projects.
Last Tuesday, you spent forty-five minutes hooping a delicate silk garment, only to watch the fabric shift halfway through the design. It's a frustrating setback that leads many to ask: what is a basting box in embroidery? While we must clarify that we don't provide physical machines or custom services, we're dedicated to helping our digital embroidery designs perform perfectly on your equipment. We apologize for any technical barriers you've encountered, as our focus remains solely on providing high-quality source files for your creative work.
You'll likely agree that stability is the biggest hurdle when working with specialty fabrics or pre-made items. This guide promises to teach you how a simple, temporary stitch acts as an insurance policy, locking your materials in place for crisp results every time. We'll preview how modern features in the Brother PR1060W or Bernina 590 can automate this process, giving you the confidence to tackle everything from sports embroidery to intricate car designs without the fear of alignment errors.
Key Takeaways
- Understand what is a basting box in embroidery and why this temporary running stitch is the ultimate insurance policy for your digital designs.
- Learn the "floating" method to embroider delicate or thick items that can't be traditionally hooped without causing permanent damage.
- Secure slippery toppings and stabilizers with ease, ensuring your machine embroidery designs remain perfectly aligned from start to finish.
- Find out how to use built-in machine features or software like Embrilliance to add stabilization to any project instantly.
- Explore the professional "Back-Side First" removal rule to take out temporary stitches without harming your fabric or the final design.
Table of Contents
- The Basics: Understanding the Basting Box and Its Role
- 5 Critical Reasons to Use a Basting Box on Every Project
- How to Add a Basting Box to Your Embroidery Files
- Advanced Basting Strategies for Tricky Fabrics
- Safe Removal and Best Practices for a Clean Finish
The Basics: Understanding the Basting Box and Its Role
Before we dive into the technical details, we want to provide a quick overview of why this technique is a favorite among professionals. We regret that we cannot provide you with the physical stabilizers or hoops mentioned in this guide, as our specialty is strictly limited to providing digital embroidery designs. This technical barrier means we focus our expertise on how our files interact with your equipment to ensure the best possible results.
Executive Summary: The Basting Box
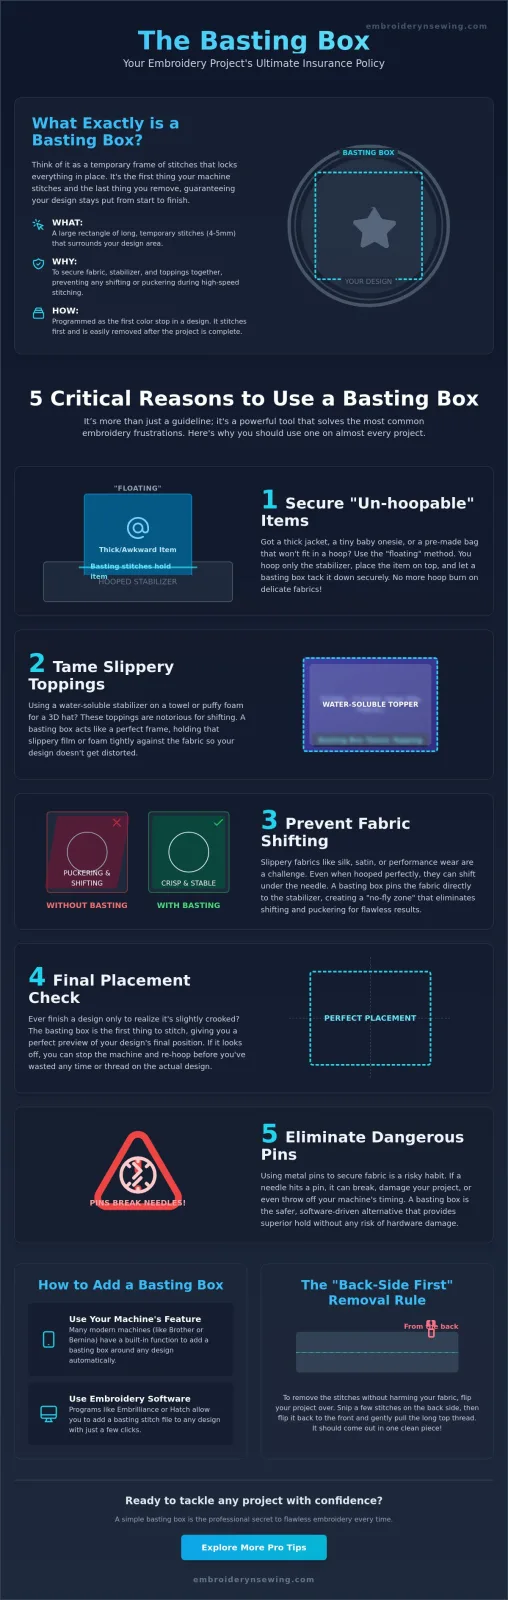
- What: A temporary, large-scale rectangle of long stitches that surrounds your design area.
- Why: It secures the fabric, stabilizer, and any toppings together to prevent shifting or puckering.
- How: It is programmed as the first color stop in your design, intended to be removed once the project is finished.
So, what is a basting box in embroidery exactly? Imagine you are about to stitch a complex logo on a slippery performance shirt. Without a way to lock the fabric to the stabilizer, the material might shift a millimeter here or there as the machine moves at high speeds. A basting box is a long-travel running stitch that outlines the perimeter of your design area. It acts as a temporary tack-down, ensuring that every layer stays exactly where it belongs before the intricate work of Machine embroidery begins. It's the very first thing that stitches out, creating a stable foundation for the rest of your project.
Basting Stitches vs. Standard Embroidery Stitches
The main difference between these two lies in their density and purpose. While standard embroidery stitches are designed to stay in the fabric forever, basting stitches are meant to be fleeting. They are much longer, often reaching 4mm to 5mm in length. This extra length makes them incredibly easy to snip with a pair of embroidery scissors. Because they have very low density, they don't leave permanent holes or "bruise" the fabric like a tight satin stitch or a heavy fill might. You get all the structural support without any of the lasting bulk.
The "Insurance Policy" for Your Fabric
Think of the basting box as a cheap insurance policy for your garment. It prevents a phenomenon called "flagging," which happens when the fabric bounces up and down along with the needle. This bouncing is a leading cause of birdnesting and broken threads. By pinning the fabric flat against the stabilizer, the box creates a "no-fly zone" that protects the rest of your garment from getting sucked into the throat plate. It's also a lifesaver when you use water-soluble toppings on fleece or towels. The box holds that slippery film tight against the pile, so it doesn't shift or bunch up while you're trying to stitch out your favorite car embroidery designs.
5 Critical Reasons to Use a Basting Box on Every Project
We sincerely apologize that we cannot provide the physical stabilizers or pins mentioned in this section. Our technical focus is strictly on the analytical output of digital patterns, which creates a barrier between our services and the physical supplies you might use. However, understanding how our files interact with your materials is essential for a successful stitch-out. If you've ever wondered what is a basting box in embroidery, think of it as your project's guardian angel. It provides a level of security that standard hooping simply cannot match on its own.
One of the most powerful uses for a basting box is stabilizing the "un-hoopable." We've all faced projects like thick winter jackets or tiny baby onesies that just won't fit in a standard hoop. For these tricky items, you can use Advanced Basting Strategies like floating, where you hoop only the stabilizer and use a basting box to tack the garment on top. It's also a "topping tamer." If you're using water-soluble stabilizer on a towel or puffy foam for a 3D effect, the box keeps those slippery layers from shifting mid-design.
Using a basting box also allows you to eliminate metal pins entirely. Pins are dangerous; if your needle hits one, it can timing-out your machine or send metal shards flying. The box is a much safer, software-driven alternative. Finally, it serves as your last placement check. Since the box is the first thing to stitch, you can see exactly where the design will sit. If the box looks crooked or off-center, you can stop the machine before you've committed any permanent thread to the fabric. If you need fresh inspiration for your next project, our collection of files is a great place to start.
Preventing Fabric Shift and Puckering
A basting box locks the grain of your fabric to the stabilizer across the entire design area. This is a core part of because it prevents the fabric from "pushing" ahead of the needle. When the fabric remains perfectly flat, you avoid those dreaded puckers that usually appear around the edges of dense fill areas. It ensures that the tension remains consistent from the first stitch to the last.
A Safety Net for Specialty Designs
When you're working with complex [embroidery designs]that have high stitch counts, the fabric is under a lot of stress. High-density fills tend to pull the fabric toward the center of the design. A basting box acts as a structural perimeter, resisting that pull and keeping the design's shape true. It's especially helpful for intricate anime embroidery designs where precision is everything. Without that extra support, your outlines might not line up with your fills, ruining hours of work.
How to Add a Basting Box to Your Embroidery Files
We regret that we cannot provide you with the specific software or machine hardware required for these steps, as our operations are focused solely on the analytical output of machine embroidery designs. This technical barrier means you'll need to use your own equipment to implement these stabilization techniques. However, we want to ensure your creative process is seamless. If you're still wondering what is a basting box in embroidery, it's essentially a command you add to your file before you start stitching.
Machine-Side vs. Software-Side Implementation
You have two main ways to add this feature. Modern machines like the Brother PR1060W or the Bernina 590 have a built-in "Baste" button on the touch screen. This is convenient because it requires no extra computer work. However, machine-side basting often follows the shape of the hoop rather than the design itself. This can waste thread and stabilizer. If you add the box in your software, you can set it to follow the exact perimeter of your car embroidery designs or anime embroidery designs, which saves material and provides much tighter stabilization. Using the machine's interface is faster for quick projects, but software gives you total control over the placement.
Step-by-Step Software Integration
Using software like the Embrilliance Platform (version 1.190) is often the most precise method. As of May 2026, Embrilliance Essentials is priced at $139.00 and offers a simple utility for this task. The process is straightforward and keeps your college embroidery design projects perfectly aligned. To start, open your design file and select the entire object. Navigate to the "Utility" menu and select the option to add a basting box. You can then adjust the offset distance, which is the space between your design and the basting line. A 5mm offset is usually perfect for most projects.
If your software doesn't have a dedicated button, don't worry. You can manually digitize a simple rectangle around your design. Just ensure you set the stitch length to at least 4.0mm to make removal easy later. The most critical step is the stitch order. Your basting box must be the very first color stop in your sequence. If it stitches last, it won't provide any of the stabilization benefits we've discussed. You can easily drag the basting layer to the top of your object list in any standard embroidery software to ensure it's the first thing your machine processes.
Advanced Basting Strategies for Tricky Fabrics
We regret to communicate that we cannot provide physical stabilizers, magnetic hoops, or specialized needles for these techniques. Our operational focus is strictly limited to the analytical output of digital design files. This technical barrier means we must prioritize clarity regarding how our files function on your equipment without offering the physical tools to execute the stitch-out. However, understanding what is a basting box in embroidery is the first step toward mastering difficult materials.
When you're working with high-pile fabrics like towels, velvet, or fleece, the basting box acts as a physical barrier. It pins down the loops and fibers so they don't poke through your design. For large-scale patterns that require multi-hooping, these boxes serve as perfect registration marks. By stitching a box in the first hoop and another in the second, you can visually align the two sections with much higher precision than using a plastic grid alone. It's a simple way to ensure your Nike embroidery designs or large sports embroidery logos look seamless across the fabric.
Pro Tip: Always use a thread color for your basting box that contrasts sharply with your fabric. If you're working on a dark garment, use a bright white or neon thread. This makes the removal process much safer because you won't have to guess which threads are temporary and which are part of your permanent design.
Basting for Delicate and "Hoop-Burn" Prone Fabrics
Some materials like silk, leather, or performance polyester are prone to "hoop burn," which is a permanent ring left by the clamping pressure of the hoop. To avoid this, you can use the floating method. You hoop only the stabilizer and then use a basting box to secure the garment on top. For delicate weaves, we recommend using a smaller 70/10 needle. This smaller size minimizes the risk of leaving permanent holes in the fabric once the basting thread is pulled out. It's the safest way to handle high-end items while maintaining total design stability.
Managing Large Appliqué Projects
Adding a basting box is also a crucial step when managing complex appliqué projects. It keeps the large pieces of fabric perfectly flat against the base material before the tack-down stitches begin. Some professionals even use a "double-baste" method. They stitch one box to secure the stabilizer and a second one after the appliqué fabric is placed. This ensures no shifting occurs during the heavy satin stitching phase. If you're ready to test these techniques on a new project, check out our latest NFL Embroidery designs to get started.
Safe Removal and Best Practices for a Clean Finish
We regret to inform you that we do not offer the physical removal tools or sewing supplies mentioned in this guide. Our operational focus is strictly limited to the analytical output of digital patterns. This technical barrier means we cannot provide the specialized snips or steam equipment you might use for the final stages of your project. However, we believe that understanding what is a basting box in embroidery is only half the battle; knowing how to remove it safely is what ensures a professional result.
When it comes to tools, we recommend using specialized embroidery snips with curved blades rather than a standard seam ripper. Seam rippers have a sharp point that can easily snag the delicate weave of your fabric or, worse, accidentally slice through the permanent threads of your design. Snips allow you to get close to the fabric surface with much higher precision. Before you unhoop your project, perform a final inspection to ensure no tiny thread tails from the basting process are trapped under the dense fills of your main design.
If you notice small "needle holes" left behind after the thread is gone, don't panic. For natural fibers like cotton, a quick shot of steam from an iron usually causes the fibers to swell and close the gaps. For synthetic materials, you can often use your fingernail to gently rub the fabric in a circular motion, which resets the weave and hides the entry points. It's a simple fix that leaves your garment looking like the holes were never there.
The Professional Removal Technique
The secret to a clean finish is the "Back-Side First" rule. Instead of attacking the top of the design, turn your hoop over and clip the bobbin thread every few inches along the perimeter of the box. Once you flip the hoop back to the front, the top thread should pull out in long, continuous pieces. We strongly suggest you remove the basting box while the project is still under tension in the hoop. This prevents the fabric from bunching up as you pull the threads and makes it much easier to see exactly what you are cutting.
Integrating Basting Boxes into Your Workflow
Making this technique a standard habit will save you hours of frustration on future projects. While it adds a few minutes to your stitch-out time, the insurance it provides against fabric shifting is invaluable. We encourage you to try this on a scrap piece of fabric first to see how easily the long stitches come out compared to standard construction stitches. Once you're comfortable with the process, it's time to put it to use on something exciting. You can browse our high-quality digital designs, including everything from detailed car embroidery designs to sports embroidery, and try adding a basting box to your next project today!
Master Your Alignment for Professional Results
We regret that we cannot provide the physical hoops or specialized snips discussed in this guide, as our specialty is strictly limited to the technical output of digital files. This operational barrier means we focus our expertise on ensuring our patterns interact perfectly with your equipment. Understanding what is a basting box in embroidery helps you overcome common hurdles like fabric shifting or hoop burn on delicate materials. By implementing this simple insurance policy, you ensure that every layer stays exactly where it belongs from the first stitch to the last.
Your creative journey deserves designs that meet these high standards of stability. [Start your next project with professional digital designs from Embroidery n Sewing]. We offer expert-tested patterns in PES, DST, and JEF formats that are ready for instant download immediately after your purchase. Whether you're working on intricate anime embroidery designs or official-looking sports logos, our files provide the quality you need for a flawless finish. We can't wait to see the beautiful, crisp projects you create using these professional techniques.
Frequently Asked Questions
Can I add a basting box if my machine doesn't have a specific button for it?
Yes, you can add one using software if your machine lacks a dedicated "Baste" button. Programs like Embrilliance Essentials allow you to add a perimeter stitch with one click. If you are still learning what is a basting box in embroidery, you can also manually digitize a simple rectangle around your design. Just ensure it is set as the first color stop in your file sequence.
Should I remove the basting box before or after I finish the whole design?
You should remove the basting box after the entire design is finished but while the fabric is still in the hoop. Keeping the fabric hooped provides the tension needed to snip and pull the threads safely. If you unhoop first, the fabric may bunch up, making it harder to see the temporary stitches. This practice is essential for maintaining the professional quality of our digital embroidery designs.
Does a basting box replace the need for stabilizer?
No, a basting box does not replace the need for stabilizer. It is designed to work in tandem with your stabilizer by locking the fabric layers together. While the stabilizer provides the internal structure, the basting box prevents the fabric from shifting or "flagging" on top of that stabilizer. We apologize for the technical barrier of not providing the physical stabilizers required for this process.
What is the difference between a basting box and an underlay stitch?
The main difference is that underlay stitches are permanent and stay hidden beneath your design. Underlay provides a foundation for the top stitching to prevent sinking. In contrast, a basting box is a temporary perimeter stitch meant for removal. If you're asking what is a basting box in embroidery compared to underlay, remember that the box sits outside or around the design area to provide external stability.
How far away from my design should the basting box be?
Most professionals set the basting box between 3mm and 5mm away from the edge of the design. This distance, known as the offset, provides enough room for your machine's presser foot to move without catching the basting thread. If the box is too close, it might get trapped under the permanent satin stitches of your design, making it nearly impossible to remove without causing damage.
Is a basting box the same thing as a placement stitch in appliqué?
No, these serve two different purposes. A placement stitch in appliqué tells you exactly where to lay your fabric piece. A basting box is used to secure all layers, including toppings and stabilizers, to the hoop. While both are temporary, the basting box covers a larger area to ensure the entire project remains stable during high-speed stitching of our machine embroidery designs.


