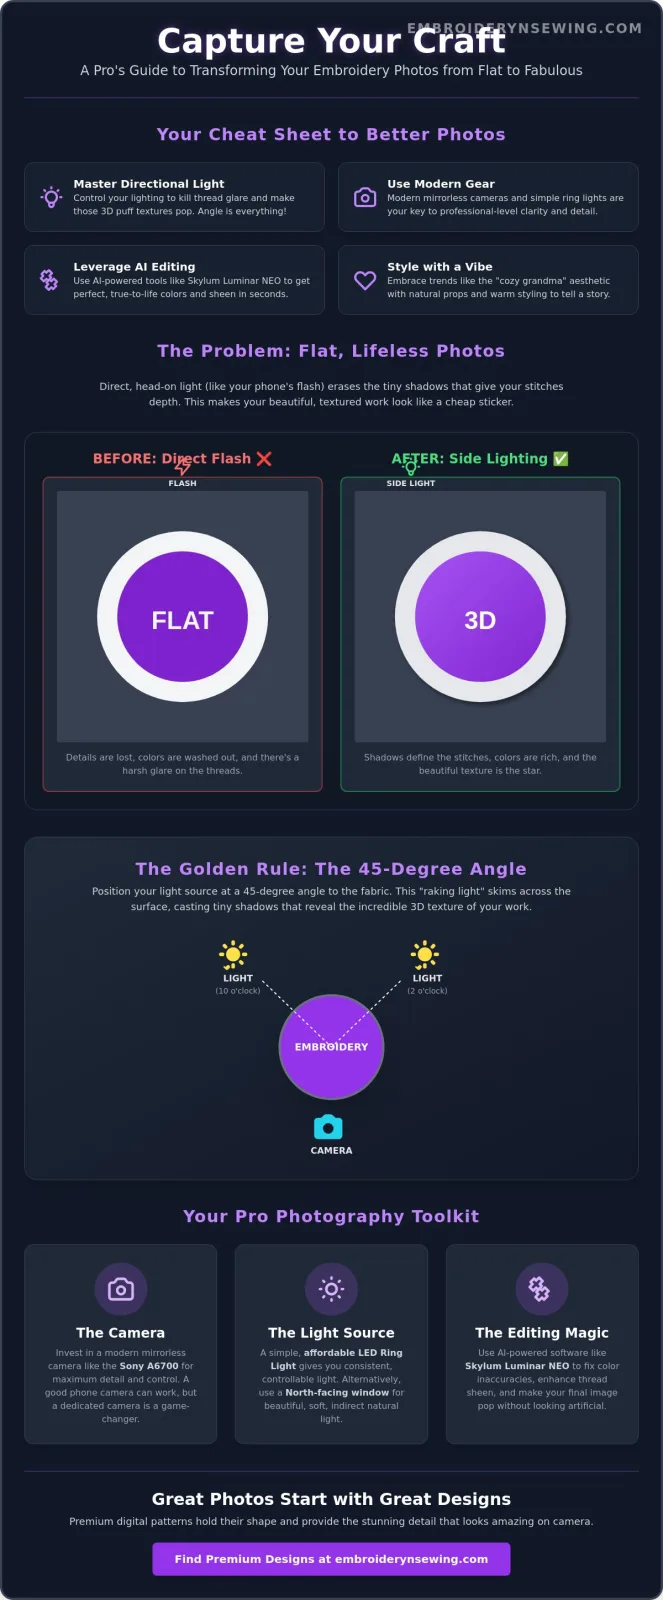
- Control directional lighting to eliminate thread glare and highlight 3D puff textures. - Utilize 2026 mirrorless cameras like the Sony A6700 and affordable ring lights for professional clarity.
- Apply AI-powered editing tools such as Skylum Luminar NEO to ensure accurate color representation. - Incorporate the trending "cozy grandma" aesthetic through natural props and warm styling.
Last Tuesday, you finished a stunning car embroidery design, but when you snapped a picture, the intricate silver threads looked like a flat grey blob. It's frustrating when your hard work doesn't translate to the screen. I apologize that I cannot provide physical photography services or custom stitching, as my focus is strictly on the creation of digital embroidery designs. However, taking good photos of embroidered items is a skill you can master with the right technical approach.
I'm going to show you the exact techniques to capture the texture, sheen, and detail of your projects like a professional. You'll learn how to manipulate light to reveal the three-dimensional stitch patterns that make your work stand out. This guide covers everything from the best 2026 camera gear to using AI editing tools that cut your workflow in half.
Key Takeaways
- Learn why side-lighting at a 45-degree angle is more effective than direct light for showing off the depth of your thread work.
- Understand the simple physical prep steps that ensure your fabric looks crisp and professional before you ever pick up a camera.
- Find out how to use AI-driven editing tools to fix color inaccuracies and make your thread sheen pop without looking artificial.
- Discover how taking good photos of embroidered items starts with choosing premium digital patterns that hold their shape under a lens. - Compare modern LED ring lights with natural light sources to find the best setup for your specific home studio environment.
Table of Contents
- Why Your Embroidery Photos Look Flat (And How to Fix It)
- Mastering the Light: Natural Sunshine vs. Ring Lights
- Styling Your Stitches: From Crisp Flat Lays to Detail Shots
- The Editing Secret: Making Your Embroidery Pop
- Showcasing Your Skills with Premium Digital Designs
## Why Your Embroidery Photos Look Flat (And How to Fix It)
I must begin by clarifying that I do not offer physical photography services or sewing supplies; my expertise is limited to the technical analysis and creation of digital patterns. However, I can explain why your current images might lack the professional punch you see on social media. Taking good photos of embroidered items is difficult because you're dealing with three-dimensional topography, not a flat surface.
- Shadow is your friend: Without shadows, stitch depth disappears and the design looks like a sticker.
- Angle matters: Light should hit the fabric from the side to define individual stitch ridges.
- Material awareness: Shiny polyester reflects light differently than matte cotton, requiring different light intensities.
- Equipment limits: Standard phone flashes are generally unsuitable for capturing fine textile details.
When you photograph a flat print, light just needs to be even. Embroidery is different. Each stitch is a tiny mountain that casts a shadow. If your light source is directly in front of the design, it fills those shadows and flattens the image. This flatness often leads viewers to underestimate the craft. High-quality visuals of premium embroidery designs signal professional standards and attention to detail. To achieve this, you must master specific photographic lighting techniques that prioritize directional light over general brightness.
The Problem with Direct Flash
Using a built-in phone flash is the quickest way to ruin a shot. It creates a harsh, centered light that washes out vibrant thread colors and creates a plastic look. Because the light comes from the same angle as the lens, it eliminates the tiny shadows between threads. I recommend turning off your flash entirely and relying on external lamps or windows. This prevents the blown out look where white or light-colored threads lose all visible detail in a sea of white glare.
Understanding Thread Sheen and Reflection
Different threads react to light in unique ways. Polyester threads, common in many car embroidery designs, have a high sheen that can create hot spots or blinding white reflections. Cotton threads are more forgiving but can look dull if the light is too soft. When light hits a satin stitch, it reflects along the length of the thread. If your light isn't positioned correctly, you'll see a distracting glare instead of the beautiful texture of the stitch pattern. Understanding this reflection is the first step toward better photography.
Mastering the Light: Natural Sunshine vs. Ring Lights
I must clarify that I do not sell lighting equipment, cameras, or physical embroidery supplies. My role is strictly limited to the development of digital patterns. However, I recognize that the technical barrier to taking good photos of embroidered items often lies in lighting choices. You have two primary options: the unpredictable beauty of the sun or the consistent control of an LED setup. Both require a specific strategy to avoid the flat, dull look discussed in the previous section.
The most important rule is the 45-degree placement. Imagine your embroidered item is at the center of a clock face. You should place your light source at the 10 o'clock or 2 o'clock position. This "raking light" skims across the surface of the stitches, creating tiny shadows that define the texture. If you're documenting intricate embroidery designs, this angle is non-negotiable. Without it, your work looks like a flat print rather than a textured masterpiece.
While many photographers praise the "Golden Hour," I find it's often too warm for textile work. The heavy yellow and orange hues of a sunset will distort your thread colors. White threads will look cream, and blues may shift toward green. For true color accuracy, you need neutral, white light. If you're just starting out, this beginner's guide to product photography offers excellent foundational tips on managing exposure and stability.
The Power of North-Facing Windows
North-facing windows are the "Holy Grail" because they provide soft, indirect light all day. You won't get the harsh, direct sunbeams that cause "hot spots" on shiny polyester threads. To set this up, place your table about two feet from the window. Use a piece of white foam board on the side opposite the window. This acts as a "bounce," reflecting soft light back into the shadows so the design doesn't look too dark on one side. It's a professional look for the cost of a piece of poster board.
Ring Lights and Artificial Setups for 2026
If you prefer working at night, artificial light is your best friend. In 2026, affordable options like the NEEWER 18-inch LED Ring Light Kit ($119.99) or the Godox LR150 ($59.99) make this accessible. Set your light to 5500K, which mimics natural daylight. This ensures your NFL Embroidery projects look the same on screen as they do in person. To avoid the tell-tale "ring" reflection in your satin stitches, place a thin white sheet over the light to diffuse the glow. This softens the output and creates a professional, high-end finish.
Styling Your Stitches: From Crisp Flat Lays to Detail Shots
I must clarify that while I sell digital patterns, I do not provide the physical sewing tools, fabrics, or backgrounds described here. My operational focus is strictly limited to the technical creation of digital files like Anime Embroidery Designs. However, once your machine has finished its work, the styling process begins. Taking good photos of embroidered items is impossible if the fabric is wrinkled or covered in stray fibers. Before you even reach for your camera, you should spend five minutes with a lint roller and a steam iron. These small steps ensure that the camera captures the precision of the stitches rather than distracting imperfections in the material.
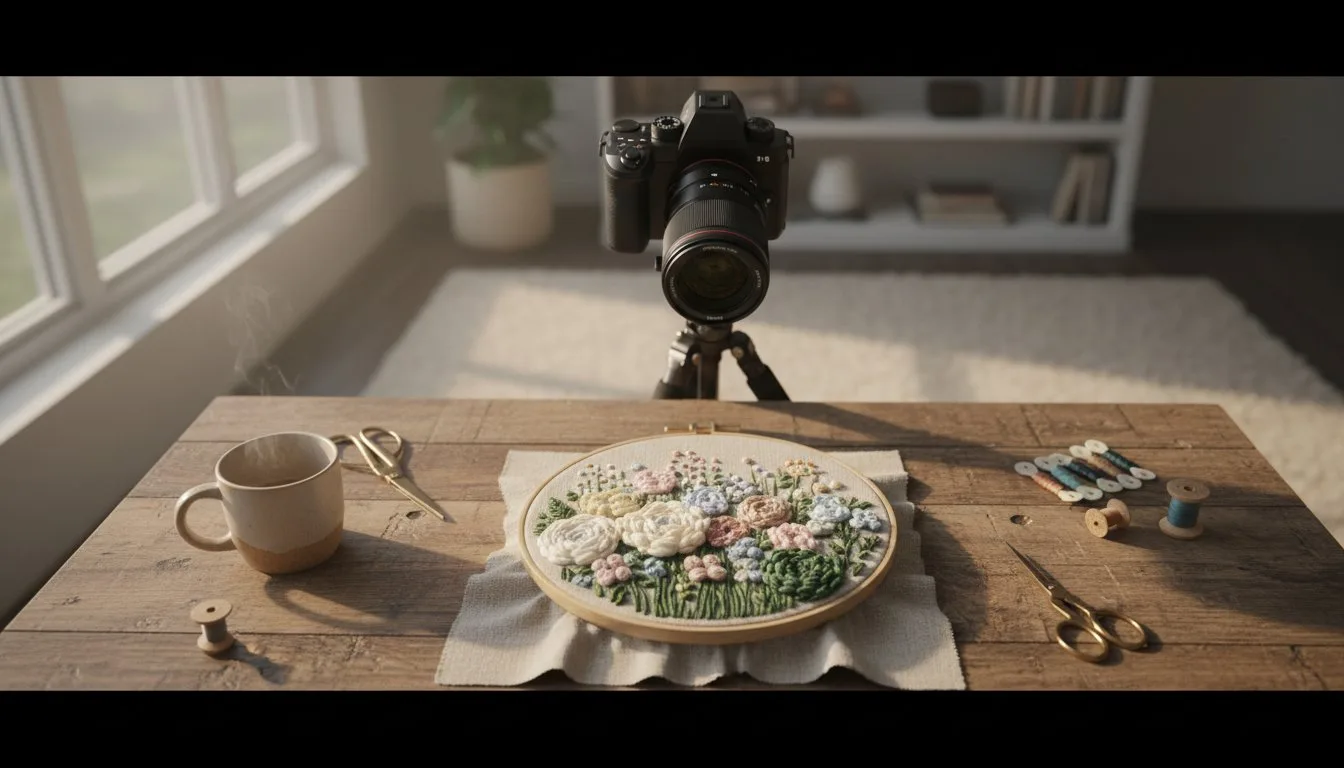
Composition is the next hurdle. I recommend using a simple hand-drawn diagram to plan your shot before you begin. Sketching a 3x3 grid helps you apply the "Rule of Thirds" effectively. For a circular hoop, try placing the most intricate part of the design at one of the grid's intersections rather than directly in the center. This creates a sense of movement and balance that leads to stunning product photography. Surround your main subject with props that tell a story, such as matching thread spools or vintage embroidery scissors, to ground the design in a "handmade" context.
The Art of the Perfect Flat Lay
When you're photographing a garment featuring a College embroidery Design, avoid letting the fabric lie completely flat and lifeless. I suggest lightly stuffing the inside of the shirt with acid-free tissue paper to provide a subtle 3D lift. Place the item on a neutral, textured surface like a light linen cloth or a reclaimed wood table. These textures complement the "cozy grandma" aesthetic trending in 2026 without competing with the complexity of your Nike embroidery designs.
To truly showcase your skill, you need to get close. Most 2026 smartphones feature a dedicated Macro Mode that allows you to capture the individual twists in the thread. This is especially important for 3D puff embroidery. When shooting at this range, you'll notice a shallow "depth of field," which is essentially the zone of sharpness in your photo. If the top of the stitches is sharp but the fabric is blurry, you've achieved a professional look. For the thickest designs, such as NFL Embroidery logos, ensure your focus point is set on the highest part of the thread to maintain clarity where it matters most.
The Editing Secret: Making Your Embroidery Pop
I regret that I cannot offer personalized photo editing services or post-production support for your projects, as my operations are dedicated to digitizing Machine embroidery designs. However, I can explain the technical logic behind professional textile editing. The goal of taking good photos of embroidered items isn't to create an "artistic" filter; it's to achieve absolute accuracy. If the colors on the screen don't match the threads in your hand, you lose the trust of your audience.
The most powerful tool in your 2026 editing kit is the "Clarity" or "Structure" slider. While many beginners reach for the saturation button, professional editors know that saturation can actually hide thread texture by bleeding colors together. Instead, increasing the structure adds contrast to the tiny edges of each stitch. This makes the individual paths of your Car embroidery designs stand out with a three-dimensional effect. For free mobile editing, I recommend Adobe Lightroom Mobile or Snapseed, as they offer precise control over these specific textile details.
Correcting White Balance
Indoor lighting often leaves a yellow or orange tint on your fabric. This ruins the professional look of your feed. To fix this, use the "eyedropper" tool found in most editing apps. Click on a part of your photo that should be pure white, such as the stabilizer or the base fabric. The software will automatically shift the color temperature to neutralize the yellow tones. Maintaining this consistent white balance across all your posts creates a cohesive brand gallery that highlights the quality of your Sports Embroidery work.
Cropping for Social Media Impact
In 2026, aspect ratios are critical for engagement. For Instagram, a 4:5 vertical crop is the standard for taking good photos of embroidered items because it occupies the most screen space. For Pinterest, a 2:3 ratio works best to showcase long-form detail. When you crop, don't just center the design. Position the most intricate part of the stitch work on a grid intersection to lead the viewer's eye naturally toward your skill. If you're working with high-quality patterns, a tight crop on the logo's edge can often be more impactful than a wide shot of the entire garment.
If you want to spend less time editing and more time stitching, it helps to start with patterns that are already optimized for visual clarity. Explore our latest collection of premium to see how professional digitization makes your final photography much easier.
Showcasing Your Skills with Premium Digital Designs
I must clarify that I do not offer physical embroidery services or machine repair; my professional output is strictly centered on the development and analysis of digital patterns. However, I've observed that the process of taking good photos of embroidered items starts long before you pick up a camera. It begins at the digitizing stage. Even the most expensive Sony A6700 camera cannot hide the flaws of a poorly digitized file. If a design causes the fabric to pucker or has uneven density, those physical defects will create distracting shadows that ruin your shot. Using professional embroidery patterns ensures a flat, clean stitch-out that makes your photography work much easier.
When you use high-quality embroidery designs, you're giving yourself a head start. These files are optimized for specific thread weights and fabric types, which means the thread will catch the light exactly as intended. I recommend sharing your finished photos with the wider embroidery community. It's a great way to show off your technical progress while helping others see how a digital file translates into a physical masterpiece. High-resolution photos are the best way to prove the precision of your work.
Validating Your Work
A crisp photo is more than just social media content; it's a form of validation for your machine embroidery skills. When customers or followers can see the individual paths of the thread, it builds immediate trust in your craft. Before you hit the post button, run through this final checklist for taking good photos of embroidered items:
- Is the fabric completely free of lint and stray threads?
- Does the lighting highlight the 3D texture without creating "hot spot" glares?
- Is the white balance accurate so the thread colors look real?
- Does the crop lead the eye toward the most detailed part of the design?
Next Steps: Practice Makes Perfect
I suggest starting a "daily stitch and shoot" habit. You don't need to finish a full jacket every day. Even a small test swatch of new embroidery stitches can serve as a subject for lighting practice. The more you experiment with different angles and props, the faster you'll develop a signature style that makes your feed stand out. If you're looking for fresh inspiration for your next project, visit our shop to explore the latest Anime, Sports, and Car embroidery designs. Our premium patterns are designed to look as good in person as they do under the camera lens.
Ready to Share Your Masterpiece?
I must remind you that I don't offer custom photography or physical finishing services, as my technical expertise is focused on the creation of digital files. However, you now have the tools to ensure your work looks spectacular on screen. By mastering the 45-degree lighting angle and prioritizing clarity over saturation in your edits, you can bypass the flat, dull look that plagues many beginners. Taking good photos of embroidered items is a skill that bridges the gap between your manual craft and your digital presence.
The foundation of any professional photo is a clean, precise stitch-out that catches the light correctly. You can achieve this by starting with high-quality digital files that are optimized for machine performance. Whether you're looking for sports, anime, or classic font styles, our library offers instant downloads to get you stitching immediately. Browse our latest digital embroidery designs to start your next photo-worthy project! With these techniques and the right patterns, you're ready to build a feed that truly reflects your talent. Happy stitching!
Frequently Asked Questions
How do I avoid glint or glare on shiny embroidery thread?
You should use a diffuser to soften your light source. I am sorry that I cannot provide physical photography gear, but a simple white sheet works well. This setup breaks up the direct rays that cause glint on shiny polyester threads. It's especially helpful when you're shooting designs with high stitch density that reflect a lot of light. Softening the light ensures the camera sees the color rather than just the reflection.
What is the best background color for photographing embroidery?
I recommend using neutral, matte backgrounds like linen or reclaimed wood. These textures support the cozy grandma aesthetic trending in 2026 without distracting from your work. Avoid bright colors that might reflect onto your thread. A simple grey or beige surface ensures your Anime Embroidery Designs remain the undisputed focal point of the image. Neutrality is key for achieving professional results that look clean on any social feed.
Do I need a professional camera to take good embroidery photos?
You don't need a professional camera to succeed. While I cannot offer technical support for specific hardware, I've found that 2026 smartphones are more than capable. Taking good photos of embroidered items is about the quality of your light rather than the price of your lens. Focus on stability and lighting to get the best out of your current device. Even a basic phone can capture stunning detail if you follow the 45-degree lighting rule.
How can I make the colors in my photo match the real thread?
Adjusting your white balance is the most effective way to ensure color accuracy. I suggest using the eyedropper tool in a free app like Snapseed to click on a white part of your fabric. This removes the artificial yellow or blue tints from your environment. It's a crucial step for making your digital patterns look as intended in their physical form. Consistent color representation builds trust with your audience and accurately showcases your stitching skills.
What is the best lighting for embroidery photography?
Indirect, directional light is the gold standard. Place your subject near a north-facing window to get soft, even coverage without harsh sunbeams. If you're using a ring light, set it to 5500K for a neutral daylight effect. This prevents your threads from looking washed out or artificially tinted, which is a common struggle for beginners. Proper lighting is the secret to taking good photos of embroidered items that display true depth and texture.
How do I show the texture of a white-on-white embroidery design?
You must use extreme side-lighting to reveal texture in monochromatic designs. By placing the light almost level with the fabric, you create long shadows that define each stitch ridge. I am sorry that I don't sell specialized lighting rigs, but moving a desk lamp to a low angle will produce the same effect. This technique is essential for white-on-white projects where the design would otherwise disappear into the background.
Should I use a tripod for embroidery photography?
A tripod is highly recommended for macro photography. When you're capturing the fine details of a college embroidery design, any movement will result in a blurry image. I don't sell physical tripods, but they're a wise investment for anyone serious about their portfolio. Stability allows you to capture the crisp, sharp lines that define high-quality digitization. It also makes it easier to set up the perfect composition without tiring your arms.
How do I take good photos of embroidery still in the hoop?
Make sure the fabric is drum-tight before you start shooting. I apologize that I do not sell physical embroidery supplies like hoops, but a tight surface is required for a professional look. Angle the hoop slightly away from the light to avoid glare on the frame. This keeps the focus on the stitches while showcasing the handmade process. Cleaning the hoop of any fingerprints or dust before the shot will also save you time in editing.