

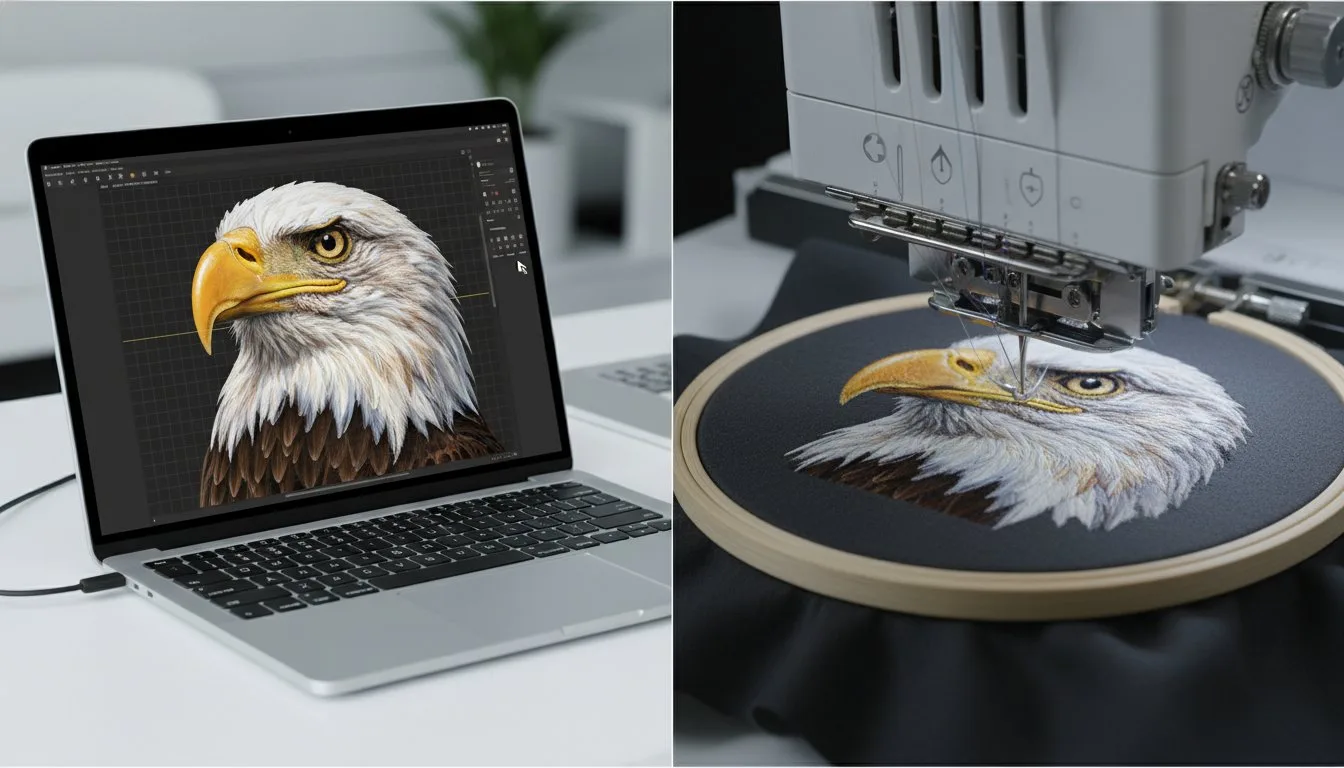
- Matching proprietary file formats like Brother's PE-Design 11 (.PES) or Tajima's (.DST) to your specific machine. - Preventing thread breaks and "blob" designs through proper density management and machine prep.
- Budgeting for the standard $30 digitizing fee for converting custom artwork into high-quality stitch files.
What if your embroidery machine could act more like a high-definition printer and less like a needle and thread? You've likely felt the frustration of finding a photo embroidery designs download, only to have it stitch out as a blurry blob that looks nothing like the preview. It's a common pain when files aren't digitized with the precision required for realistic textures. We've all been there, staring at a birdnest of thread while wondering why the PES file isn't behaving. In 2026, achieving that "wow-factor" is simple once you master the digital side of the craft.
This guide promises to help you find and stitch high-quality photo-realistic patterns for any machine. You'll learn how to navigate modern software like PE-Design 11 or ArtLink 9 and why the industry standard $30 digitizing fee ensures professional quality. We're going to dive into density management and format selection so your next project looks exactly like the original photo.
- Learn why simply renaming a file extension like .PES to .DST will fail and how to identify the correct native format for your specific machine brand.
- Master the secure process for a photo embroidery designs download, including how to correctly extract files from ZIP folders without losing critical stitch data.
- Discover how to spot the difference between risky auto-digitized "freebies" and professional designs by evaluating real stitch-out photos rather than digital mockups.
- Understand the essential stabilization and layering techniques needed to handle high-density photo patterns without causing thread breaks or fabric puckering. - Find out why using files tested on major brands like Brother, Janome, and Singer is the secret to achieving a "wow-factor" finish every time.
Table of Contents
- What Are Photo Embroidery Designs? (Executive Summary)
- Choosing the Right File Format for Your Machine
- How to Download and Transfer Designs Successfully
- Evaluating Quality: Free vs. Paid Photo Designs
- Get Professional Photo Designs at Embroidery n Sewing
## What Are Photo Embroidery Designs? (Executive Summary)
- Formats: Matching the right file extension to your specific machine hardware to ensure compatibility.
- Density: Managing the high stitch counts required for photographic detail without damaging fabric.
- Transfer: Moving files via USB or cloud systems without corrupting the complex data paths.
- Stabilization: Selecting heavy-duty backing to support the intense weight of layered thread.
- Sourcing: Finding reliable photo embroidery designs download sites that provide tested, professional files.
Photo embroidery is a high-density digital pattern designed for realism. As of May 2026, the craft has evolved significantly because machines are more precise and software is smarter. To truly grasp What Are Photo Embroidery Designs?, you have to see them as a digital translation of art into physical texture. Unlike a flat logo, these designs use layered stitching to mimic the shading, highlights, and intricate details of a real photograph. It's the difference between a simple sketch and a museum-quality portrait.
Photo-Stitch vs. Realistic Art Designs
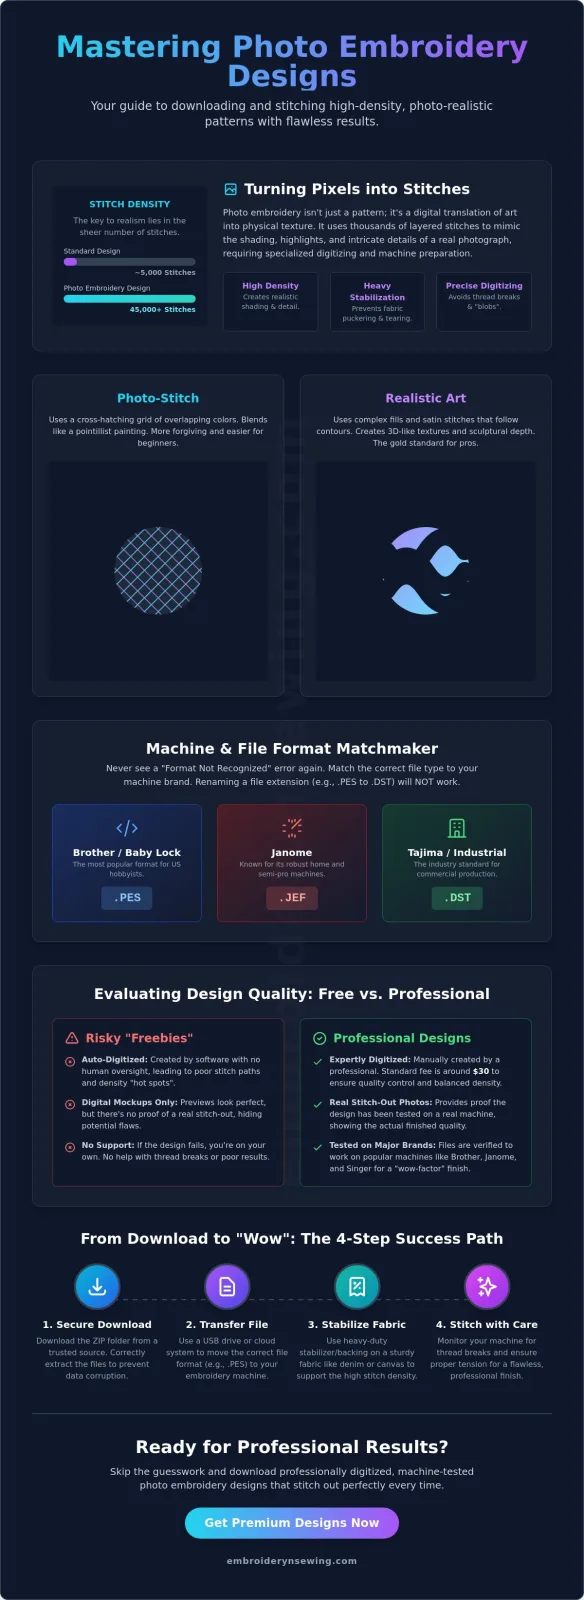
There's a major technical difference in how these files are built. A "photo-stitch" technique uses a cross-hatching method where different colors of thread overlap in a grid. It looks like a pointillist painting; from a distance, the colors blend perfectly to the eye. On the other hand, "realistic art" designs use complex fills and satin stitches to build 3D-like textures and flow. If you're looking for that have sculptural depth, realistic art is the gold standard for experienced crafters. Beginners often find photo-stitch easier because the software algorithm handles the color blending naturally, making it more forgiving during the stitch-out process.
[Diagram: A side-by-side comparison showing the grid-like layering of photo-stitch versus the directional, contoured satin stitches used in realistic art fills.]
The Importance of Design Density
Standard embroidery designs might have 5,000 stitches, but a photo design can easily top 45,000 for the exact same surface area. This density is what creates the realism, but it also creates physical stress on your materials. You can't just put a high-density photo embroidery designs download on a thin t-shirt; the fabric will pucker or even tear under the weight. You need a stable base like heavy denim, canvas, or thick twill. A poorly digitized file will have "hot spots" where too many stitches hit the same coordinate. This is a fast track to a broken needle or a birdnest under your hoop. Always look for designs that show a physical stitch-out photo rather than a digital mockup to ensure the density is balanced for a real machine.
Choosing the Right File Format for Your Machine
Imagine downloading a stunning photo pattern only to have your machine screen flash a "Format Not Recognized" error. It's a total buzzkill. The biggest mistake beginners make is thinking they can just change the letters at the end of a file name on their computer. Renaming a .PES file to a .JEF extension is like trying to play a DVD in a toaster; the hardware simply doesn't speak that language. When you start your photo embroidery designs download journey, you've got to match the "alphabet soup" of extensions to your specific brand. If you're still getting the hang of your equipment, our guide on covers the setup basics you'll need before you even touch these complex files.
[Diagram: A flowchart showing a single digital image branching out into five different file extensions, each pointing to a specific machine brand logo like Brother, Janome, and Singer.]
Format Compatibility Chart
- PES: This is the standard for Brother and Baby Lock machines, which are incredibly popular in the US hobbyist market.
- JEF: If you're a Janome user, this is your go-to format for almost every project.
- DST: This is a universal commercial format. While it works on Tajima machines, almost every modern machine can read it, though it has some technical drawbacks.
- EXP: You'll primarily see this used for Melco and Bernina machines.
- HUS: This is the native language for Husqvarna Viking machines.
Using Conversion Software
Sometimes you find the perfect photo embroidery designs download but it isn't available in your machine's native tongue. This is where conversion software comes in. While professional-grade tools like Brother's PE-Design 11 or BERNINA's ArtLink 9 offer the most control, many hobbyists look for free alternatives. You should be careful with complex photos, though. DST files often lose color data during conversion, which means your machine won't remember which thread color goes where. If you're dealing with a 30-color realistic design, manually re-assigning those colors on a tiny machine screen is a nightmare. For a smoother experience, it's always better to source your files from a reliable collection of machine embroidery designs that provides the correct native format from the start.
How to Download and Transfer Designs Successfully
You've finally found the perfect photo embroidery designs download, but getting it from your computer screen into your machine's needle can feel like a tech hurdle. It's not as simple as clicking "save" and walking away. Most professional files arrive in a compressed ZIP folder to keep the data safe. Your first step is to download that folder and immediately right-click to select "Extract All" or "Unzip." If you skip this, your machine won't be able to see the files inside, leading to a lot of unnecessary frustration. Once extracted, you'll see a list of formats; grab only the one your machine needs, like .PES or .JEF, and leave the rest behind.
There are three main ways to move your design. The most reliable method is the trusty USB stick. You can also use a direct USB cable connection between your laptop and machine, or if you have a high-end model from 2024 or later, you might use a Wi-Fi cloud transfer. No matter which you choose, always load the design into your machine's internal memory rather than running it directly from the USB. This prevents the stitch-out from stopping if the stick gets bumped or loses its connection mid-project.
Preparing the USB Stick
Your machine isn't a high-powered PC, so it can be picky about hardware. Many older machines struggle to read modern 64GB or 128GB USB drives. For the best results, stick with a smaller 2GB to 8GB drive. Before you move your files, you should format the drive to FAT32 on your computer. This is the universal language for embroidery hardware. Keep your folder structure simple; machines can get lost if you bury your photo embroidery designs download three or four folders deep.
[Diagram: A 3-step visual showing a computer screen with an "Extract" button, followed by a USB drive labeled "FAT32," and ending with a simple folder on the drive named "My_Designs" containing a single .PES file.]
Stabilizer Secrets for Photo Designs
Because photo designs are so heavy, your choice of backing is the difference between a masterpiece and a mess. Cut-away stabilizer is non-negotiable here. Unlike tear-away, it stays behind to support those 40,000+ stitches forever. You also need to follow the "Hoop it Tight" rule. If your fabric can move at all, the high-density layers will cause it to pucker, ruining the realistic effect. Understanding how different interact with your stabilizer will help you predict how the fabric will behave during these long, intense projects.
Evaluating Quality: Free vs. Paid Photo Designs
Everyone loves a bargain, but in the world of high-density stitching, the "free" price tag is often a trap. Most free photo designs you'll find online are created using auto-digitizing software. While AI tools have improved their accuracy by roughly 25% since 2024, they still can't match the human eye for nuanced shading. Professional digitizers manually path every thread for smoothness, ensuring the machine follows a logical, efficient route. When you're looking for a photo embroidery designs download, you're paying for that human expertise that prevents your machine from choking on 50,000 stitches. A high-quality photo embroidery designs download should always come with a PDF thread chart and specific stabilizer recommendations.
Don't trust a digital mockup. A computer-generated image of a design always looks perfect because it doesn't account for thread tension or fabric pull. Instead, look for "stitch-out" photos. These are actual pictures of the design sewn onto real fabric. If a seller doesn't show you the physical result, they probably haven't tested it on a real machine. It's always a smart move to perform a test stitch on a piece of scrap fabric that matches your final project. This 20-minute trial run can save you from ruining a $40 hoodie or a custom jacket.
Red Flags in Digital Designs
- Excessive Jump Stitches: If you see long threads crisscrossing the face of your design, it's a sign of lazy digitizing. These snags are a nightmare to trim and can ruin the realistic texture.
- Lack of Underlay: This is the invisible foundation of stitches that anchors your fabric to the stabilizer. Without it, your design will shift, leading to ugly gaps between colors.
- Mismatched Density: If the stitches are packed too tightly, the needle acts like a blade. This creates a "cookie cutter" effect that literally cuts a hole in your garment.
Where to Find the Best 2026 Patterns
In 2026, the best patterns come from niche marketplaces where artists specialize in realism rather than generic clip art. Check the "Stitcher Showcases" or customer review sections to see how the designs look on different machine brands. Make sure the design is optimized for your specific hoop size. Scaling a photo design up or down by more than 10% can cause massive density issues that the original digitizer didn't intend. If you want a library that's already been vetted for quality and stitch-ability, you can browse our collection of tested machine embroidery designs to ensure your next project is a total success.
[Diagram: A side-by-side comparison of a digital mockup versus a real stitch-out photo, highlighting how thread sheen and fabric texture change the look of the design.]
Get Professional Photo Designs at Embroidery n Sewing
You've seen how complex the world of high-density stitching can be, from picking the right stabilizer to navigating the "alphabet soup" of file formats. At Embroidery n Sewing, we take the guesswork out of your next photo embroidery designs download. We understand that a $30 digitizing fee is the industry standard for a reason; it represents the hours of manual labor required to path a design correctly. Our library follows these professional standards, ensuring that every file you purchase has been meticulously checked for stitch flow and density. We don't just sell files; we provide digital blueprints that are built to succeed on your machine without the common headaches of thread breaks or fabric damage.
Reliability is our biggest priority. Every design in our collection undergoes rigorous testing on the most popular brands in the US market, including Brother, Janome, and Singer. Whether you're using the latest PE-Design 11 software or a classic setup, our files are optimized to run smoothly. We've spent years refining our process to ensure that the realistic textures you see on your screen actually translate to the fabric in your hoop. Our commitment to quality digitizing means you can spend less time troubleshooting and more time creating projects that actually get that "wow" reaction from friends and family.
[Diagram: A collage showing three identical stitch-out results of a realistic wolf design on three different machine brands, Brother, Janome, and Singer, demonstrating consistent quality across all platforms.]
Our Digital Design Categories
Our library is packed with thousands of options that go far beyond basic clip art. We specialize in high-detail featuring realistic animals, intricate portraits, and breathtaking scenic landscapes. If you're looking to add a personal touch, we also offer machine embroidery fonts that are specifically weighted to complement the density of photo-realistic designs. From college-themed graphics to anime-inspired art, our categories are curated to meet the needs of both hobbyists and small business owners who need professional-grade results every time.
Join Our Community
Staying ahead of the curve in 2026 means having access to the latest technology and design trends. When you join our community, you'll be the first to know about our newest releases and AI-enhanced digitizing updates. Our newsletter is a great resource for tips on mastering high-density projects, and it often includes exclusive discounts for your next purchase. We're here to support your creative journey with US-based customer service and a library that's always growing to match your ambitions. You can browse our full library of digital embroidery designs here to find the perfect match for your next masterpiece. Grab your favorite photo embroidery designs download and start your first realistic project today!
Bring Your Realistic Embroidery Vision to Life
In 2026, the gap between hobbyist results and professional portraits is smaller than ever. You've got the tools to navigate the "alphabet soup" of formats and the knowledge to spot a high-quality file from a mile away. Remember that success starts with a manual pathing approach that prevents those dreaded thread breaks. Whether you're using a Brother, Janome, or Singer machine, matching your stabilizer to the design's density is the secret to a professional finish. Finding a reliable photo embroidery designs download doesn't have to be a guessing game when you prioritize tested files over risky auto-digitized freebies. Our designs are ready for instant digital download right after purchase; this means you can move from the computer to the hoop in minutes. You're now equipped to handle 40,000-stitch projects with total confidence. It's time to stop worrying about the tech and start enjoying the art of realistic stitching. Your machine is capable of incredible detail, and with the right digital foundation, your next project will be a true masterpiece.
Download your next high-quality embroidery design today!
Happy stitching, and we can't wait to see what you create!
Frequently Asked Questions
Can I turn any photo into an embroidery design automatically?
No, you can't get professional results by simply hitting an "auto-convert" button in your software. While modern software has improved auto-digitizing accuracy by roughly 25% since 2024, these tools still struggle with complex lighting and shadows. For a realistic finish, a human digitizer must manually assign stitch directions and densities to create depth. This manual process is why high-quality files are worth the investment over free, automated conversions that often look like flat blobs.
What is the best file format for a Brother embroidery machine?
The .PES file format is the absolute standard for Brother machines. It's a proprietary format that carries all the color and stitch data your machine needs to run smoothly. If you're looking for a photo embroidery designs download, always ensure it includes a native .PES file for the best results. While Brother machines can sometimes read .DST files, you'll lose the specific thread color information during the transfer process.
Why does my photo embroidery design have so many jump stitches?
Excess jump stitches usually happen because the design wasn't "pathed" efficiently by a human digitizer. In complex photo designs, the needle has to move between different color blocks frequently. If the digitizer doesn't create "traveling stitches" hidden under the top layers of the design, you'll end up with a mess of threads. This is a common issue with auto-digitized freebies that skip the manual refining process required for clean results.
How do I know if a design will fit in my 4x4 or 5x7 hoop?
You should always check the "Stitch Map" or PDF worksheet included with your photo embroidery designs download. Professional designers list the exact dimensions in both millimeters and inches to prevent errors. For a 4x4 hoop, your design shouldn't exceed 100mm by 100mm. If a design is even 1mm too large, your machine's sensors will lock the file and refuse to sew it for safety reasons.
Do I need special embroidery thread for photo-realistic designs?
You don't need special thread, but using a thinner 60-weight thread can help you achieve much finer details. Standard 40-weight polyester is the industry go-to because it's durable and has a high sheen. However, since photo designs can have over 45,000 stitches in a small area, thinner 60-weight thread helps prevent the design from becoming too thick or "bulletproof" on your fabric. This keeps the finished piece flexible and wearable.
What is the difference between a PES file and a JPG image?
A JPG is a flat image made of pixels, while a PES file is a complex set of coordinate instructions for a needle. Your machine doesn't know how to "see" a JPG or PNG file. It needs the PES file to tell it exactly where to move, when to trim, and which color to use. Converting a JPG to a stitch file requires specialized software and usually takes a professional digitizer several hours to complete correctly.
How can I prevent my fabric from puckering when stitching a dense photo?
The best way to stop puckering is to use two layers of heavy cut-away stabilizer and a fresh needle. Since photo designs are incredibly dense, they pull on the fabric fibers as the needle moves through the layers. You should also avoid "hoop burn" by ensuring your fabric is taut but not over-stretched. Using a temporary adhesive spray can increase your stability by 40% according to common industry tests, keeping the fabric from shifting mid-stitch.
Is it safe to download free embroidery designs from the internet?
It's generally safe if you use reputable sites, but you run a high risk of damaging your machine with poorly digitized files. Low-quality files can have "stitch-on-stitch" errors where the needle hits the same spot 10 times, causing a needle break or a timing issue. Stick to verified sources that provide real stitch-out photos. A broken needle plate can cost over $100 to replace, making "free" designs quite expensive in the long run.


