

You've scrolled through endless websites, found a design you absolutely love, but a wave of questions stops you cold. Is this the right file type? Will it stitch out cleanly? And how in the world do I get it from my computer onto my beloved Brother machine? If these doubts sound familiar, you're not alone. The journey to buy embroidery files for your Brother machine can often feel more confusing than creative, leaving you overwhelmed and hesitant to click that 'purchase' button.
This guide is here to change all that. We’re going to eliminate the guesswork and empower you with the knowledge to purchase with total confidence. You'll learn exactly which file format your machine speaks (hello, .PES!), discover our favorite trusted sources for high-quality, gorgeous designs, and master the simple process of transferring your new files for a flawless stitch-out. It’s time to leave the confusion behind and get back to the joy of creating beautiful projects with ease.
## First Things First: The File Format Your Brother Machine Needs
Before you dive into the exciting world of digital designs, let's get the most critical technical detail out of the way. The short answer for virtually every home embroiderer is this: your Brother machine needs .PES files. Understanding this simple fact is the first step to successfully buy embroidery files for brother machine projects and get stitching without any trouble.
Think of a digital embroidery file as a detailed blueprint or a set of instructions for your machine. It doesn't just contain the image; it tells the needle exactly where to go, what type of stitch to use, when to change colors, and when to trim the thread. The entire craft relies on these digitized embroidery files to translate a creative design into a physical, stitched-out reality. While you will often see other formats mentioned like .DST, .JEF, or .HUS, you can safely ignore them. They are simply the 'language' for other machine brands, like Janome or Husqvarna, and are not what you need when you buy embroidery files for brother machine compatibility.
.PES stands for Physics Embroidery System, a format originally developed for Brother's PE-Design software. It’s the native language for your machine. Unlike simpler formats, a .PES file is robust and contains crucial information beyond just the stitches, including:
- Precise stitch data (coordinates and stitch type)
- Color information for each thread stop
- A small thumbnail image for previewing the design
Because .PES is the industry standard for Brother, you'll find that nearly every reputable designer and marketplace offers it. This ensures you have the widest possible selection of creative options when you're ready to buy embroidery files for brother machine use.
Whether you own a popular Brother PE-800, a versatile SE-1900, or a high-end Luminaire, they all read the .PES format. It's the universal standard across their entire modern lineup. While extremely old machines from the 1990s might use older versions of the format, it's rarely an issue today. If you have any doubt, a quick check of your machine's manual is always a good idea, but rest assured that 99% of the time, .PES is the correct choice when you buy embroidery files for brother machine models.
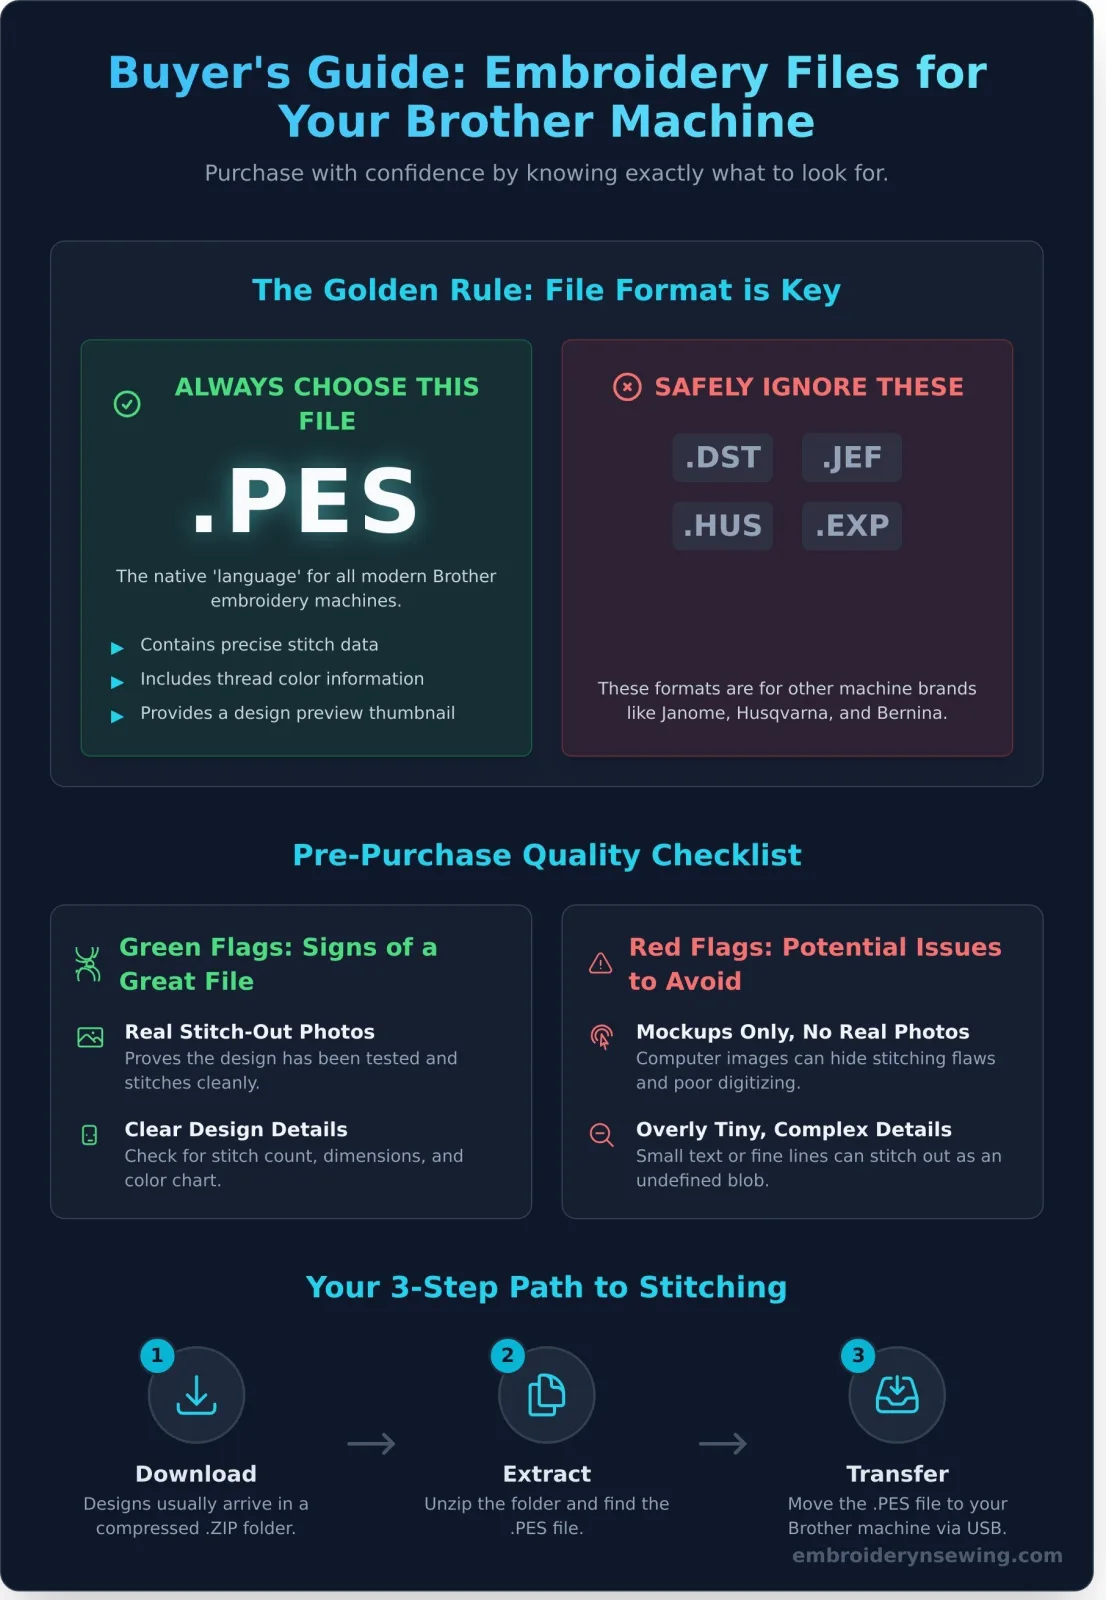
When you purchase and download a design, it will almost always arrive in a compressed .ZIP folder. Inside, you'll find the design saved in multiple formats (.DST, .JEF, .EXP, etc.). Simply ignore the others and extract only the .PES file to use on your machine.
Quality Checklist: How to Spot a Great Embroidery File Before You Buy
The digital marketplace is flooded with beautiful designs, but not all files are created equal. When you buy embroidery files for your Brother machine, you're purchasing a complex set of instructions, and the quality of those instructions determines your final result. A well-digitized file prevents common frustrations like thread breaks, fabric puckering, and uneven stitching. It's also wise to understand your digital ownership rights, as you are typically buying a license to use the design, not the copyright to the artwork itself. Investing a moment to check for quality upfront will save you time, thread, and fabric later.
Understanding Digitizing Quality
Digitizing is the manual process of converting an image into a map of stitches that your Brother machine can read. It’s more art than science. A professional digitizer carefully plans the pathing (the order of stitches), underlay (the foundation stitches that stabilize the fabric), and stitch density. Poor digitizing often results in designs that are too dense, creating a stiff, "bulletproof" patch that can damage delicate fabrics and even break needles.
Reading the Design Details
A reputable seller will always provide clear and detailed information. Before you purchase, look for these essential details to ensure the design is a good fit for your project and machine:
- Stitch Count: This tells you how dense the design is and gives you a rough estimate of how long it will take to stitch out. Higher counts mean longer stitch times.
- Dimensions: Check the height and width of every size included. This is critical to ensure the design will fit within your Brother machine's specific hoop limitations.
- Color Chart: A professional file includes a thread color guide, often with suggested brand numbers, that shows the sequence of color stops.
Red Flags to Watch Out For
Protect your investment by learning to spot the signs of a low-quality file. If you see any of the following, it's best to keep shopping:
- No Real Stitch-Out Photos: Be wary of sellers who only show a computer-generated mockup. A real photo of the stitched design proves it has been tested and sews correctly.
- Vague or Missing Information: A lack of details on file sizes, formats, or stitch counts is a major red flag.
- Overly Complex, Tiny Details: Extremely small text or intricate details may look good on screen but often turn into an undefined blob of thread when stitched.
Where to Buy Embroidery Files: Top Sources for Brother Users
Once you've mastered your Brother machine and understand the importance of the .PES file format, the next exciting step is building your design library. When you're ready to buy embroidery files for your Brother machine, the internet offers a vast landscape of options. To help you navigate it, we've broken down the top sources into three main categories, each with its own unique benefits.
Independent Digital Stores
Independent stores are often run by passionate digitizers or small teams dedicated to the craft. This focus results in highly curated collections with a consistent artistic style and reliable quality. You'll frequently discover unique, creative designs here that you simply can't find on larger platforms. It's an excellent way to support small businesses while acquiring truly special patterns.
- Pros: Consistent quality, unique designs, direct support from the creator.
- Cons: Smaller overall selection compared to a massive marketplace.
At Embroidery n Sewing, we pride ourselves on offering a huge range of categories, from intricate floral patterns and sports logos to playful cartoons and seasonal holiday designs, all professionally digitized for a flawless stitch-out. Explore our collection of high-quality .PES files and find the perfect addition to your next project.
Official Brand Stores
For designs featuring famous characters, official brand stores like Brother's own iBroidery are your go-to source. These are the only legitimate places to purchase licensed designs from brands like Disney, Pixar, Marvel, and Star Wars. Purchasing from an official source guarantees perfect compatibility with your machine and ensures you are respecting intellectual property rights, a key component of copyright law for digital files.
- Pros: Exclusive access to licensed characters, guaranteed quality and compatibility.
- Cons: Generally more expensive, with a more limited and specific selection.
Large Online Marketplaces
Marketplaces like Etsy host thousands of individual sellers, offering a seemingly endless variety of embroidery files. If you can imagine a design, you can probably find it here. The sheer volume and competition often lead to very competitive pricing, making it a budget-friendly option for expanding your collection.
- Pros: Massive selection, competitive pricing, diverse styles.
- Cons: Quality can vary dramatically between sellers.
Pro Tip: Vet sellers carefully before you buy. Always read recent shop reviews, look for photos of actual stitched-out examples (not just digital mockups), and double-check that the seller includes the .PES format in their file package.
From Purchase to Stitching: A Simple 4-Step Workflow
Congratulations on your new design! Getting it from your computer to your embroidery machine is a straightforward process once you know the steps. This simple, four-step guide will walk you through every click, ensuring you go from purchase to stitching in just a few minutes. We'll demystify the most common hurdle for new users-the ZIP file-and get you creating in no time.
Step 1 & 2: Download and Unzip Your Files
After you buy embroidery files for brother machine, you'll receive a download link. This download will almost always be a single .ZIP file. Think of a ZIP file as a compressed digital package that holds all the different file formats and instructions together to save space. To use the files, you must first "unzip" or "extract" them.
- On Windows: Right-click the downloaded .ZIP file and select "Extract All..." from the menu. Follow the on-screen prompts to create a new, regular folder containing your designs.
- On a Mac: Simply double-click the .ZIP file. Your Mac will automatically create a new folder with the same name, containing all the extracted files.
Step 3: Transfer the .PES File to a USB Drive
Now that your files are accessible, it's time to move the correct one. Insert a standard USB flash drive into an available port on your computer. Navigate to the new folder you just unzipped. Inside, you will likely see several files with different extensions (.DST, .JEF, .XXX, etc.). Your Brother machine needs a specific format. Look for the file that ends with the .PES extension. Copy this single .PES file and paste it directly onto your USB drive.
Step 4: Load the Design on Your Brother Machine
This final step is the most exciting part of the process. First, safely eject the USB drive from your computer to prevent file corruption. Now, insert it into the USB port on your Brother embroidery machine. Using the machine's LCD screen, touch the icon that looks like a USB stick or pocket to access the drive's contents. You will see a list of the files on your drive. Select your new .PES design, load your hooped fabric, and you're officially ready to start stitching your beautiful new project!
For a wide selection of high-quality, pre-tested designs perfect for your machine, explore the curated collection at embroiderynsewing.com.
Your Next Stitching Adventure Awaits
You're now equipped with everything you need to succeed. From understanding the crucial .PES file format to spotting a high-quality design before you click 'purchase,' you have the knowledge to confidently buy embroidery files for your Brother machine. The simple four-step process of downloading, transferring, and stitching means your creative ideas are just moments away from becoming beautiful, tangible art.
The only thing left is to find that perfect spark of inspiration. Ready to get started? Find your next project! Browse thousands of Brother-compatible designs now. Our massive library covers sports, cartoons, holidays, and more, with instant digital downloads for all designs. Plus, you can shop with complete peace of mind knowing all our files include the .PES format required for your Brother machine.
Unleash your creativity and transform that blank fabric into something extraordinary. Happy stitching!
Frequently Asked Questions
Can I resize embroidery files myself?
While you can resize embroidery files, it should be done with caution. Most experts recommend not resizing a design by more than 10-20%. Drastically changing the size without using proper embroidery digitizing software can distort the stitch density, leading to gaps, puckering, or thread breaks. For best results, use a program that recalculates the stitches when resizing, rather than just stretching the existing stitch data. Always run a test stitch-out after resizing.
What's the difference between .PES and .DST files?
The primary difference is the information they contain. .PES is a native format for Brother (and Babylock) machines that includes stitch data, thread color information, and other machine commands. .DST is a more universal commercial format (originally for Tajima machines) that only contains stitch commands. While a Brother machine can read .DST files, it won't show the correct color palette on the screen, requiring you to assign colors manually. For this reason, .PES is always preferred.
Do I need special software to view embroidery files on my computer?
Yes, standard image viewers on your computer, like Windows Photos or macOS Preview, cannot open embroidery file formats. You will need dedicated embroidery software to view, manage, and edit these files. Fortunately, there are many excellent free options available, such as Bernina ArtLink, Wilcom TrueSizer, or Embrilliance Express. These programs allow you to see the design, view its properties, and often perform simple edits like changing colors or converting file formats.
Are free embroidery files from the internet safe to use on my machine?
You should exercise caution with free files. While many reputable digitizers and brands offer high-quality free designs as promotions, files from unverified sources can be problematic. Poorly digitized free files can cause thread nests, needle breaks, and frustration. When you are looking to get designs, it's often safer to buy embroidery files for a Brother machine from trusted sellers to ensure they have been properly tested and digitized for a smooth stitch-out.
How do I know what size hoop a specific embroidery design requires?
Reputable sellers will always list the design's exact dimensions in the product description, usually in both inches and millimeters (e.g., 3.9" x 3.8" or 99mm x 97mm). Before purchasing, compare these dimensions to the maximum embroidery area of the hoops you own for your Brother machine. For example, a design measuring 3.9" x 3.8" would fit perfectly in a standard 4" x 4" hoop, but a 5" x 6" design would require a 5" x 7" hoop.
What should I do if the file I bought doesn't include the .PES format?
First, double-check the product listing to ensure the .PES format was advertised. If it was, contact the seller immediately; it was likely an oversight and they can send you the correct file. If .PES was not listed, you can use an embroidery software program to convert the file. Many free viewers, like Wilcom TrueSizer, can open other formats (like .DST, .JEF, or .EXP) and save them as .PES, making it compatible when you buy embroidery files for a Brother machine.


