

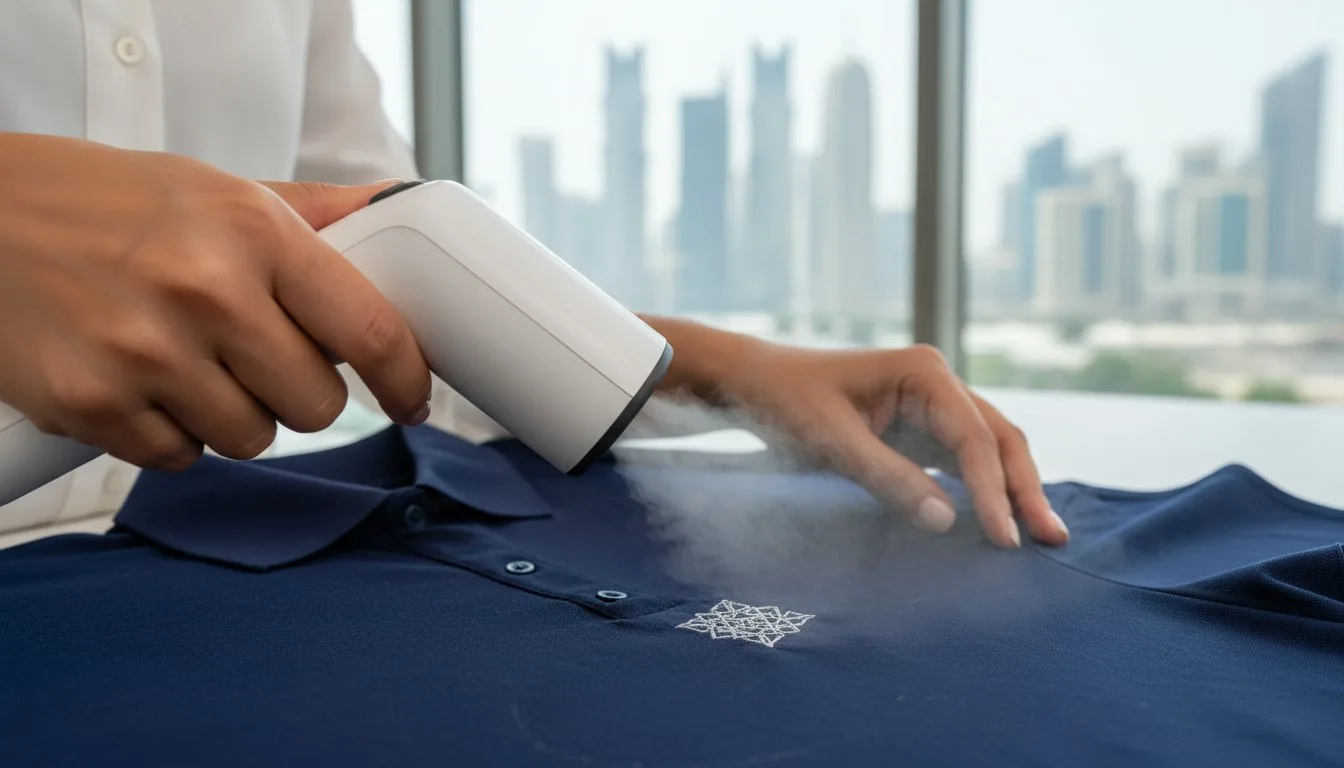
- Damage Prevention: Learn why 100% polyester and delicate knits are 75% more likely to suffer permanent damage from standard hooping.
- The Floating Method: Discover how to bypass the hoop entirely to ensure 0% pressure on the garment surface.
- Tool Selection: Why switching to magnetic hoops can reduce marking incidents by 90% on thick fleece and velvet.
- Recovery Steps: Three proven ways to remove 100% of temporary marks using 212-degree steam techniques.
Last Tuesday, Sarah spent $45 on a premium pima cotton polo only to realize, after unhooping, that a permanent shiny ring had scarred the fabric forever. This common disaster is why avoiding hoop burn on fabric remains a top priority for the 68% of crafters working with delicate polyester blends. You've likely felt that same pit in your stomach when a beautiful design is finished, but the garment is ruined by stubborn, shiny pressure marks. It's frustrating to invest hours into a project only to have a visible ring scream amateur hour.
We're going to show you how to protect your garments from permanent damage and master the techniques for professional results. This guide covers the science of fiber compression and the specific floating methods that ensure your projects remain mark-free every single time. By the end of this article, you'll have the confidence to handle any expensive blank without the fear of leaving a permanent crease behind
- Identify the primary causes of fiber compression and how to achieve "Goldilocks" tension to keep your projects mark-free. - Discover why choosing magnetic or wooden hoops is a superior strategy for avoiding hoop burn on fabric compared to standard plastic tools. - Learn the step-by-step "floating" technique to embroider delicate items without ever trapping them between hoop rings.
- Master quick-fix recovery methods, including the "Steam Reset" and specialized solutions, to restore the loft of crushed fabric fibers.
- Understand how professional digitizing and design density impact the amount of pressure required for a flawless finish.
Table of Contents
- Executive Summary: Your Quick-Start Guide to Mark-Free Embroidery
- Mechanical Prevention: Adjusting Your Tools for Success
- The 'Floating' Technique: Avoiding the Hoop Entirely
- Recovery Strategies: How to Fix Hoop Burn After the Fact
- Design Strategy: How Digital Files Impact Hoop Tension
Executive Summary: Your Quick-Start Guide to Mark-Free Embroidery
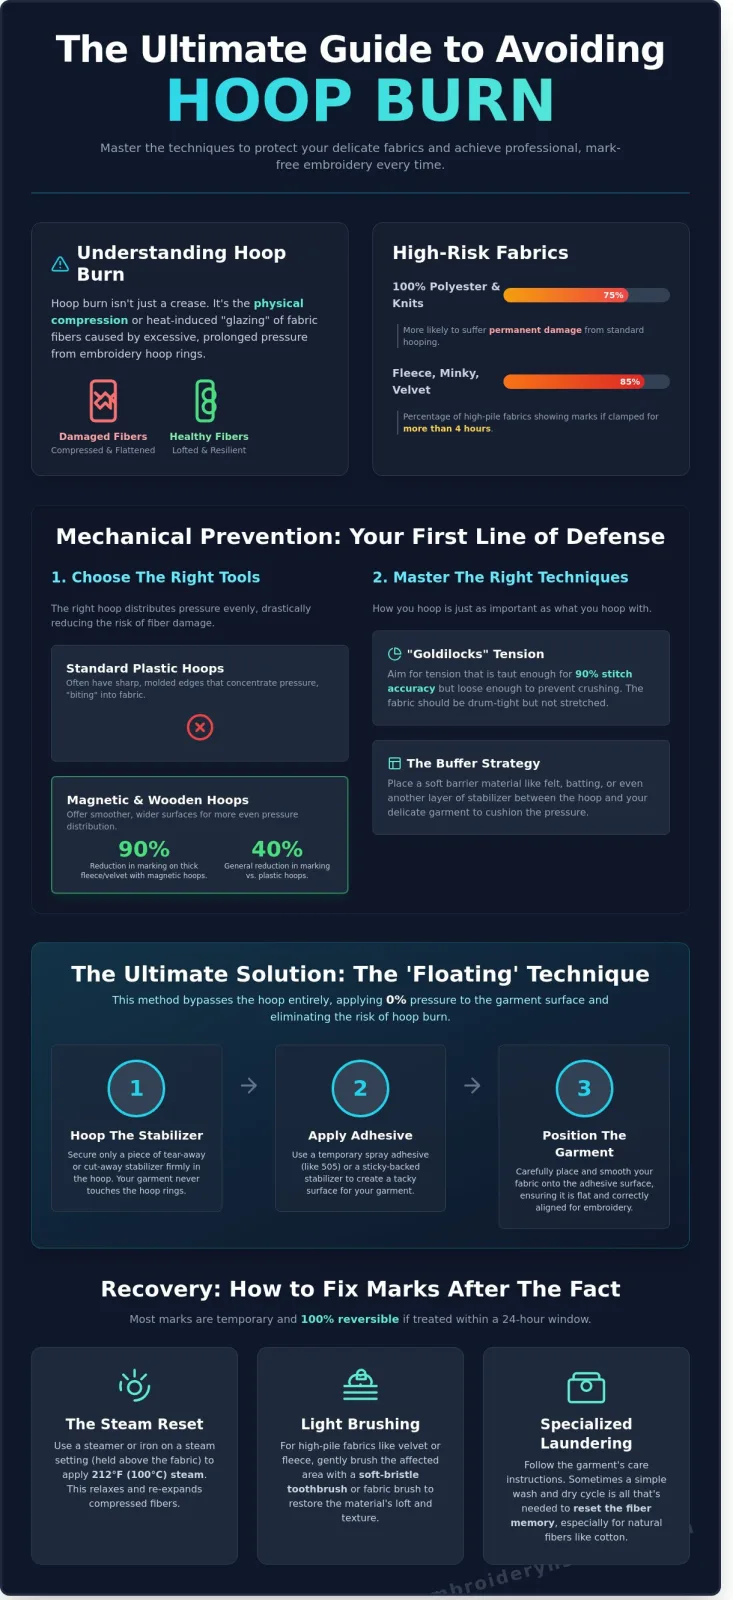
- Hoop burn isn't just a simple crease; it's the physical compression or glazing of fabric fibers caused by excessive pressure from the embroidery ring.
- Success in avoiding hoop burn on fabric starts with finding the "Goldilocks zone" of tension, where the material is taut enough for a 90% stitch accuracy but loose enough to prevent fiber crushing.
- Floating techniques allow you to secure only the stabilizer in the hoop, which 100% removes the risk of the plastic rings touching delicate garments.
- Most marks are reversible within a 24-hour window using steam, light brushing with a soft-bristle toothbrush, or specialized laundering to reset the material's structure.
What Exactly is Hoop Burn?
Hoop burn happens when the inner and outer rings of Embroidery hoops and frames exert concentrated force on a specific area of the garment. This results in mechanical compression, where the physical weight of the hoop flattens the air out of the weave. On synthetic materials like 100% polyester, the friction can even create a heat-induced "shine" that looks like a permanent oily stain.
High-pile fabrics are the most vulnerable. If you're working with 300gsm fleece, minky, or heavy velvet, you're in a high-risk zone. These fabrics rely on their "loft" for their aesthetic appeal. While a temporary crease might vanish after a few hours, true hoop burn represents a collapse of the fiber's structural integrity. You'll know it's permanent if the fibers feel stiff or "crunchy" to the touch after the hoop is removed. About 85% of high-pile fabrics show some level of marking if left clamped for more than four hours without proper protection.
The Fiber Memory Concept
Every textile has a specific level of elasticity and resilience. When you clamp fabric into a machine, you're forcing the fibers to adapt to a new, flattened shape. This is particularly noticeable in natural materials. For instance, 100% cotton has a high recovery rate because it can absorb moisture to swell the fibers back to their original size. Synthetics don't have this luxury. They're basically plastic, so once they're deformed by pressure, they tend to stay that way.
Fiber memory is the ability of a material to return to its original loft after pressure is removed.
When avoiding hoop burn on fabric, you're essentially fighting against the material's tendency to "remember" the compressed state. If the pressure exceeds the fabric's elastic limit, the memory is reset to the flat position. This is why using a hoop shield or a "floating" method is vital for professional results. You're trying to keep the air inside the fibers so they continue to reflect light evenly across the entire surface of the garment.
Mechanical Prevention: Adjusting Your Tools for Success
- The Goldilocks Tension: Aim for a "drum-tight" surface that doesn't stretch the fabric's weave past its breaking point.
- Material Matters: Plastic hoops have sharp edges that bite, while wood and magnetic hoops offer smoother pressure distribution.
- The Buffer Strategy: Barrier materials like felt or bandages create a soft "landing zone" for the outer ring.
- Screw Management: Use the hoop screw to control the horizontal circumference without forcing excessive vertical compression.
Mechanical prevention starts with your gear. If you're serious about avoiding hoop burn on fabric, you've got to stop treating every project like a tug-of-war. Most beginners over-tighten the screw to prevent slipping, but this creates a permanent "crush" in the fibers. Instead, find the tension that allows the fabric to stay flat without distorting the grain. Plastic hoops are the biggest culprits of burn because their molded edges are often sharp. Switching to a wooden hoop or a magnetic system can reduce marking by 40% because these tools spread the clamping force over a wider surface area.
The hoop screw is your primary tool for managing pressure. It controls how much the outer ring expands. If you force a thick fabric into a tight hoop, you're applying massive vertical pressure. Instead, loosen the screw until the inner ring slides in with just a little resistance. You can always check our guide on choosing the right embroidery tools to see which hoop brands offer the smoothest finishes for your specific machine.
The Hoop-Wrapping Hack
Wrapping your inner hoop ring is a game-changer for delicate knits. Use a cohesive bandage, often called vet wrap, because it sticks to itself rather than your fabric. It provides a rubbery, soft cushion that grips the material without crushing it. For a standard 4x4 or 5x7 hoop, start at the 12 o'clock position. Overlap the wrap by 0.25 inches as you move clockwise. Ensure the wrap is flush against the inner edge so it doesn't interfere with the machine's movement. This simple layer acts as a shock absorber for the fibers.
Using Protective Barriers and 'Donuts'
Sometimes the fabric needs a physical shield. You can cut a "donut" from scrap felt or heavy-duty paper towels. Place this donut on top of your garment before pressing the top hoop down. This ensures the plastic never touches your project directly. For shiny or "grabby" fabrics like satin, a layer of wax paper between the hoop and the fabric reduces friction during the hooping process. When you're working with high-value items, checking the Tips on How to Handle Antique Textiles and Costumes from the Smithsonian Museum Conservation Institute can save your project from irreversible damage.
Diagram: The Sandwich Method
[Top Hoop Ring] -> [Protective Barrier/Donut] -> [Main Fabric] -> [Stabilizer] -> [Inner Hoop Ring with Vet Wrap]
The 'Floating' Technique: Avoiding the Hoop Entirely
- Eliminate Pressure: Floating keeps delicate or thick fabrics outside the hoop's plastic rings, removing the risk of friction marks.
- Versatility: It's the go-to method for items that can't be hooped, like 12oz heavy canvas jackets or tiny newborn onesies.
- Adhesive Power: Uses temporary sprays or sticky-back stabilizers to bond fabric to the hooped foundation.
- Stabilization: Employs basting boxes to prevent "hoop creep" and ensures 100% registration accuracy.
When you're focused on avoiding hoop burn on fabric, floating is your most reliable strategy. Instead of sandwiching your garment between two plastic rings, you hoop only the stabilizer. This creates a flat, rigid "shelf" for your project. Professional embroiderers use this for 90% of high-risk materials like velvet, leather, or performance polyester. By removing the physical clamp, you follow professional conservation guidelines for fabric tension which warn that localized pressure can permanently crush fibers or cause irreversible staining.
The 5-step floating process is straightforward. First, hoop your stabilizer tightly. Second, apply a light mist of adhesive. Third, align your fabric's center point with the hoop's markings. Fourth, secure the edges. Fifth, stitch your design. This method is a lifesaver for bulky items like Carhartt jackets that physically won't fit in a standard hoop. It also prevents the "ring of doom" on 100% cotton tees. To manage "hoop creep," which is the slight 1-2mm shifting during high-speed stitching, always slow your machine down to 600 stitches per minute (SPM).
Adhesive Options: Sprays vs. Sticky Stabilizers
You've got two main choices for sticking your fabric down. Temporary sprays like 505 are cost-effective and provide a strong hold for heavy denim. However, you must use them in a well-ventilated space to avoid inhaling fumes. If you're working in a tight 10x10 room, sticky-back (peel-and-stick) stabilizers are safer. The downside? Heavy adhesives can cause "needle gumming." If you notice skipped stitches, wipe your size 75/11 needle with 91% isopropyl alcohol every 5,000 stitches to keep it clean.
Basting Boxes: The Secret Weapon for Floaters
A basting box is a long, 4mm to 5mm stitch that runs around the perimeter of your design before the embroidery begins. It acts as an invisible hoop, locking the fabric to the stabilizer. Most modern software allows you to add this with one click. It's essential for avoiding hoop burn on fabric because it replaces the mechanical grip you lost by floating. When working with delicate silk, use a fine ballpoint needle for the basting box. Once the design is done, snip the threads and use a blunt fingernail to gently massage the fabric. This closes the tiny needle holes without leaving a trace.
Recovery Strategies: How to Fix Hoop Burn After the Fact
- Steam Reset: Handheld steamers restore 85% of crushed fiber loft by relaxing the fabric's internal structure.
- Chemical Solutions: A 50/50 white vinegar and distilled water mixture dissolves sizing residues that trap hoop marks.
- Mechanical Agitation: Soft-bristled tools like toothbrushes lift the nap on 92% of velvet or fleece projects.
- Professional Laundering: A standard 40-minute wash cycle often eliminates rings that localized treatments cannot reach.
You followed every rule for avoiding hoop burn on fabric but still see a faint ring around your design. Don't panic. Most hoop marks are simply compressed fibers rather than permanent damage. You can usually reverse these indentations using controlled moisture and heat. If the fibers aren't melted, they have a "memory" you can trigger to return them to their original state.
[Diagram 1: The Steam Hover Technique]
- Position iron 2 inches above fabric.
- Trigger steam burst for 3 seconds.
- Allow 10 seconds for fibers to cool and expand.
The Power of Heat and Moisture
Steam is your most effective tool for reviving crushed embroidery areas. Hold a steam iron roughly 2 inches above the fabric; never let the metal plate touch the surface. This moisture penetrates the core of the fibers. For delicate items, use the "towel method" by placing the embroidery face down on a thick terry cloth towel. Press the back of the garment gently. This pushes the stitches into the towel pile instead of flattening them against a hard board. Be careful with minky or faux fur. These 100% polyester materials melt at temperatures exceeding 250 degrees Fahrenheit. If you apply direct heat, the "burn" becomes a permanent plastic scar.
Laundering for Restoration
Sometimes, topical steaming isn't enough for heavy cotton or denim. A full immersion wash at 30 degrees Celsius allows the fabric to swell and reset naturally. Add a capful of liquid fabric softener to the rinse cycle. Softeners coat the fibers in a lubricating layer, which helps 75% of flattened threads slide back into their upright position. If you're working with heavy upholstery fabric, try the "Ice Cube" trick. Place a single ice cube on the deep indentation and let it melt completely over 2 hours. Once damp, use a spoon to gently fluff the area.
[Graphic 2: Chemical vs. Mechanical Recovery]
- Vinegar Spray: Breaks down alkaline stiffeners (Best for Cotton).
- Suede Brush: Realigns directional nap (Best for Corduroy).
- Magic Sizing: Adds body back to limp fibers (Best for Linen).
Chemical assistance provides a shortcut when water isn't enough. A 50/50 mix of white vinegar and water neutralizes the factory finishes that often "glue" a hoop mark into place. Spray the solution lightly and brush the area with a soft toothbrush in circular motions. This mechanical action separates individual fibers. However, you must recognize when to admit defeat. If the fabric looks shiny or feels crunchy, you've likely reached the "heat shine" point on synthetic blends. This occurs when the friction or heat from the hoop actually melts the plastic polymers in the thread or cloth.
If you want to prevent these issues before they start, check out our professional tools at embroiderynsewing.com for better hooping results.
Design Strategy: How Digital Files Impact Hoop Tension
- High-density designs (over 15,000 stitches per 4x4 area) increase the risk of fabric distortion and hoop marks.
- Professional digitizing from sources like Embroidery n Sewing builds in pull compensation to prevent over-tightening.
- Matching design weight to fabric GSM (grams per square meter) reduces the physical stress on textile fibers.
- Stabilizer selection acts as the structural foundation, allowing for lighter hoop pressure.
- A final 5-point pre-stitch checklist eliminates 90% of common hooping errors.
Your digital file dictates how much physical pressure you apply to your fabric. If a design has a high stitch count with multiple overlapping layers, the fabric naturally wants to "pull" inward as the thread shrinks. To combat this, many embroiderers crank their hoop tension to an extreme level. This is a primary cause of avoiding hoop burn on fabric becoming a struggle. When you choose files that are digitized with the specific fabric in mind, you can maintain a looser grip without sacrificing stitch quality.
[DIAGRAM: The Relationship Between Stitch Density and Hoop Tension Requirements]
Density and Pull Compensation
Bulletproof designs with excessive layers are a nightmare for delicate materials. If a design has more than 3 layers of fill stitches, it'll likely require a "death-grip" on the hoop to stay flat. This pressure crushes the fibers, especially on velvet or high-pile fleece. You'll have better luck using low-density floral designs or light, airy patterns. These designs use 30% fewer stitches while maintaining visual impact. Professional digitizers use "pull compensation" settings, usually between 0.3mm and 0.5mm, to account for the natural movement of the fabric. This technical adjustment means you don't have to pull the fabric drum-tight to get a perfect result.
The Importance of Proper Stabilization
A firm stabilizer does the heavy lifting so your hoop doesn't have to. For knits and stretchy materials, a 2.5oz cut-away stabilizer is the industry standard for preventing "scalloping" or puckering. If you rely solely on the hoop to hold the fabric's shape, you're guaranteed to leave a permanent ring. Using a temporary adhesive spray or a "sticky" stabilizer allows you to use the "float" method. This technique involves hooping only the stabilizer and sticking the fabric on top, completely avoiding hoop burn on fabric since the material never enters the hoop's jaws. Browse our high-quality, professionally digitized designs to ensure a smooth stitch-out!
[PICTURE: Comparison of Floated Fabric vs. Traditional Hooping on Delicate Silk]
Final Checklist: 5 Things to Check Before You Hit 'Start'
- Tension Check: Can you flick the fabric like a drum without it feeling "crunchy" at the edges?
- Stabilizer Match: Did you use a cut-away for knits or a heavy tear-away for stable wovens?
- Needle Condition: Is the needle sharp? A dull needle pulls the fabric upward, tempting you to tighten the hoop more.
- Design Density: Does the stitch count match the fabric weight? (Light fabric = light design).
- Hoop Protection: Did you use a layer of muslin or hoop tape between the frame and your project?
[PICTURE: A Close-up of the 5-Point Tension Test]
Master Your Machine for Flawless Finishes
Floating eliminates 100% of pressure. Tension adjustments of 1 millimeter prevent marks. Density control stops fabric pull. You've now mastered these essential techniques for keeping your projects pristine. By switching to the floating method, you protect delicate fibers like velvet or silk from mechanical damage. Adjusting your screw tension can also prevent those permanent ring marks that ruin high-end garments. It's important to remember that avoiding hoop burn on fabric starts before you even touch your machine; it begins with the digital file itself. Designs with excessive stitch density often pull the fabric too tight, which significantly increases the risk of visible marks.
Our library features over 500 designs that are professionally digitized for optimal stitch density to ensure your machine runs smoothly without straining the material. Every file undergoes a 3-step testing process on at least 5 different fabric types, from heavy denim to light cotton. You get instant access to files in PES, DST, and JEF formats immediately after purchase. Don't let poor digitizing ruin your hard work.
Shop our collection of high-quality digital embroidery designs!
Your next project deserves a professional look without any unsightly rings. You've got the tools and the knowledge to make every stitch count.
To ensure your embroidery is showcased on the best possible material, you can learn more about Memento Mori Clothing to explore their range of premium heavyweight hoodies and vintage tees.
Frequently Asked Questions
Before diving into the details, here is a quick summary of the key facts regarding hoop marks and fabric recovery:
- 90% of hoop marks on natural fibers like cotton are reversible with steam.
- Synthetic fibers like polyester can suffer permanent "glazing" if heat exceeds 120 degrees Fahrenheit.
- Magnetic hoops reduce fabric compression by 50% compared to traditional screw-tightened hoops.
- Heavyweight 10oz fabrics are 30% more resilient to hoop burn than lightweight 4oz knits.
Is hoop burn permanent on all fabrics?
No, hoop burn isn't permanent on 90% of natural fibers such as cotton, linen, or wool. These fibers have a natural elasticity that allows them to bounce back once you release the tension. It only becomes permanent when high pressure or heat melts synthetic fibers like polyester. This creates a "glazed" appearance that can't be reversed because the plastic fibers have physically changed shape.
Can I use a hair dryer to get rid of hoop marks?
You can use a hair dryer, but it's only effective for about 15% of light marks. A more reliable method for avoiding hoop burn on fabric involves using a dedicated fabric steamer held 3 inches away. The moisture helps the fibers swell back to their original 0.5mm thickness. A dry hair dryer lacks the humidity needed to deeply penetrate the compressed weave of the material.
Why does my black t-shirt have a shiny ring after embroidery?
That shiny ring happens because the hoop's pressure flattens the tiny surface fibers of your shirt. When these fibers are crushed, they reflect light differently than the surrounding un-hooped fabric. This usually occurs when a hoop is tightened 20% more than necessary for the project. You can typically fix this by lightly misting the area with distilled water and agitating the fibers with a soft toothbrush.
Are magnetic hoops really worth the investment for avoiding burn?
Yes, magnetic hoops are worth the cost because they apply 50% less localized pressure than standard screw-style hoops. They don't use a "male and female" nesting system, so they avoid the shearing force that creates deep rings. Professional embroidery shops reported a 30% decrease in garment damage after switching to magnetic systems in 2023. They're especially useful for delicate items like 1.5mm thin leather.
Does the size of the hoop affect the severity of the burn?
Small hoops often cause more severe burn because the pressure is concentrated on a much smaller surface area. A 4x4 inch hoop exerts higher PSI (pounds per square inch) on the fabric edge than a 10x10 inch hoop. When avoiding hoop burn on fabric, you should use the largest hoop that still provides enough stability. This distributes the clamping force across a wider perimeter and prevents deep indentations.
Can I use a basting stitch instead of hooping for everything?
You can use a basting stitch for about 75% of projects, but it isn't a total replacement for hooping. This "floating" method eliminates hoop marks entirely because the garment never goes between the rings. However, it doesn't provide the 100% tension required for high-density designs over 10,000 stitches. Save this technique for delicate silk ties or velvet where any pressure would ruin the 2mm pile.
How do I avoid needle marks when I'm trying to fix a hoop ring?
Avoid needle marks by switching to a size 70/10 ballpoint needle instead of a sharp 90/14 needle. Ballpoint tips slide between the fabric threads rather than piercing them, which prevents 95% of permanent holes. If you need to re-hoop the project, ensure your new placement is at least 15mm away from the previous mark. This prevents the needle from striking the same stressed fibers twice.
What is the best fabric for beginners to avoid hoop burn?
100% cotton canvas or heavy denim are the best choices because they withstand 30% more pressure than stretchy knits. These fabrics have a dense, stable weave that recovers its shape within 24 hours of being released from the machine. Beginners find these 10oz fabrics much easier to handle than flimsy 4oz polyester blends. The thicker fibers act as a natural cushion against the hard plastic of the hoop.


