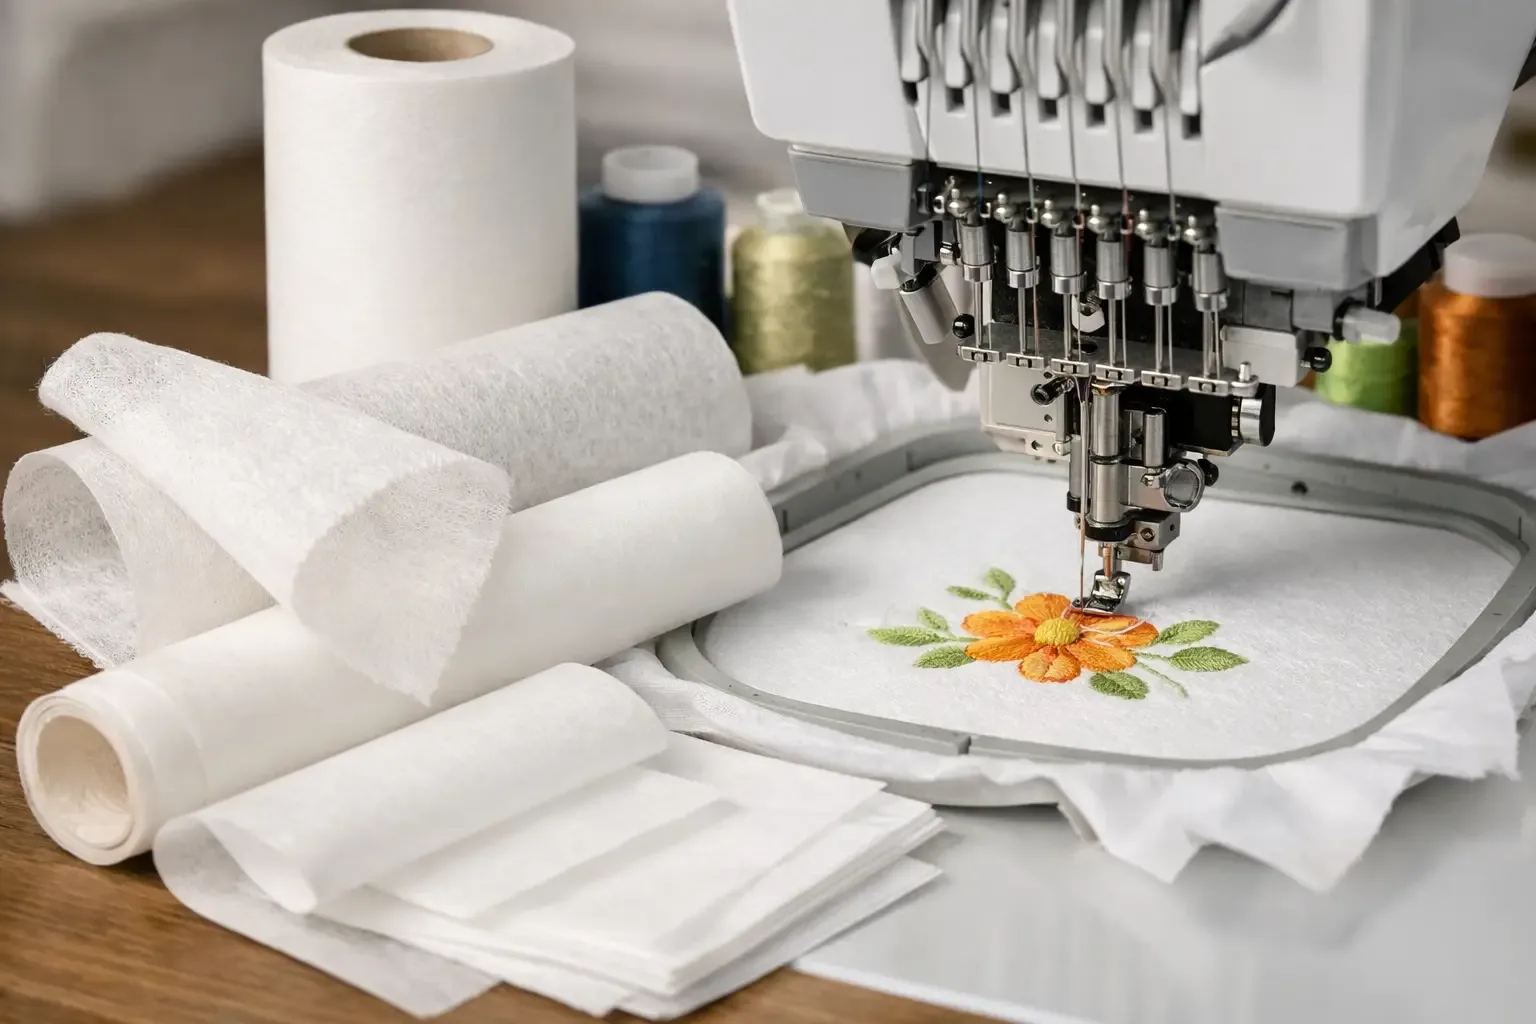
A great design file can still stitch poorly if the fabric shifts, stretches, or sinks beneath the thread. This machine embroidery stabilizer guide makes the choice simpler: start with your fabric, consider the design density, then select support that stays put for the whole stitch-out. Stabilizer is not an optional extra added only when a project feels difficult. It is the foundation behind crisp lettering, smooth fills, clean outlines, and fabric that keeps its shape after the hoop comes off. Whether you are personalizing a team hoodie, making a baby gift, or stitching a detailed fandom design on a tote, the right stabilizer gives your instant-download file the support it needs.
## Start With the Fabric, Not the Design
It is tempting to choose stabilizer based on the design alone, especially when a file has lots of color changes or dense fill stitching. Design density matters, but the fabric tells you how much movement you must control.
Stable woven fabrics such as quilting cotton, canvas, denim, and twill usually need less help than stretchy or textured materials. Knits, performance shirts, fleece, towels, and thin fashion fabrics can distort quickly under thousands of needle penetrations. A dense sports logo-style design on a polo needs a different setup than a simple name on a cotton apron.
Look at three things before hooping: stretch, thickness, and texture. If the fabric stretches in any direction, plan on a cut-away stabilizer. If it is thin or loosely woven, use enough backing to prevent puckering and show-through. If it has a raised surface, such as terry cloth or fleece, add water-soluble topping so small details do not disappear into the pile.
## Machine Embroidery Stabilizer Guide: The Main Types Most projects can be handled with cut-away, tear-away, wash-away, or fusible stabilizer. The best choice depends on how permanent the support needs to be after stitching.
Cut-Away Stabilizer for Stretch and Wearables
Cut-away stabilizer stays behind the embroidery after you trim away the excess. Because it remains attached, it is the dependable choice for T-shirts, sweatshirts, polos, onesies, activewear, and other garments that stretch or get washed often.
Use a light or medium cut-away for most knit garments. Move to a heavier cut-away, or two layers, for dense designs, thin jerseys, and fabrics with significant stretch. A large athletic-style logo may look fine immediately after stitching with tear-away, then become wavy after a few washes. Cut-away is insurance against that result.
The trade-off is comfort and visibility. Heavy backing can feel stiff against skin and may show through pale, lightweight fabric. Match the stabilizer color to the garment when possible, and use the lightest cut-away that still holds the design flat.
### Tear-Away Stabilizer for Stable Fabrics
Tear-away is made to support the fabric during stitching, then remove cleanly around the design. It works well for woven cotton, denim, canvas, bags, caps with appropriate backing, and decorative items that do not need long-term stretch recovery.
A medium tear-away is a practical everyday choice for cotton towels, kitchen textiles, patches, and many gift projects. For a light design, one layer may be enough. For dense fills, broad satin stitches, or fabric that shifts in the hoop, use two layers with the grain running in different directions.
Tear-away has a clean finish, but it is not always the cheapest shortcut. If the item will be pulled, stretched, or repeatedly laundered, it can leave the embroidery without enough support. When in doubt on a wearable knit, choose cut-away instead.
Wash-Away Stabilizer for Sheer and Open Work
Wash-away stabilizer dissolves in water. It is useful when you do not want backing left on the finished item, including freestanding lace, lace ornaments, cutwork, organza, tulle, and sheer fabrics.
For freestanding lace, hoop the wash-away firmly and stitch directly onto it. The thread structure becomes the finished piece once the stabilizer dissolves. For delicate fabric, wash-away can be used underneath as a temporary backing, but test first. Some lightweight materials benefit from a gentle rinse, while others can pucker if the design is too dense for the fabric.
There are film-like wash-away products and softer fibrous versions. Film is useful for topping and crisp detail. A fibrous wash-away backing may provide more support for lace and open designs.
Water-Soluble Topping for Towels and Fleece
Topping goes on top of the fabric, not behind it. Its job is to keep stitches from sinking into nap, pile, or texture. Use it on terry cloth towels, fleece blankets, velvet, minky, sherpa, and similar surfaces.
Place the topping over the hooped fabric and secure it with the first stitches. Afterward, tear or trim away what you can, then remove small remaining bits with water according to the product instructions. Topping is especially helpful for small lettering, fine outlines, and detailed eyes or facial features in cartoon and character designs.
Fusible and Adhesive Options for Hard-to-Hoop Items
Fusible stabilizer has a heat-activated side that can be pressed onto the wrong side of fabric before hooping. It can reduce slipping on lightweight wovens, but it is not a replacement for proper backing when a design is dense.
Sticky, self-adhesive stabilizer is useful when hooping the item itself would leave marks or is physically difficult. Float a cap brim, pocket, sock cuff, collar, or small finished item on the exposed adhesive, then stitch carefully. Avoid pulling the item tight while placing it. The fabric should lie naturally, with no stretch added by the adhesive.
Match Stabilizer Weight to Stitch Density
The heavier the stitch count and the larger the filled areas, the more support the project needs. Dense embroidery pulls fabric inward as the thread forms. If backing is too light, you may see puckering, ripples around the design, or a distorted circle that should have been round.
A simple running-stitch outline or small monogram on stable cotton may only need one light tear-away. A full-coverage mascot, stadium scene, or detailed sports-inspired crest often calls for medium cut-away on apparel or two layers of tear-away on a structured bag. Large designs are not automatically difficult, but they create more pull than small ones.
Your fabric color also matters. White cut-away behind a black or navy shirt can be visible from the front, especially under bright light. Black backing is often a better match for dark garments. On pale, thin fabric, use a lightweight backing and avoid overbuilt designs when possible.
## Hoop Correctly Before You Blame the Stabilizer
Even the right stabilizer cannot fix a fabric that is hooped poorly. The fabric and backing should be smooth, secure, and relaxed. Do not stretch the garment drum-tight, because it can spring back after removal and cause ripples around the stitches.
Choose a hoop that is only slightly larger than the design area. A very large hoop gives fabric more room to shift. If your machine supports magnetic hoops, they can be convenient for bulky items, but check that the fabric and backing are held evenly without gaps.
For projects that cannot be safely hooped, use a floating method with adhesive stabilizer or hoop only the backing, depending on the material and design. Baste around the design area if your machine has a basting function. That extra step takes little time and makes shifting obvious before the main stitching begins.
Quick Fixes for Common Stabilizer Problems
If the fabric puckers, increase stabilizer support, reduce hoop tension, and make sure the item was not stretched while hooped. If stitches disappear into a towel or fleece, add water-soluble topping. If lettering looks uneven on a knit shirt, switch from tear-away to cut-away and check whether the lettering is sized appropriately for the font.
If a design shifts partway through, the issue may be hooping, adhesive failure, or an overly large hoop rather than the backing itself. Stop early when you notice movement. Continuing usually turns a small alignment problem into a wasted blank.
Keep a few stabilizer types on hand rather than trying to make one roll work for every project. A basic setup of medium cut-away, medium tear-away, water-soluble topping, and wash-away backing covers a wide range of apparel, gifts, décor, and freestanding projects.
When you download a new design from Embroidery n Sewing, take a moment to picture where it will live: on a stretchy jersey, a structured tote, a plush blanket, or a crisp cotton shirt. That one decision will point you toward the right backing and help the finished embroidery look as good as the design that caught your eye.