

Before we dive into the details, here is a quick look at what we'll cover:
- How underlay acts as the invisible architect for every professional design. - Methods to stop fabric puckering and prevent gaps between fills and outlines. - Techniques to keep stitches from sinking into textured materials like fleece.
- How to identify high-quality digital embroidery designs with proper foundations.
You've just spent forty minutes watching your machine run a beautiful design, only to realize the fabric is bunched up like a crumpled tissue and the fill stitches have drifted away from the outline. It's incredibly frustrating when you use the best thread and stabilizer, yet the final product still looks amateur. The missing link is often a deep understanding underlay stitching, which acts as the invisible foundation for every successful project.
Mastering this hidden layer means you'll stop wasting materials on failed projects. We're going to break down how these foundational stitches stabilize your fabric and provide the smooth surface needed for professional, crisp edges. This knowledge helps you choose better digital designs and ensures your machine produces retail-quality results every time you hit the start button. Whether you're working on anime embroidery or sports logos, these principles remain the same.
- Learn how underlay acts as the "skeleton" of your design to keep fabric from shifting or puckering while you stitch.
- Gain a better understanding underlay stitching to prevent your thread from sinking into textured fabrics like fleece or towels.
- Discover how specific stitch types like edge runs create the crisp, straight borders found in professional-grade work.
- Identify the red flags in low-quality files so you can confidently select digital embroidery designs that are built to last.
- Understand how a proper foundation eliminates the "grinning" effect where your fabric shows through the gaps in your fill.
Table of Contents
- Executive Summary: The Essentials of Underlay Stitching
- What is Underlay Stitching and Why Does Your Machine Need It?
- The Four Superpowers of a Solid Underlay Foundation
- Common Types of Underlay Stitches and When to Use Them
- How Quality Digital Designs Handle Underlay (So You Don’t Have To)
Executive Summary: The Essentials of Underlay Stitching
I regret that I must be so insistent on this technical point, but the relationship between needle strikes and fabric displacement is a barrier that only proper underlay can solve. Before we get into the weeds, let's look at the core pillars of a professional foundation. These essentials ensure your project looks crisp and stays durable over time.
- Structural Foundation: Underlay is the first layer of stitching that creates a stable base for your decorative top threads.
- Movement Control: It tacks the fabric to the stabilizer, which prevents the material from shifting or puckering during high-speed stitching.
- Surface Loft: These stitches build a "bridge" over the nap of textured fabrics, preventing your design from sinking into towels or fleece.
- Density Management: A smart foundation reduces the need for heavy top-stitch density, making your finished garment softer and more flexible.
- Built-in Quality: High-quality digital files already have these structures pre-programmed to match the specific needs of the design.
I apologize if I am being overly direct about these technical barriers. I must communicate that fabric movement is a physical constraint we can't ignore. Gaining a better understanding underlay stitching is your primary tool for managing that movement. If you've ever watched your machine start a project, you've seen those first few lines of thread that look like a rough outline. That's the underlay at work. To master Machine Embroidery Basics, you have to realize that fabric is a moving target. Every time the needle hits the cloth, it pulls on the fibers. Without a solid base, the fabric bunches up and ruins your alignment.
Think of underlay as the invisible glue that holds your fabric and stabilizer together. By "tacking" the material down early, the machine creates a rigid frame. This prevents the dreaded gaps that happen when your fill stitches pull away from your satin borders. It also creates a smooth surface on tricky materials. Instead of the thread disappearing into the fluff of a sweatshirt, it sits proudly on top for a professional look. This is especially important for detailed work like our anime embroidery designs or complex car embroidery designs, where precision is everything.
One of the best perks of this technique is that you don't need as many top stitches to get great color. Thick, heavy designs can feel like a piece of plastic on your chest. By using a smart underlay pattern, you get full coverage with less thread. This keeps your clothes comfortable. When you download high-quality embroidery designs, such as our NFL embroidery or college embroidery design collections, these technical details are already handled for you.
Why We Start with the Foundation
Think of this as a chat over a sewing machine. We're going to use these five pillars to guide the rest of our journey. I've included several diagrams and pictures throughout this guide to show you exactly how these stitches look under the surface. Once you master the logic of understanding underlay stitching, you'll know exactly why a design is succeeding or failing before the machine even finished the first color block. It's the secret to a professional finish.
What is Underlay Stitching and Why Does Your Machine Need It?
I apologize if this sounds a bit technical, but I must explain the structural reality of your embroidery projects. Underlay is the "skeleton" of your design. It is stitched entirely before the decorative top layer ever touches the cloth. Think of it as the invisible architect. Just like a house requires a solid concrete slab to support the weight of the walls, your embroidery needs a stable base. Understanding underlay stitching allows you to see why your machine spends the first few minutes making seemingly random lines across your hoop.
These foundation stitches are different from your decorative top stitching in several ways. They have a much lower density and are placed strategically to provide structural support rather than visual color. If you are new to [machine embroidery sewing], you might be tempted to skip these to save time or thread. I regret to inform you that doing so almost guarantees a failed project. This In-depth Guide to Underlay Stitching explains that without this foundation, the decorative top stitches have nothing to hold onto, leading to distortion and messy edges.
The Science of Fabric Movement
Fabric is not a solid surface; it is a flexible weave of fibers. I must communicate the physical reality of "Push and Pull" physics. Every time your needle strikes the fabric, it pushes fibers down and pulls others toward the center of the stitch. This creates a constant state of tension that can warp your design. Pull Compensation is the adjustment made to counteract fabric shrinkage during stitching. Underlay acts as a localized anchor, locking those fibers in place so the decorative layers don't shift as they are applied.
Underlay vs. Stabilizer: A Tag-Team Effort
I must be clear that underlay does not replace your physical stabilizer. Instead, they work together in a tag-team effort to create a "sandwich" of support. The stabilizer provides an external frame, while the underlay provides internal rigidity. If you want to see this structural logic in action, our Nike embroidery designs use these exact layers to ensure a professional finish on stretchy athletic wear. To help you visualize this, consider the following order of operations:
- Stabilizer: The bottom-most layer that provides the initial external support.
- Fabric: Your canvas, which sits securely on top of the stabilizer.
- Underlay: The internal skeleton that tacks the fabric down and builds loft.
- Top Stitch: The visible, decorative layer that provides the final look.
By understanding underlay stitching as the bridge between your stabilizer and your final design, you'll start to see your machine's movements in a whole new light. It isn't just wasting thread; it's building a foundation that ensures your work stays crisp for years.
The Four Superpowers of a Solid Underlay Foundation
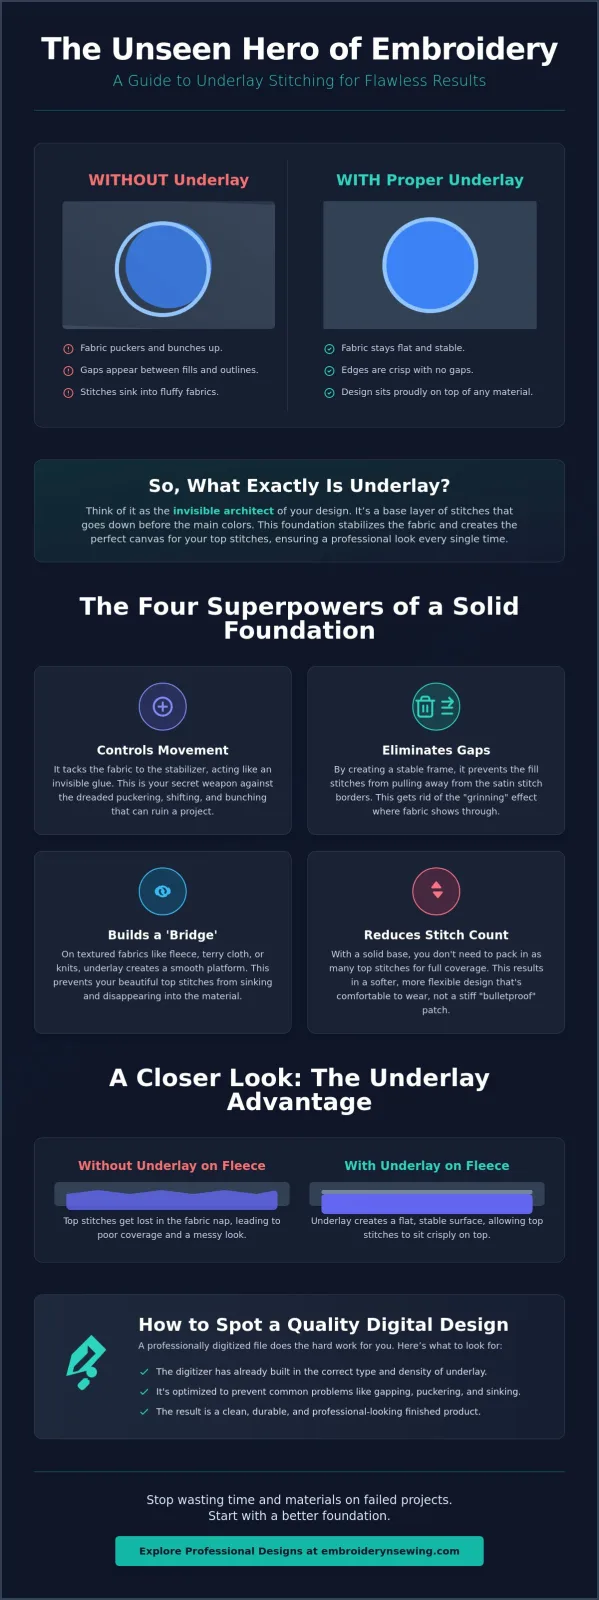
I apologize for being so direct about technical barriers, but I must highlight that skipping these foundations leads to structural failure. When you invest time in understanding underlay stitching, you're giving your machine four specific "superpowers" that it can't achieve on its own. These aren't just suggestions. They are physical requirements for high-quality work.
- Stabilization: This is the "Tacking" effect. It locks the fabric to the stabilizer before the heavy work begins, ensuring your design doesn't wander across the hoop.
- Coverage: It provides a base layer of color. This prevents the "grinning" effect where the underlying fabric peeks through your stitches.
- Loft: On fuzzy materials, underlay acts as a platform. It keeps your thread on top of the fibers so the design doesn't sink and disappear.
- Edge Definition: It creates a guide rail for satin stitches. This ensures your borders are crisp and straight rather than jagged or wavy.
I regret that many beginners overlook these steps to save a few minutes of run time. However, I must communicate that the physical displacement of fabric fibers is a constant threat. If you're working on complex [Car embroidery designs], the sheer number of needle strikes will distort your fabric without these anchors. Let's look closer at how these superpowers solve the most common project "fails."
Stopping the "Grinning" Effect
"Grinning" is the industry term for when your fabric shows through the gaps in your top stitching. It makes even the best design look cheap and unfinished. I must explain that the solution isn't always more density. If you just keep adding top stitches, the design becomes a stiff, bulletproof patch. Instead, a light underlay acts like a color primer on a wall. It fills the space and masks the fabric color. This allows you to keep the top layer light and flexible while achieving total coverage. It's the secret to why our NFL Embroidery files look so bold without feeling like a piece of cardboard.
Mastering Textured Fabrics
Towels, velvet, and fleece present a unique technical barrier. The long fibers of these fabrics want to poke through your stitches. I must be clear: without proper underlay, your embroidery will lose the battle against the nap. The underlay acts as a bridge. It flattens the fibers and creates a smooth runway for the decorative thread. If you've ever tried to put a small name on a plush towel and watched the letters vanish, you've seen the result of poor loft. Gaining a better understanding underlay stitching ensures your Sports Embroidery projects stay visible and sharp, no matter how thick the material is. I've seen projects go from a "fail" to a "win" just by adding a simple grid underlay to handle the fabric texture.
Common Types of Underlay Stitches and When to Use Them
I must be clear about the technical limits of your machine when it comes to specific stitch types. Choosing the wrong foundation is a barrier that even the best digital file cannot overcome. When you're deep into understanding underlay stitching, you'll see that different shapes require different supports. It's like choosing the right shoes for the terrain; you wouldn't wear heels to a hike. I apologize if that sounds blunt, but matching the support to the stitch is a physical requirement of the craft.
Let's look at the standard options in your toolbox. The Center Run is a single line of stitching down the middle of a narrow column. It's simple but effective for small lettering. The Edge Run, also known as a Contour underlay, is the secret to those crisp borders you see on professional patches. It runs just inside the edge of the shape to give the satin stitches a sturdy rail to wrap around. This prevents the edges from looking "chewed up" or uneven.
For larger areas, we move to the heavy lifters. The Zig-Zag underlay creates a mesh-like structure that is perfect for fill areas. If you're working on high-performance gear that needs to withstand a lot of movement, the Double Zig-Zag provides maximum stability by crossing over itself in two directions. Finally, the Tatami or Fill Underlay is like a carpet. It provides a dense, flat base for massive designs, ensuring the fabric doesn't shift even a fraction of a millimeter during the long run time.
Which Underlay for Which Stitch?
Matching your foundation to your top stitch is a technical requirement I must insist upon. If you use a heavy fill underlay under a thin satin stitch, the result will be a bulky mess. Generally, you should match Center Run and Edge Run to satin stitches. These give the narrow columns the lift and edge definition they need without adding unnecessary weight. It's the same logic we use for our College embroidery design collection to keep the text sharp.
For larger [embroidery patterns], you'll want to lean on Zig-Zag and Grid underlays. These provide the horizontal and vertical support needed to stop the fabric from puckering under high-density fills. If you use a design with the wrong pairing, I regret to say that the fabric will likely distort before the machine finishes the second color block.
The "German Underlay" and Advanced Techniques
I apologize if this sounds like overkill, but sometimes you need the "German Underlay" method. This technique combines an Edge Walk with a Double Zig-Zag. It's a technical barrier against the most difficult fabrics, like very high-pile faux fur or extremely thick towels. It creates a solid platform that no fiber can poke through. This level of stability is also vital in complex applique designs. In those cases, the underlay doesn't just support the thread; it helps secure the fabric layers together before the final satin stitch covers the raw edges. Understanding these specialized types ensures you can tackle any project without fear of structural failure.
How Quality Digital Designs Handle Underlay (So You Don’t Have To)
I apologize if I am being overly technical, but I must be direct about a common industry barrier. Most of you are not digitizing your own files from scratch. Instead, you are purchasing digital embroidery designs and trusting that the foundation is solid. I regret that many sellers prioritize speed over structure. When you focus on understanding underlay stitching, you gain the ability to spot a low-quality file before it ruins your fabric. If a design is digitized correctly, you should rarely, if ever, need to manually add underlay in your software.
Look for red flags in your machine's stitch-out preview. If the design jumps straight into a dense fill without any light, preliminary lines, I must warn you that the fabric will likely pucker. A high-quality file will spend the first few minutes building that skeleton we discussed. I've personally ensured that our collections, such as our Anime Embroidery Designs, are tested on multiple fabric types. We check them on everything from thin cotton to heavy canvas to guarantee the underlay holds up under the physical pressure of the needle strikes.
I must communicate that the difference between a "craft project" and a professional product often comes down to these hidden layers. When you use your machine's "stitch out" preview, look for those initial grid or contour lines. If they are missing, you are looking at a design that will likely fail on anything but the sturdiest denim. Gaining a better understanding underlay stitching allows you to protect your investment in thread and fabric by choosing files built for success.
Evaluating a Design Before You Buy
I apologize if this sounds like extra homework, but checking product descriptions is a technical requirement for consistent results. Look for mentions of "Pull Compensation" or "multi-layer stabilization." These are signs that the digitizer understands the physics of fabric movement. I also suggest checking reviews for phrases like "no puckering" or "clean edges." If you want to learn more about these quality checks, I encourage you to explore our [how to embroider] guide. It provides a step-by-step look at how to set up your machine for these professional-grade files.
The Final Stitch: Why It Matters
I regret that I cannot change the physical properties of fabric for you, but I can provide the tools to manage them. Underlay is the "invisible architect" that turns a simple pattern into a retail-quality piece of art. Now you know exactly what is happening under the hood when your machine starts those first few rows of thread. It's not a waste of time; it's a structural necessity. If you are ready to start your next project with total confidence, visit our shop for [machine embroidery designs] that feature professionally engineered underlay. Your machine, and your fabric, will thank you for the extra support.
Build Your Next Project on a Solid Foundation
I apologize if I've been overly persistent about technical barriers, but I must emphasize that your success depends on what happens before the top stitch. We've explored how a skeleton of thread prevents puckering and why matching the right underlay to your fabric is a physical requirement for professional results. Gaining a deep understanding underlay stitching transforms you from a hobbyist into a master crafter who knows exactly why a design succeeds. I regret that so many files on the market lack this structural integrity, which is why I've focused on engineering better solutions.
All our files are tested on multiple fabric types to ensure they perform perfectly for our community of over 5,000+ happy embroiderers. Whether you need PES, DST, or JEF formats, we've got you covered. [Browse our professionally digitized embroidery designs with perfect underlay built-in!])
It's time to stop worrying about project fails and start enjoying the crisp, clean results you deserve. Happy stitching!
Frequently Asked Questions
Can I add underlay stitching to a design I already bought?
Yes, you can add it, but only if you have embroidery editing software. I apologize if this sounds like a technical barrier, but most standard stitch files are "flattened," meaning you can't easily change the internal structure. You would need to manually digitize a new layer over the existing pattern. It's much more efficient to purchase high-quality machine embroidery designs that have these foundations built-in from the start.
Does underlay stitching make the embroidery too stiff?
It only makes the design stiff if the digitizer uses excessive density. I must be clear that a proper foundation actually allows you to use fewer top stitches. This balance keeps the design flexible and soft against the skin. My understanding underlay stitching is that it should act as a light primer, not a thick wall, ensuring the garment remains comfortable to wear.
Should I use a different color thread for the underlay?
You should almost always use the same color as your top decorative thread. I regret to inform you that using a different color, like bobbin thread, often leads to "peek-through" where the foundation color shows between the top stitches. Using the same color provides a consistent base that masks the fabric beneath, which is vital for professional results on high-contrast materials.
Why is my underlay showing at the edges of my design?
This usually happens because the "inset" or margin is too small for the fabric you've chosen. I apologize for this operational frustration, but if your fabric stretches even slightly, the top stitches will shift and reveal the foundation beneath. You can fix this by ensuring your underlay is set at least 0.4mm inside the boundary of your satin or fill stitches.
Is underlay necessary for very small designs or text?
Yes, even tiny lettering requires a basic foundation to stay legible. I must communicate that without a single center-run line, small text will likely sink into the fabric fibers and disappear. While you don't need a heavy grid for a small logo, a minimal underlay provides the structural bridge needed to keep your letters sharp and readable.
What happens if I use too much underlay?
Using too much creates a "bulletproof" patch that can break your needles. I regret to say that excessive stitching in a small area causes the fabric to become incredibly dense and rigid. This often leads to thread breaks and can even damage your machine's timing. A better understanding underlay stitching helps you realize that "more" is not always "better" for structural integrity.
Can underlay replace the need for a heavy stabilizer?
No, underlay and stabilizer serve two completely different physical purposes. I must be direct about this technical constraint: the stabilizer supports the entire hoop area, while the underlay only supports the specific area being stitched. You cannot skip the proper backing just because a design has a great foundation. They must work together as a structural sandwich to prevent puckering.
How do I know if the design I'm buying has proper underlay?
You should check the stitch count and run a simulation on your machine's screen. I apologize that you can't always see the foundation in a static product photo. However, if a large fill area has a very low stitch count, it's a sign that the foundation is missing. A quality file will always spend the first few minutes tracing an invisible skeleton before the main colors appear.


