

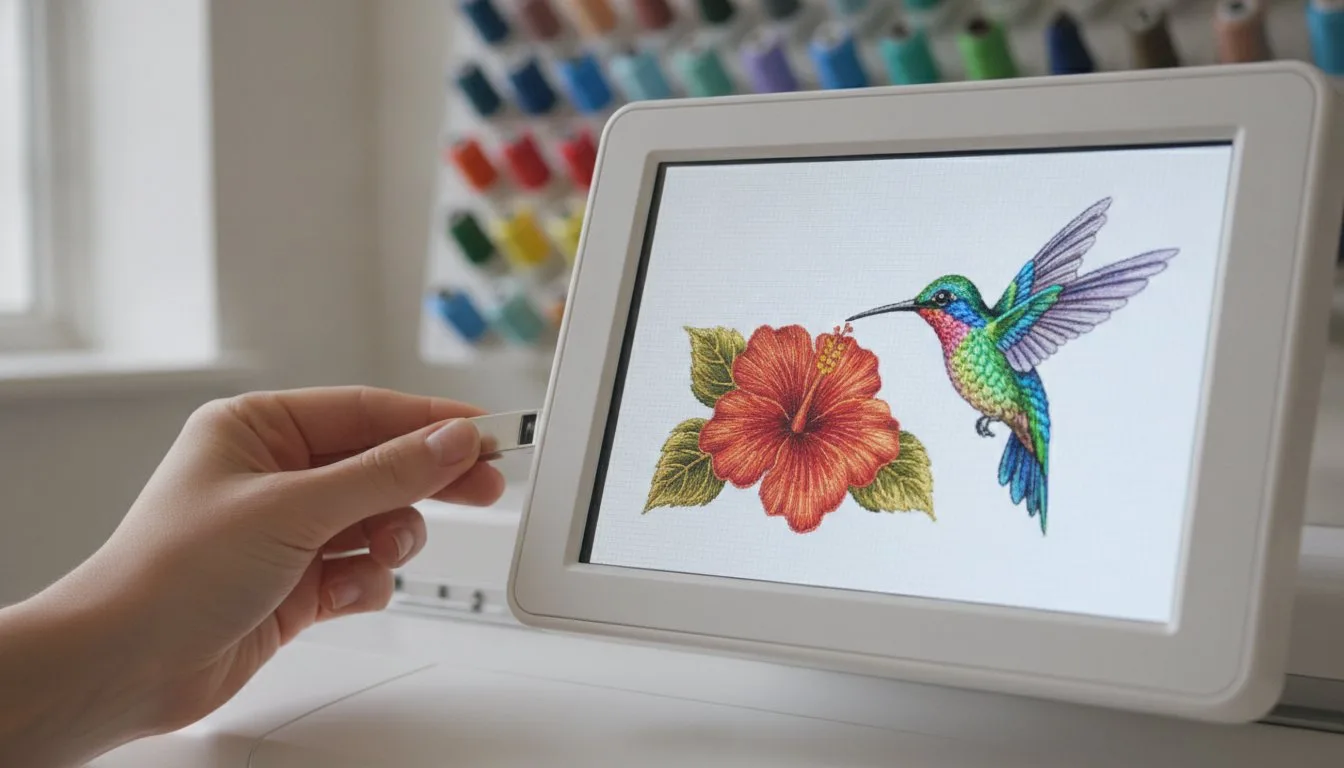
You’ve found the perfect embroidery design, a beautiful digital file just waiting to be stitched. But now comes the part that can feel intimidating. Does the thought of file types like PES, JEF, or ZIP make your head spin? Are you staring at a USB stick your machine refuses to read, worried you might damage your new investment? The process of transferring embroidery designs to your machine can feel like a major hurdle, but it doesn’t have to be a source of frustration.
This complete guide is here to bridge that gap between your computer and your creative projects. We will walk you through the simple, step-by-step methods to get your files where they need to go with total confidence. Whether your machine uses a USB drive, a direct cable connection, or even WiFi, we’ve got you covered. Get ready to troubleshoot common issues, understand the correct process for your specific machine, and start stitching that gorgeous new design in minutes.
- Master the three essentials-file format, design file, and transfer medium-to ensure a flawless transfer every time. - Identify the right transfer method for your machine, whether it's the popular USB stick, a direct cable connection, or convenient WiFi.
- Follow our step-by-step instructions for transferring embroidery designs to machine, making the process simple and frustration-free. - Don't let an older machine stop you; learn specialized techniques for transferring designs using proprietary memory cards and reader boxes.
Table of Contents
- Before You Begin: 3 Essentials for a Smooth Transfer
- Method 1: Using a USB Stick (The Most Common Way)
- Method 2: Direct Connection via USB Cable
- Method 3: Wireless (WiFi) Transfer for Modern Machines
- What About Older Machines? Memory Cards and Reader Boxes
Before You Begin: 3 Essentials for a Smooth Transfer
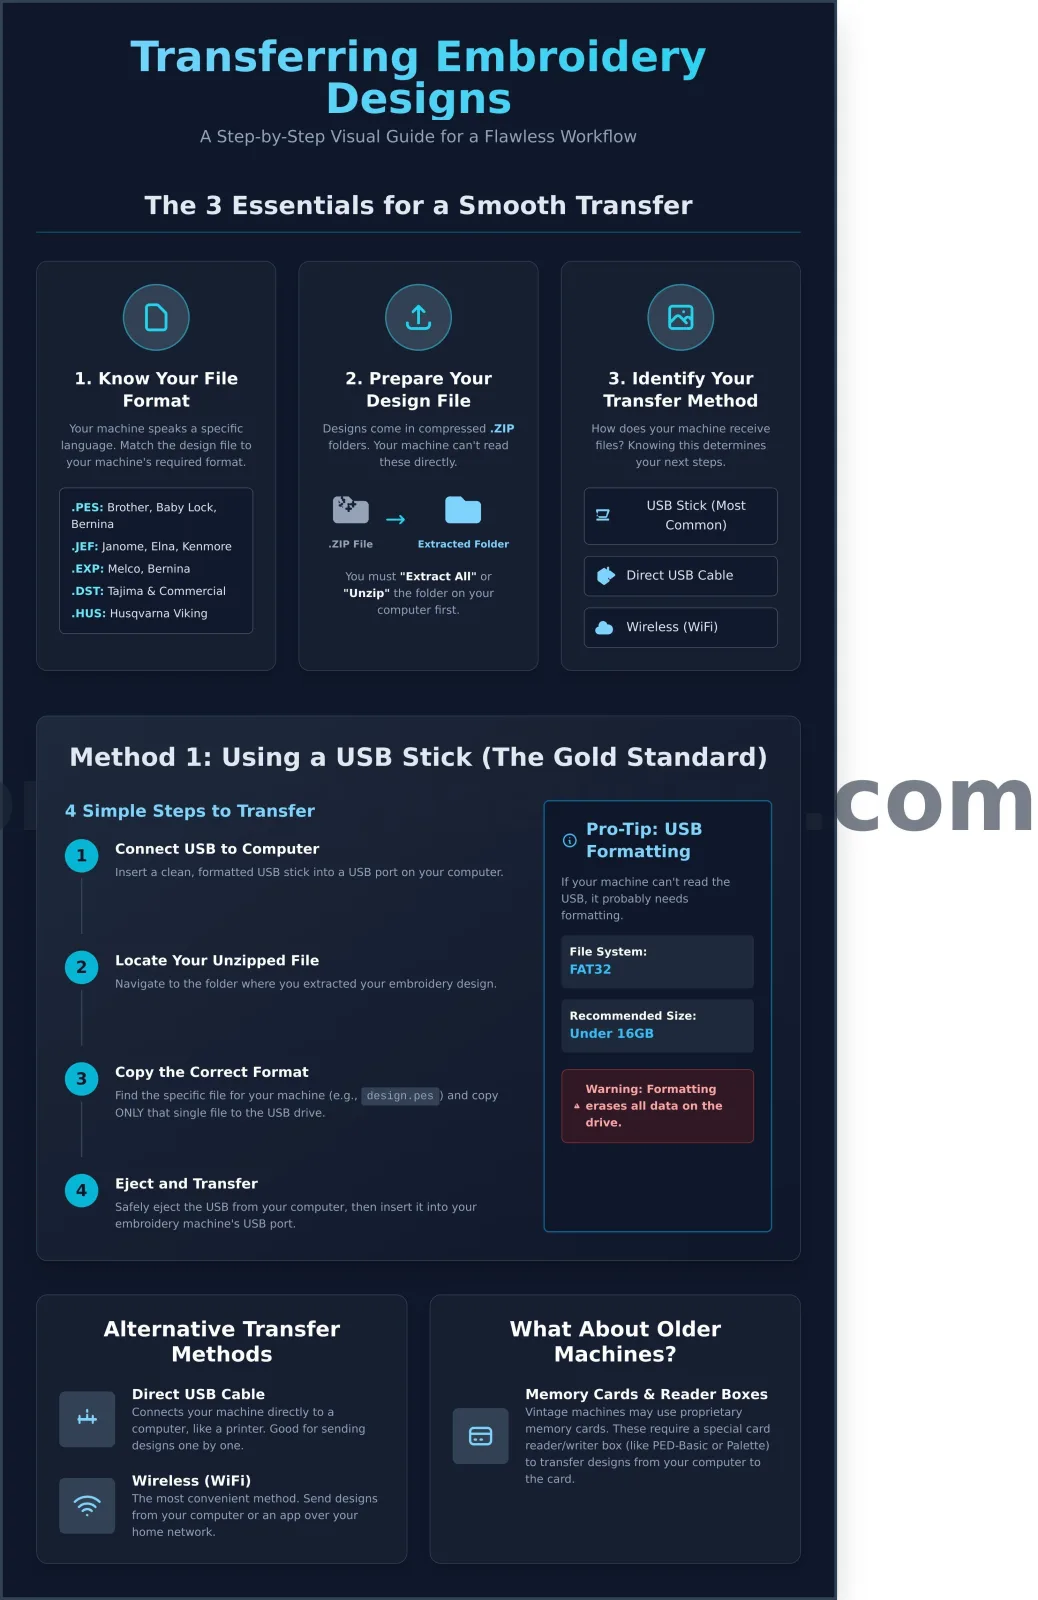
Jumping straight into transferring an embroidery design without a little prep work can lead to frustrating errors and wasted time. To ensure a perfect stitch-out every time, it's crucial to start with the right foundation. Mastering the process of transferring embroidery designs to machine is all about understanding three key components: your machine's required file format, the state of your design file, and your transfer method. Getting these three things right from the start is the secret to a flawless workflow.
Think of your embroidery machine as a reader that only understands one specific language. This "language" is its file format. While many modern computer-controlled embroidery machines are incredibly advanced, they cannot interpret a file that isn't in their native format. You must provide the correct file type for it to read the stitch data. Always check your machine's manual or the manufacturer's website to confirm its required format.
Common formats include:
- .PES: Brother, Baby Lock, Bernina
- .JEF: Janome, Elna, Kenmore
- .EXP: Melco, Bernina
- .DST: Tajima and most commercial machines
- .HUS: Husqvarna Viking
When purchasing designs, always make sure the format you need is included in the download.
Essential #2: Prepare Your Design File (Unzipping)
Embroidery designs are almost always downloaded in a compressed folder, known as a '.zip' file. This saves space and bundles all the different machine formats together neatly. However, your embroidery machine cannot read a .zip file directly. You must first "unzip" or "extract" the files onto your computer.
On most computers, this is simple: just right-click the .zip folder and select "Extract All" (Windows) or simply double-click it (Mac). This will create a new, regular folder containing all the individual design files (e.g., design.pes, design.jef, design.dst).
Essential #3: Identify Your Transfer Method
Finally, you need to know how your machine receives designs. While we will cover each method in detail later, familiarizing yourself with your machine's capabilities is a vital first step. The primary methods for transferring embroidery designs to machine are:
- USB Stick: The most common method for modern home machines.
- Direct USB Cable: Connecting your machine directly to your computer.
- Wireless (WiFi): The newest and most convenient option, allowing you to send designs over your home network.
Method 1: Using a USB Stick (The Most Common Way)
For over 90% of modern home embroidery machines, the humble USB stick is the key to unlocking a world of creativity. This method is the gold standard because it's reliable, straightforward, and frees you from needing your machine physically connected to a computer. Mastering this simple process is the most important step in successfully transferring embroidery designs to machine, opening the door to countless projects. From formatting the drive to troubleshooting, we'll cover everything you need to know.
Step-by-Step Guide to USB Transfer
Follow these four simple steps to move your design from your computer to your machine. The process is quick, but paying attention to the details is crucial for a flawless transfer.
- Step 1: Insert a clean, formatted USB stick into an available USB port on your computer.
- Step 2: On your computer, navigate to the folder where you saved and unzipped your downloaded embroidery design.
- Step 3: Identify the correct file format for your specific machine (e.g., .PES for Brother, .JEF for Janome, .DST for many commercial machines). This step is critical; even public guides like the Johnson County Library embroidery resources emphasize bringing your design in the correct format. Copy only this single file directly onto the USB drive.
- Step 4: Use the "Safely Eject" option on your computer before physically removing the USB stick. Then, insert it into your embroidery machine's USB port.
Formatting Your USB Drive for Success
If your machine doesn't recognize your USB, it likely needs to be formatted. Most embroidery machines require a specific file system called FAT32 to read data. Formatting prepares the drive with this system, but be warned: formatting will permanently erase all existing data on the drive.
To format, simply right-click the drive on a Windows PC and select "Format," choosing FAT32 from the dropdown. On a Mac, use the "Disk Utility" application. For best compatibility, we recommend using a dedicated, smaller-capacity USB stick (under 16GB is perfect).
Troubleshooting Common USB Errors
Encountering an error is common, but the fix is usually simple. Here are the two most frequent issues and how to solve them:
- Problem: 'My machine doesn't see the USB stick.'
Solution: The drive is almost certainly not formatted correctly. Re-format it to FAT32 using the steps above. If the problem persists, try a different (and preferably smaller) USB stick. - Problem: 'The USB is recognized, but the design file isn't there.'
Solution: Double-check that you copied the unzipped stitch file (e.g.,my_design.pes) and not the entire folder or the original .zip file. Your machine can only read the specific design file.
Method 2: Direct Connection via USB Cable
For a more streamlined approach to transferring embroidery designs to machine, some models can connect directly to your computer, much like a standard office printer. This method creates a direct line of communication for your digital patterns, eliminating the need for a separate USB flash drive. It’s an ideal solution for crafters who have a dedicated sewing station with their computer and machine side-by-side.
However, this convenience relies on having the correct drivers or software installed. This essential step, often overlooked, is what allows your computer to recognize and communicate with your embroidery machine. Without this software, the connection simply won't work.
When to Use a Direct Cable Connection
This method is perfect for a fixed crafting station where your computer is always near your machine. Many modern mid-to-high-end models from brands like Brother, Janome, and Bernina support it. The main pro is convenience-no need to find and format a USB stick. The primary con is limited mobility. You'll need a specific USB Type-B cable (the kind used for printers) to make the connection.
How to Connect and Transfer Files
The process is simple once you complete the one-time setup. This direct link makes sending files over a quick, drag-and-drop task. Follow these four steps for a flawless transfer:
- Install Software First: Before connecting anything, download and install the correct USB driver for your specific model from the manufacturer’s official website. This is the most critical step for success.
- Connect the Cable: Plug the square USB-B end into your machine and the rectangular USB-A end into an open port on your computer.
- Power On the Machine: Turn on your machine. Your computer should recognize it, and it will often appear as a new drive or device.
- Drag and Drop Your File: Locate your design file (.PES, .DST, etc.) on your computer and simply drag it into the machine’s folder.
Once transferred, the design is stored in your machine's internal memory, ready for you to select on the machine's screen and begin stitching immediately. This instant feedback loop is a major advantage of the direct connection method.
Method 3: Wireless (WiFi) Transfer for Modern Machines
Welcome to the future of embroidery! The latest generation of machines has cut the cord, offering the ultimate convenience of wireless design transfer. Forget about fumbling with cables or searching for a USB stick; with a WiFi-enabled machine, you can send patterns from your computer, tablet, or smartphone directly to your machine with just a few taps. This method is not only the fastest but also provides incredible flexibility for managing your entire design library from anywhere in your home.
This seamless process streamlines your workflow, allowing you to spend less time on setup and more time creating. If your machine supports it, this is the premier method for transferring embroidery designs to machine with unparalleled speed and ease.
Setting Up Your Machine's WiFi Connection
Getting started is as simple as connecting any other smart device to your home network. You’ll navigate your machine's settings menu, typically under a "Network" or "WiFi" icon, to find and select your home network and enter your password. A stable internet connection is crucial for a smooth and uninterrupted transfer, so ensure your machine is within a good range of your router. For model-specific instructions, always consult your machine’s manual for the most accurate, step-by-step guidance.
Using Apps and Cloud Software for Transfer
Most manufacturers with WiFi-enabled machines provide dedicated apps or cloud-based software to make the transfer effortless. Popular platforms include Brother's Artspira app, Bernina's Stitchout, and the comprehensive mySewnet ecosystem from Husqvarna Viking and PFAFF. The workflow is elegantly simple and consistent across most brands:
- Upload from Any Device: Using your computer or mobile device, upload your chosen design file (.PES, .JEF, etc.) to the brand's app or cloud portal. You can do this right after purchasing or creating a new design.
- Access at the Machine: On your embroidery machine's touchscreen, open the corresponding app or cloud library. Your full, synchronized collection of designs will be visible.
- Download and Stitch: Browse your uploaded designs, select the one you want, and download it directly to the machine's memory. It’s ready to stitch in seconds!
This cloud-based approach keeps your designs perfectly organized, backed up, and accessible whenever inspiration strikes. Ready to try this modern workflow on your next project? Find your next design to send wirelessly and experience the magic for yourself!
What About Older Machines? Memory Cards and Reader Boxes
Do you own a trusty older embroidery machine that still stitches beautifully but lacks a modern USB port? You're not alone. Many of the most reliable and beloved machines from past decades were built to last, and the absence of a USB connection doesn't mean they are obsolete. By using special hardware, you can give your vintage machine a new lease on life and access the vast world of modern digital designs.
Understanding Embroidery Memory Cards
Before USB became standard, many machines relied on proprietary memory cards to load designs. These cards, often resembling the flash cards from early digital cameras, were specific to brands like Brother, Janome, Bernina, and Pfaff. The key thing to know is that these are not single-use items; they are blank, rewritable cards designed to be loaded with new files from your computer again and again.
Using a Card Reader/Writer Box
The bridge between your modern computer and your vintage machine's memory card is a dedicated card reader/writer box. Devices like the Brother PED-Basic or the versatile Ultimate Box are designed specifically for this purpose. This hardware makes the process of transferring embroidery designs to machine straightforward, even for non-technical users. The workflow is simple and consistent:
- Connect: Plug the card reader/writer box into your computer's USB port.
- Insert: Place a blank, machine-compatible memory card into the slot on the reader box.
- Transfer: Use the accompanying software to copy your downloaded design files (e.g., .PES, .JEF, .ART) from your computer directly onto the memory card.
- Load: Safely eject the card from the box, and insert it into your embroidery machine. Your new design is now ready to stitch!
This simple investment opens up a universe of creativity, ensuring your reliable older machine can keep up with your imagination. It's the perfect way to blend classic durability with contemporary design possibilities. For more expert tips on machine maintenance and accessories, explore the helpful guides at embroiderynsewing.com.
From Screen to Stitch: Mastering Your Design Transfer
You now have the knowledge to confidently move your digital patterns to your embroidery machine. Whether you're using a universal USB stick, a direct cable connection, or the modern convenience of a WiFi network, the perfect method is at your fingertips. Mastering the process of transferring embroidery designs to machine is the final, crucial step that turns a digital file into a beautiful, tangible piece of art.
Now that you've got the technique down, it's time for the fun part! Ready to stitch? Browse thousands of high-quality embroidery designs to try out your new skills! With instant download access after purchase and designs provided in all major file formats, you'll find the perfect pattern compatible with top brands like Brother, Janome, and Singer. The world of machine embroidery is waiting for you.
Happy stitching!
Frequently Asked Questions
Why isn't my embroidery machine recognizing the design file?
This issue is most often caused by an incorrect file format. Each machine brand reads specific formats, like .PES for Brother or .JEF for Janome. Double-check that you have the correct file type for your machine model. Another common mistake is failing to unzip the downloaded folder. Your machine cannot read a compressed .ZIP file; you must extract the actual design file onto your USB drive first.
Do I need to buy special software to transfer embroidery designs?
No, for the basic process of transferring embroidery designs to machine, you do not need special software. All you need is a computer and a compatible USB stick or a direct cable connection. However, if you wish to edit designs-for example, by resizing, combining, or changing colors-you will need to use an embroidery editing program like Embrilliance or the software that may have come with your machine.
Can I transfer designs from a Mac computer?
Absolutely. Transferring designs from a Mac is nearly identical to the process on a Windows PC. Simply download the file, unzip the folder (usually by double-clicking it), and then copy the correct embroidery file format onto your USB stick. For best results, ensure your USB drive is formatted as FAT32, as this is the most universally recognized format by embroidery machines of all brands.
How many designs can I put on my USB stick at once?
The number of designs is limited only by the storage capacity of your USB stick. Since embroidery files are quite small, even a 4GB drive can hold thousands of designs. However, we recommend not overloading your USB stick. Having too many files can make your embroidery machine load slowly and can make it difficult for you to scroll through and find the specific design you want to use.
What's the difference between a ZIP file and the actual embroidery file?
Think of a ZIP file as a compressed shipping box. Designers use it to package multiple file formats (e.g., PES, JEF, DST) and documents into a single, neat download. The actual embroidery file that your machine reads is inside this ZIP folder. You must first "unzip" or "extract" the contents on your computer to access the usable design file before you can transfer it to your machine.
My machine says the design is too large for the hoop. What do I do?
This error means the design's stitch area is larger than your currently attached hoop's maximum embroidery field. Your first step should be to ensure you are using the largest hoop compatible with your machine. If the design is still too large, your only options are to choose a smaller design or use embroidery software to resize the file to fit your hoop. Be aware that resizing can affect stitch quality.


