

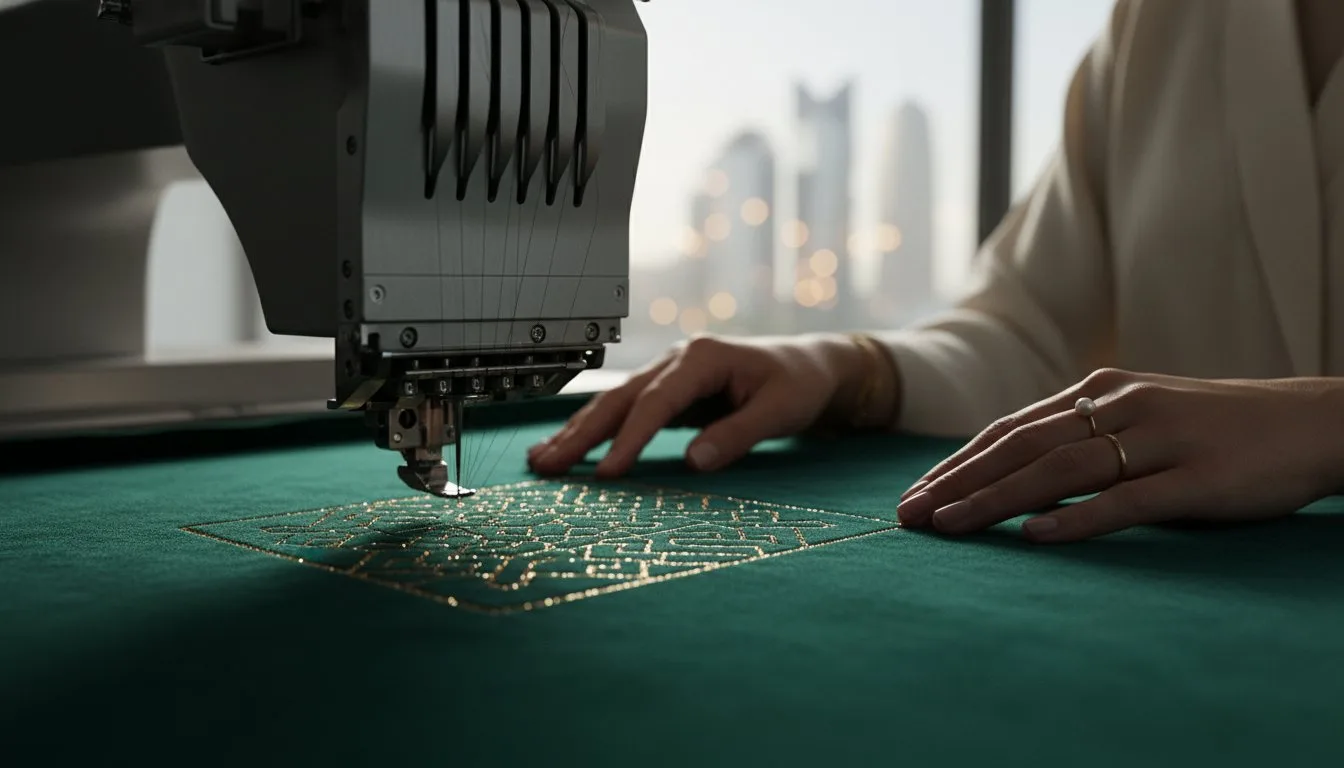
Have you ever held your breath, watching your machine stitch, praying you won’t end up with a flattened mess on that gorgeous velvet? The fear of permanent hoop burn or a design getting lost in the plush pile can make machine embroidery on velvet feel incredibly intimidating. But what if you could achieve flawless, luxurious results every single time, without the stress? The secret isn't luck; it's knowing the right professional techniques, and we're here to share them all with you.
In this ultimate guide, we’ll unlock the secrets to crush-free embroidery. You’ll master the 'floating' method that protects the fabric's delicate pile and discover which digital designs are destined to shine. We'll cover the essential stabilizers and toppers that prevent shifting and ensure every stitch is crisp and clean. Get ready to confidently create stunning monogrammed pillows, elegant apparel, and bespoke gifts that look like they came from a luxury boutique.
- Discover the professional 'floating' technique to embroider velvet without leaving a single permanent mark from the hoop. - Learn which specific needles and threads are essential for creating a high-end, luxury finish that doesn't damage the fabric. - Master the art of selecting the right digital designs to ensure your machine embroidery on velvet looks stunning, not sunken.
- Uncover the secrets to safely removing stabilizers and reviving the velvet's pile for a flawless final product.
Table of Contents
- Executive Summary: The Golden Rules of Velvet Embroidery
- The Essential Toolkit for Professional Results
- The 'Floating' Technique: Step-by-Step Guide
- Choosing Digital Designs for High-Pile Fabrics
- Post-Embroidery Care and Troubleshooting
Executive Summary: The Golden Rules of Velvet Embroidery
Venturing into machine embroidery on velvet can feel intimidating, but success hinges on a few core principles. This luxurious fabric, with its deep pile and elegant sheen, requires a gentle touch and specific techniques to avoid irreversible damage. By mastering these golden rules, you can achieve stunning, professional-quality results every time.
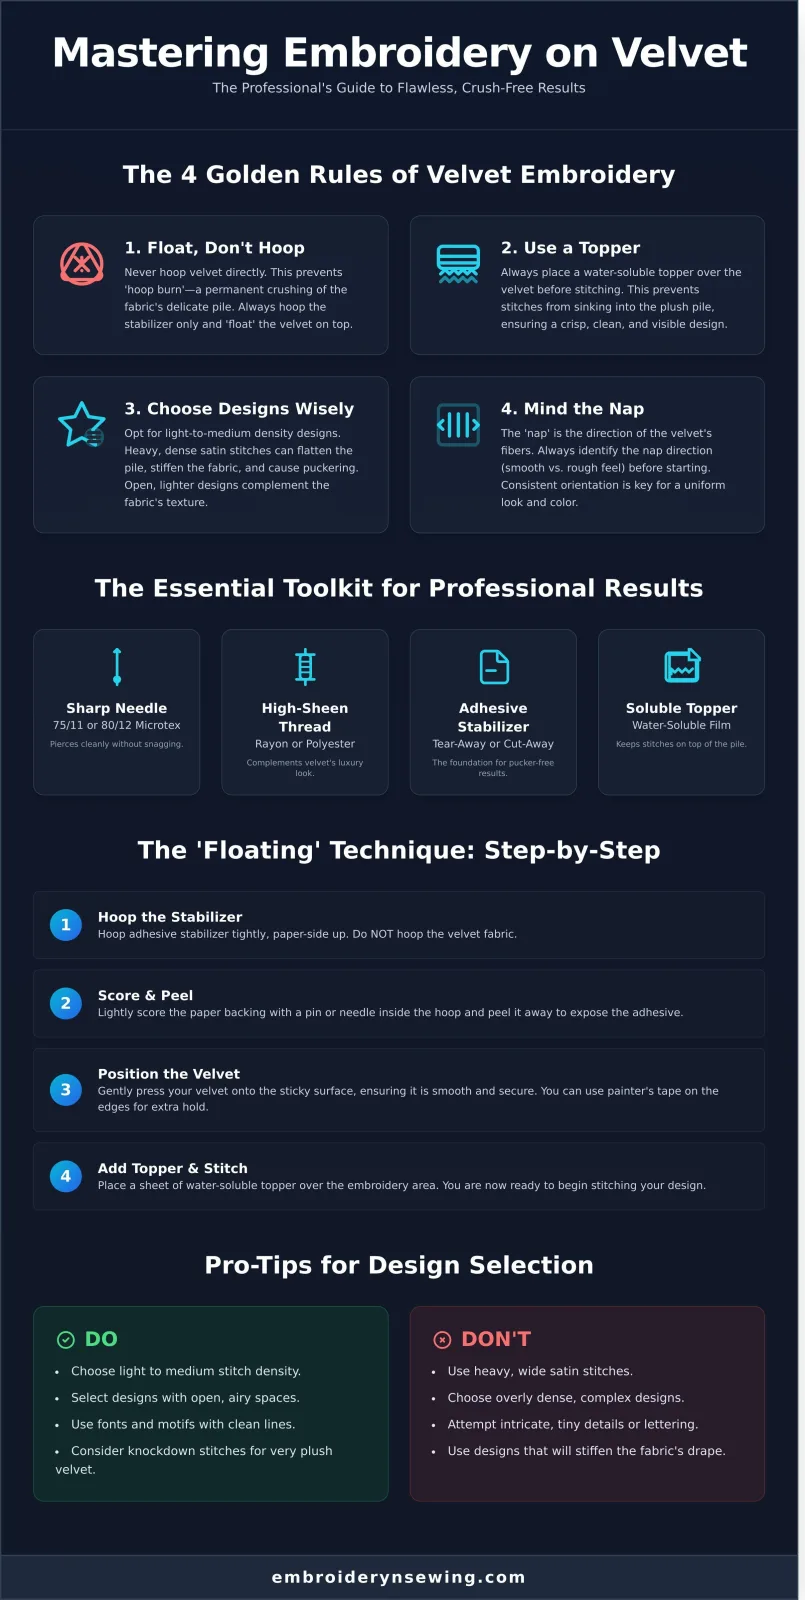
- Float, Don't Hoop: Never hoop velvet directly. This prevents 'hoop burn,' a permanent crushing of the fabric's pile. Instead, use the 'floating' method by hooping only your stabilizer.
- Use a Topper: Always place a water-soluble topper over the velvet before stitching. This simple step prevents your beautiful stitches from sinking and getting lost in the plush pile.
- Choose Designs Wisely: Opt for embroidery designs with light-to-medium stitch density. Heavy, satin-stitched designs can flatten the pile, stiffen the fabric, and cause puckering.
- Mind the Nap: The direction of the velvet's fibers, or 'nap,' dramatically affects its color and shine. Always identify and mark the nap direction before you begin.
[Image: A beautiful, crisp embroidery design on a piece of dark blue velvet]
Understanding Velvet: Nap, Pile, and Sheen
To really understand what is velvet, you must get familiar with its unique structure. The fabric's soft, raised surface is called the pile, and the direction these fibers naturally lie is the nap. To find it, use the 'Petting the Cat' test: run your hand along the fabric. The smooth direction is 'with the nap,' while the rough direction is 'against the nap.' Stitching with the nap down often creates a richer, darker appearance for your finished project.
Why Velvet is Different from Standard Cotton
Unlike sturdy cotton, velvet has a significant 'crush factor.' Traditional hooping applies intense pressure that flattens the pile, leaving a permanent mark known as hoop burn. Some velvets also have stretch, which can lead to distortion if not handled correctly with the right stabilizer. Remember this key definition: Nap is the directional grain of the pile that dictates light reflection. This single property is why your approach to machine embroidery on velvet must be different from other fabrics.
The Essential Toolkit for Professional Results
Achieving a flawless finish with machine embroidery on velvet isn't about luck; it's about using the right tools for the job. Before you even thread your machine, gathering this specific toolkit will prevent puckering, protect the fabric's delicate pile, and ensure your stitches look crisp and professional.
- Sharp Needle: A 75/11 or 80/12 Sharp (or Microtex) needle is non-negotiable. It pierces the velvet's dense backing cleanly, preventing snags.
- High-Sheen Thread: Rayon thread offers a silky, luxurious sheen that complements velvet perfectly, while Polyester provides superior durability and colorfastness.
- The 'Magic Trio': Your core setup should always include an adhesive stabilizer, a water-soluble topper, and painter's tape to secure the fabric.
- Hoop-less Method: Never hoop velvet directly. Instead, "float" the fabric on top of your hooped stabilizer to avoid crushing the pile and creating permanent marks.
Unlike a ballpoint needle, which pushes fibers aside, a sharp needle creates a clean entry point for the thread. This is critical for a fabric with a woven backing like velvet. When selecting your thread, consider the project's end-use. Rayon’s brilliant luster beautifully mimics the fabric's opulent nature, a quality celebrated throughout the history of velvet textiles. For items that will be washed frequently, Polyester is the more practical choice. Finally, consider switching to a non-stick or Teflon presser foot, which will glide effortlessly over the velvet's surface without dragging or compressing the pile.
[Image: A flat-lay photo showcasing a Sharp 75/11 needle, spools of Rayon and Polyester thread, adhesive stabilizer, and a water-soluble topper.]
Stabilizers: The Foundation of Success
Your stabilizer is the hidden foundation of great embroidery. For most velvets, an adhesive (sticky) tear-away stabilizer is perfect. However, if you're working with stretch velvet, opt for an adhesive cut-away to provide permanent support and prevent the design from distorting over time. The best practice is the "hoop-less" or "floating" technique: hoop only the stabilizer with the paper side up, score the paper with a pin to create an outline, peel it back, and gently press your velvet onto the sticky surface. This completely avoids hoop burn.
Toppers: Keeping Your Stitches on Top
A topper is the secret to preventing your stitches from sinking and disappearing into the velvet's plush pile. A layer of water-soluble film (WSS) is placed on top of the fabric before stitching, creating a smooth surface for the thread to sit on. For natural fiber velvets (cotton, silk), a wash-away topper is ideal. For synthetic velvets that may be damaged by water, use a heat-away topper that dissolves with a warm iron. Pro Tip: For extra-thick upholstery velvet, use a double layer of WSS to guarantee your stitches remain prominent.
The 'Floating' Technique: Step-by-Step Guide
The 'floating' method is the professional standard for successful machine embroidery on velvet because it completely avoids the risk of crushing the fabric's delicate pile. Instead of clamping the velvet directly in the hoop, you hoop the stabilizer by itself and adhere the fabric to it. This guide breaks down the process.
- Hoop the Stabilizer: Secure a piece of self-adhesive stabilizer in your hoop.
- Float the Fabric: Gently press your velvet onto the sticky surface.
- Add a Topper: Place a water-soluble topper over the design area to keep stitches prominent.
- Baste to Secure: Run a basting stitch around the design perimeter for ultimate security.
[Image: Diagram showing the layers: hoop, sticky stabilizer, velvet, and water-soluble topper.]
While the history of textile production shows a constant move toward automation, precious fabrics like velvet still demand a precise, manual touch. Here’s how to apply it:
Step 1: Hoop Your Stabilizer
Select a medium-weight, self-adhesive tear-away or cut-away stabilizer. Hoop it tautly with the paper-side facing up. Using a pin or scoring tool, lightly score an 'X' within the inner hoop boundary, being careful not to cut through the stabilizer itself. Peel away the paper to reveal the tacky surface.
Step 2: Align Your Velvet
Carefully position your velvet over the sticky stabilizer, using the center markings on your hoop and the nap direction you marked previously as guides. Gently smooth the fabric from the center outwards with your palm to ensure it adheres without any wrinkles or bubbles.
Step 3: Apply a Water-Soluble Topper
Place a sheet of water-soluble stabilizer (WSS) over the embroidery area. This topper acts as a temporary surface, preventing your stitches from sinking into the velvet’s pile and getting lost. It ensures your design sits crisply on top of the fabric.
Step 4: Use a 'Basting Box' Stitch
Before starting the main design, use your machine’s basting function to stitch a large rectangular outline around your embroidery area. This temporarily sews all three layers (stabilizer, velvet, and topper) together, providing the best defense against shifting.
Step 5: Monitor the Machine
As the machine begins stitching, watch closely for any signs of fabric puckering. The combination of floating and basting minimizes risk, but staying attentive is crucial for a perfect finish when performing machine embroidery on velvet.
How to Avoid the Dreaded Hoop Burn
Hoop burn happens when the pressure from a standard hoop crushes the velvet's pile, leaving a shiny, permanent indentation. This is especially true for synthetic velvets; hoop burn is often permanent because the heat and pressure 'set' the crushed fibers. As an alternative, magnetic hoops offer even, gentle pressure without clamps. However, they are more expensive and their strong magnets can still be too much for the most delicate velvets.
Basting and Securing Your Fabric
Think of a basting stitch as your best insurance policy against shifting fabric. For extra security on large designs, you can place a few pins through all layers, but only in the stabilizer margin outside the basting box. To remove the basting stitch later, use a seam ripper to carefully snip a thread every few inches on top, then gently pull the single bottom thread out. This prevents any tugging on the velvet’s delicate fibers.
Choosing Digital Designs for High-Pile Fabrics
- Avoid Dense Fills: Heavy, compact stitch patterns will crush the velvet's pile, leaving it flat and stiff.
- Embrace Open Designs: Lighter styles like Redwork, linework, and appliqué complement the fabric's texture instead of fighting it.
- Check Stitch Count: Before stitching, evaluate the design file. A high stitch count in a small area is a red flag for high-pile fabrics.
- Prioritize Underlay: Satin stitches require a strong underlay to prevent them from sinking into the pile and disappearing.
The luxurious texture of velvet is what makes it so special, but it's also what makes design selection critical. Designs with dense, heavy fill stitches are a definite 'no-go.' They flatten the beautiful pile, creating a stiff, matted patch that ruins the fabric's natural drape and sheen. The goal is to enhance the velvet, not overpower it.
Lighter, more open designs are your best friends here. Think elegant "Redwork," vintage-inspired linework, or sketch-style motifs. These designs use running stitches and minimal fills, allowing the velvet's rich texture to shine through. Always check a design's stitch count in your software or on your machine's screen before you start. A high number in a small area signals a density that velvet can't handle.
Even classic satin stitches, used for borders and lettering, can get lost in the pile. A well-digitized design for machine embroidery on velvet must include a proper underlay. This foundational layer of stitches (like a lattice or edge-run) acts as a platform, lifting the satin stitches so they sit proudly on top of the fabric, looking crisp and defined.
Best Design Types for Velvet
For monograms and text, choose bold fonts with thick, confident strokes. Delicate, wispy scripts tend to sink and become illegible. Appliqué is also a match made in heaven for velvet, allowing you to create large-scale, impactful designs with a fraction of the stitches, which drastically reduces the risk of puckering. For great bold lettering, check out Embroidery n Sewing's Font Collection.
Digitizing Tips for Velvet (For the Tech-Savvy)
If you're digitizing your own files, be sure to increase the 'pull compensation' to account for the fabric's thickness and plushness. This widens columns to prevent gaps. For any fill areas or wide satin stitches, use a light-density 'lattice' or 'contour' underlay. This stabilizes the material without adding the bulk of a full fill underlay. You can see examples of well-structured fills in our Sports Logos collection.
Post-Embroidery Care and Troubleshooting
You’ve navigated the stitch-out, and your design looks stunning! The final steps are just as important for a perfect finish. Here’s a quick summary of what to do after the last stitch is made:
- Remove Topper Gently: Use minimal moisture to dissolve water-soluble toppers, protecting the velvet’s delicate pile from water damage.
- Revive the Pile: Carefully apply steam from a distance to lift any fibers that were crushed by the hoop.
- Clean Up the Back: Trim away excess stabilizer with precision, ensuring you don’t accidentally snip your beautiful fabric.
- Fix Common Glitches: Quickly address issues like thread nests or shifting to save your project.
[Image: A close-up of a finished embroidery on velvet, still in the hoop with topper and stabilizer visible.]
The 'Dry' Topper Removal Method
Never submerge velvet in water to remove a water-soluble topper. This can permanently crush the nap and leave water spots. Instead, gently dab the topper with a damp Q-tip or a fine mist spray bottle. For tiny, stubborn pieces caught between stitches, use a pair of fine-tipped tweezers and a little patience. If you use any moisture, always let the project air-dry completely before handling it further.
After your project is dry and the topper is gone, carefully trim the excess cut-away stabilizer from the back. Use small, sharp scissors, like appliqué scissors with a curved tip, to get close to the stitches without nicking the velvet. A clean back not only looks professional but also ensures the item drapes correctly.
[Diagram: Using curved appliqué scissors to trim stabilizer away from the back of the embroidery.]
Troubleshooting Common Velvet Issues
Even with perfect preparation, challenges can arise during machine embroidery on velvet. Here’s how to handle them:
- Crushed Pile: If you see "hoop burn," don't panic. Hold a steamer or an iron on its steam setting several inches away from the fabric. The steam will relax and lift the crushed fibers. Never press the iron directly onto the velvet!
- Bird's Nests: If your machine 'eats' the fabric and creates a tangled mess of thread underneath, stop immediately. Cut the threads, remove the hoop, and clean out the bobbin area. This is often caused by incorrect threading, so re-thread from scratch.
- Thread Breaks: Check your needle for tiny burrs by running a fingernail down its side. The thick pile can also increase friction, so ensure your tension isn't too tight.
- Final Polish: After unhooping, use a soft-bristled brush to gently groom the nap in its natural direction, blending the embroidered area seamlessly with the rest of the fabric.
For more expert tips and high-quality embroidery supplies, explore our full range of resources at embroiderynsewing.com.
Unlocking the Luxury of Embroidered Velvet
You have now mastered the essential techniques for creating stunning embroidery on one of the most opulent fabrics. Always remember the two golden rules: protect the pile by 'floating' your velvet with a water-soluble topper, and choose designs with appropriate density to prevent flattening. By following these core principles, you are fully prepared to achieve professional results with machine embroidery on velvet and elevate your projects from simple to sensational.
The perfect project begins with the perfect design. Ready to put your knowledge into practice? Browse our collection of velvet-friendly digital embroidery designs! Every file in our library is professionally digitized with tested density for luxury fabrics, delivered as high-quality PES and DST files. With instant digital download, you can start stitching your next masterpiece in minutes.
Embrace the challenge, trust your new skills, and create something truly breathtaking. Happy stitching!
Frequently Asked Questions
Can you machine embroider on stretch velvet?
Yes, you can absolutely embroider on stretch velvet with the right preparation. The key is to avoid stretching the fabric during hooping. Use a medium-weight cut-away stabilizer for support and a ballpoint or stretch needle (size 75/11) to prevent snagging the delicate knit fibers. Consider "floating" the velvet on top of a hooped stabilizer instead of hooping it directly to prevent distortion and hoop marks.
How do I remove hoop burn from velvet if it happens?
Hoop burn on velvet is a crushed pile, not a permanent mark. To fix it, gently steam the affected area. You can use a handheld steamer or hold an iron a few inches above the fabric, never letting it touch the surface. As you apply steam, use a soft brush or a scrap piece of velvet to gently fluff the pile back into its original upright position.
What is the best needle for embroidering on velvet?
The best needle depends on the type of velvet. For woven velvet, a sharp 75/11 embroidery or Microtex needle provides clean penetration. For stretch velvet, a 75/11 ballpoint or stretch needle is crucial; it slides between the knit fibers instead of piercing them, preventing holes and runs. Always start any new project with a fresh needle for the best results and to avoid fabric damage.
Do I need a special embroidery machine for velvet?
No, a special machine is not required. Most modern home embroidery machines can successfully handle velvet. The success of your project depends more on your technique and materials than the machine itself. Using the correct stabilizer, a new needle, a topper, and potentially slowing your machine's stitch speed are the most important factors for beautiful machine embroidery on velvet.
Can I use tear-away stabilizer with velvet?
It is strongly advised to avoid tear-away stabilizer for velvet. The process of tearing it away can pull on your stitches, distort the design, and damage the delicate velvet pile. A medium-weight cut-away stabilizer is the superior choice. It provides stable, long-lasting support for the embroidery and is simply trimmed away after stitching, posing no risk to your fabric or thread.
Why is my thread breaking when I embroider on velvet?
Thread breaking on velvet often points to friction or tension issues. First, ensure you are using a new 75/11 embroidery needle, as a dull needle creates more drag. The dense pile of velvet can also increase friction on the thread. Try slightly loosening your upper thread tension. Also, consider slowing down your machine's stitching speed to reduce stress on the thread as it forms stitches.
Is it better to use Type 1 or Type 2 topping for velvet?
For most velvet projects, a heat-soluble topper (Type 2) is an excellent choice. It dissolves completely with the heat from an iron, leaving a clean finish with no residue and without introducing moisture to the fabric. A water-soluble topper (Type 1) is also effective, but you must first test an inconspicuous spot to ensure your specific velvet will not water-stain or have its texture altered by dampness.
What happens if I don't use a topper on velvet?
If you don't use a topper, your embroidery stitches will sink into the dense pile of the velvet. This makes the design look buried, indistinct, and unprofessional. A topper, such as a water-soluble or heat-soluble film, creates a smooth, temporary surface that holds the pile down. This allows the stitches to sit neatly on top of the fabric, resulting in a crisp, clear, and high-quality embroidered finish.


