- Understanding the step-by-step logic of ITH design sequences. - Selecting appropriate stabilizers and fabrics like minky or fleece. - Managing hoop dimensions and multi-hoop project requirements. - Completing your first 3D plushie with professional results.
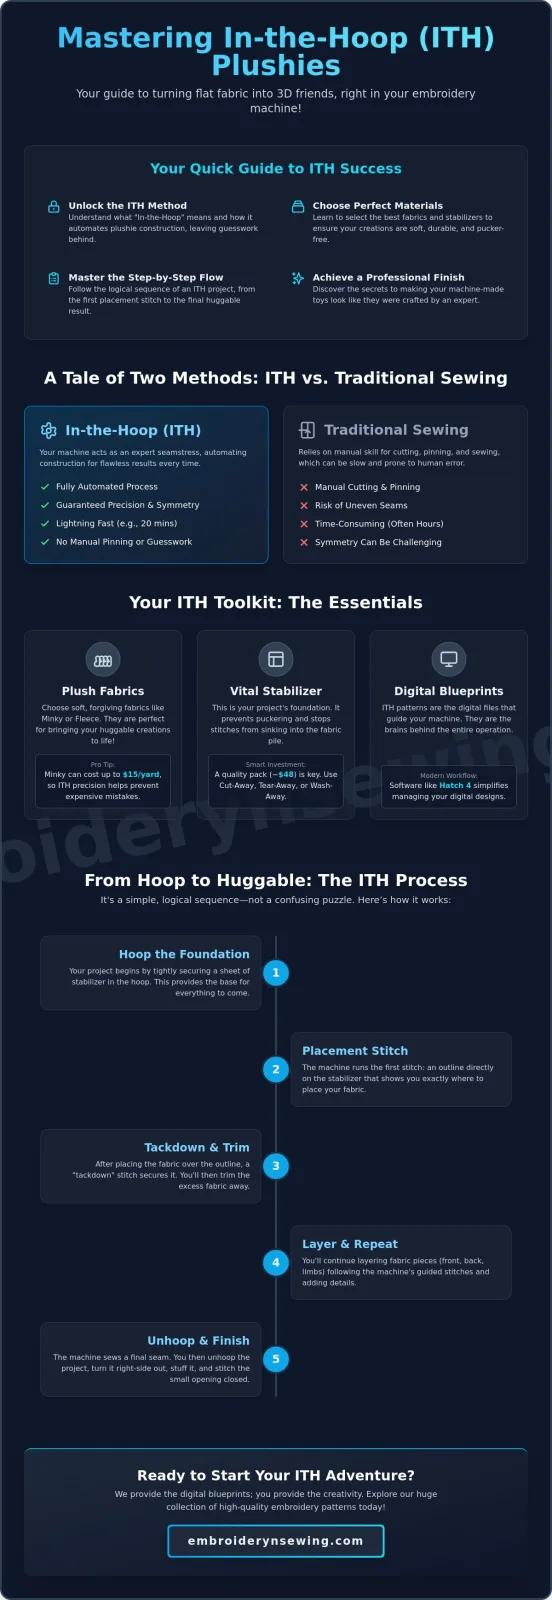
What if you could transform a flat piece of fabric into a three-dimensional friend without ever touching a traditional sewing machine? I understand that the technical barrier of machine embroidery can feel high, and I apologize if the initial process seems intimidating. It's natural to worry about wasting minky fabric, which can cost up to $15.00 per yard, or feeling lost during a complex multi-hoop project. Discover how to turn your embroidery machine into a toy-making factory with our guide to in-the-hoop stuffed animal patterns. I'll show you how these designs function as a logical sequence of automated steps rather than a confusing puzzle. You'll learn why a $48.38 pack of cut-away stabilizer is a vital investment and how modern software like Hatch 4 simplifies the digital workflow. This guide explains the essential materials and techniques you need to successfully complete your first 3D plushie with confidence and precision.
- Understand the fundamental differences between ITH assembly and traditional sewing to simplify your toy construction and eliminate manual pinning.
- Identify the best fabrics and stabilizers to use so your projects are both soft and structurally sound, preventing common issues like puckering.
- Learn how to navigate in-the-hoop stuffed animal patterns to maximize the efficiency of your digital embroidery designs and achieve professional results.
- Master the sequence of placement and tackdown stitches to ensure perfect fabric alignment for every three-dimensional plushie you create.
Table of Contents
- Executive Summary: The Essentials of ITH Stuffed Animal Patterns
- Understanding In-the-Hoop (ITH) Stuffed Animal Patterns
- Selecting Fabrics and Stabilizers for ITH Plushies
- The Anatomy of an ITH Project: From Hoop to Huggable
- Understanding what in-the-hoop (ITH) stuffed animal patterns are and how they differ from traditional sewing.
- Selecting the best fabrics and stabilizers to ensure your plushie is soft yet durable.
- Learning the step-by-step anatomy of an ITH project from the first stitch to the final turn.
- Mastering the professional finishing touches that make your machine-made toy look handmade.
I'm sorry if the transition from traditional patterns to digital files feels overwhelming. I recognize that many crafters find the technical requirements of Machine embroidery to be a significant barrier. However, the logic behind in-the-hoop stuffed animal patterns is actually quite simple once you see the sequence. Unlike traditional sewing where you pin paper to fabric, these designs use the machine to mark exactly where every piece goes. You aren't just stitching a design; you're automating the entire construction of a three-dimensional object. It's a precise way to work. You don't need to worry about slipping fabric or uneven seams.
You'll find that the machine handles the precision, but you still control the quality. Successfully executing in-the-hoop stuffed animal patterns requires a shift in how you view project assembly. Choosing the right stabilizer is perhaps the most important technical step you'll take. I recommend using a heavy-weight tear-away or a wash-away variety depending on your fabric choice. If you use minky, which often ranges from $5.19 to $15.00 per yard, you want to ensure the stitches don't sink into the pile. These small technical choices determine whether your final plushie looks like a professional product or a hobbyist experiment.
I regret to inform you that we do not sell physical plushies or physical embroidery machines. I apologize for any disappointment this may cause if you were looking for a finished toy. Our operational focus is exclusively on the distribution of digital files. We specialize in providing high-quality digital embroidery designs, including sports and anime themes, for you to execute on your own equipment. I believe this focus allows us to maintain the technical integrity of the patterns we provide for your machine. We provide the digital blueprint; you provide the creativity and the fabric.
Understanding In-the-Hoop (ITH) Stuffed Animal Patterns
I apologize for any confusion regarding the technical definitions of digital crafting. I recognize that "In-the-Hoop" or ITH can sound like a complex manufacturing term, but it is actually a streamlined process where the embroidery machine acts as both the seamstress and the artist. By using in-the-hoop stuffed animal patterns, you allow the machine to handle the heavy lifting of construction while simultaneously applying decorative details. This method is a total game changer for creators who struggle with the manual dexterity required for traditional plushie making.
[DIAGRAM: A cross-section visual showing the layers of an ITH toy project, including the stabilizer base, placement stitches, fabric layers, and final finishing stitches inside the hoop.]
It's frustrating to deal with paper patterns that shift or pins that prick your fingers. I’ve found that using digital files eliminates these physical barriers entirely. The design is digitized to tell the machine exactly where to place each seam. This intersection of technology and artistry is a growing field, much like the concepts explored in the Rhode Island School of Design's textile program, where digital tools are used to push the boundaries of traditional fabric work. You aren't just sewing; you're executing a programmed set of instructions that guarantees a specific result.
ITH vs. Traditional Plushie Sewing
I regret that I cannot offer you a physical sewing machine to start this journey, as we only provide the digital files. However, the benefits of the digital approach are clear. Precision is the biggest win. When you use in-the-hoop stuffed animal patterns, the machine ensures every limb and seam is perfectly symmetrical every time. You don't have to worry about one arm being slightly longer than the other because of a cutting error or a shaky hand on the sewing machine pedal.
Speed is another factor to consider. What used to be a multi-hour sewing project can often be compressed into a 20-minute automated run. Once you have hooped your stabilizer and fabric, the machine takes over the tedious parts. This efficiency is why many of our customers enjoy browsing our digital embroidery designs to find their next quick project. It’s a logical, fast, and repeatable way to create high-quality toys without the stress of manual assembly.
![In-the-Hoop Stuffed Animal Patterns: A Beginner’s Guide to ITH Plushies]
Selecting Fabrics and Stabilizers for ITH Plushies
I apologize if the selection of materials for in-the-hoop stuffed animal patterns feels daunting. I recognize that choosing the wrong combination can lead to puckering or ruined projects, especially when working with stretchy fabrics. For soft toys, minky, fleece, and felt are the gold standard. Minky, which typically ranges from $5.19 to $15.00 per yard, is preferred for its professional plush texture, though it's notoriously slippery. Felt is much easier for beginners because it doesn't stretch. I've found that using heavy-weight tear-away stabilizer is essential to support the stitch density of these 3D designs. While a pack of 100 sheets might cost around $48.38, it's a necessary investment to prevent the fabric from shifting. You can learn more about choosing materials in our Machine Embroidery & Sewing: A Beginner’s Complete Guide.
[Photo: Close-up of minky fabric with a clear water-soluble topper placed over the embroidery area to show how it supports the stitches.]
The Role of Water-Soluble Topping
I'm sorry to report that high-pile fabrics like minky often "eat" your stitches, causing them to disappear into the fluff. This is why you need a water-soluble topping. It acts as a temporary bridge, keeping the thread on the surface so the eyes and nose of your plushie stay visible. Once the machine finishes, you simply tear away the excess. I recommend using a damp cloth or a quick spray of water to dissolve any tiny remaining bits without damaging the delicate embroidery.
Hoop Sizing and Design Selection
I recognize that hoop logic can be confusing for those new to the hobby. When matching embroidery patterns to your machine, you must check the "hoop count." A 1-hoop project is completed in one session. However, more complex in-the-hoop stuffed animal patterns might require three hoopings to create separate limbs and bodies. Remember that a 5x7 hoop won't yield a 7-inch toy. The finished product is always smaller due to the internal seam allowances. If you're ready to start, I suggest browsing our collection of machine embroidery designs to find a pattern that fits your specific hoop dimensions.
The Anatomy of an ITH Project: From Hoop to Huggable
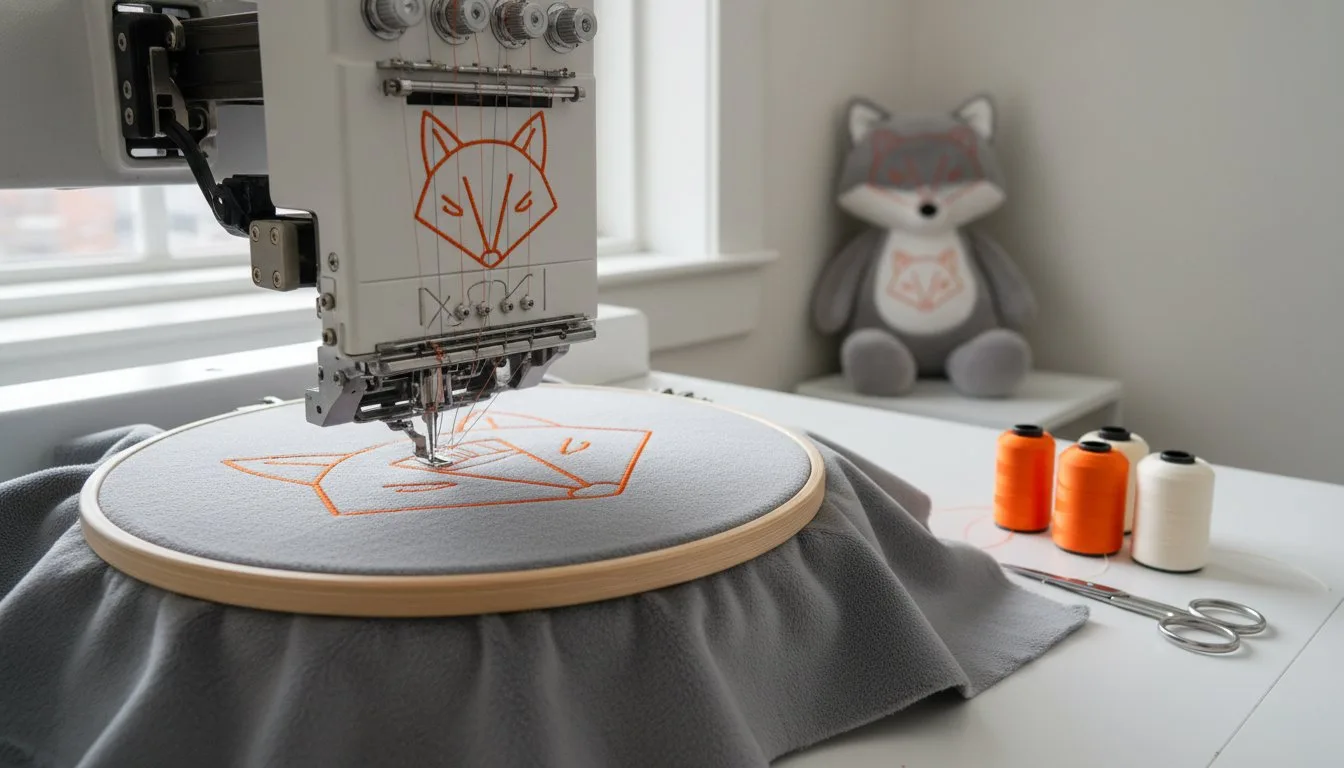
I apologize if the internal logic of an embroidery machine feels like a mystery. I recognize that understanding the order of operations is the biggest hurdle for beginners using in-the-hoop stuffed animal patterns. The process begins with placement stitches. These are simple outlines that tell you exactly where to put your fabric on the stabilizer. Once your material is in place, the machine runs tackdown stitches. These secure the plush fabric so nothing shifts during the high-speed decorative embroidery. For a deeper look at specific stitch types, see our [Visual Guide to Embroidery Stitches].
I've found that the "flip and fold" method is where most users feel the most confusion. This technique is how the machine handles limbs and ears by stitching them in what looks like reverse. You'll often stitch these smaller pieces first, then place them facing inward on the main body. It seems backward during the process. However, once you turn the toy right-side out, they pop into the correct position. I regret that I cannot physically demonstrate this for you, but following the digital instructions included in your file is vital for a successful outcome.
The Final Seam and Turning
The final step involves placing your backing fabric right-sides-down over the entire design to create a fabric sandwich. The machine then sews a final perimeter stitch to join everything together. I must emphasize that in-the-hoop stuffed animal patterns are programmed to leave a small unstitched area. This "turning gap" is intentional. It allows you to pull the toy through to the right side and provides a space for you to add your stuffing once the project is out of the hoop.
Professional Finishing and Troubleshooting
I recognize that the transition from machine-stitched fabric to a finished toy requires some manual effort. You must clip your curves before turning. This means making small notches in the seam allowance around rounded areas like heads or paws to prevent the fabric from bunching. Finally, you'll need to close the turning gap. I recommend using the ladder stitch. It is an essential hand-sewing technique that pulls the fabric edges together invisibly. While our shop focuses exclusively on digital embroidery designs, mastering this one manual finishing touch ensures your machine-made projects look professional and polished.
Ready to Create Your First ITH Plushie?
I apologize if the technical sequence of machine-made toys feels overwhelming. I recognize that mastering in-the-hoop stuffed animal patterns requires a shift from traditional sewing to a more automated, logical workflow. You now have the foundational knowledge to select the right minky fabrics and heavy-weight stabilizers to ensure your projects are durable and professional. By following the machine's placement and tackdown steps and finishing with a hand-sewn ladder stitch, you'll achieve results that simply aren't possible with manual pinning.
I regret that we don't offer physical sewing supplies or finished toys, as our focus is strictly on digital excellence. I'm pleased to provide high-quality digital files optimized for major machine formats like PES, DST, and JEF. Our library includes a wide variety of categories, from sports logos to anime designs, all available for instant download. I believe these digital tools will help you transition from a beginner to a confident plushie maker. Browse our latest digital embroidery designs to start your next project!
I hope you find joy in watching your machine bring these characters to life. Happy crafting!
Frequently Asked Questions
Do I need a special machine for in-the-hoop stuffed animal patterns?
You don't need a specialized machine, but you must have a standard embroidery machine capable of reading digital files. I recognize that the distinction between a sewing machine and an embroidery machine is often confusing for beginners. I apologize for any frustration this causes, but I must clarify that we only sell the digital patterns, not the hardware itself. Your machine simply needs to accommodate the hoop size required by the specific design you've selected.
What is the best fabric for making ITH plushies?
Minky and fleece are widely considered the best fabrics for these projects because of their soft texture and slight stretch. I recommend using in-the-hoop stuffed animal patterns specifically designed for high-pile fabrics to get the best results. I'm sorry if the cost of minky, which can reach $15.00 per yard, seems high. However, it provides a professional finish that felt or standard cotton cannot match for a huggable toy.
How do I make a large stuffed animal if I only have a 4x4 hoop?
You can create larger toys by selecting multi-hoop designs that assemble the plushie in segments. I recognize that a 4x4 hoop feels restrictive. I apologize that a single hooping cannot produce a large toy, but many in-the-hoop stuffed animal patterns are digitized to be made in parts. You stitch the limbs in one hoop and the body in another, then join them during the final automated assembly phase.
Why did my ITH toy turn out lumpy or misshapen?
Lumpy results usually happen because of improper stabilization or uneven stuffing. I've found that using a heavy-weight tear-away stabilizer, which costs about $48.38 for a bulk pack, prevents the fabric from shifting. I also recommend clipping your curves as described in the previous section. If you don't notch the seam allowances, the fabric won't expand correctly when you turn the toy right-side out, causing visible lumps.
Can I use regular sewing thread for ITH stuffed animals?
You can use regular all-purpose sewing thread for the construction seams, but 40-weight polyester embroidery thread is better for the decorative details. I'm sorry if this requires keeping two types of thread on hand. Embroidery thread has a higher sheen and is designed to run through your machine at high speeds without breaking. Using standard sewing thread for the eyes or nose might result in a dull, less professional appearance.