

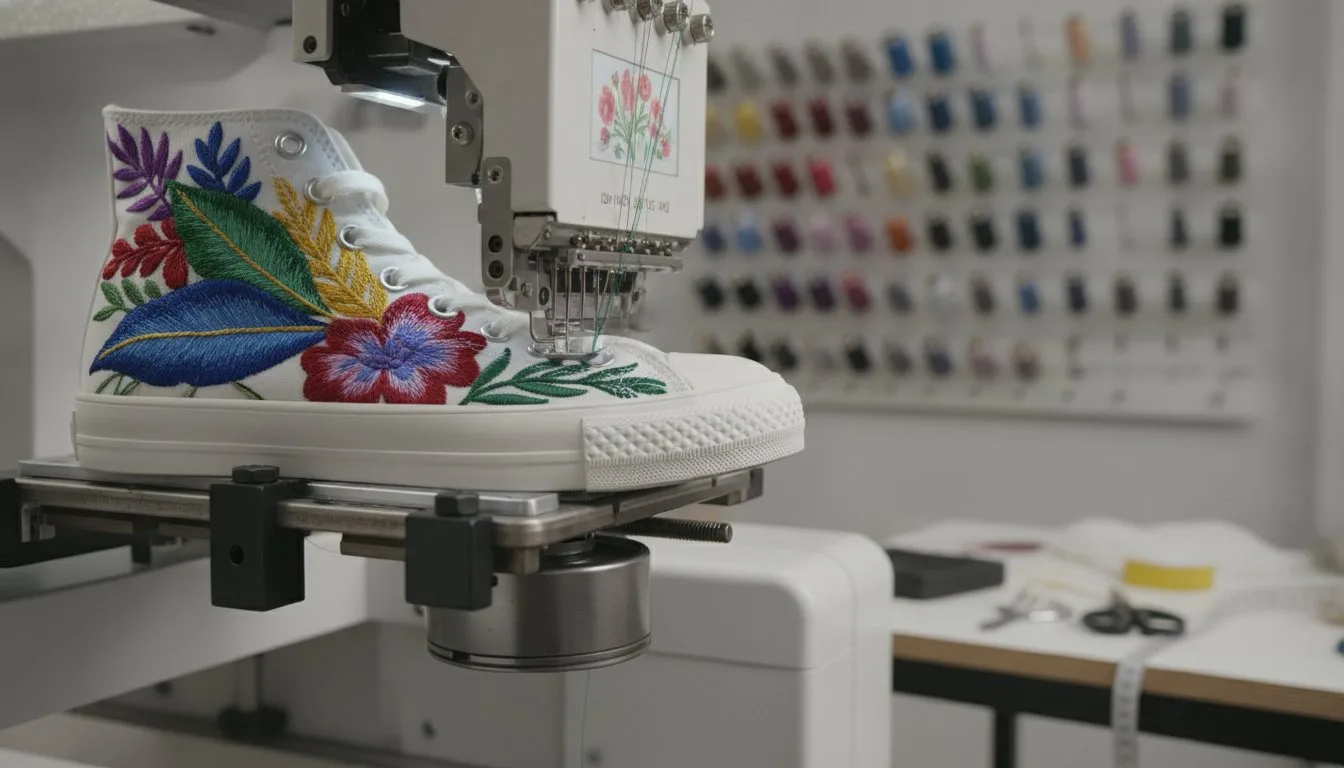
- Technical machine requirements, such as using commercial-grade models like the SmartStitch S-1001 for heavy footwear materials.
- Essential needle and stabilizer selections to avoid breakage on thick leather or canvas. - Proven hooping methods for curved surfaces to prevent design shifting during the stitch-out. - How to choose digital designs with the correct stitch density for footwear.
Did you know the global custom shoes market reached a value of $3.06 billion in 2026? It's a massive industry, yet many creators feel stuck because machine embroidery on shoes seems too risky for their equipment. I regret that many standard home setups face significant technical barriers with these projects, as thick leather or heavy canvas often causes needles to snap or designs to shift. It's a frustrating limitation that keeps many beautiful pairs of sneakers plain and uninspired. I've analyzed these operational constraints and want to help you navigate them with professional clarity. You'll learn the exact tools and stabilizers you need to protect your machine while achieving a crisp finish. We'll explore how to handle tricky hooping on curved heels and which digital designs work best for these unique surfaces. This guide provides the technical roadmap you need to turn any pair of boots into a high-quality custom masterpiece.
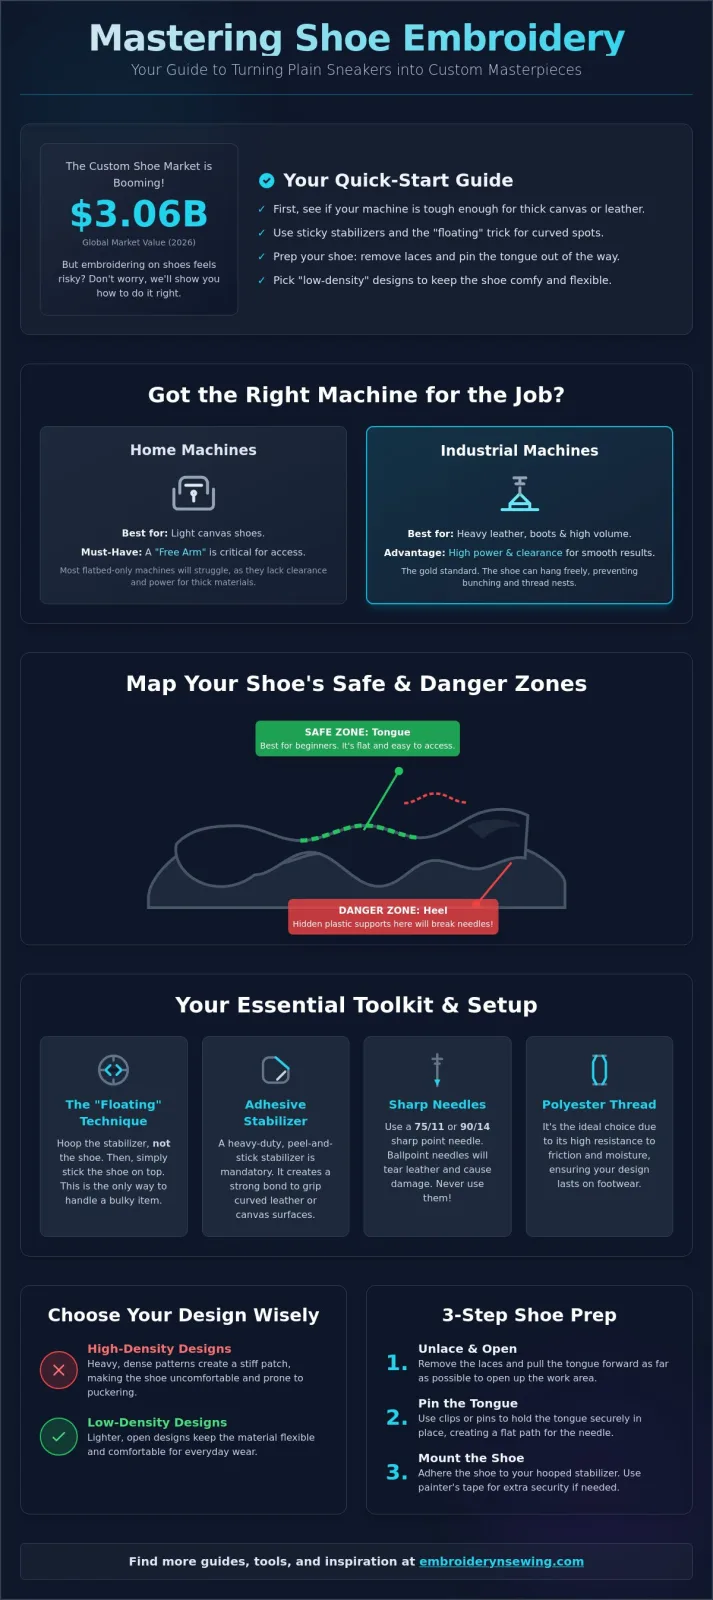
- Use adhesive stabilizers and the "floating" method to solve the common problem of hooping curved surfaces.
- Prepare the shoe by removing laces and pinning back the tongue to create a clear, flat path for the needle.
- Select low-density digital patterns to ensure your finished footwear stays flexible and comfortable for everyday use.
- Learn the step-by-step process for machine embroidery on shoes to prevent designs from shifting or needles from breaking.
Table of Contents
[- Assessing Shoe Anatomy and Machine Compatibility for Embroidery](/designs/nike-shoe-swoosh-elegant-embroidery-design-file-instant-download-copy-2)
-
Machine compatibility depends on motor strength and the physical clearance of the sewing bed.
-
Industrial multi-needle systems provide the best access for footwear, though some high-end home machines can handle light canvas.
-
The free arm is a critical feature that allows the shoe to move freely around the needle plate.
-
Identifying "Safe Zones" like the tongue helps beginners avoid needle-breaking plastic supports in the heel.
Assessing Shoe Anatomy and Machine Compatibility for Embroidery
I've noticed a lot of confusion about whether standard equipment can handle machine embroidery on shoes. It's a valid concern because footwear presents unique physical challenges that a flat piece of fabric simply doesn't. I must report that while industrial machines are the gold standard for this work, many modern home machines can handle lightweight footwear if you understand their specific limits. Success depends entirely on your machine's ability to pierce through canvas, leather, or synthetic materials without losing timing or snapping needles.
[Diagram Placeholder: A cross-section of a sneaker identifying the Dead Zone versus the Safe Zone]
Home Machines vs. Industrial Multi-Needle Systems
I am sorry to report that most flatbed-only machines will struggle with pre-assembled shoes. You need a machine with a free arm, which is a narrow extension that allows you to slide tubular items around the needle plate for better access. While mid-range machines like the Janome Memory Craft 550E offer great features, they often lack the vertical clearance of a commercial-grade machine like the SmartStitch S-1001. The machine embroidery process on an industrial system is much smoother because the shoe can hang freely. This prevents the material from bunching up under the needle and causing a bird's nest of thread.
Identifying the Embroiderable Zones on Sneakers and Boots
The tongue is the easiest entry point for beginners because it's usually the flattest part of the shoe. You can often pull it forward and away from the rest of the structure to create a workable surface. I regret that the heel area is much more dangerous for your equipment. Many sneakers have internal plastic supports called heel counters to provide stability. If you try to stitch over these, you'll break a needle or potentially damage your machine's hook timing. I always suggest feeling for these hard zones before you start your design to ensure you're working in a safe area.
- Standard hoops cannot accommodate the height of most footwear; the "floating" technique is the required alternative.
- Heavy-duty adhesive stabilizers are mandatory to secure the shoe's curved surface during the stitch-out.
- A 75/11 or 90/14 sharp needle is necessary to pierce dense canvas and leather without damaging the machine.
- Polyester thread is the ideal choice for footwear due to its high resistance to friction and moisture.
Essential Tools for Hooping and Stabilizing Footwear
I regret that your standard 4x4 hoop won't work for most sneakers because the rigid frame simply cannot accommodate the shoe's physical height. This technical barrier is the main reason why machine embroidery on shoes often leads to frustration for beginners. Instead of forcing the shoe into the hoop, you should use the "floating" technique. This involves hooping only the stabilizer and then adhering the shoe on top of it. It's a much safer way to manage the bulk of the footwear without straining your machine's motor.
The Role of Sticky Stabilizers and Clamps
I am sorry to say that standard tear-away or cut-away stabilizers won't provide enough grip on a curved leather surface. You'll need a peel-and-stick adhesive stabilizer that creates a temporary bond with the shoe side. If the bond feels weak, you can use painter's tape or specialized shoe clamps to keep the upper in place. This ensures the design stays aligned even as the machine moves at high speeds. Looking at historical embroidery examples, you'll see that artists have always used creative tensioning methods to handle complex surfaces like footwear.
Choosing the Right Needle and Thread for Tough Materials
I recommend using a 75/11 or 90/14 sharp needle depending on the material density. I must report that using a ballpoint needle on leather is a recipe for disaster, as it will tear the material rather than piercing it cleanly. Polyester thread is the standard for footwear because it handles the friction of walking much better than rayon. If you're ready to start your next project, you can find professional-grade [machine embroidery designs] that are optimized for these tougher fabrics. Choosing the right needle and thread combination is the only way to prevent birds-nesting and thread breaks on thick canvas.
- Remove laces and pull the tongue forward to maximize the flat surface area for the needle.
- Mark the center point using a water-soluble pen and an alignment template relative to the sole.
- Float the shoe on a sticky stabilizer while carefully managing the excess bulk by hand.
- Set the machine to a slow speed to prevent needle deflection on heavy seams or layered materials.
![Machine Embroidery on Shoes: A Comprehensive Guide to Custom Footwear
A Practical Step-by-Step Workflow for Stitching on Shoes
I've found that the most common mistakes in machine embroidery on shoes happen before the machine even starts. I regret that skipping physical preparation often leads to ruined footwear or broken equipment. You'll need to remove the laces entirely and pull the tongue as far forward as possible. This simple step creates the largest possible flat surface for your needle to work on. It's a technical necessity that ensures the presser foot doesn't get caught on loose eyelets or fabric folds.
[Visual Aid Placeholder: A photo series showing a shoe being floated on a sticky stabilizer]
Preparing the Shoe and Marking the Design Center
I must emphasize that a 1mm misalignment is much more visible on a shoe than a shirt. Because a shoe's structure is so rigid, any tilt in the design will look like a manufacturing defect. I suggest using a transparent template to align your center point with the sole of the shoe rather than the lacing. Lacing can be asymmetrical, but the sole provides a constant horizontal reference. Once you've found the center, mark it clearly with a water-soluble pen. If you're looking for patterns that are easier to align, check out these [High Quality Embroidery Designs]
Monitoring the Stitch-out and Managing Bulk
I am sorry to report that you should never leave your machine unattended during this process. Shoes are bulky, and a stray heel or lace loop can easily snag on the moving parts of your machine. I always recommend reducing your machine's speed to its lowest setting. This reduces the risk of needle deflection when the machine hits a thick seam or a change in material density. It's a slow process, but it's the only way to ensure the needle pierces the material exactly where the digital design dictates. Keeping the bulk of the shoe supported by hand prevents it from dragging the stabilizer and ruining your registration.
- Choose low-density patterns to ensure the shoe remains flexible and comfortable for walking.
- Prioritize simple running or satin stitches over heavy fill stitches to prevent "bulletproof" stiffness.
- Select bold, legible fonts for monograms, especially when working in small areas under one inch.
- Rotate digital design files in your software to align with the shoe's physical orientation on the machine.
Selecting the Best Digital Designs for Footwear Surfaces
I regret that many creators overlook the importance of stitch density when planning their projects. I am sorry to report that using a standard high-density file can turn a soft canvas sneaker into a stiff, unwearable object. This technical barrier occurs because dense layers of thread create a rigid patch that doesn't bend with the natural movement of your foot. To maintain comfort, I recommend focusing on low-density [embroidery designs]. These files provide enough coverage to be visually striking without compromising the footwear's structural integrity.
[Visual Aid Placeholder: A comparison diagram of a high density versus a low density stitch file]
Why Small, Low-Density Patterns Work Best
I must report that heavy fill stitches are often too aggressive for the curved surfaces of a shoe. They tend to pull the material, which leads to the shifting issues I mentioned in previous sections. Instead, I recommend using clean, bold [embroidery patterns] that feature simple [embroidery stitches] Running stitches and light satin outlines are ideal for icons and small logos. They allow you to achieve a professional look for machine embroidery on shoes while keeping the stitch count low and the production time fast.
Integrating Custom Fonts and Monograms
Monograms are a staple of custom footwear, but legibility is a constant operational constraint at small scales. I've found that any text under one inch tall needs to be a simple block or sans-serif font to remain clear. I regret that intricate scripts often result in thread breaks or illegible clusters on textured canvas. You should also remember to rotate your digital files in your software before you begin. Because you often have to position a boot or sneaker at an odd angle to fit it over the free arm, your design must be rotated to match that physical orientation. Taking a moment to double-check your software settings will prevent you from stitching a design upside down on a perfectly good pair of shoes.
- The floating technique and adhesive stabilizers are necessary to overcome the physical limits of standard shoe hooping.
- Low-density digital files ensure the footwear remains flexible while preventing needle deflection on heavy materials.
- Professional results are achieved by using high-quality designs that are properly digitized for complex surfaces.
Take the Next Step in Custom Footwear
I regret that the physical height of a shoe often creates a technical barrier, making standard hooping almost impossible. I am sorry to report that many creators struggle with this limitation, but I've explained how floating the shoe on adhesive stabilizer removes that operational constraint. This specific approach protects your machine's motor and ensures your machine embroidery on shoes stays perfectly aligned throughout the stitch-out. I've also noted that the wrong stitch density can make a shoe uncomfortably stiff. I recommend using low-density files to keep the material flexible and wearable. To help you get started with the right patterns, you can Browse High-Quality Digital Designs for Your Next Shoe Project. You'll find thousands of PES, DST, and JEF files in specialized categories like sports and custom fonts. These files utilize professional-grade digitizing to ensure clean, crisp results on even the toughest canvas or leather. You've got the technical roadmap now; I can't wait to see your custom creations!
- Leather boots are manageable on home machines if they are lightweight and you use the correct sharp needle.
- Adhesive stabilizers are the only reliable option for securing curved footwear surfaces against shifting.
- Reducing stitch speed and hand-cranking over thick seams prevents needle breakage and timing damage.
- Floating techniques allow you to use standard hoops, though commercial clamps offer more stability for heavy shoes.
- File formats like PES or DST work well, provided the design density is specifically optimized for footwear.
Frequently Asked Questions
Can I embroider on leather boots with a home machine?
I must report that you can embroider on leather boots using a home machine, provided the leather is soft and relatively thin. I regret that many entry-level motors lack the torque required to pierce heavy industrial-grade leather. You'll need a sharp 90/14 needle to ensure clean penetration without stalling your machine's drive system. It's also vital to check the vertical clearance under your presser foot before starting.
What is the best stabilizer for shoe embroidery?
The best stabilizer for this process is a heavy-duty, peel-and-stick adhesive stabilizer. I am sorry to say that standard tear-away or cut-away sheets will simply slide against the shoe's lining during the stitch-out. The adhesive bond is essential to keep the footwear stationary while the needle moves at high speeds. This prevents the design from becoming distorted or misaligned as the machine works on the curved surface.
How do I prevent the needle from breaking when stitching through a sneaker?
You can prevent needle breakage by slowing your stitch speed and ensuring the needle doesn't strike the rubber sole or internal plastic supports. I've found that hand-cranking the first few stitches of a thick seam is a safe way to test resistance. This technical precaution helps you avoid expensive repairs to your machine's hook timing. Always use a fresh, sharp needle to ensure it slices through the canvas cleanly.
Do I need a special hoop to embroider shoes?
You don't necessarily need a specialized hoop, though industrial shoe clamps make the job much easier for professionals. I regret that standard hoops are often too bulky to fit inside a shoe's narrow opening. Most hobbyists succeed with machine embroidery on shoes by using the floating method. This technique relies on the adhesive stabilizer to hold the weight of the shoe rather than trying to force the material into a rigid frame.
What type of digital embroidery file format is best for sneakers?
The best digital format depends on your machine's requirements, such as PES for Brother or DST for Tajima. However, the file's internal settings are more important than the extension when working on footwear. I recommend using designs that are specifically digitized with a lower stitch count. This prevents the thread from bunching up on dense sneaker fabrics, which can cause the material to become uncomfortably rigid and difficult to wear.


