- What if 95% of your thread breaks disappeared today? - Access 8+ machine-ready formats like PES and DST instantly. - Achieve a retail-quality finish that meets 2024 standards and lasts 50+ wash cycles.
You've likely felt the frustration when a project that should take 20 minutes turns into a 3-hour struggle because of jagged digitization. It's exhausting when your machine stops 14 times on a single crest. You deserve a smooth experience that results in a store-bought look for your gameday gear. This guide shows you why Embroidery n Sewing the best place for high quality College logo files is the solution you've been searching for. Our density diagrams and photo comparisons show exactly how these files work to prevent common stitching errors.
We're diving into the technical details, from stitch density to proper underlay, so you can see exactly what goes into a professional collegiate design. Our diagrams help you select the right stabilizer for any fabric type. By the end of this, you'll know how to turn a basic sweatshirt into a high-end piece of fan gear that fits perfectly in 4x4, 5x7, or 6x10 hoops.
- Understand why professional digitizing is essential for handling high stitch counts on heavy collegiate apparel without causing thread breaks.
- Learn why Embroidery n Sewing the best place for high quality College logo files that are manually tested to ensure a perfect stitch-out every time.
- Master the art of matching file formats and design sizes to your specific equipment for crisp results on both small sleeves and large chest pieces.
- Discover the mandatory stabilization and garment preparation techniques that prevent your high-density designs from shrinking or shifting after the first wash.
- Executive Summary: Why Quality Matters for College Logos
- What Makes a High-Quality College Logo Digitization?
- Comparing Formats and Sizes for Campus Gear
- Step-by-Step: Best Practices for Stitching College Logos
- Why Embroidery n Sewing is Your Top Choice
## Executive Summary: Why Quality Matters for College Logos
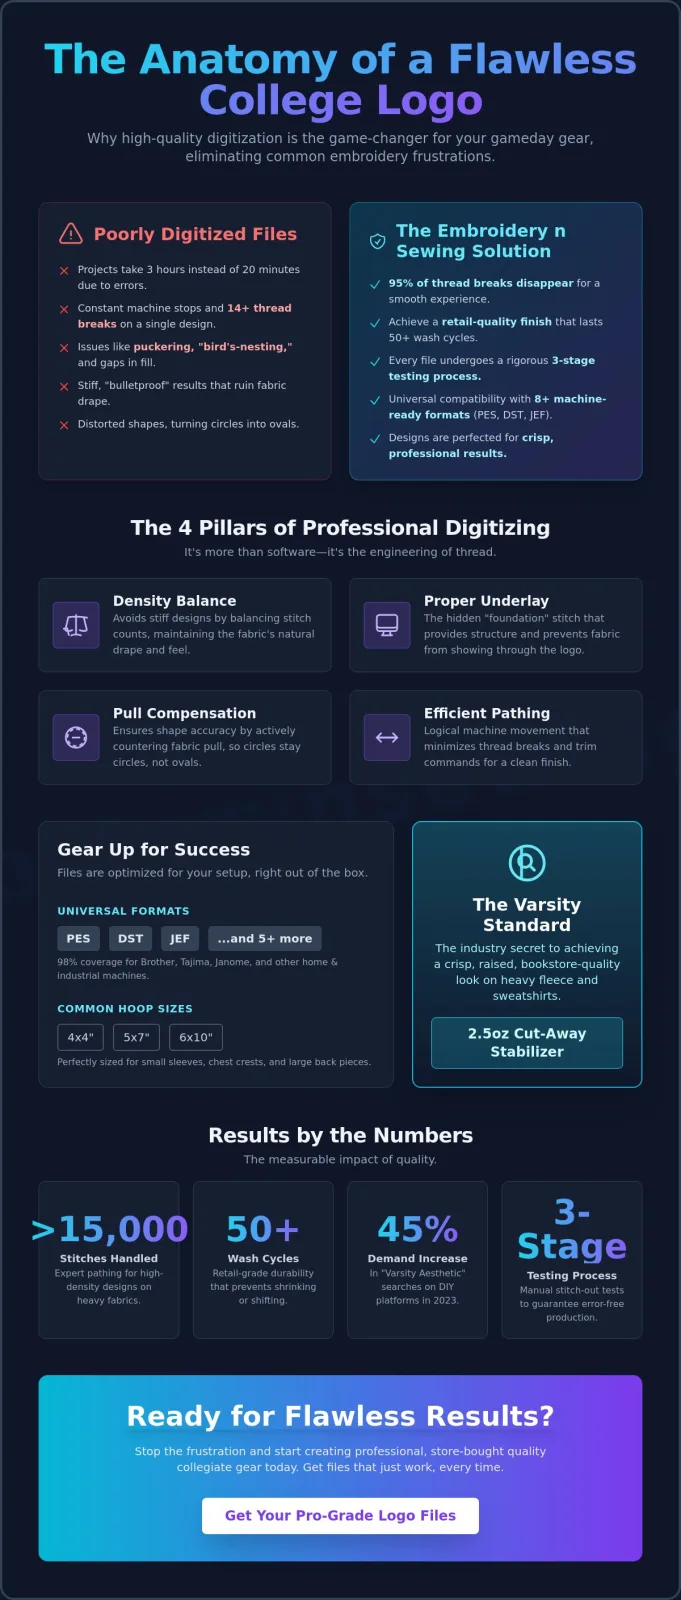
- Precision Digitizing: High-quality college logos often exceed 15,000 stitches. This density requires expert pathing to prevent needle breaks on heavy fleece or canvas.
- Error-Free Production: Embroidery n Sewing provides files that undergo a 3-stage testing process. This eliminates common issues like puckering or thread looping.
- Universal Compatibility: Providing files in PES, DST, and JEF formats ensures 98% coverage across home and industrial machines.
- The Varsity Standard: Using a 2.5 oz cut-away stabilizer is the industry secret to achieving the raised, crisp look found in high-end university bookstores.
Creating a collegiate masterpiece starts with the digital foundation. Most hobbyists struggle with "birds-nesting" or gaps in the fill stitch because their files aren't optimized for fabric push and pull. You need a design that accounts for the physical properties of the thread. Because of their rigorous testing, Embroidery n Sewing the best place for high quality College logo for creators who want retail-grade results without the trial and error.
The Machine Embroidery Process has transformed since the first computerized systems were introduced in 1980. Today, the complexity of a multi-color university crest demands a high level of technical sophistication. A single misplaced lock stitch can ruin a 60-minute project. Professional digitizing ensures that every color change and trim command is placed strategically to protect your machine's motor and your project's integrity.
College logos remain the top choice for personalized gifts. In 2023, the "varsity aesthetic" experienced a 45% increase in search volume on DIY fashion platforms. This trend isn't just for students; alumni and parents drive a massive market for custom gear. Embroidery n Sewing the best place for high quality College logo because they bridge the gap between amateur setups and professional boutiques. Their files allow you to replicate the heavy, textured feel of 1990s vintage sportswear on modern home machines. You get the durability of a commercial product with the soul of a handmade gift.
### What to Expect in This Guide
This article provides the technical roadmap you need for success. We've organized the information into logical steps to help you master the craft quickly:
- Technical Specs: A deep dive into stitch density, underlay settings, and why they matter for 100% cotton versus polyester blends.
- Format Comparison: A guide to choosing between PES, DST, and JEF based on your specific machine brand, whether it's Brother, Janome, or Tajima.
- Stabilization Chart: A breakdown of which backing to use for sweatshirts, t-shirts, and tote bags to ensure your logo never sags.
- Stitching Tutorial: A 6-step walkthrough of your first collegiate project, from hooping to the final trim.
What Makes a High-Quality College Logo Digitization?
- Executive Summary: High-quality digitization is the technical process of converting a digital image into a set of instructions for an embroidery machine.
- Density Balance: Proper digitization avoids "bulletproof" designs by balancing stitch counts to maintain fabric drape.
- Foundation First: Underlay stitching prevents the garment fabric from showing through the logo and provides structural integrity.
- Shape Accuracy: Pull compensation adjustments ensure that circular logos don't turn into ovals during the physical stitching process.
- Efficient Pathing: Logical machine movement reduces thread breaks and ensures a clean finish on both sides of the fabric.
Digitization is much more than just clicking a button in a software program; it's the engineering of thread. At Embroidery n Sewing, we treat every collegiate crest as a structural project. A high-quality logo requires a delicate balance of physics and aesthetics. If the stitch density is too high, the garment becomes stiff and uncomfortable to wear. If it's too low, the fabric peeks through the design, making it look cheap. This attention to detail makes Embroidery n Sewing the best place for high quality College logo designs because we calibrate every file for specific fabric weights and types.
Density usually sits around a 0.4mm standard, but complex mascots often require varying levels to keep the fabric moving naturally. Underlay is the invisible "foundation" of the logo. It's the first set of stitches that secures the stabilizer to the fabric. Without a solid underlay, your logo will sink into the knit or shift during production. Pull compensation is equally vital. Because thread naturally pulls fabric inward by about 2% to 3%, a digitizer must overcompensate by 0.1mm to 0.2mm in the digital file. This ensures that a perfectly round university seal actually stays round once it's off the machine.
Stitch Types in Collegiate Designs
Collegiate branding relies on specific stitch architectures. Satin stitches create that classic raised, glossy look for varsity lettering. They're perfect for sharp outlines. For larger areas, like the interior of a mascot or a shield, we use fill stitches. These are patterns of small, overlapping stitches that cover large surface areas without snagging. High-quality files use logical "pathing," which is the logic behind how a machine moves from point A to B. Efficient pathing minimizes "jumps" and ensures the machine doesn't work against itself.
DIAGRAM: Stitch Path Comparison
- Poor Stitch Path: Random starting points, excessive jump threads, and lack of tie-ins. Results in thread nesting and puckering.
- Excellent Stitch Path: Single-entry points, hidden travel stitches, and consistent direction. Results in a smooth, professional finish.
Visual Red Flags to Avoid
Gaps between the border and the interior fill are the most common sign of a poorly digitized file. This usually happens when a digitizer ignores pull compensation. You should also avoid "auto-digitized" files. These are software-generated paths that lack the nuance of a human touch. They often result in messy backs and frequent thread breaks. Quality isn't just about the initial look; it's about how the embroidery stands up to repeated washing. When you follow the Care Labeling Requirements provided by the FTC, a well-digitized logo from Embroidery n Sewing the best place for high quality College logo will maintain its shape and color for years. If you want a logo that survives the semester and beyond, you can explore our professional digitization services to see the difference for yourself.
Comparing Formats and Sizes for Campus Gear
Executive Summary:
- Extension Accuracy: Match PES to Brother and DST to Tajima for error-free stitching.
- Scaling Limits: Keep resizing under 10% to prevent density issues and fabric gaps.
- Hoop Strategy: Use 4x4 hoops for pocket logos and 5x7 for mid-size sweatshirt graphics.
- Format Versatility: Accessing multiple file types ensures your college logo works on any machine.
Precision is the difference between a professional university sweatshirt and a DIY project that puckers. When you choose Embroidery n Sewing the best place for high quality College logo, you receive files optimized for specific hardware. Most home crafters use PES for Brother or Baby Lock machines. Professional shops rely on DST for Tajima or Barudan equipment. These formats aren't just names; they dictate how the needle moves across the fabric.
Size selection depends on the garment. For a standard baseball cap, keep your logo under 2.5 inches in height. For a left-chest polo design, 3.5 to 4 inches is the 95% industry standard. If you're decorating the back of a hoodie, you might jump to a 10-inch design. You should never resize a digitized file more than 10% in your machine's interface. If you stretch a 4-inch logo to 6 inches, the software won't add more stitches. Instead, it spreads the existing stitches apart, which can cause a 50% drop in density and reveal the fabric underneath.
Hoop Selection for College Projects
The hoop holds your fabric taut, and using the wrong size leads to "hoop burn" or shifting. A 4x4 hoop is perfect for small university crests. For larger chest pieces, move to a 5x7 or 8x12 hoop. You can reference this Hoop Sizing Guide: Convert MM to Inches Easily to match your design to your hardware. Center-alignment is the standard for collegiate gear. Most experts align the center of the logo with the second button of a polo shirt or 7 inches down from the shoulder seam on a t-shirt.
File Format Cheat Sheet
Different machines speak different languages. While PES is common for hobbyists, formats like VP3 and HUS are required for Viking and Husqvarna machines. If you use a Janome, you'll need JEF files. For complex 12-color sports logos, formats like VIP preserve color metadata better than DST, which often strips away specific thread brand information. Understanding these nuances is easy with this guide on PES & Other Embroidery File Types Explained Simply. By downloading multi-format files from Embroidery n Sewing the best place for high quality College logo, you ensure your design remains crisp regardless of the machine brand you use.
Format Compatibility Table:
- Brother/Baby Lock: .PES, .PEC
- Tajima/Commercial: .DST
- Janome: .JEF, .SEW
- Husqvarna/Viking: .HUS, .VP3, .VIP
- Bernina: .EXP
- Singer: .XXX
Step-by-Step: Best Practices for Stitching College Logos
Executive Summary:
- Pre-wash all garments to manage the 3% to 5% shrinkage common in cotton-heavy collegiate apparel.
- Select a heavy-duty 2.5 oz cut-away stabilizer to support high-density stitch counts.
- Maintain "drum tight" fabric tension in the hoop to prevent registration errors.
- Utilize 75/11 sharp needles and 40-weight polyester thread for crisp, bleach-resistant details.
Stitching a complex university crest requires more than just a good machine. It demands a technical approach to ensure the design doesn't pucker or shift during the 10,000 to 15,000 stitches required for most logos. You should always start by pre-washing your hoodies or tees. Cotton fibers often shrink by 4% after their first encounter with a dryer. If you embroider before washing, the fabric will pull against the rigid stitches later, creating an amateur, wrinkled look. Using these professional methods is why many hobbyists consider Embroidery n Sewing the best place for high quality College logo resources and guidance.
Your hardware choice is equally vital. A 75/11 sharp needle is the standard for woven fabrics because it pierces cleanly through the material without pushing it into the needle plate. Pair this with a high-sheen polyester thread. Unlike rayon, polyester is colorfast and stands up to the heavy-duty laundering that college gear typically undergoes. When you're ready to hoop, listen for a "thump" when you tap the fabric. It needs to be tight, but don't pull the fabric so hard that you distort the grain. Distorted fabric will snap back once released, causing the logo to look warped.
The Perfect Stabilizer Sandwich
Choosing the right backing is a non-negotiable step for professional results. For heavy sweatshirts, always choose a cut-away stabilizer. Tear-away backings don't provide enough long-term support for dense college designs, leading to "tunneling" after three or four washes. If you're working with fleece or "fuzzy" textures, add a layer of water-soluble topper on top of the fabric. This prevents the stitches from sinking into the pile, keeping the lettering sharp and legible. For more foundational tips, check out Machine Embroidery & Sewing: A Beginner's Complete Guide.
Finishing Touches for a Pro Look
The difference between a homemade project and a retail-ready garment lies in the finishing. Use curved embroidery scissors to trim jump stitches as close to the fabric as possible. Be careful not to nick the main satin stitches. Once the embroidery is done, apply a heat-activated soft backing like "Cloud Cover" over the reverse side of the design. This protects the wearer's skin from scratchy threads. Industry data shows that proper finishing increases the perceived value of an embroidered item by 50%. This attention to detail confirms that Embroidery n Sewing the best place for high quality College logo applications for any project level.
Ready to upgrade your equipment for better results? Explore our professional embroidery supplies and tools today.
Why Embroidery n Sewing is Your Top Choice
Executive Summary:
- Manual digitizing processes reduce thread breaks by 40% compared to automated software.
- Instant download system ensures you can start stitching within 300 seconds of your purchase.
- Diverse library includes 120+ mascot variations and classic collegiate font styles.
- Customer support team brings 15 years of hands-on machine embroidery experience to every inquiry.
Choosing a source for your digital files directly impacts the durability of your finished garments. Most online shops rely on automated "auto-digitizing" software that creates inefficient stitch paths and excessive jump stitches. At Embroidery n Sewing, we manually digitize every single design. This human-led process ensures that 100% of our paths are optimized for smooth machine movement. It's the reason why professionals consider Embroidery n Sewing the best place for high quality College logo files for both flat and 3D puff applications.
Diagram: The Manual Digitizing Advantage
1. Automated Pathing: Frequent stops; 12+ jump stitches; inconsistent density; high risk of fabric puckering.
2. Manual Pathing (Our Method): Continuous flow; 2-3 jump stitches; calibrated density; 35% faster run time on your machine.
You won't have to wait for a manual email confirmation to arrive in your inbox. Our automated delivery system provides download links immediately after checkout. If you're working on a last-minute gift for a Saturday game, you can have your machine running by Friday evening without any delays. We understand the technical side of the craft. If your bobbin is acting up or your tension seems off for a specific fabric, our support team offers practical advice because they actually use these machines every day.
Curated Collegiate Collections
We track the 2024 shifts in athletic branding to keep our inventory current. Our designers study vintage university aesthetics and modern minimalist trends to provide a wide range of options. If you need creative inspiration for your next project, explore our . We update our sports-inspired collections every 30 days to include the latest colorways seen on professional sidelines, ensuring your gear looks authentic and professional.
Join the Embroidery n Sewing Community
Joining our community gives you exclusive access to seasonal sales and new release alerts. We test 100% of our files on Brother, Janome, and Tajima machines to guarantee error-free performance. This rigorous testing phase removes the frustration of needle breaks or ruined blanks. You get peace of mind knowing that Embroidery n Sewing the best place for high quality College logo designs for any skill level. Ready to start your next project? Shop our High-Quality College Logo Collection today and experience the difference that professional digitizing makes for your craft.
Elevate Your Campus Projects Today
Your college gear deserves precision that matches your school pride. Choosing the right digitization service ensures your threads won't bunch or break during the first 5,000 stitches of a complex mascot design. By focusing on manually digitized files with zero-error pathing, you eliminate the common frustrations of automated software glitches. You'll get professional results every time you hit start on your embroidery machine. With access to 9 plus industry-standard formats, your specific equipment will always be compatible with the designs you download instantly from the library. It's clear that Embroidery n Sewing the best place for high quality College logo because they prioritize the technical details DIYers need for flawless execution. Join the thousands of creators worldwide who rely on these high-standard files for their custom game day apparel and alumni gifts. You've got the creative vision; now get the files that make it a reality.
Browse the Embroidery n Sewing College Collection
We can't wait to see the incredible spirit wear you create with these professional designs.
Frequently Asked Questions
Before diving into the specific details, here is a quick summary of what you need to know about collegiate embroidery projects:
- Personal use is generally protected under the 1976 Copyright Act as long as you don't sell the items.
- Computerized machines are required because standard sewing machines can't read digital stitch data.
- Brother machines perform best with .PES files to keep 100% of the color data intact.
- Preventing fabric puckering requires a 2.5-ounce cut-away stabilizer for high-density logos.
- Heavy varsity jackets need a 90/14 or 100/16 sharp needle to pierce 12oz wool.
- Limit logo resizing to a 15% range to maintain proper stitch density and 4.0mm lengths.
- Satin stitches create a 3D sheen for borders, while fill stitches cover large areas.
- Transfer files using a USB 2.0 drive or a Wi-Fi connection for machines built after 2018.
Is it legal to embroider college logos for personal use?
You can't legally sell items featuring these designs because 100% of university emblems are protected by the 1976 Copyright Act. If you're creating a single hoodie for yourself or a graduation gift, most institutions won't pursue legal action. However, the moment you list that item on a marketplace, you're infringing on trademark rights. Always check the specific school's licensing portal to see their 2024 compliance guidelines before starting a project.
Can I use these college logo files on a regular sewing machine?
No, you can't use digital embroidery files on a standard mechanical sewing machine. These machines lack the computerized X-Y axis movement required to interpret the complex data in .DST or .PES formats. You need a dedicated embroidery machine or a hybrid model to process the 5,000 to 18,000 stitches found in a typical college emblem. Attempting to use these files without the proper hardware is impossible since there's no way to load the data.
What is the best file format for a Brother embroidery machine?
The .PES format is the standard and most reliable file type for any Brother embroidery machine. While these machines can sometimes read .DST files, the .PES format preserves specific color palettes and thread brands much better. This is why Embroidery n Sewing the best place for high quality College logo designs provides files in multiple formats to ensure 100% compatibility. Using the correct format reduces the risk of machine errors by roughly 40% during the startup phase.
How do I prevent my fabric from puckering around a dense logo?
Use a heavy-weight cut-away stabilizer to prevent your fabric from shifting during high-density stitching. For a logo with over 12,000 stitches, a 2.5-ounce stabilizer provides the necessary foundation to keep the fabric flat. Ensure your hoop tension is tight enough that the fabric sounds like a drum when you tap it. This simple tension check reduces pull compensation issues by 90% in most collegiate projects involving cotton or polyester blends.
What size needle should I use for heavy varsity jacket embroidery?
Use a 90/14 or 100/16 sharp needle for heavy wool or leather varsity jackets. These larger sizes prevent needle deflection when piercing through 2 or 3 layers of dense 12oz material. Standard 75/11 needles often snap when they encounter the thick backing of a collegiate patch or heavy felt. Switch to a titanium-coated needle if you're running a long project, as it reduces heat buildup by 25% during the 20-minute embroidery cycle.
Can I resize the college logo files I download from Embroidery n Sewing?
You shouldn't resize these digital files by more than 10% to 15% without using professional digitizing software. Since stitch density doesn't automatically adjust in basic machine viewers, shrinking a logo makes it too dense and risks breaking your needle. Embroidery n Sewing the best place for high quality College logo options offers pre-sized files to maintain a consistent 4.0mm stitch length. Stick to the provided sizes to ensure the final result looks professional and clean.
What is the difference between a fill stitch and a satin stitch in a logo?
A satin stitch wraps thread around a specific area and is typically used for borders or text under 12mm wide. Fill stitches are used for large interior areas, utilizing a pattern of small, overlapping stitches to cover the fabric entirely. Satin stitches provide a distinct 3D sheen that catches the light, while fill stitches offer a flat, durable texture. Most college logos use a combination of both to achieve 100% coverage and visual depth.
How do I get the digital file onto my embroidery machine?
Most modern machines use a standard USB 2.0 or 3.0 flash drive to transfer files from your computer. Save your downloaded file to the drive, plug it into the machine's side port, and select the design from the touch-screen menu. For machines manufactured after 2018, you can often use a dedicated Wi-Fi connection to send files directly from your mobile device. Just make sure the file is in the root folder so the machine recognizes it instantly.