

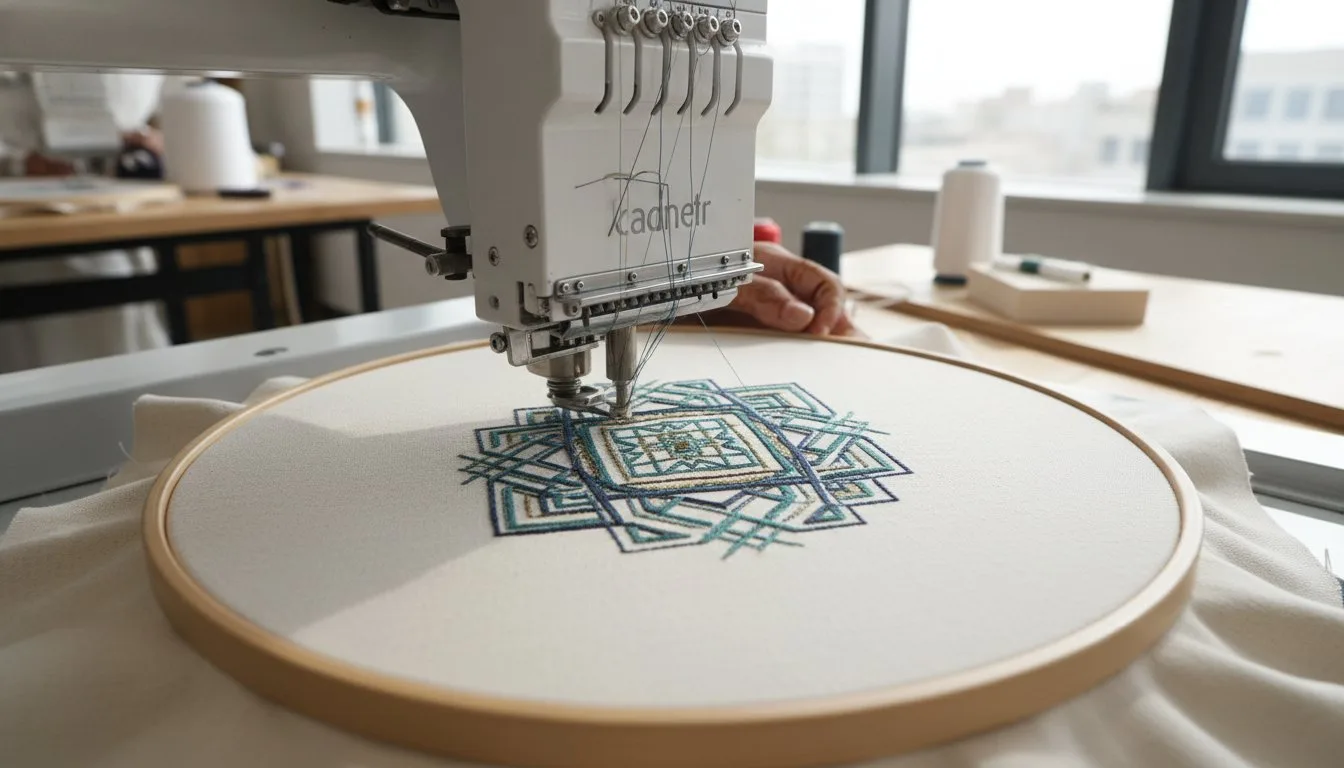
There's nothing more frustrating than pulling your machine embroidery project from the hoop only to find it riddled with wrinkles and puckers. That sinking feeling when a beautiful design distorts an expensive garment is a common pain point, but learning how to avoid puckering in embroidery is the key to unlocking professional results. If you're tired of your hard work looking unprofessional or wasting precious fabric because of stabilizer confusion, you've come to the right place. This isn't just about luck; it's about understanding the right techniques.
In this pucker-free guide, we will demystify the entire process. We’ll guide you through confidently choosing the correct stabilizer for any fabric and mastering the art of perfect hooping. You'll learn the core principles behind thread tension and design density, so you can prevent puckering before you even press "start." Get ready to transform your wrinkled frustrations into the flawlessly smooth, flat masterpieces you've been dreaming of, saving you time, money, and creative energy on every future project.
- The foundation of a pucker-free project is pairing the correct stabilizer with your specific fabric type. - Master the "taut but not tight" hooping technique to ensure your fabric and stabilizer work together as a single, stable unit. - Discover how to avoid puckering in embroidery by adjusting key design settings like stitch density and underlay before you start stitching. - Learn simple finishing techniques to press out minor puckers and properly remove stabilizer for a flawless final result.
Table of Contents
- Understanding the Enemy: What Causes Embroidery Puckering?
- The Foundation: Choosing the Right Fabric and Stabilizer
- Perfect Hooping: Your Secret Weapon Against Puckers
- Design & Machine Settings: The Technical Side of Puckering
- Post-Embroidery Care: Finishing Touches to Fix Minor Puckering
Understanding the Enemy: What Causes Embroidery Puckering?
Embroidery puckering is that frustrating wrinkling or bunching of fabric around your stitched design. It can turn a beautiful project into a bumpy mess. At its core, puckering happens when the fabric shifts, stretches, or pulls during the stitching process. Think of it like trying to build a house on a weak foundation; if the base isn't stable, the structure on top will inevitably warp and buckle.
The key to smooth, professional-looking embroidery is creating a stable environment for your stitches. The first step in learning how to avoid puckering in embroidery is to identify the three main culprits that undermine this stability: a mismatch between your fabric and stabilizer, improper hooping technique, and excessive design density.
The Push and Pull Effect
Every single stitch your machine makes creates a tiny amount of tension. The top thread pulls the fabric inward, while the needle simultaneously pushes the fabric down with each penetration. On their own, these forces are small. But when you have hundreds or thousands of stitches in a concentrated area, like a satin stitch border or a dense fill, the cumulative "pull" effect becomes powerful, causing the unsupported fabric to gather and pucker.
Not all fabrics are created equal when it comes to embroidery. Materials with inherent stretch, like t-shirt knits, are particularly prone to puckering because they distort easily under the tension of the stitches. Similarly, thin or delicate fabrics like silk or rayon lack the internal structure to support the weight of the thread. The entire mechanics of the machine embroidery process rely on a stable canvas, and if the fabric's weave is too loose or stretchy, puckering is almost guaranteed without proper support.
The Role of Thread Tension
Your embroidery machine relies on a delicate balance between the top thread and the bobbin thread. If your top thread tension is set too high, it will overpower the bobbin thread, yanking it upwards and physically bunching the fabric together with each stitch. While many modern machines have auto-tension settings, this is always a critical factor to check, as incorrect tension is a direct cause of puckering and other stitch quality issues.
The Foundation: Choosing the Right Fabric and Stabilizer
If you want to master how to avoid puckering in embroidery, this is the most critical step. Think of stabilizer as a temporary foundation for your fabric. It provides the stability needed to withstand the thousands of needle penetrations and the pull of the thread during the stitching process. Without the right support, your fabric will shift, stretch, and bunch up, creating the puckers we all want to avoid.
The three main categories of stabilizers are:
- Cut-Away: A permanent stabilizer that is trimmed away after stitching. It offers the most support.
- Tear-Away: A temporary stabilizer that is easily torn away from the design's edges.
- Wash-Away: A stabilizer that dissolves completely in water, perfect for toppings or delicate fabrics.
A crucial concept is matching the stabilizer's weight to the fabric's weight and the design's stitch density. And remember to always pre-wash fabrics like cotton or linen to pre-shrink them before embroidering. This simple action prevents the fabric from shrinking around your finished design after the first wash, which is a common cause of delayed puckering.
Stabilizers for Stretchy Knits (T-shirts, Sweatshirts)
For any fabric that stretches, a cut-away stabilizer is your best friend. Stretchy knits will move and distort under the needle, and a tear-away stabilizer simply doesn't have the integrity to hold the fabric securely in place. Use a medium-weight no-show cut-away stabilizer, like a fusible poly-mesh, for thin t-shirts to provide robust support without adding bulk. For heavier sweatshirts and fleece, a standard medium-weight cut-away is ideal.
Stabilizers for Woven Fabrics (Denim, Cotton Twill, Quilting Cotton)
Because woven fabrics are inherently more stable, you can often use a crisp tear-away stabilizer for simple, low-density designs. However, the moment your design becomes more complex or stitch-heavy, the rules change. A dense design exerts significant pull on the fabric, and while a cut-away stabilizer is your best defense, technical factors like properly Adjusting Sewing Machine Tension also become crucial. When in doubt, especially with a dense logo on a cotton twill cap, opt for a cut-away to ensure a perfectly flat result.
Stabilizers for Delicate or Textured Fabrics (Towels, Silks)
For fabrics with a pile or texture, like terry cloth towels or fleece, a wash-away stabilizer used as a "topping" is essential. This thin, film-like layer is placed on top of the fabric before stitching to prevent the stitches from sinking into the texture, keeping your design crisp and defined. You will still need a backing stabilizer-typically a medium-weight cut-away or tear-away-underneath the fabric for support. For sheer fabrics like organza, a heavy-duty wash-away can be used as the sole stabilizer to provide support that later disappears completely.
Perfect Hooping: Your Secret Weapon Against Puckers
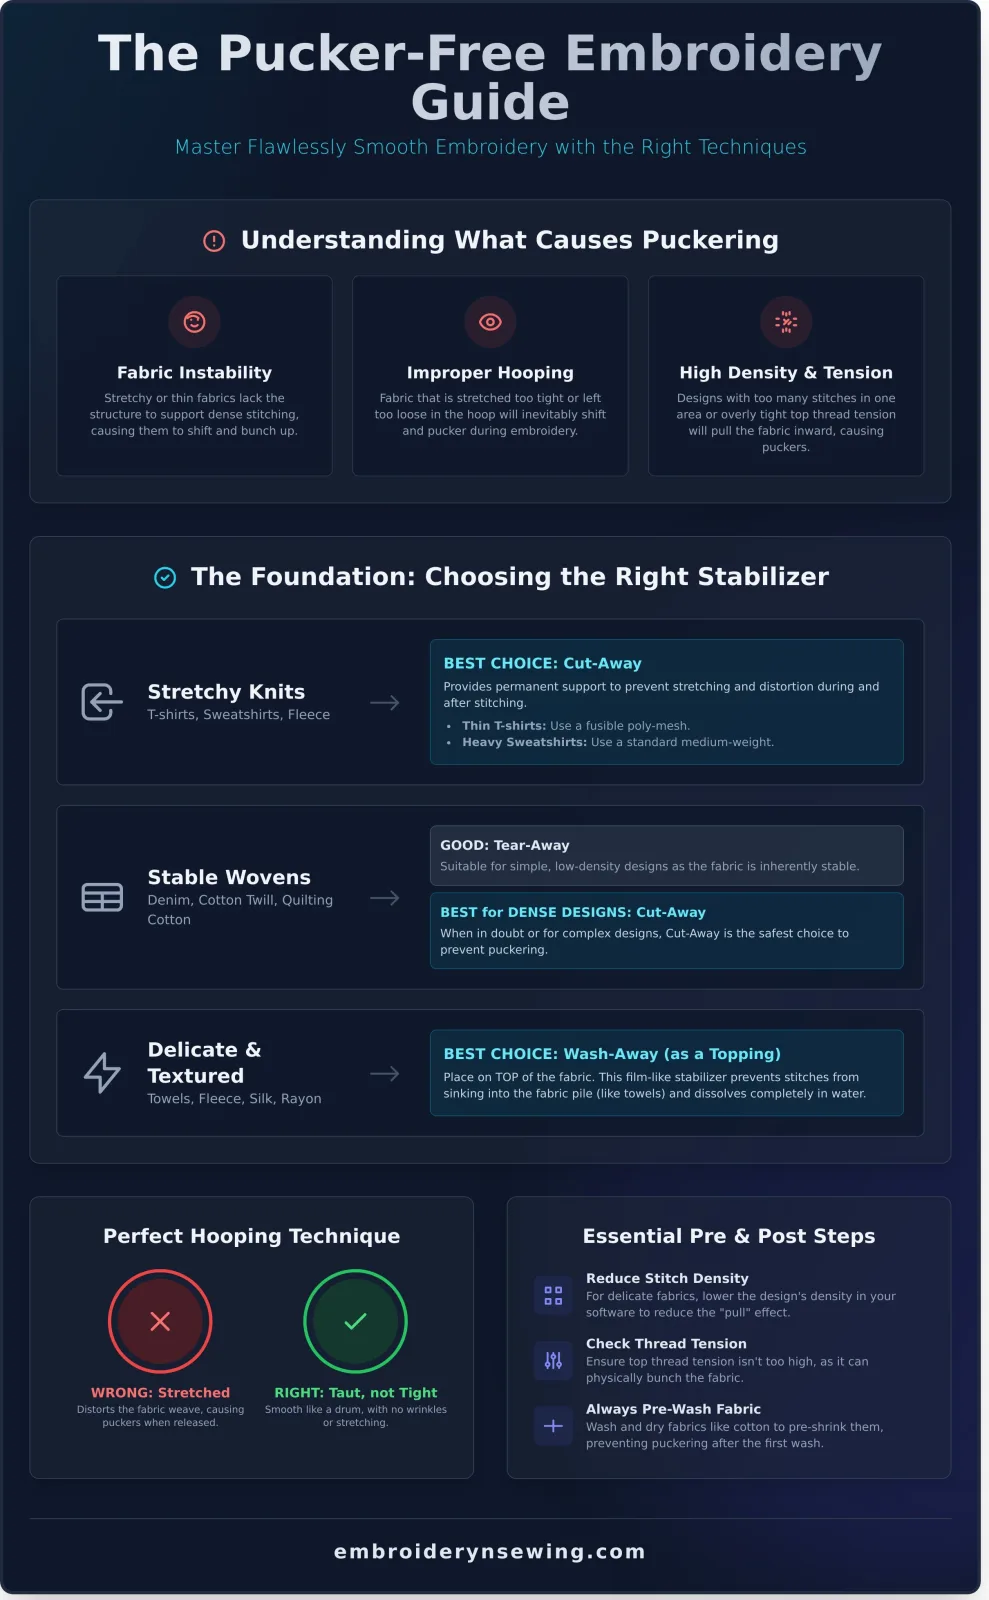
Your embroidery hoop is more than just a holder; it's a tensioning tool. The primary goal of hooping is to create a single, stable unit where your fabric and stabilizer cannot shift independently. This is the foundational secret for how to avoid puckering in embroidery. A common myth is that you must stretch the fabric as tightly as possible, but this is a direct path to disaster. When you stretch the fabric and the stitches later pull it back to its natural state, wrinkles and puckers form. The correct tension is 'drum tight'-taut and smooth, but not distorted or stretched.
The Correct Hooping Technique
To achieve perfect tension, follow this simple process. First, lay your stabilizer on a flat surface. Lightly spray it with a temporary spray adhesive, then carefully smooth your fabric over the top, ensuring the grain is straight and there are no wrinkles. Place this bonded pair over your outer hoop. Finally, gently press the inner hoop into the outer hoop, making sure you don't push or stretch the fabric in the process. The surface inside the hoop should be flat and ripple-free.
Using Temporary Spray Adhesive Effectively
Temporary spray adhesive is a game-changer for preventing fabric movement. By creating a temporary bond between your fabric and stabilizer, it eliminates the micro-shifts that cause puckering during the stitching process. Always opt for a spray made specifically for embroidery, as it won't gum up your needle. Apply a light, even coat to the stabilizer, not the fabric. While adhesive creates a strong bond, the foundation of your project is still the stabilizer itself. Understanding the differences between various Cut-Away and Tear-Away Stabilizers is fundamental to success.
How to 'Float' Un-hoopable Items
Some items are too thick, small, or awkwardly shaped to hoop directly. This is where 'floating' comes in. Floating is the technique of hooping only the stabilizer and then adhering the item to the top. It's the perfect solution for:
- Thick jackets or towels
- Small items like baby onesies or pockets
- Structured hats or bags
To float an item, hoop your stabilizer until it's drum tight. Use temporary spray adhesive on the hooped stabilizer, then carefully position your item on top. For extra security, use your machine's basting stitch function to tack the item down before the main design begins. This technique is essential for achieving professional results on challenging materials.
Design & Machine Settings: The Technical Side of Puckering
You’ve done everything right: you chose the perfect fabric, used the best stabilizer, and hooped it tight as a drum. Yet, you still see puckers. What gives? Often, the culprit isn't your prep work at all-it’s the embroidery design file or your machine's settings.
Even the best technique can't save a poorly constructed design. Understanding the technical side is a critical step in learning how to avoid puckering in embroidery for good.
Why Your Embroidery Design Matters
A high-quality digital design is built with the fabric in mind. The digitizer accounts for something called stitch density-the number of stitches packed into a specific area. A design with too many stitches for its size will inevitably push and pull the fabric, causing it to ripple. Professional designs also include proper underlay stitching, which are foundational stitches that stabilize the fabric before the detailed top stitches are applied. This is why resizing a design by more than 10-20% is risky; it warps the carefully planned density. While free designs are tempting, they are sometimes poorly digitized and a common source of puckering issues. Start with success using professionally digitized designs that are built to stitch out smoothly.
Choosing the Right Needle
Your needle is the only thing that physically pierces the fabric, and using the wrong one can cause significant pulling. A tiny, incorrect tool can ruin an entire project. Follow these simple guidelines:
- Match the Needle to the Fabric: Use a sharp needle for tightly woven fabrics like cotton or denim, and a ballpoint needle for knits. A ballpoint needle pushes the knit fibers aside instead of cutting them, preventing snags and runs.
- Don't Use a Dull Needle: A dull needle punches through fabric with blunt force, dragging and distorting it. A fresh, sharp needle glides through cleanly.
- Replace It Often: As a rule of thumb, change your embroidery needle after every 8-10 hours of active stitching time to ensure it remains sharp and effective.
Optimizing Machine Settings
Your embroidery machine offers several settings that can help prevent puckering. Before you press start, take a moment to review these key adjustments. Tweaking these settings is a powerful way to control your final result.
- Reduce Machine Speed: While it's tempting to stitch at top speed, slowing down your machine gives the fabric time to settle between stitches. This is especially important for dense designs or delicate fabrics like silk or satin.
- Check Thread Tension: If your top thread tension is too tight, it will pull on the bobbin thread, causing the fabric to bunch up underneath. Your stitches should look neat and even on both the top and bottom.
- Perform a Tension Test: If you suspect an issue, stitch an "I" or "H" test pattern. If you see too much bobbin thread on top, your upper tension is too tight. If you see top thread loops on the bottom, it's too loose.
Post-Embroidery Care: Finishing Touches to Fix Minor Puckering
You’ve followed every step, yet you still see a hint of puckering around your finished design. Don't despair! Often, minor fabric distortion can be corrected with careful finishing techniques. The final steps you take after the machine stops stitching are just as crucial as your initial setup. Proper post-embroidery care is the last piece of the puzzle in learning how to avoid puckering in embroidery for a truly professional result.
Removing Stabilizer Correctly
How you remove your stabilizer can either solve or create puckering issues. Rushing this step can pull and distort the fabric, undoing all your careful work. Always handle the project gently and use the correct method for your stabilizer type.
- Cut-Away: Using a small, sharp pair of embroidery scissors, carefully trim the excess stabilizer as close to the outer stitches as you can without cutting the thread or your garment.
- Tear-Away: To prevent stretching, support the stitches with one hand while gently tearing the stabilizer away with the other. Always tear towards the stitching, not away from it.
- Wash-Away: Follow the manufacturer's directions precisely. Using water that is too hot or too cold can leave a sticky residue or fail to dissolve the stabilizer completely.
The Magic of Steam and Pressing
A good press is one of the most effective ways to smooth out fabric and eliminate minor puckers. The combination of heat and moisture helps the garment’s fibers relax and settle around the density of the embroidery thread. However, you must do it correctly to avoid damaging your stitches.
Place your embroidered item face down on a thick, fluffy towel. The towel protects the loft of your stitches, preventing them from getting flattened. Cover the back of the design with a pressing cloth, and use an iron on a steam setting appropriate for your fabric. Press gently, letting the steam do the work. Never iron directly on the front of the embroidery, as it can melt or damage the thread.
By integrating these finishing touches into your routine, you ensure every project looks its absolute best. Mastering these post-stitching steps is a key part of how to avoid puckering in embroidery from start to finish. For more expert guides and supplies, visit us at embroiderynsewing.com.
Stitch with Confidence: Your Pucker-Free Future Awaits
Embroidery puckering doesn't have to be a constant source of frustration. Mastering how to avoid puckering in embroidery truly comes down to mastering the fundamentals. By focusing on the crucial combination of the right fabric and stabilizer and ensuring your hooping is drum-tight, you set every project up for success. These foundational steps, paired with smart design choices, are your ultimate defense against unwanted wrinkles and gathers.
Of course, starting with a flawless design is a game-changer. A poorly digitized file can cause puckers no matter how perfect your technique is. Ready to guarantee a smooth stitch-out from the very first needle drop? Explore our collection of high-quality, pucker-free embroidery designs! Professionally digitized and tested by thousands of embroiderers, our designs are built for beautiful results. Get instant downloads and start your next perfect project right away.
Now, go put these techniques into practice and create the stunning, smooth embroidery you deserve. Happy stitching!
Frequently Asked Questions About Embroidery Puckering
Can I use the wrong side of the stabilizer?
In most cases, you should not use the wrong side. Fusible or iron-on stabilizers have an adhesive on one side that must face the fabric to work correctly. For other types, like some cut-aways, one side may have a softer texture designed to be more comfortable against the skin. Using the wrong side can lead to poor support, failed adhesion, or discomfort. Always check the manufacturer's instructions to ensure you are using it as intended.
Why does my embroidery pucker even when I use a stabilizer?
Puckering with a stabilizer often points to other issues. The most common culprit is improper hooping; the fabric may be stretched too tightly or left too loose. The stabilizer might also be the wrong weight or type for your fabric and design density. A dense design on a lightweight knit, for instance, requires more support than a simple name on denim. Ensuring your fabric is hooped taut like a drum, but not stretched, is a crucial step in learning how to avoid puckering in embroidery.
Is it better to use one heavy layer of stabilizer or two lighter layers?
Two lighter layers often provide superior support compared to a single heavy layer. By placing two medium-weight layers in a crisscross pattern (one vertical, one horizontal), you create multi-directional stability. This method is more effective at counteracting the push and pull forces of the embroidery needle from all angles. This layered approach gives you a firm, stable foundation that prevents shifting and puckering, especially with complex or dense designs.
How do I stop puckering on performance wear or dri-fit shirts?
Stretchy performance fabrics require specific handling. Use a lightweight no-show mesh cut-away stabilizer, preferably a fusible version, to bond with the fabric and prevent it from stretching during stitching. It is critical not to stretch the garment when hooping. Instead, hoop only the stabilizer and "float" the shirt on top, securing it with a temporary spray adhesive. Also, use a ballpoint needle to prevent snags and runs in the delicate knit fabric.
Can a poorly digitized embroidery design cause puckering?
Absolutely. A design with excessive stitch density, incorrect underlay stitching, or a lack of pull compensation will almost always cause puckering, regardless of your stabilization technique. Professional digitizers create designs that account for the type of fabric they will be stitched on. If you've tried every stabilization trick and a specific design still puckers, the issue is likely rooted in the digital file itself. Sourcing designs from reputable digitizers is essential.
What is the best all-purpose stabilizer for a beginner to buy?
A medium-weight cut-away stabilizer is the most versatile and forgiving choice for a beginner. It provides robust and permanent support suitable for a wide variety of projects, from t-shirt knits to woven fabrics like denim or twill. Because it isn't removed, it continues to support the design through washing and wearing, preventing future distortion. While tear-away is useful for stable fabrics, cut-away is a fantastic starting point for achieving consistently professional, pucker-free results.
Does thread type affect puckering?
Yes, both thread type and tension can contribute to puckering. Using a thread that is too thick for your needle or fabric can cause the material to bunch up. More commonly, if your machine's upper thread tension is set too tight, it will pull the bobbin thread upwards, causing the fabric to gather and pucker beneath the stitches. Always perform a test stitch-out on a scrap of the same fabric to ensure your tension is balanced before starting your project.


