Yes, you can embroider a hat with the right backing and attachment for its shape. How to embroider hats and choose the right attachments starts with matching the stabilizer to the fabric: unstructured caps need backing, while side decorations benefit from embroidery clips to keep the design level. For bucket hats, keep a front-crown design within 2.5 inches tall by 4 inches wide.
A curved crown and soft fabric can make embroidery placement less straightforward, so choose your setup before stitching. This guide explains which backing and clips can support side embroidery, how to size designs for curved crowns, and where to place decorations, including on the brim. You'll also learn how cap construction affects hooping and stabilization, helping you make practical choices for the hat you're working on.
Key Takeaways
- Identify the cap's construction before choosing how to hoop and stabilize it; a center seam and a single-piece front affect setup.
- Allow for the bucket hat's slight crown curve when shaping a design so it sits naturally on the fabric.
- Plan decoration beyond the front crown: the sides, back, and brim each offer placement options with different setup needs.
- For sports-themed projects, explore embroidery designs that can help you choose a motif suited to your hat and personal style.
1. Backing and Clips for Side Embroidery
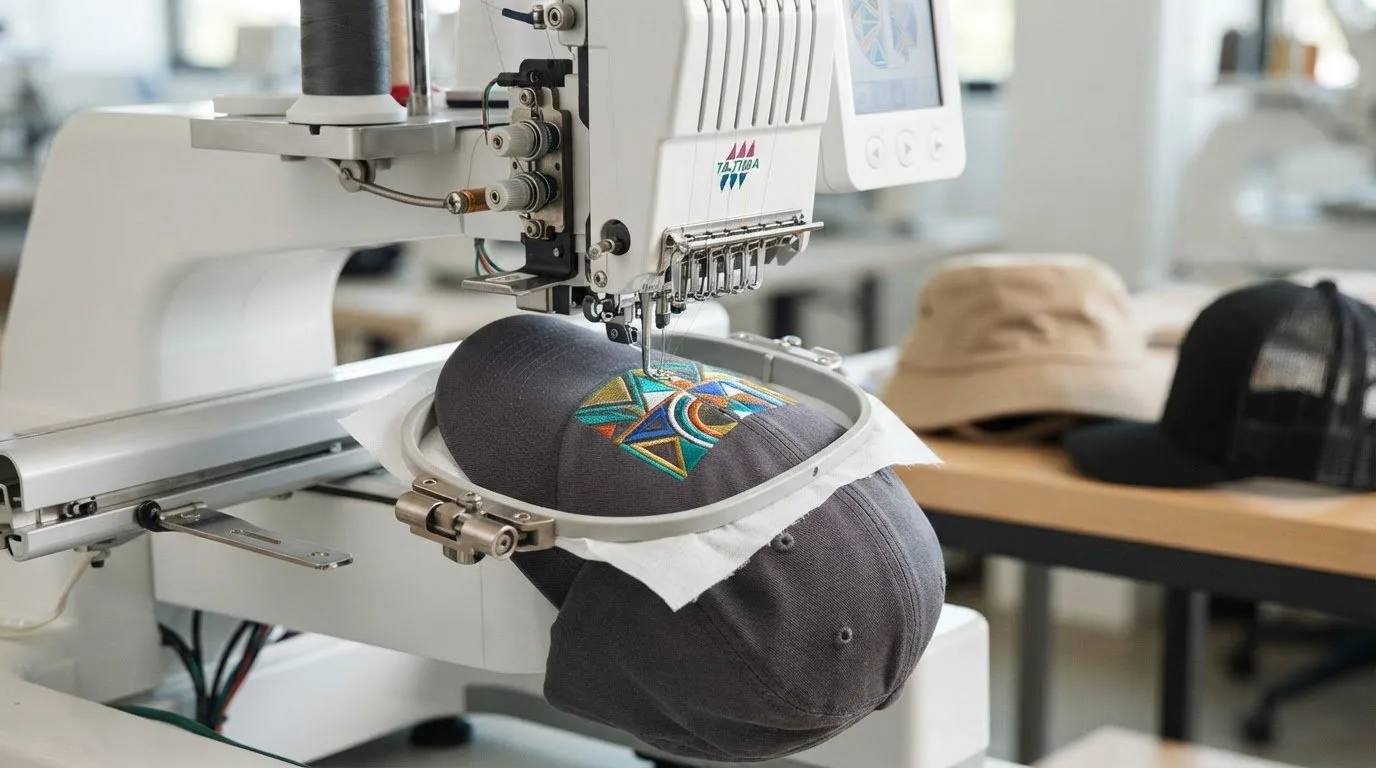
Mount the cap driver at the machine's designated attachment point, then secure the cap in its holder. Align the intended embroidery area beneath the needle before stitching. The driver keeps the cap in position as the machine works across its curved surface. Follow your machine's operating sequence to attach and release the driver safely.
Learning how to embroider hats and choose suitable attachments starts with matching the backing to the cap's fabric and structure. Unstructured caps need backing or stabilizer to support the stitches. FlexFit and other stretch-to-fit caps need at least two pieces of backing or a cutaway backing. For side embroidery on twill and mesh caps, one piece of cap backing can provide stabilization.
Embroidery clips help keep side decorations level. If the cap is positioned incorrectly, the finished design may appear to slope downhill. Secure the cap evenly, then check the design's angle from the side and above before stitching. These views can reveal a tilted placement before the machine starts.
Cap construction affects setup. Sports caps commonly have six panels, a center seam, and laminated backing that gives the crown structure. Trucker, farmer, and one-piece-front hats have a foam-laminated front and mesh around the rest of the hat. Without a center seam, they can be easier to hoop. Buckram, which shapes a cap's front, ranges from soft and flexible to stiff. Match the stabilizer to the structure: an unstructured cap needs support, while a shaped crown already has more body. For more on choosing the right hoop and frame, see our guide to different hoop sizes and types of hoop.
2. Bucket-Hat Design Size and Curved Crowns
Keep a bucket-hat front-crown design within 2.5 inches tall by 4 inches wide. The vertical crown panel may look straight, but it curves slightly around the hat. A wide motif can therefore distort if it's treated like flat fabric. Choose a compact layout, then adjust its shape to follow the crown instead of forcing the fabric flat.
Bucket hats often have a soft cotton crown with little structure. A firm, medium-weight cutaway or sticky stabilizer can support embroidery on this flexible fabric. Choose the stabilizer before hooping, then secure the crown without stretching it. This helps the design sit smoothly across the curved area.
The best embroidery machine for hats and caps is one that works with a compatible cap driver attachment. Match the machine and attachment to the hat's shape and the placement you plan to stitch. Compatibility matters more than choosing a machine by name alone.
Soft bucket hats can be machine embroidered when the design and stabilizer suit the fabric. Their flexible cotton crowns differ from structured caps, so avoid pulling the panel taut during setup. A small, well-positioned motif can follow the crown more naturally than an oversized design.
For brim embroidery, first map the brim's curve. Photograph it, then digitize a placement line along its edge. Use suitable supplies to hoop and stabilize the brim while keeping its curve in view. Bucket hats can also be decorated in other areas, including the crown, when the setup suits the placement.
Machine and cap-attachment costs depend on whether you need the machine, the attachment, or both. The selected machine configuration and included components determine the total, so compare the parts as a complete setup.
3. Front, Side, and Back Decoration Placement
Choose the decoration area before positioning the hat in its attachment. On a six-panel sports cap, the center seam divides the front panels. Position a centered motif in relation to the seam, and check whether its edges cross the stitching. A design placed across the seam may look different from one positioned entirely on a panel. Keep the cap aligned as you check the placement from the front.
For side decoration, mark the intended area before securing the cap. Embroidery clips help keep the design level rather than sloping downhill. Check its angle from the side, not just from above. A small emblem can be positioned to read clearly without crowding the front panel or the cap's edge.
The back offers a separate space for a compact decoration. A conventional round hoop measuring 12 cm is used for back-of-hat embroidery. Pair it with cutaway backing, then position the design within the hoop's sewing area. Keep the closure and nearby seams in mind as you align the motif, so they don't obstruct the intended placement.
Before stitching, inspect the design from the front, side, or back, depending on where it will appear. Confirm that the motif follows the hat's orientation and sits clear of seams. For a school-themed cap, browse our college embroidery designs for a motif that suits your chosen placement, or see our picks of mascot-inspired embroidery patterns that stitch well. The design's shape and direction should work with the panel, not compete with it.
Embroidery n Sewing: Sports Embroidery
Embroidery n Sewing offers Sports Embroidery for crafters choosing a team-inspired design for a hat project. Once you've settled the placement and prepared the cap, explore sports themes that match your preferred look. Our MLB baseball embroidery designs are a natural fit for caps, including the Eagle Hitter baseball design and the LA Dodgers slugger design, while football fans can choose the Chicago Bears design. These digital embroidery designs can help you move from a general sports idea to a motif that suits your project. If you'd like more ideas, read our guide to the best embroidery designs for hats, then use the backing and attachment guidance above to plan your setup.
Choose a Theme for Your Next Hat
Start your next hat project with a theme that suits the person who will wear it. Learning how to embroider hats and select attachments also means shaping the design around that person's interests. Consider a team, school, or personal interest, then use the cap's color and silhouette to guide your creative direction. Embroidery n Sewing offers digital embroidery designs, machine embroidery designs, and college embroidery designs in a range of themes. Browse the collection to find a motif that inspires your project and gives the hat its own character.
Browse the available options and choose a design direction that feels right for your project. Explore digital embroidery designs, and bring your next hat idea to life with confidence.
Frequently Asked Questions
So, can you embroider that hat?
Yes, you can embroider a hat if its fabric and shape can be secured for stitching. A compact emblem on a firm cap requires a different setup from lettering on a soft, unstructured crown. Check the intended area for seams, folds, and closures, then choose a design that fits without forcing the material flat.
What hat embroidery attachments and hoops are needed?
A cap driver attachment holds a hat for stitching on a curved surface, and it must be compatible with your embroidery machine. For back-of-hat decoration, a conventional round hoop measuring 12 cm can be used with cutaway backing. Match the attachment to the design location, since a front or side project needs different access than a back decoration.
What needle thread and stabilizer should I use for hat embroidery?
Choose needle and thread types that suit both your machine and the hat fabric, following your machine's guidance. Select stabilizer based on the fabric's stretch and structure: flexible material needs support to resist movement, while a structured panel already holds its shape. Stitch a sample on comparable fabric first to assess how the materials work together.
What embroidery settings and designs work best on hats?
There isn't one setting combination for every hat. Use settings suited to your machine, fabric, stabilizer, and design. A motif that fits the available panel without crowding seams is easier to position. Test the design on comparable material before stitching the hat, then check alignment and stitch coverage to identify any adjustments for the final run.