

Have you ever spent hours on a beautiful embroidery design, only to watch it sink and disappear into the plush fibers of a new towel? It’s a frustratingly common problem. That sinking feeling, the fabric shifting in the hoop, and the dreaded "hoop burn" on a brand-new set can make you want to give up entirely. If you’ve been struggling to get professional results, you’re not alone. Mastering how to embroider on towels requires a special approach to conquer that tricky, high-pile fabric.
But what if we told you there’s a professional secret that guarantees crisp, beautiful stitches that sit perfectly on top of the pile every single time? Welcome to the "sandwich" technique! In this ultimate 2026 guide, we’ll demystify the process for you. You'll learn exactly which stabilizers to use, how to hoop a towel without damaging it, and how to choose designs that pop. Get ready to transform those fluffy towels into personalized works of art with complete confidence.
- Prevent your stitches from sinking into the fabric by using the essential "embroidery sandwich" technique with a water-soluble topping. - The secret to how to embroider on towels without causing "hoop burn" is to use the "floating" method by hooping only your stabilizer. - Discover why dense designs can ruin your project and how to select the right stitch types for a flawless, pucker-free finish on terry cloth. - Achieve a professional, store-bought look by mastering the final steps for cleanly removing your toppings and trimming the back of your work.
Table of Contents
- The Challenge of Towel Texture: Why Standard Embroidery Fails
- Essential Supplies: Building the Towel Embroidery "Sandwich"
- The Floating Method: Step-by-Step Execution
- Choosing the Right Designs for Towels
- Finishing Touches and Long-Term Care
The Challenge of Towel Texture: Why Standard Embroidery Fails
You’ve digitized the perfect design, hooped your fabric, and hit "start," only to find your beautiful stitches have vanished into the material. This is the most common frustration when learning how to embroider on towels. Unlike flat fabrics, towels are a three-dimensional landscape defined by their "pile" or "nap"-the thousands of tiny loops that make them soft and absorbent.
These loops act like a dense forest, swallowing standard embroidery stitches and causing the dreaded "sinking stitch" phenomenon. While the long history of embroidery has seen thread applied to countless materials, the modern terry cloth towel requires a unique approach. Standard stabilization with just a backing isn't enough; the loops on top will still poke through and obscure your design. The goal of successful towel embroidery is to create a stable bridge between the thread and the fabric surface, allowing your design to sit proudly on top of the pile, not sink within it.
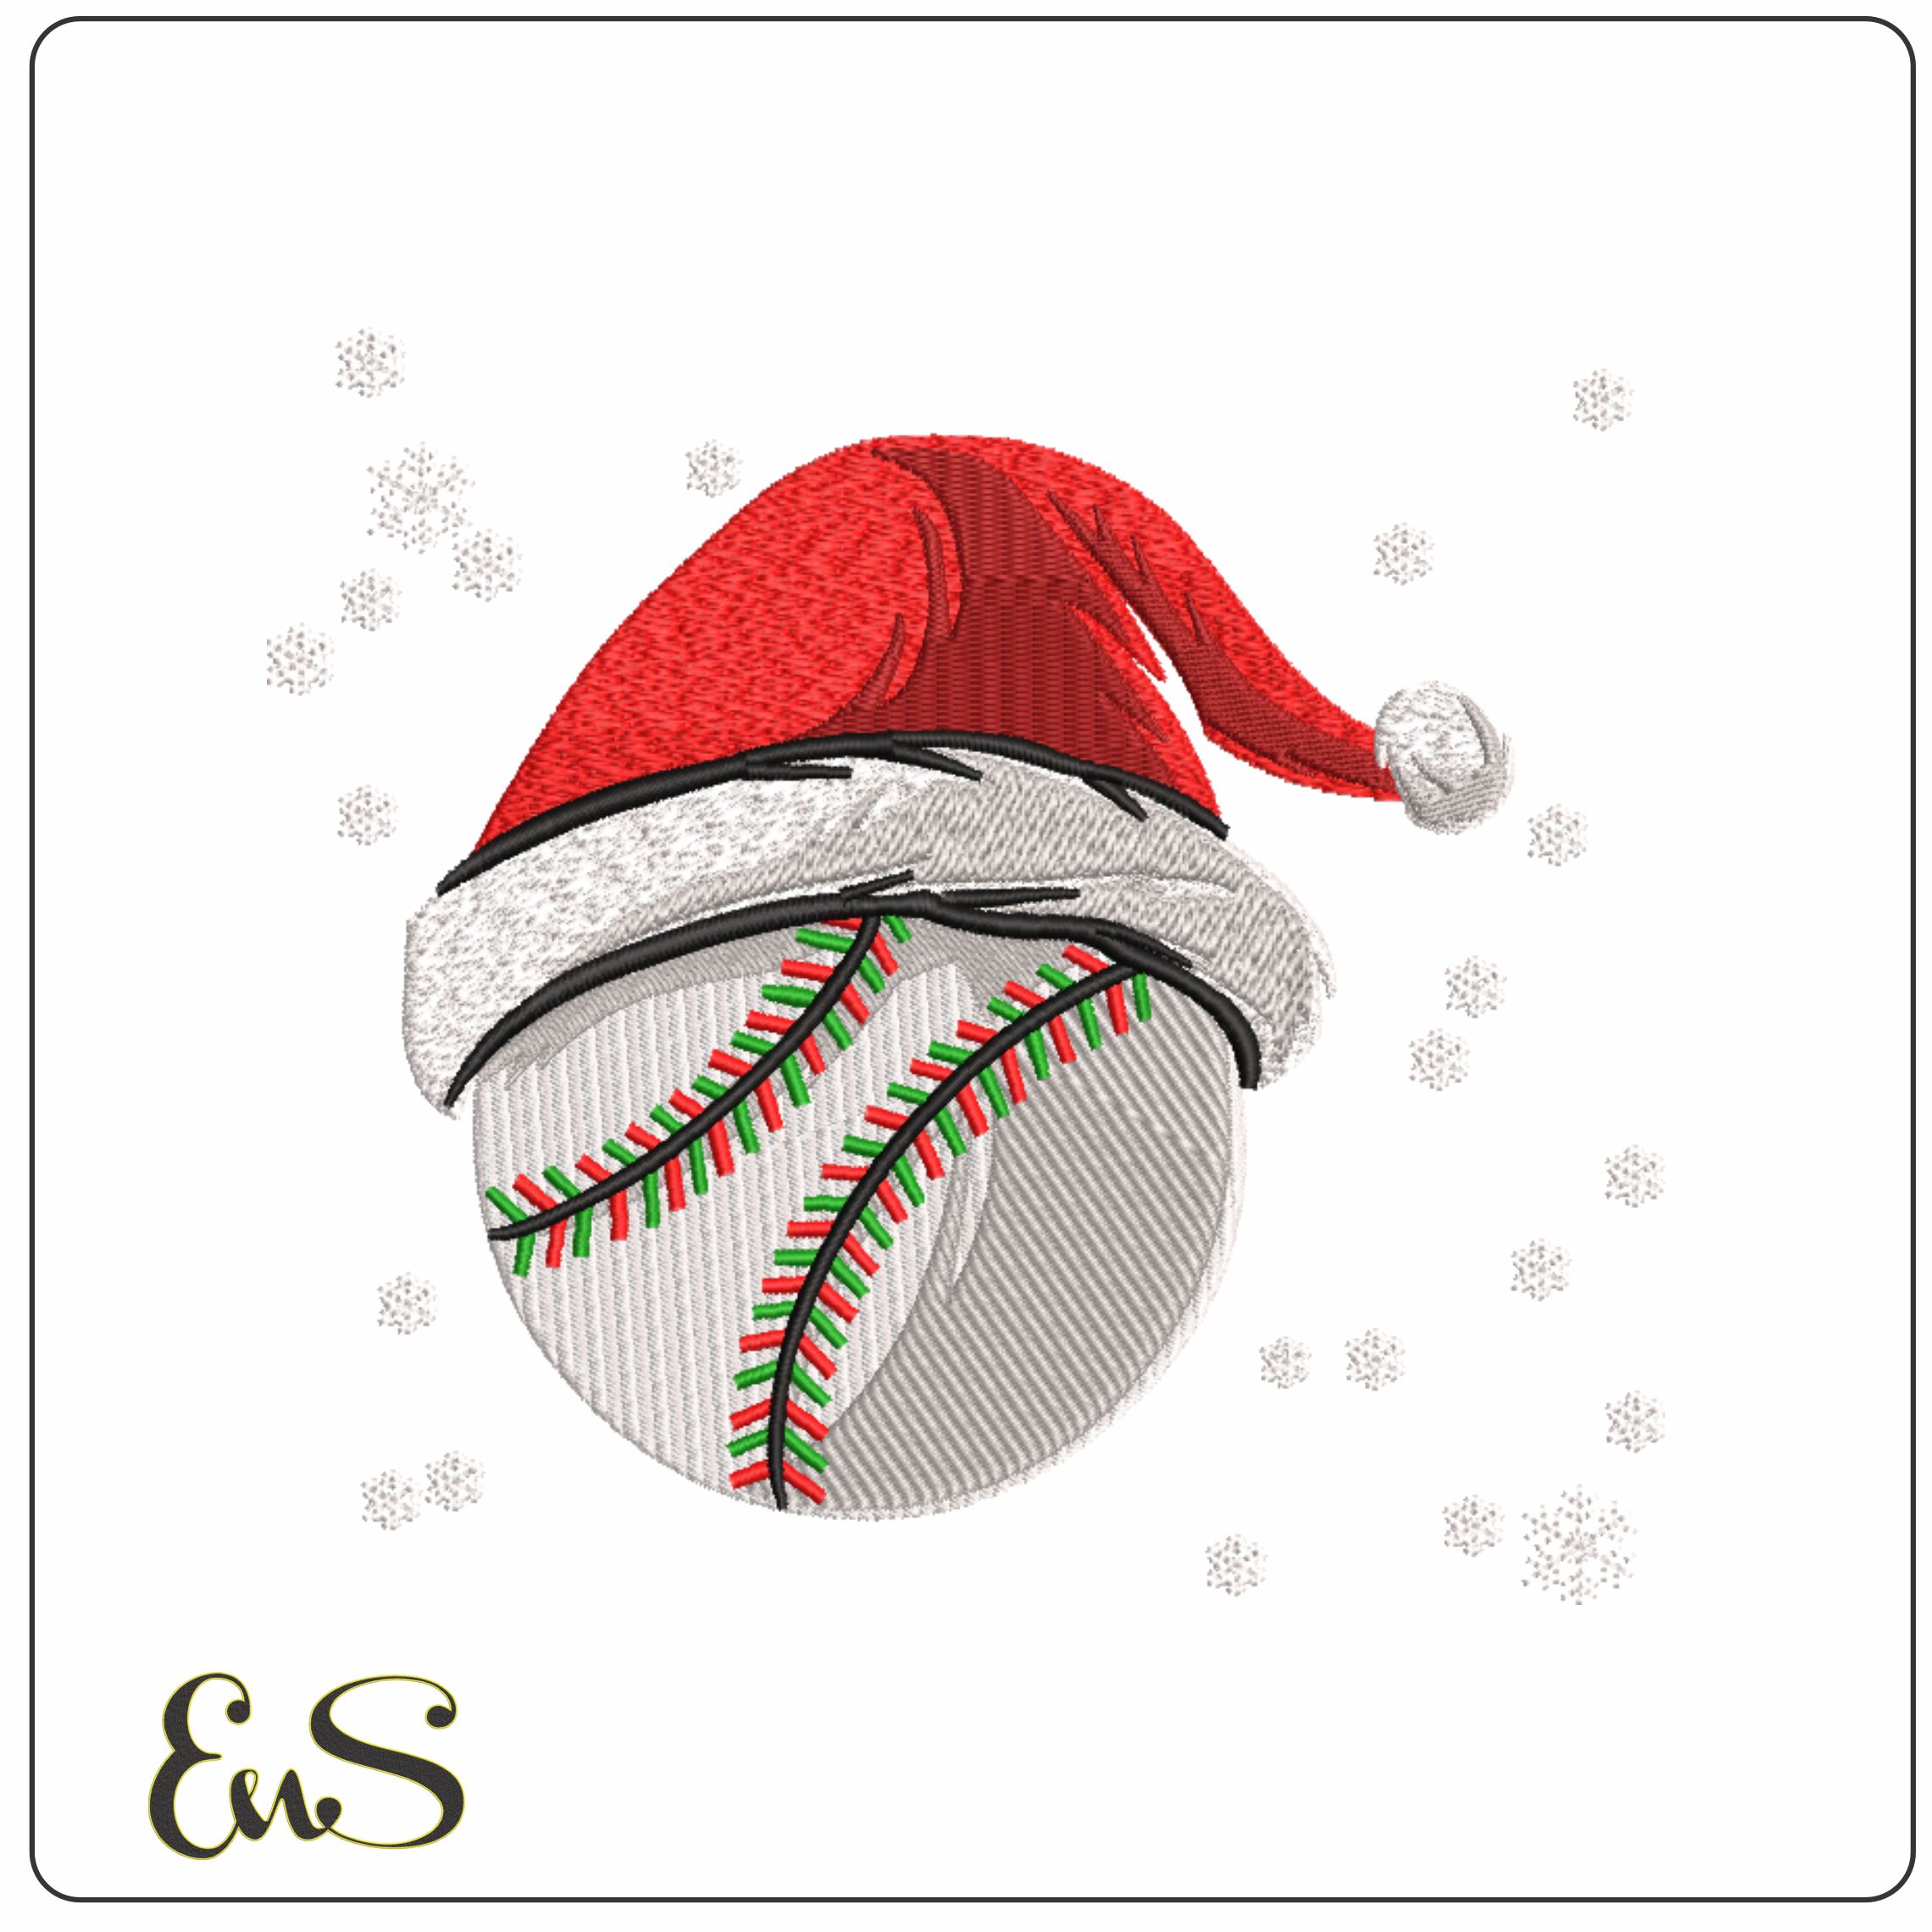
Not all towels are created equal. The type of towel you choose directly impacts your embroidery strategy. Understanding the surface you're working with is the first step to a flawless result.
- Terry Cloth: This is your classic, fluffy towel with high, uncut loops. It offers maximum absorbency but poses the biggest challenge for embroidery. It requires a heavy-duty water-soluble topping to press the pile down.
- Velour Towels: These towels have had their loops shorn off on one side, creating a plush, velvet-like surface. While smoother than terry cloth, the dense nap can still obscure fine details, so a topping is still recommended.
- Microfiber Towels: Often used for sports or cleaning, these towels have a very low pile but can be quite stretchy. The main challenge here is preventing the fabric from puckering or distorting during the stitching process.
The Role of the "Knock-down" Stitch
For intricate logos or small text on particularly plush towels, a "knock-down" stitch is your secret weapon. This is a preliminary layer of light-density fill stitching, often in a color that matches the towel, that is sewn directly onto the fabric before your main design. Its sole purpose is to flatten, or "knock down," the towel's nap in the embroidery area.
This technique creates a smooth, stable canvas for your detailed design to sit on. The result is a crisp, professional look that resembles an embroidered patch but is stitched directly onto the towel, ensuring a clean and integrated finish. It’s an essential technique for anyone serious about mastering how to embroider on towels with professional-grade quality.
Essential Supplies: Building the Towel Embroidery "Sandwich"
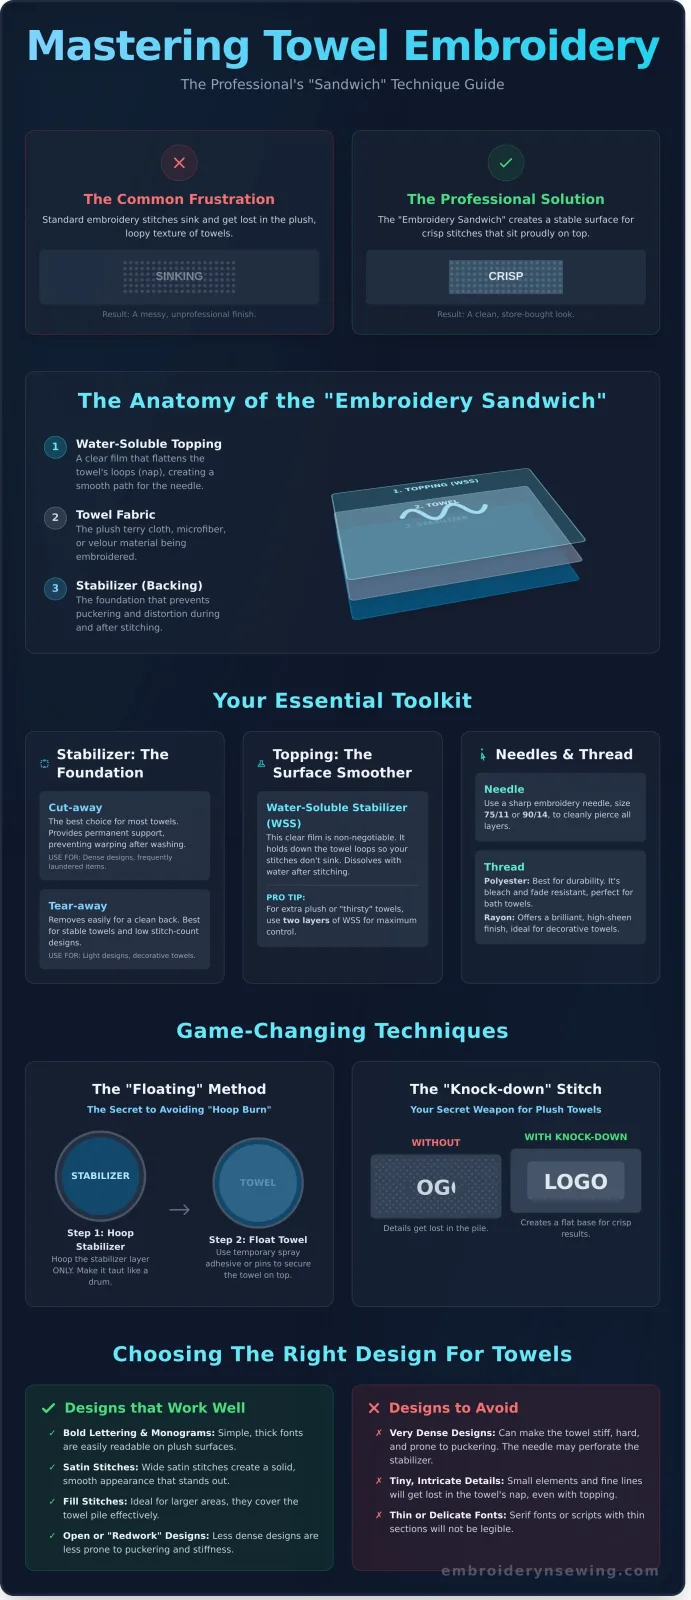
The secret to professional-looking towel embroidery lies in what you can't see: the "sandwich" of materials that supports your design. This layered approach prevents stitches from sinking into the plush terry cloth and ensures your work remains crisp and stable through countless washes. Getting this foundation right is a critical step in learning how to embroider on towels without frustration.
Stabilizer Deep Dive: Tear-away vs. Cut-away
The bottom layer of your sandwich is the stabilizer, which provides the structural support. Your choice depends entirely on the towel and your design.
- Tear-away Stabilizer: Ideal for light, low-stitch-count designs on high-quality, stable towels. It removes easily after stitching, leaving a clean finish. For easier hooping, consider an adhesive or "sticky" tear-away, which allows you to "float" the towel on top of the hooped stabilizer.
- Cut-away Stabilizer: This is the workhorse for most towel projects. It's non-negotiable for dense, complex designs or any towel that will be laundered frequently. It remains with the fabric permanently, providing lasting support and preventing the design from warping over time.
Water-Soluble Topping (WSS) Explained
The top layer is a clear, plastic-like film called a water-soluble stabilizer (WSS), often known by brand names like Solvy. Its job is to flatten the towel's loops (the nap) during embroidery, creating a smooth surface for the needle and thread. This prevents the terry cloth loops from popping through and obscuring your beautiful stitches. For very plush or "extra thirsty" towels, don't be afraid to use two layers of WSS for maximum control.
With your foundation set, you need the right tools for the job. An embroidery needle, typically a size 75/11 or 90/14 sharp, is essential for cleanly piercing the towel and stabilizer. For thread, the choice between polyester and rayon comes down to function versus finish. Polyester thread is the champion of durability, offering excellent bleach and fade resistance perfect for bathroom towels. Rayon thread, while less colorfast, provides a brilliant, high-sheen finish that beautifully accentuates decorative or classic embroidery styles for guest towels.
The Floating Method: Step-by-Step Execution
To achieve flawless results on thick, plush fabrics, professionals avoid hooping the towel directly. This can crush the pile and leave a permanent "hoop burn" mark. Instead, we use the "floating" method. This technique involves hooping only the stabilizer and then securing the towel on top, allowing the fabric to lie in its natural state. While our modern machines make the process efficient, the core principles of careful fabric handling echo centuries of historical needlework and craftsmanship.
Here’s the core process for this superior technique:
- Hoop the Stabilizer: Tightly hoop a piece of medium-weight cut-away stabilizer, ensuring it is taut like a drum.
- Apply the Towel: Lightly spray the hooped stabilizer with a temporary fabric adhesive. Carefully position your towel onto the stabilizer, pressing gently to secure it.
- Layer the Topping: Place a sheet of water-soluble stabilizer (WSS) over the embroidery area. This topping prevents stitches from sinking into the towel's loops. Secure its corners with pins or tape, well outside of where the needle will stitch.
- Run a Basting Box: Before starting the design, use your machine's basting function. This sews a large, temporary rectangular stitch around your design area, locking the towel, stabilizer, and topping together for maximum security.
Finding the Perfect Placement
Correct placement is crucial for a professional look. Use these industry standards as a guide: place your design 2 to 2.5 inches above the hem or dobby border for hand towels, and 4 to 5 inches for bath towels. Always use a printed template of your design and a water-soluble marking pen to draw center crosshairs on the WSS topping-never directly on the towel. For perfect alignment, use the towel’s woven dobby border as a straight visual guide.
Executing the Stitch
Your setup is perfect, but the job isn't done. The secret to learning how to embroider on towels successfully is active monitoring during the stitch-out. Keep the bulk of the towel rolled and secured with clips to prevent it from snagging on the machine's arm. Most importantly, reduce your machine's speed. A slower pace (around 500-600 stitches per minute) gives the needle time to navigate the thick pile, resulting in cleaner stitches, fewer thread breaks, and a much more polished final product.
Choosing the Right Designs for Towels
The secret to a beautiful embroidered towel isn't just in the technique; it's in choosing the right design from the start. Terry cloth's plush, loopy texture can swallow up the wrong type of embroidery, so understanding what works is a key part of learning how to embroider on towels for a professional finish.
The most important factor is density. A design with too many stitches packed into a small area will turn your soft towel into a stiff, puckered mess. This "bullet-hole" effect happens when the needles perforate the fabric too many times, compromising its integrity. Instead of dense fills, look for designs that use lighter, more open stitching.
While bold satin stitches look fantastic, they can be a double-edged sword. Shorter, wider satin stitches are perfect, but long ones are prone to snagging during use and washing. For this reason, fonts and monograms are consistently the most popular and successful projects for towel embroidery. They provide a classic, personalized touch without compromising the towel's function.
Best Design Categories for Towels
When selecting a design, focus on styles that work with the fabric, not against it. Here are three excellent choices:
- Monograms and Fonts: Classic, bold, and perfectly suited for personalization. They offer great impact with stitch types that hold up well on terry cloth. Browse our high-quality machine embroidery fonts to find the perfect style for your project.
- Open-Work or "Sketch" Designs: These low-density designs are meant to be light and airy. They allow the towel's texture to peek through, creating a charming, integrated look rather than a heavy patch.
- Appliqué: This technique uses fabric pieces to form the design, which are then stitched down. It's the ultimate way to achieve a solid, bold look without a high stitch count, as the fabric provides the color and coverage.
Design Red Flags
Equally important is knowing what to avoid. Steer clear of designs with these characteristics to prevent frustration:
- Tiny, intricate details: Small text and complex miniature elements will get completely lost in the towel's pile.
- Long, floating satin stitches: Any satin stitch over 7mm is a high risk for snagging on jewelry or in the laundry.
- No built-in underlay: A design without a foundation of underlay stitching will sink into the fabric, disappearing from view and lacking definition.
Finishing Touches and Long-Term Care
Congratulations, the stitching is complete! But the final steps are what separate a good project from a great one. Proper finishing and care will ensure your embroidered towel looks professional and lasts for years. This final stage is a crucial part of learning how to embroider on towels successfully.
Getting Rid of Water-Soluble Residue
First, gently tear away the large, excess pieces of your water-soluble topping (WSS). For any remaining bits stuck in the stitches, use the "mist and wait" technique: lightly spray the design with water and let it sit for a minute to dissolve the stabilizer. For tiny, stubborn areas, a damp Q-tip works perfectly. Important: Never iron your project before the WSS is completely gone, as the heat can cook the residue into a permanent, stiff film.
Flip the towel over to clean up the back. Carefully snip any long jump threads between letters or design elements. Then, trim the excess cut-away stabilizer, leaving about a 1/4 to 1/2-inch border around your design for continued support.
Don't panic if you see "hoop burn"-a flattened ring on the towel's pile. This is easily fixed. Hover a steam iron a few inches above the area (do not touch the fabric) or toss the towel in the dryer on low heat with a damp cloth for 10 minutes to fluff the fibers right back up.
Ensuring Longevity
For towels that will be frequently washed, always opt for high-quality polyester embroidery thread. It stands up to hot water and even bleach without fading or weakening. If a towel loop ever gets snagged and pulled after embroidering, simply snip the pulled loop level with the surrounding pile-never pull it further.
To keep your creations looking vibrant, follow these laundering tips:
- Wash with like colors in warm water on a gentle cycle.
- Avoid using liquid fabric softener, which can coat fibers and reduce absorbency.
- Tumble dry on a low or medium heat setting.
- Do not use chlorine bleach on the embroidery itself.
With these finishing touches, your project is ready to impress. Ready to start your next masterpiece? Download professional digital embroidery designs for your next towel project and put your new skills to the test!
Embrace the Fluff: Your Towel Embroidery Journey Begins
You've journeyed from understanding the unique challenge of plush towel textures to mastering the essential embroidery "sandwich" with the right stabilizer. By learning the floating method and how to select appropriate designs, you have unlocked the secrets to preventing loops from getting crushed and ensuring your stitches stand out beautifully against any terry cloth.
Now that you have the foundational knowledge of how to embroider on towels, the only thing missing is the perfect pattern. Your machine is ready, your towels are waiting, and your creativity is sparked. It's time to bring that vision to life with a design that's built to succeed on this tricky, textured fabric.
Why not start with a proven winner? Start your next project with our premium Digital Embroidery Designs. Our extensive collection, featuring everything from bold sports logos to vibrant cartoon characters, is delivered in high-quality PES and other universal file formats. With instant digital delivery, you can be crafting in minutes.
Don't let that pile of plain towels intimidate you any longer. Go ahead, choose your first design, and transform that simple fabric into a personalized masterpiece. Happy stitching!
Frequently Asked Questions About Embroidering on Towels
Do I really need water-soluble topping to embroider on towels?
Yes, a water-soluble topping (or topper) is essential for a professional result. Towels have a high pile, and this clear film prevents your stitches from sinking into the fabric loops. It creates a smooth surface for the machine to stitch on, ensuring your design is crisp, clear, and sits on top of the towel. Without it, the design will look fuzzy and undefined. After stitching, it rinses away easily with water.
What is the best stabilizer for bath towels?
A medium to heavy-weight cut-away stabilizer is the best choice for bath towels. Because towels are stretchy and laundered often, they need the permanent support that cut-away provides. This prevents the embroidery design from distorting, puckering, or stretching out of shape over time. While you can add a layer of tear-away for extra stability during stitching, a cut-away should always be your primary foundation for durability.
How do I prevent "hoop burn" on dark or plush towels?
The best way to avoid "hoop burn," or the shiny, crushed marks left by a hoop, is to "float" the towel instead of hooping it directly. To do this, hoop your stabilizer by itself until it is taut like a drum. Then, apply a light coat of temporary spray adhesive to the hooped stabilizer and carefully press your towel onto it, smoothing out any wrinkles. This technique secures the towel without clamping its delicate pile.
Can I embroider on both sides of a towel?
While it is technically possible, embroidering on both sides of a towel is not recommended for a high-quality finish. The back of any embroidery design shows the bobbin thread, knots, and stabilizer, which is not visually appealing. Placing a design on both sides would mean one design's "messy" back would always be visible. For a clean, professional product, it is standard practice to embroider on one side only.
What size needle should I use for heavy hotel-style towels?
For thick, densely woven towels, you should use a larger and stronger needle. A size 80/12 or even a 90/14 embroidery needle is ideal. These needles have the strength to penetrate the thick towel fabric and layers of stabilizer without deflecting, breaking, or shredding your thread. Using a needle that is too small can lead to skipped stitches, broken threads, and a poor-quality final design. Always start a new project with a fresh needle.
How do I center a monogram on a bath towel?
The standard placement for a monogram is centered horizontally above the decorative band (the dobby border). A good rule of thumb is to place the bottom of the design 2 to 4 inches above this band. To find the center, fold the towel in half lengthwise and make a small crease with your finger or a water-soluble marker. Use the intersection of your vertical crease and your horizontal height measurement as the center point for your design.
What is a knock-down stitch and do I need it for every towel?
A knock-down stitch is a base layer of low-density stitching that is embroidered before your main design. It tacks down the fluffy pile of the towel, creating a flat surface for your design to sit on. This is especially useful for very plush towels or for intricate designs with fine lettering that might get lost in the texture. You don't need it for every towel, but it is a fantastic tool for ensuring your design stands out clearly.
Is it better to use tear-away or cut-away stabilizer on towels?
Cut-away stabilizer is the superior choice for towels. Because towels are a knit fabric that gets stretched and washed frequently, they require the permanent support that cut-away provides. It remains with the fabric to keep the stitches stable for the life of the towel. Learning how to embroider on towels with the right foundation is key, and tear-away stabilizer simply doesn't offer enough long-term support and will lead to puckering after washing.


