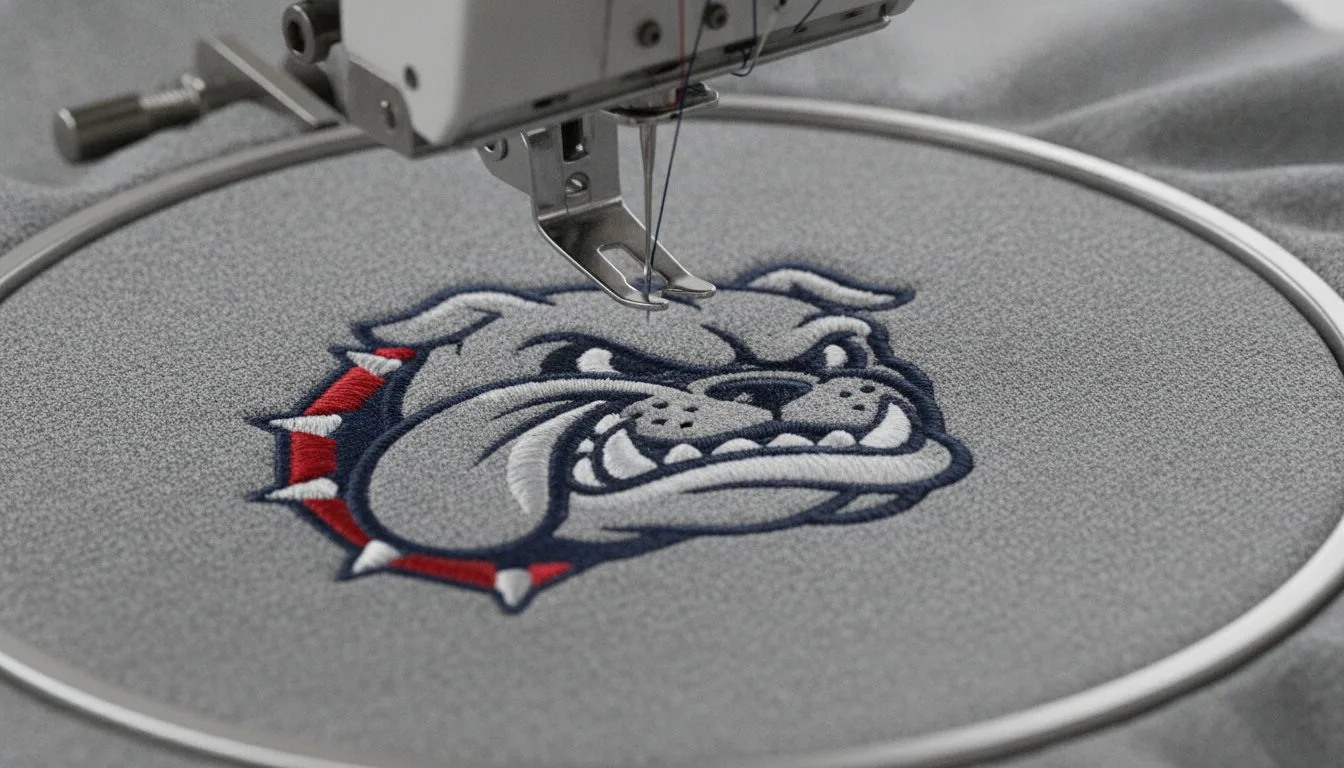
Picture this: you walk past a beautiful piece of embroidered wall art, or maybe you spot a delicately stitched floral design on someone's tote bag, and you think, "I would love to make something like that." But then the questions start piling up. Where do I even begin? What supplies do I need? Is this something a total beginner can actually do?
Good news: the answer is yes, and it is much easier to get started than you might think. Embroidery kits for beginners are the perfect way to jump into this relaxing and rewarding craft without feeling overwhelmed. Everything you need comes bundled together, so there is no guesswork involved.
In this guide, we are breaking down everything you need to know before picking up your first kit. From understanding what comes inside a typical beginner embroidery kit to tips for choosing the right one for your skill level, we have got you covered. By the end, you will feel confident, excited, and ready to make your very first stitch.
What's Actually in a Beginner Embroidery Kit
When you search "embroidery kits beginner," the results can feel overwhelming, and here's the thing most product listings won't tell you upfront: not all embroidery kits are built for the same kind of beginner. Understanding exactly what's inside a kit before you buy it will save you a frustrating afternoon and an unnecessary second trip to the craft store.
What Goes Into a Hand Embroidery Kit

Most retail starter kits are designed for hand embroidery, and their contents follow a fairly consistent formula. You'll typically find an embroidery hoop, a small selection of thread or floss, a needle set, and either a printed pattern or a pre-stamped practice fabric panel. Some kits include a lightweight stabilizer or fusible interfacing to prevent fabric from puckering, though many budget kits skip this entirely and leave beginners to discover that problem mid-project. Fabric choice matters too: quality kits use woven cotton or linen, which is far more beginner-friendly than stretchy or knit fabrics. One detail worth watching for is what gets deliberately left out. As one DIY kit seller explains on Instagram, scissors are commonly omitted to keep costs down, and pattern transfer tools are another frequent gap that catches new stitchers off guard.
Machine Embroidery Kits Are a Completely Different Animal
If you're a new machine owner, here's something that surprises a lot of beginners: the overwhelming majority of kits marketed as "beginner embroidery kits" are built for hand embroidery, not machine embroidery. For machine beginners, the kit concept shifts almost entirely. The physical starter supplies matter far less than having a digitized design file in the correct format for your specific machine brand (.PES for Brother machines, .DST for broad compatibility, .JEF for Janome). Beyond the file, you need stabilizer matched to your fabric type, the correct needle weight for that fabric, and embroidery-specific thread. No retail kit bundles all of this for you, which is why machine embroidery beginners need to build their own checklist rather than grabbing whatever box looks good on a shelf. For tips on mastering both hand and machine embroidery essentials, pairing kit contents with solid technique guidance goes a long way.
Three Questions to Ask Before Buying Any Kit
Before you commit to any beginner embroidery kit, run it through these three practical checks. First, does it include a design you can realistically finish in a single session? Complexity is rarely disclosed clearly on packaging, and nothing kills early momentum like a pattern that requires fifteen hours of work. Second, if you own an embroidery machine, does the included design file match your machine's accepted format? A mismatch here means the file is useless to you. Third, does the kit include enough stabilizer for at least two practice runs? Most kits that include stabilizer at all provide just enough for one attempt, leaving zero margin for the mistakes every beginner makes.
This last point connects to a bigger market trend worth knowing. The hand embroidery segment is projected to grow from $1.63 billion in 2025 to $2.95 billion by 2035, and that explosive growth means kit manufacturers are flooding retail channels with hand-focused products. If you're shopping for machine embroidery kits beginner resources, you have to be especially deliberate about filtering out what doesn't apply to your setup.
## Hand vs. Machine Embroidery: Which Path Is Right for You?
Once you know what's in a starter kit, the next question hits almost immediately: should you be stitching by hand, or is it time to look at a machine? Both paths lead to beautiful results, but they suit very different beginners, budgets, and goals. Here is an honest breakdown to help you choose.
The Case for Starting with Hand Embroidery
Hand embroidery has one enormous advantage right out of the gate: the startup cost is almost nothing. A basic beginner kit with a hoop, needle, fabric, and a few skeins of DMC floss typically runs between $15 and $40. There is no equipment to research, no software to install, and no file formats to decode. You just thread the needle and start learning. That low friction makes hand embroidery genuinely meditative, and many beginners find the slow, rhythmic quality of stitching by hand to be the entire point. The hand embroidery segment is currently valued at around $1.63 billion and is projected to grow to $2.95 billion by 2035 at a 6.1% CAGR, which tells you this is a thriving, actively growing community you would be joining. If you are drawn to artisanal, one-of-a-kind results and you have patience to spare, hand embroidery is an excellent first home.
### The Case for Going Straight to Machine Embroidery
Machine embroidery operates in a completely different gear. Where a detailed hand-stitched design might take several hours across multiple evenings, a machine can reproduce that same design in minutes with perfect consistency every single time. That speed and precision matter a great deal if your goal is personalizing garments, creating custom gifts, or producing team apparel at any kind of volume. The learning curve is real, covering hoop alignment, stabilizer selection, and understanding embroidery file formats like DST and PES, but the payoff is significant. The embroidery equipment market is growing at a 8.5% CAGR from 2026 to 2033, outpacing the hand embroidery segment, which signals that new machine owners are entering the hobby in growing numbers every year. Entry-level machines now start around $200 to $400, and resources like Meissner's 2026 embroidery machine guide can help you compare options by price point before committing.
The Hybrid Path Most Beginners Overlook
Here is something the beginner content rarely says plainly: you do not have to choose forever. A growing number of crafters start with a hand embroidery kit specifically to build stitch vocabulary and develop an intuitive sense of how thread fills a shape and how design placement affects the finished look. That hands-on foundation translates directly into smarter machine embroidery decisions later, from choosing the right downloadable design file to understanding why stitch density matters on a particular fabric. Starting by hand and graduating to machine is a completely viable and increasingly popular sequence, and once you make that transition, platforms with ready-to-use downloadable design files make the jump far less intimidating than it sounds.
Your honest decision comes down to three things: your current budget, whether you want one-off personal projects or repeatable custom output, and how comfortable you are with a short technical learning curve. Either path works beautifully; it just depends on what kind of maker you want to be. [
Best Beginner Design Styles to Stitch in 2026](/articles/choosing-your-first-embroidery-machine-a-beginners-guide-2025)
Not every design style is created equal when you're just starting out, and picking the wrong one for your first project is one of the fastest ways to get frustrated and quit. Here's a skill-tiered breakdown of what's trending in 2026 and where each style honestly falls on the beginner-to-advanced spectrum.
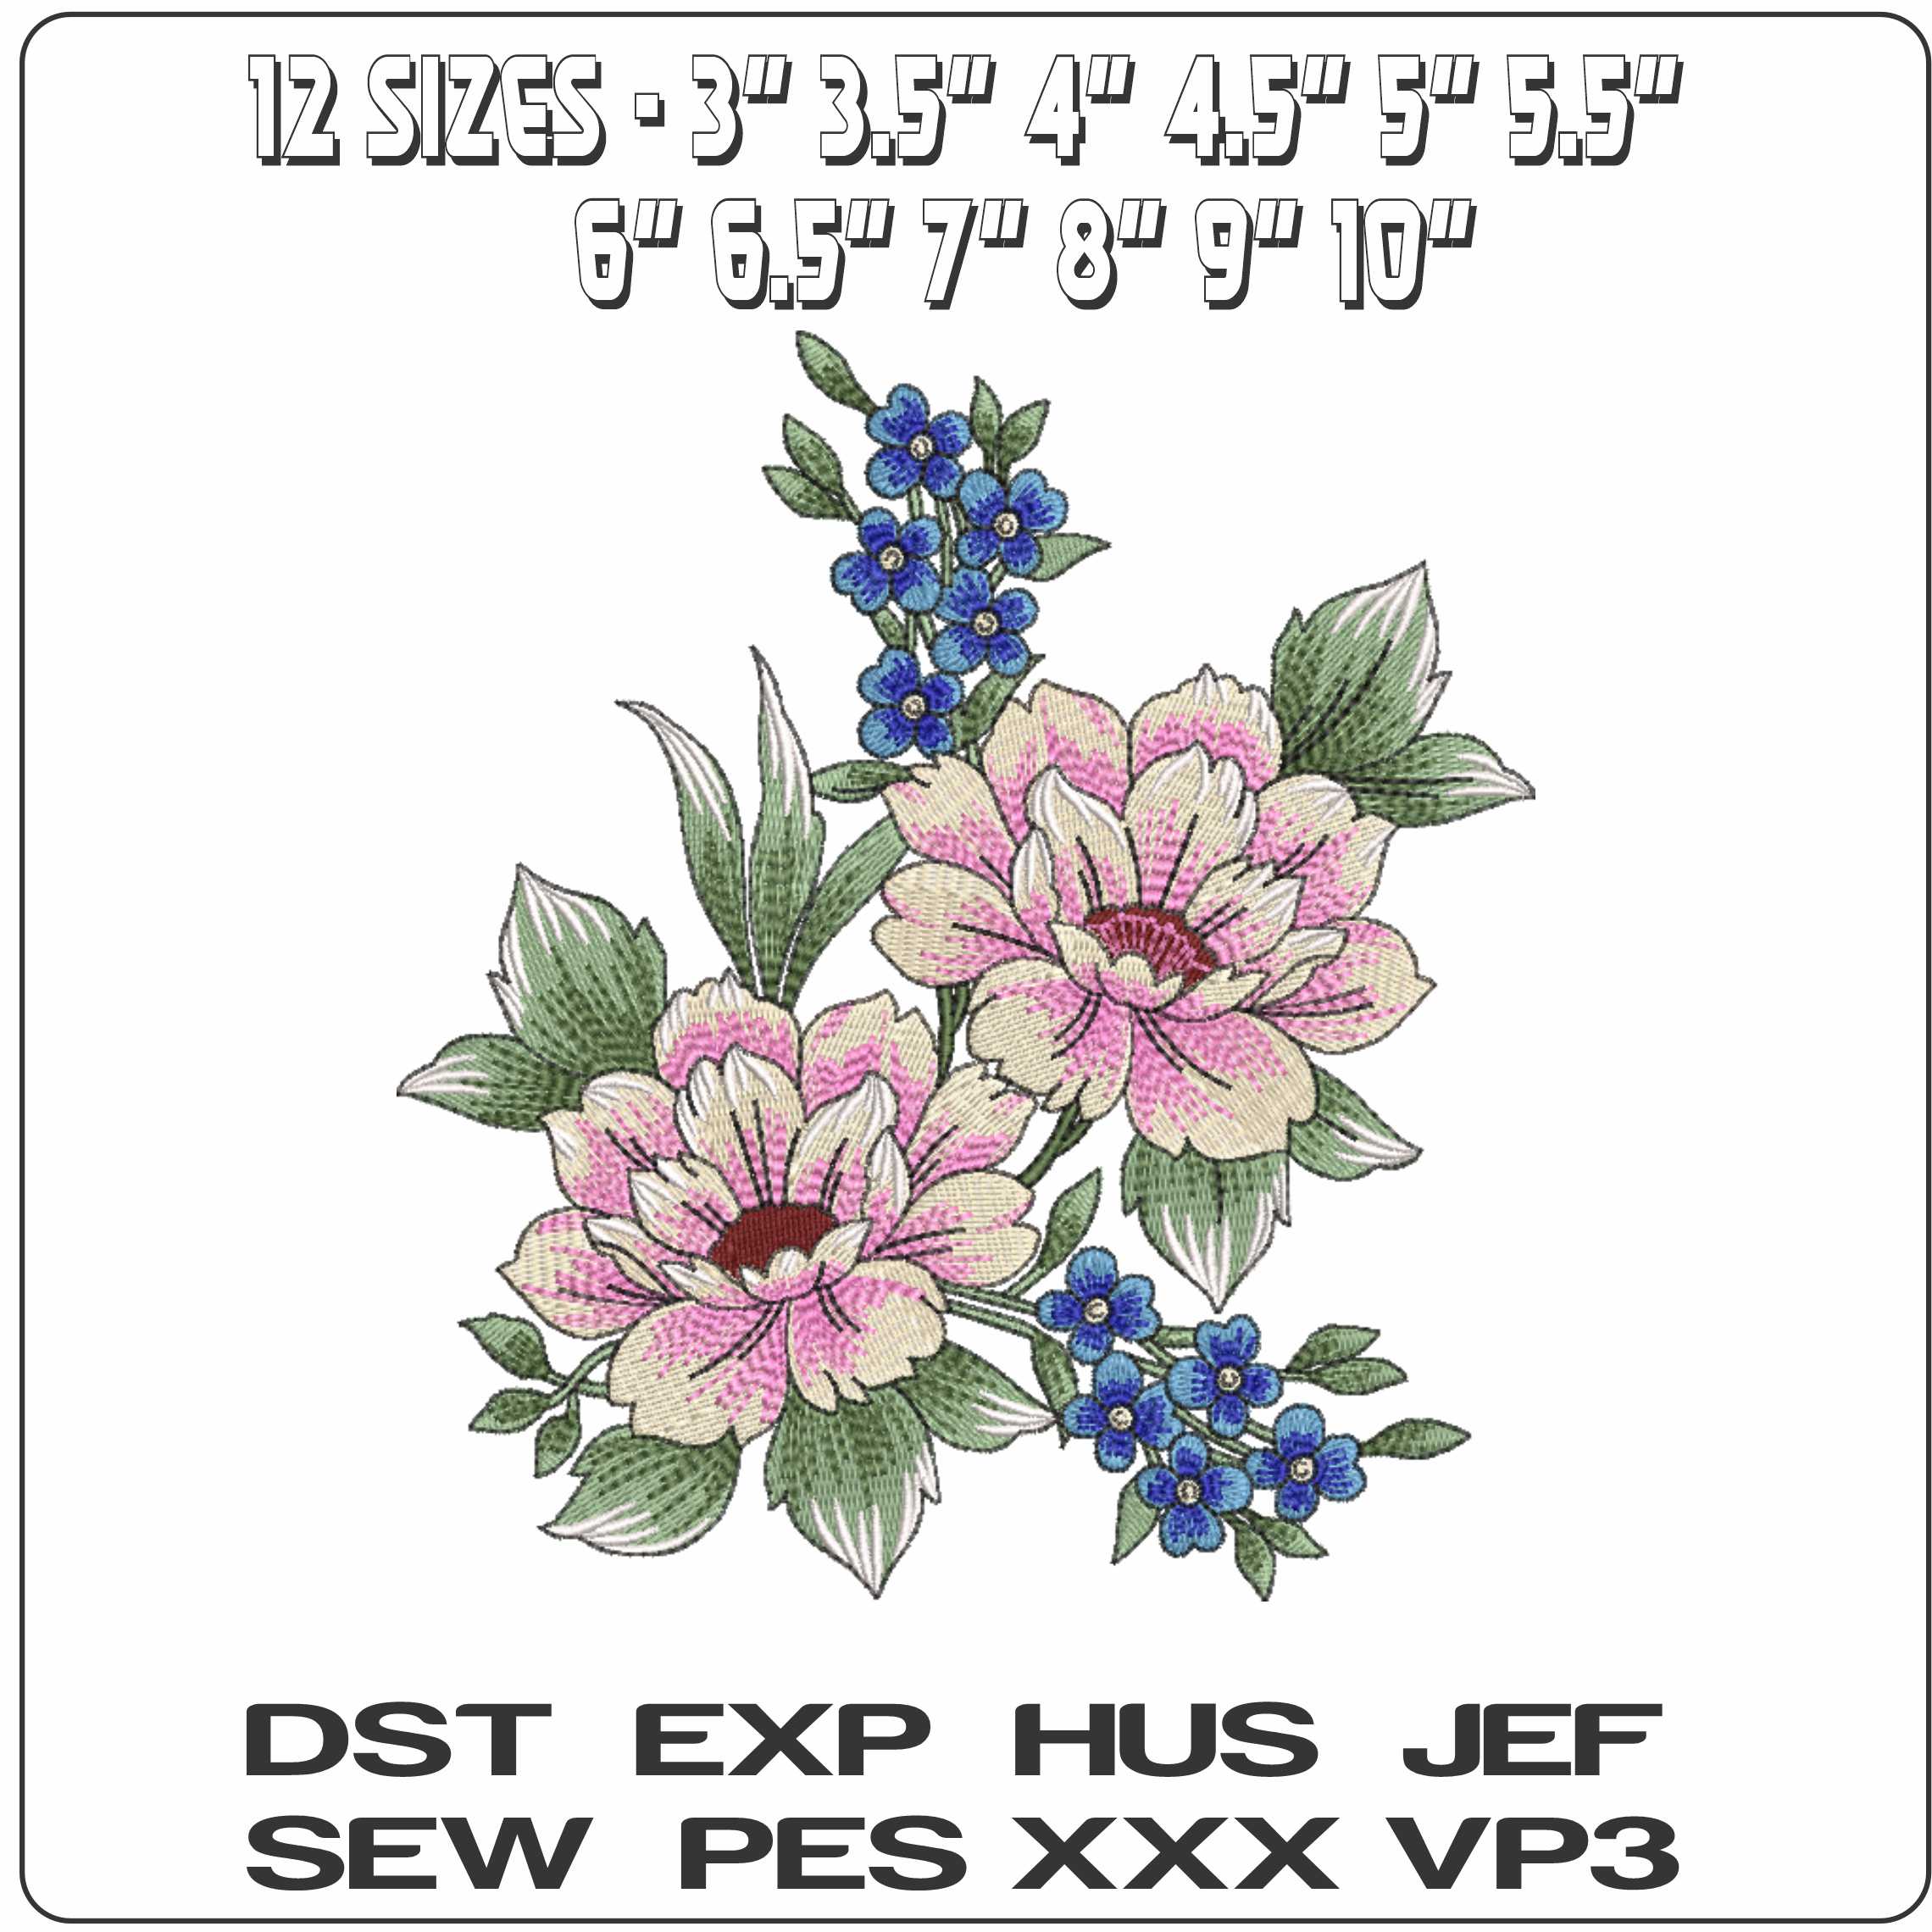 Embroidery designLily Flowers And Forget Me KnotsView this design →
Floral designs are the dominant embroidery style of 2026, and the timing couldn't be better for new stitchers. Industry trend coverage aligned with Etsy's "Soft Stitch Era" movement points to oversized botanicals and nature motifs as the defining aesthetic of the year. The practical reason florals work so well for beginners is structural: individual petals and leaves function as isolated modules. You stitch one element, finish it cleanly, and move to the next. There's no complex registration across the whole design, so a minor tension wobble on one petal doesn't unravel the entire composition. This forgiving quality makes florals the single best first-project category, and it's no coincidence that 75 Modern Embroidery Kits for Beginners are almost universally anchored in botanical themes.
2. Minimalist Line Art: The True First Project
If florals are the most popular starting point, minimalist line art is arguably the most technically appropriate one. These designs use low stitch counts and clean outlines, which means your machine has fewer opportunities to build up thread bulk or compound small errors. Tension inconsistencies that plague first-time operators become nearly invisible in a spare line design. Think simple silhouettes, single-color outlines, or geometric shapes with breathing room between elements.
3. Retro Y2K Typography: Save It for Project Two or Three
Lettering and retro-styled fonts are genuinely trending right now, but they carry a moderate skill requirement that beginners often underestimate. Letter alignment, underlay settings, and density management all interact in ways that take a few projects to develop intuition for. Put this style on your list, just not at the top.
### 4. 3D Puff Embroidery: Bookmark for Month Three
That raised, textured look on structured hats is everywhere in 2026, and it's an advanced technique. It requires foam backing cut precisely to each letter or shape, calibrated machine pressure, and deliberate design file settings. Week one is not the time. Add it to your goals list and revisit it once you have solid runs on flat fabric under your belt.
5. Metallic Thread and Tone-on-Tone Micro Embroidery: Beautiful but Demanding
Metallic threads are visually striking but notoriously sensitive to tension changes, and tone-on-tone micro embroidery requires precision that standard beginner machines and hands aren't yet calibrated for. Master standard polyester thread on medium-weight cotton first. Once thread flow feels intuitive, these styles become genuinely achievable rewards to work toward.
Where to Find Beginner-Appropriate Design Files
If you're running a machine rather than stitching by hand, design file selection matters as much as technique. Embroiderynsewing.com carries a wide catalog of floral and nature motif instant-download design files that map directly to the beginner-appropriate tier described above. For new machine owners who want to skip the digitizing learning curve entirely, browsing their nature and floral categories is a practical first stop.
Embroidery File Formats Explained: PES, DST, JEF and More
If you've made it this far in your embroidery journey and you're starting to look at downloadable designs, there's one technical topic you absolutely need to understand before you buy anything: file formats. This is the part where a lot of beginners hit a wall, and it's almost entirely avoidable with a little upfront knowledge.
Why Format Matters More Than You Think
Embroidery design files are not images. They're sets of machine-specific instructions that tell your needle exactly where to move, when to cut thread, and when to pause so you can swap colors. Your machine can't read a JPG or PNG any more than it can read a recipe card. It needs a format written in its own language, and every major brand speaks a slightly different one.
Here's a quick breakdown of the formats you'll see most often:
- PES is the native format for Brother and Babylock machines. It stores color palette information and hoop size data, which makes it the most user-friendly option for home embroiderers. Since Brother and Babylock dominate the home machine market, PES is the format you'll encounter most as a beginner.
- DST is often called the universal industrial standard, originally created by Tajima in the late 1980s. Nearly every machine can read it, but there's a catch: DST files don't store color information. That means when you load a DST file, your machine won't know which thread colors go where. You'll need a separate color reference sheet to assign colors manually, which is a genuinely confusing experience if you weren't expecting it.
- JEF is native to Janome machines, and VP3 is the format used by Husqvarna Viking and Pfaff. HUS is an older Husqvarna format that still shows up regularly in download bundles.
Using the wrong format is one of the most common beginner mistakes out there. The outcome is usually one of two things: either your machine throws an error and refuses to load the file at all, or the design loads but stitches out wrong because the color-stop data got stripped somewhere along the way. According to Top 10 Embroidery File Formats You Must Know, at least 10 distinct formats are in active use today, so the landscape is genuinely fragmented.
How to Avoid the Format Problem Entirely
The good news is that most reputable design sellers have already solved this for you. Sites like embroiderynsewing.com sell designs as multi-format ZIP bundles, typically packaging PES, DST, JEF, HUS, and additional formats together in a single download. You unzip the file, grab the format your machine needs, and you're ready to go. No conversion required.
Before you purchase any design file, take 60 seconds to do two things. First, identify your machine's brand and model number, usually printed on a label on the front or underside of the machine. Second, confirm the seller explicitly lists your machine's native format in the product description. Don't assume DST will work cleanly just because it's labeled "universal."
A Word on File Converters
Free conversion tools like Ink/Stitch and commercial options like SewWhat-Pro do exist, but they come with real trade-offs. Every conversion involves stitch recalculation, which can introduce path errors and degraded stitch geometry. Ink/Stitch also requires the free Inkscape vector editor as a prerequisite, which adds a learning curve most beginners don't need on their first project. For a first attempt, buying natively formatted files from a trusted source is the far safer choice.
Don't Overlook Stitch Count
One more file attribute worth checking before you buy: stitch count. Beginner-friendly designs typically fall in the 3,000 to 8,000 stitch range. Anything above 15,000 stitches significantly raises the risk of stabilizer failure, thread breaks, and registration drift, all of which are frustrating to diagnose when you're still learning the basics. Most product listings display stitch count in the description; if you don't see it, ask before you buy.
What It Realistically Costs to Start Embroidering
Now that you understand the two paths available to you, let's talk about real numbers. Budget surprises are one of the most common reasons beginners abandon a new hobby, so here's an honest breakdown of what you'll actually spend.
Hand Embroidery: Start for Under $50
If you're starting with hand embroidery, you're looking at the most beginner-friendly price point in the entire craft. A complete starter kit with a hoop, fabric, cotton floss, needles, and a printed pattern typically runs $15 to $45. If you prefer building your own kit from scratch, expect to spend $25 to $40 on the essentials: a 6- to 8-inch hoop ($4 to $8), a pack of needles ($2 to $5), six to ten colors of stranded floss ($5 to $10), a fabric quarter ($3 to $8), and a small pair of scissors ($6 to $12). Most of those tools are one-time purchases. After that, restocking floss and fabric for each new project usually costs just a few dollars. For anyone who wants to try embroidery before committing to a machine, this is the smart starting point. Check out Embroidery Kits: The Ultimate Beginner's Guide (2026) for a fuller look at what beginner kits include.
Machine Embroidery: A Four-Category Budget
Machine embroidery costs more upfront, but the investment makes sense once you understand what you're paying for. The breakdown looks like this:
- Machine: $200 to $600 for a reliable entry-level single-needle model
- Stabilizer sampler: $15 to $30 for a pack covering cutaway, tearaway, and topping types
- Thread: Often partially included with your machine; a standalone 40-color polyester set runs $20 to $40
- Design files: $2 to $15 per instant-download single design, or $15 to $40 for a themed multi-design bundle
The machine is the biggest hurdle. Everything else is relatively modest and builds gradually.
The Hidden Cost Nobody Warns You About
Budget for practice fabric. Seriously. Most beginners skip this and regret it when a beautiful design ends up puckered or misaligned on a finished shirt. Plan on 5 to 10 practice runs on inexpensive muslin or plain cotton before you commit any design to a garment or gift. Muslin costs almost nothing per yard, and those practice sessions are where you learn tension, stabilizer selection, and hoop placement without the heartbreak of ruining something that matters.
Why Digital Design Files Win on Value
For machine embroiderers, downloadable design files offer the best cost-per-use value of anything in your supply list. A single file priced at $5 to $8 can be stitched dozens of times across different projects and fabrics, giving you far more mileage than a single-use printed kit pattern ever could. That math gets even better when you shop themed bundles and catch sale pricing.
The timing is also worth noting. The global embroidery market was valued at $3.27 billion in 2024 and is projected to reach $5.95 billion by 2032, growth driven in part by falling machine prices and the expansion of affordable digital design libraries. More competition in the market means better deals for beginners, and there has genuinely never been a more accessible moment to pick up this hobby.
From Kit to First Stitch: How to Complete Your First Embroidery Project
You've read through the theory. Now it's time to actually stitch something. This five-step walkthrough is built specifically for machine embroidery beginners working with downloadable design files, so you can move from an empty hoop to a finished piece without second-guessing every decision along the way.
Step 1: Choose the Right Design File
Before you touch your machine, your design choice sets the ceiling on how smoothly your first project goes. For your first run, stay under 8,000 stitches, limit yourself to three colors or fewer, and download a file in the format your machine reads natively. Brother machines use .PES, Janome uses .JEF, Viking uses .HUS, and most commercial machines default to .DST. Using the wrong format forces your machine's software to convert the file, and that conversion can shift stitch paths in ways that aren't obvious until you're mid-stitch-out. A simple floral outline or a small text design in your machine's native format is genuinely the lowest-risk starting point available to you.
Step 2: Hoop Your Stabilizer and Fabric Together
Hooping errors cause more first-project failures than any other single factor, and that's not an exaggeration. Before placing anything in the hoop, lay your stabilizer flat and position your fabric on top with the grain running perfectly straight. For lightweight wovens like quilting cotton, use a tearaway stabilizer. For knits or stretchy fabrics, use a cutaway stabilizer that stays put after washing. Tighten the hoop screw gradually and evenly, aiming for consistent tension across the entire surface without distorting the weave. If the fabric looks puckered or pulled in any direction before you stitch a single thread, re-hoop it. A few extra minutes here prevents bubbled designs and misaligned elements that no amount of pressing will fix afterward.
Step 3: Load Your Design and Run a Test Stitch
Transfer the design file to your machine via USB drive or direct cable connection, then pull up the on-screen preview and confirm the size and placement match what you planned. This is also the step most beginners skip entirely, according to common machine embroidery beginner mistakes: run a complete test stitch on a scrap of the same fabric-and-stabilizer combination you're using for your real project. Not a similar fabric. The same fabric. Tension behaves differently on different materials, and catching a problem on a scrap piece costs you nothing except a few minutes.
Step 4: Thread, Speed, and Stitch-Out
Thread your machine following the design's color sequence exactly, then drop your speed to 50 to 60 percent of maximum before you hit start. That reduced pace gives you time to watch the stitch-out as it progresses and pause immediately if thread breaks or stabilizer shifting starts. Stay present during this step rather than walking away. Most beginner machine embroidery tips emphasize that the habits you build on your first project tend to stick, and attentive monitoring is one worth keeping.
Step 5: Finish, Trim, and Press
Once the final color stops stitching, remove the hoop from the machine before unhooping the fabric. Trim your stabilizer close to the design edges using small sharp scissors, being careful not to clip any jump stitches connecting design elements. Flip the piece face-down on a pressing cloth, set your iron to a low to medium heat appropriate for your fabric type (around 270°F for cotton, lower for synthetics), and press gently from the reverse side. This settles the stitches into the fabric and gives your finished piece a clean, professional look without flattening the thread texture.
Three Mistakes Worth Avoiding Right Now
Skipping the test stitch is the fastest way to ruin a finished piece. Using cutaway stabilizer on lightweight fabrics that need tearaway causes persistent puckering that won't press out. And using the wrong needle type creates problems that look like thread or tension issues but aren't: use a ballpoint needle for knits and stretch fabrics, and a sharp or microtex needle for wovens. A size 75/11 sharp handles most standard woven fabrics, while heavier materials like denim call for a 90/14. Getting these three details right before you stitch eliminates the majority of issues that beginner embroiderers typically troubleshoot after the fact.
Why Embroidery Fits Perfectly Into a Slow Fashion Mindset
Slow fashion is a movement built on one core idea: instead of buying new, you repair, personalize, and extend the life of what you already own. It pushes back against the cycle of cheap, disposable clothing by asking you to invest care and creativity into your existing wardrobe. Embroidery fits this mindset so naturally that it almost feels like the two were made for each other. Whether you're reinforcing a worn spot on a favorite jacket or adding a design to make something feel new again, embroidery turns ordinary garments into intentional ones.
Think about what happens when you pick up a plain thrifted denim jacket for a few dollars and add an embroidered floral motif to the back. That jacket stops being forgettable and becomes a piece you actually want to wear. The same logic applies to a basic tote bag, a faded pillowcase, or a pair of jeans with a scuffed knee. Embroidery transforms low-cost or pre-loved items into personalized statement pieces, and it does so without generating new textile waste. According to a 2026 review of the crafting landscape, personalization is continuing to dominate creative culture with a specific shift toward "softer, handcrafted expressions that feel collected and thoughtful," and embroidery is one of the clearest examples of that shift in action.
Consumer research points to this connection growing stronger, especially among younger crafters picking up the hobby for the first time. Sustainable and slow-fashion DIY positioning is emerging as an accelerating demand signal in the embroidery market, and it tracks with what the broader crafting community is reporting. Craft trend forecasters for 2026 have explicitly named upcycling and slow crafting as two of the biggest movements shaping the year, sitting alongside nature-inspired design and vintage aesthetics as defining values for a new generation of makers.
For machine embroidery beginners specifically, downloadable design files add another layer of slow-fashion value that's worth calling out. A single digital file purchased once can be stitched onto a jacket this season, a tote bag the next, and a set of linen napkins as a holiday gift after that. One small, affordable purchase multiplies across many projects and many seasons, which means you're getting far more creative mileage out of minimal spending. That's the opposite of fast fashion logic, and it's one of the quietest but most compelling reasons to start building your design library now rather than waiting until you feel "ready."
Recommended Beginner Embroidery Kits and Design Files to Start With
Here are five specific starting points worth bookmarking, whether you're just unboxing your first machine or picking up a needle for the very first time.
1. Embroiderynsewing.com Floral and Nature Design Files
Florals are the single best first category for new machine embroidery owners, and the timing couldn't be better. Oversized botanicals and nature motifs are the dominant design direction in 2026, which means your first finished project will look current rather than like a practice run. The floral and nature design files at Embroiderynsewing.com are priced in the impulse range, available as multi-format bundles that include PES, DST, JEF, and other common formats in a single download, and are accessible instantly after checkout. There's no waiting, no shipping, and no scrambling to find a compatible file. For new machine owners who are still getting comfortable with the setup process, removing that friction matters more than most people expect.
2. Brother PE550D Starter Bundle
If you're still deciding on a machine, the Brother PE550D is one of the most consistently recommended entry-level options on the market. It comes with 125 built-in designs, a 4x4 inch embroidery field, and USB connectivity so you can load downloaded design files directly from a flash drive. That USB capability is the feature that makes it pair so well with downloadable PES-format files from a catalog like Embroiderynsewing.com. You essentially go from 125 designs to hundreds on day one. The embroidery equipment market is growing at a CAGR of 8.5% through 2033, which reflects just how many new machine owners are entering the hobby right now, and the PE550D sits right at the center of that beginner wave.
3. Dimensions Learn-A-Craft Counted Cross Stitch Kit
For beginners taking the hand embroidery path instead, the Dimensions Learn-A-Craft line is a reliable first purchase. The kits use pre-printed fabric with the pattern already stamped directly onto the cloth, which eliminates one of the most common beginner frustrations: pattern transfer. You open the kit, identify your starting point, and stitch. There's no tracing, no lightboxes, and no guessing. It's a low-stakes way to build stitch confidence before investing in additional tools or supplies.
4. Embroiderynsewing.com Seasonal and Holiday Design Collections
Once you've completed your first floral project, seasonal and holiday design bundles make an excellent second purchase. The reason is practical: personalized ornaments, holiday apparel, and gift items all come with a natural deadline built in. That deadline creates momentum in a way that open-ended practice projects simply don't. A Christmas deadline in November, for example, gives you a real reason to sit down and finish something, which is exactly what most beginners need to move from "starter" to "consistent maker."
5. Sulky Sticky+ Tear-Away Stabilizer Sampler
Stabilizer selection is one of the most underdiscussed beginner pain points in machine embroidery. Most new stitchers buy one type in bulk, discover it doesn't work well on a specific fabric, and then feel stuck. The Sulky Sticky+ Tear-Away Stabilizer sampler solves this by giving you small quantities of multiple stabilizer types in a single package. You can test tear-away against cut-away and water-soluble options on actual projects before committing to a full roll of anything. It's a small addition to your supply list that prevents a disproportionately large amount of beginner frustration.
Frequently Asked Questions About Beginner Embroidery Kits
Q: Can I use embroidery kit designs on any machine?
No, and this is one of the most common beginner mix-ups worth clearing up right away. Physical hand embroidery kit patterns are printed on paper or fabric and are designed entirely for hand stitching. They cannot be loaded into an embroidery machine in any form. Machine embroidery requires a digitized design file saved in your specific machine's native format, such as PES for Brother machines or JEF for Janome. If you buy a hand embroidery kit hoping to run it through your machine, you will not find a compatible file inside the box.
Q: Are embroidery kits good gifts for beginners?
Hand embroidery kits make genuinely excellent gifts, especially the ones that include printed fabric, a hoop, a needle, and a full floss set. Everything a beginner needs arrives in one box, with no extra shopping required. For machine embroidery beginners, however, the standard kit model does not translate as well. What a machine embroidery beginner actually needs is access to compatible digital design files in the right format for their machine. In that case, a gift card to a design file marketplace is a far more practical and flexible option than any physical kit.
Q: What is the easiest embroidery stitch for absolute beginners?
For hand embroidery, the running stitch and backstitch are the standard starting points, and beginner tips from embroidery educators consistently emphasize getting your hoop tension right before worrying about which stitch to use first. For machine embroidery, the machine executes every single stitch automatically. The beginner learning curve shifts completely toward hooping technique, stabilizer selection, and managing design file formats rather than any manual stitch skill.
Q: How long does a beginner embroidery project take to complete?
A simple hand embroidery design on a 5-inch hoop typically takes somewhere between 2 and 6 hours, depending on how stitch-dense the design is and how much experience you have. Machine embroidery works on a very different timeline. A design running 5,000 to 8,000 stitches usually takes 20 to 45 minutes of actual machine time once your fabric is hooped, your stabilizer is in place, and your file is loaded correctly. The setup process is where most of your time goes as a beginner.
Q: Do I need a special machine for embroidery?
Yes, absolutely. A standard sewing machine cannot read or execute embroidery design files. For machine embroidery, you need either a dedicated embroidery-only machine or a combination sewing and embroidery machine that accepts an embroidery hoop attachment and can read digital design files. These are sold as distinct product categories, so it is worth confirming embroidery capability before purchasing any machine.
Getting Started Is Easier Than You Think
Whether you pick up a needle and hoop or power on an embroidery machine, you are choosing a genuinely approachable craft with a clear path forward. Hand embroidery kits keep your startup cost low and your learning curve gentle. Machine embroidery delivers faster results and opens the door to downloadable design files you can stitch repeatedly. Neither choice is wrong; the right one depends on your budget, your goals, and how much time you want to spend on each project.
If you are going the machine route, the single most impactful thing you can do right now is check your machine's manual and confirm which file format it accepts (.PES, .DST, .JEF, and .EXP are the most common), then download one beginner-appropriate design file and run it. That one practice stitch-out will teach you more than hours of reading ever could.
Timing also works in your favor right now. Florals and minimalist line art are the dominant styles of 2026, and both happen to be technically forgiving for first-timers. Floral motifs read beautifully even when slightly imperfect, and simple line art stitches up quickly in a single session.
The embroiderynsewing.com floral and nature catalog gives you instant-download access to on-trend designs at impulse-buy prices, meaning you can go from browsing to stitching the same day. Start with one hoop, one design file, and one practice run. That is genuinely all it takes to cross the line from curious to someone who has actually finished an embroidery project.
Conclusion
Embroidery is one of those crafts that looks impressive but is surprisingly approachable, especially when you start with the right kit. To recap what we covered: beginner kits take the guesswork out of getting started by bundling everything you need, choosing the right kit means matching the design complexity to your current skill level, and a little patience goes a long way when you are just learning the basics.
The most important step is simply picking up a needle and starting. You do not need to be an artist or have any prior experience. You just need curiosity and a kit.
So browse a few beginner-friendly options, pick a design that genuinely excites you, and make your first stitch today. Every beautiful piece of embroidery started exactly where you are right now.