
# Magnetic Hoops: Key Benefits and Step-by-Step Usage Guide
What if hooping could feel less like a wrestling match with your fabric? Traditional hoops can be awkward to tighten, especially when you’re working with bulky or finished items. Magnetic hoops use a top frame to hold fabric and stabilizer against a lower frame, which can make setup easier, though the right fit still matters. This guide to the benefits of magnetic hoops and how to use them explains what to expect and how to test your setup before stitching.
You’ll learn how magnetic frames grip fabric, when they may simplify hooping, and how to position your layers in a repeatable sequence. We’ll also cover practical checks for machine compatibility, fabric stability, and alignment, so you can prepare with greater confidence and choose a design that suits your material and placement.
Key Takeaways
- Magnetic hoops hold fabric and stabilizer between two components, which may make placement and re-hooping simpler.
- Smooth the fabric and check that it’s held securely before loading the hoop into the machine.
Table of Contents
-
What Are Magnetic Embroidery Hoops, and What Benefits Can They Offer?
-
How to Use a Magnetic Embroidery Hoop: A Simple Setup Sequence
-
Get Better First-Test Results: Check Fit, Fabric, and Stitching
What Are Magnetic Embroidery Hoops, and What Benefits Can They Offer?
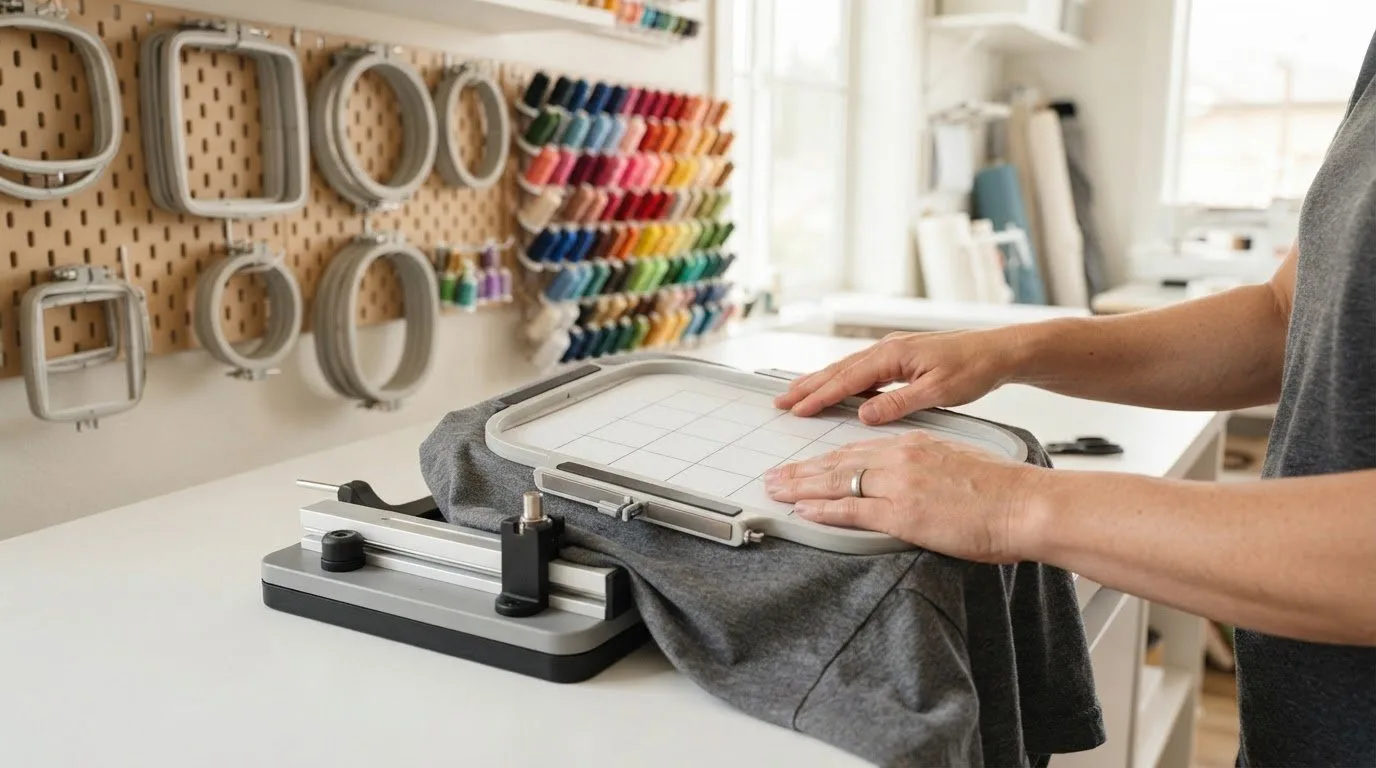
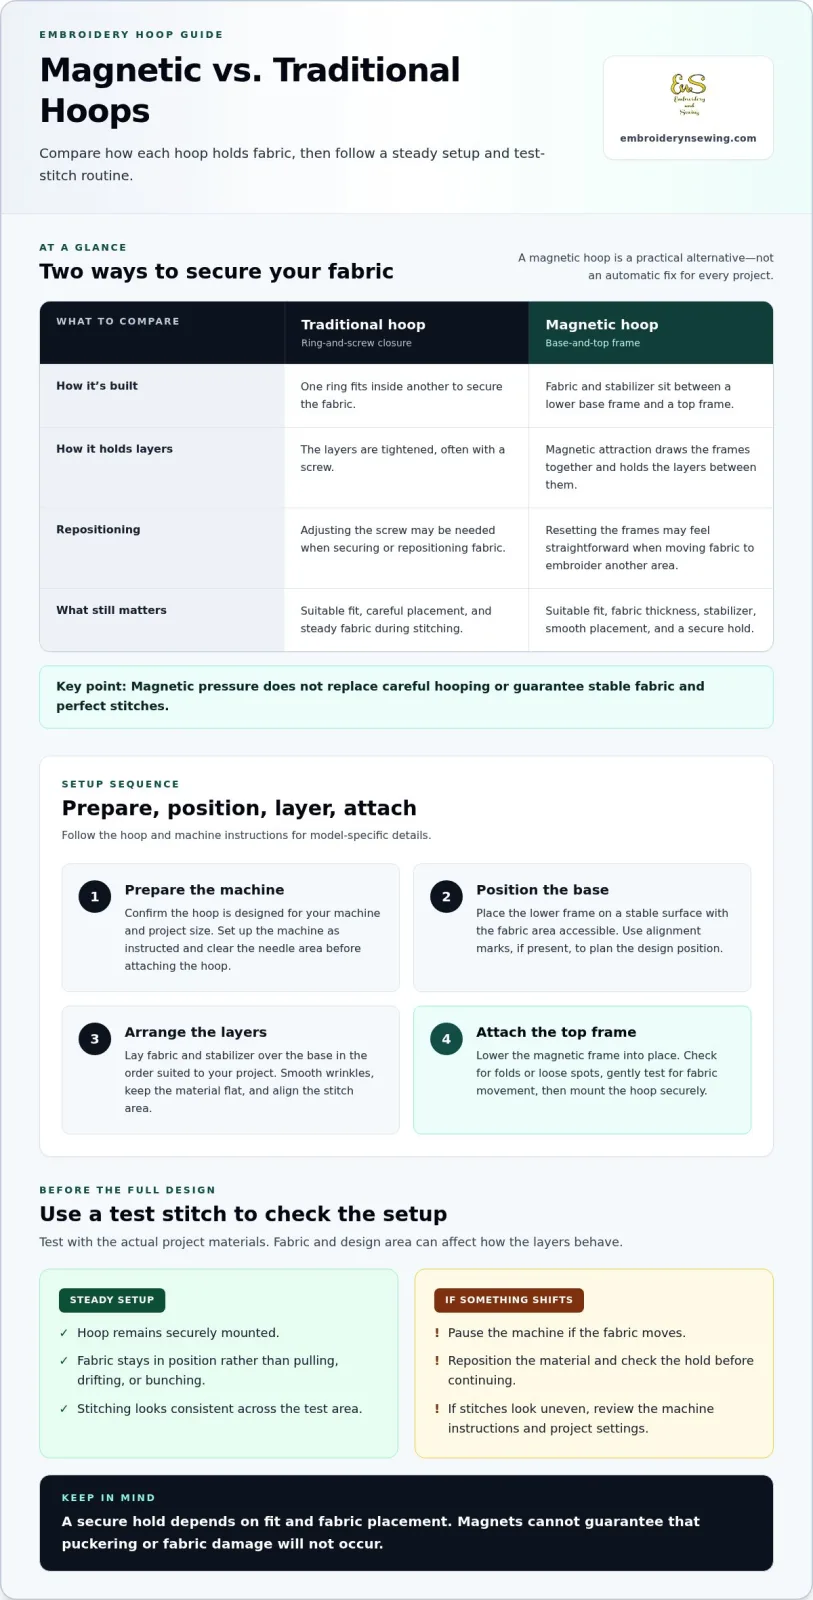
A magnetic embroidery hoop has two parts: a base frame and a top frame. Place the fabric and stabilizer over the base, then position the top frame above them. Magnetic attraction draws the pieces together, holding the layers between the frames without tightening a screw. Like any hoop, it helps keep material steady during Embroidery.
A traditional hoop usually secures fabric by fitting one ring inside another and tightening the layers, often with a screw. A magnetic hoop changes the way the fabric is secured; it isn’t automatically better for every project. Its closure may make it easier to place fabric or reposition it between stitching areas. The result depends on a suitable hoop fit and careful fabric placement.
When can a magnetic hoop make fabric easier to position?
Magnetic closure can be useful when aligning layers feels awkward or when you want to reposition fabric without repeatedly adjusting a screw. For example, resetting the magnetic frames may feel straightforward when you need to move the fabric to embroider another area. But fabric thickness, stabilizer, and hoop size all affect how securely the layers sit. Smooth out wrinkles and check that the fabric is held evenly before stitching.
Magnetic pressure doesn’t replace careful hooping, and it can’t guarantee stable fabric or perfect stitches. Check that the hoop fits your machine, mounts securely, and holds the fabric flat. For a refresher on using an embroidery hoop correctly, review the fundamentals before choosing the method that suits your project. Understanding the benefits of magnetic hoops and how to use them starts with treating them as a practical alternative, not an automatic fix.
 Embroidery designCreate Sewing - Elegant embroidery design file - instant downloadView this design →
A steady setup starts before the fabric goes into the hoop. Follow these steps in order, and use your machine and hoop instructions for model-specific details.
-
Prepare the machine. Confirm that the hoop is designed for your machine and project size. Set up the machine according to its instructions, and make sure the needle area is clear before attaching the hoop.
-
Position the hoop base. Place the lower frame on a stable surface with the fabric area accessible. If it has alignment marks, use them to plan where the design should sit.
-
Arrange the fabric and stabilizer. Lay the layers over the base in the order suited to your project. Smooth wrinkles, keep the material flat, and align the intended stitch area with the design placement.
-
Attach the top frame. Lower the magnetic frame into place so it draws the layers together. Check for folds or loose spots around the design area, then gently test whether the fabric shifts. Mount the hoop securely before stitching.
Setup in brief: prepare the machine, position the base, smooth and align the layers, then attach the top frame and check the hold before mounting the hoop.
What should you check before starting the first stitch?
Confirm compatibility and secure mounting, then check that the fabric remains smooth and stable. Run a small test stitch and watch for movement or uneven stitching before starting the full design. If you need broader machine setup context, explore how to embroider with a machine. OSHA’s Control of Hazardous Energy page discusses machinery energy control in workplace settings; follow the instructions relevant to your own machine.
Once the hoop is ready, choose a project that suits your fabric and placement. Browse machine embroidery designs for inspiration, then use the test stitch to assess your setup before embroidering the full design. A careful first check is an important part of learning the benefits of magnetic hoops and how to use them.
Get Better First-Test Results: Check Fit, Fabric, and Stitching
A test stitch gives you a chance to assess the setup before committing to the full design. Watch the fabric as the needle moves: it should stay in position rather than pull, drift, or bunch. Check that the hoop remains securely mounted and that the stitching looks consistent across the test area. If the fabric shifts, pause the machine and reposition it before continuing.
A magnetic hoop holds fabric, but it doesn’t replace careful preparation. Smooth placement, a suitable fit, and a secure hold still matter. Magnets can’t guarantee that puckering or fabric damage won’t occur.
How do you decide whether the hoop is working well for your project?
Use the test result to assess grip and placement first. If the hoop stays secure and the fabric remains steady, you can proceed while continuing to monitor the stitching. If stitches look uneven, hoop performance may be only one factor. Review your machine’s instructions and project settings before making adjustments.
Consider the fabric and design together. A broad design area or layered fabric may behave differently from a small motif on a single layer, so test the actual project materials rather than relying on a test from another fabric. If anything moves, stop and reset the fabric instead of stitching over an unstable area.
Once your setup feels steady, focus on choosing a design that suits the item and its placement. Understanding the benefits of magnetic hoops and how to use them includes checking your results before stitching the full design. Browse digital embroidery designs for inspiration for your next project.
Choose a Design for Your Next Stitch
With your hoop setup ready, choose a design that fits the project you’re excited to make. The benefits of magnetic hoops and how to use them matter most when the motif also suits your fabric, placement, and personal style. Explore designs for garments, gifts, team apparel, décor, and more in a digital catalogue of 17,343 designs and counting, with themes ranging from sports and universities to cartoons, seasonal patterns, and nature.
Design files are available for instant digital download and can be re-downloaded, so you can return to your chosen project files when you need them. Browse the collection, pick a design that inspires you, and put your careful preparation into practice.
Browse machine embroidery designs for your next project and get started on your next creative idea.